PathFactory provides default user roles as well as the ability to add your own custom user roles and set the permissions. Default roles include Revenue Team, Reporter, Author and Admin.
This article explains what each of these default user roles are able to do in the platform as well as how to create custom user roles.
Default roles
Default roles are available out of the box with PathFactory and cannot be edited or deleted. They are a good starting point to use when assigning roles to users if you are just getting up and running and are not yet sure of the specific permissions your team may need.
Revenue Team
If you have purchased PathFactory for Revenue Intelligence, you will be given a bundle of Revenue Team licenses that your sales and customer experience team members can use to access insights across your prospect and customers’ engagement. They can also leverage these licenses for outreach opportunities by configuring and sharing PathFactory content experiences.
Users with a Revenue Team role type assigned will see only the Revenue Intelligence section of the main PathFactory navigation menu, along with their username drop down menu. This gives these users access to PathFactory’s account and opportunity buying signal dashboards that leverage Salesforce data, as well as the ability to activate Content Plays to various account contacts.
Revenue Team users will also be able to view PathFactory buying signals and execute Content Plays within Salesforce, so that their workflows can remain in the system they are most frequently using day-to-day.
Reporter
When a Reporter logs in they will be directed to the Content Library Insights page.
Reporters have access to:
- Change your password and access our knowledge base directly from within the app
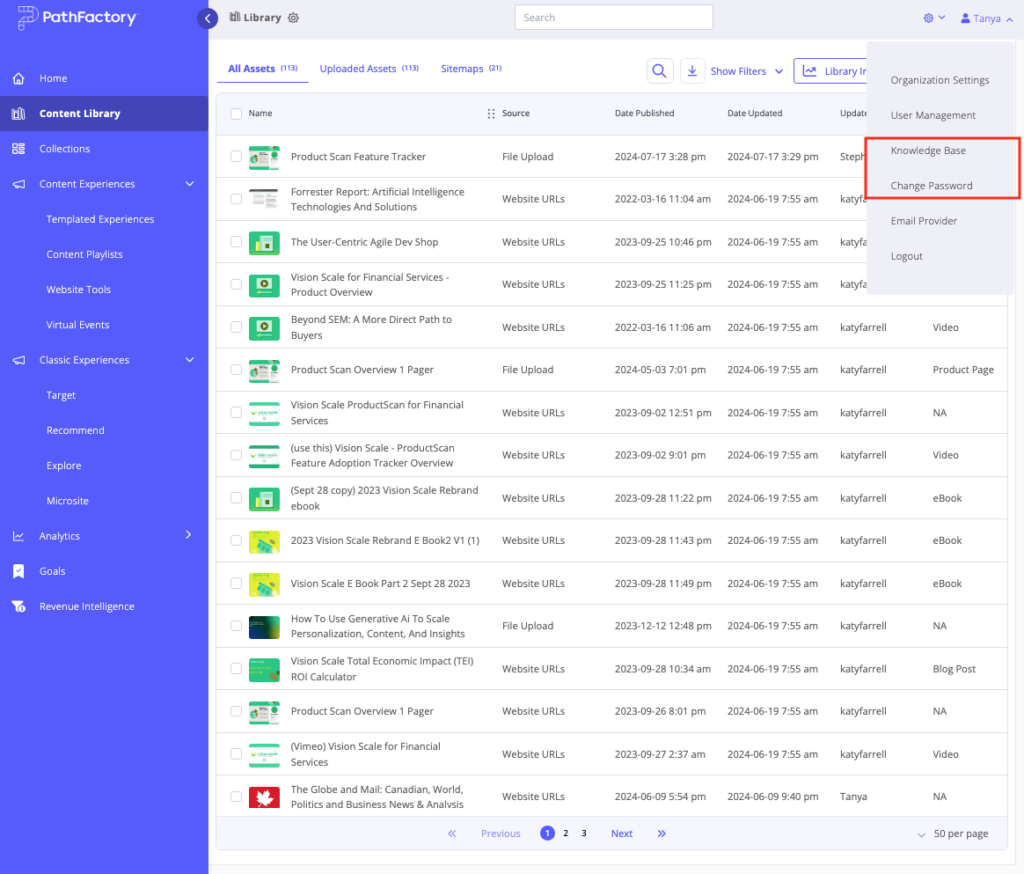
Knowledge Base and Change Password items - View all analytics pages within your organization’s instance of PathFactory, based on the subscription type(s) you have
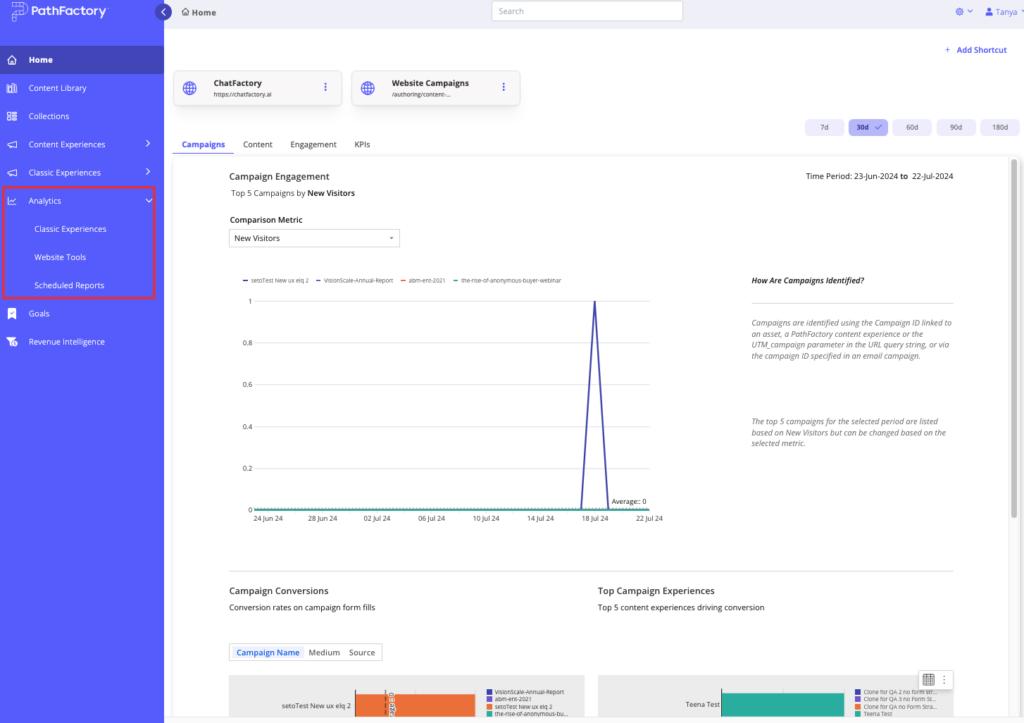
Analytics menus
- Download data reports in a variety of formats
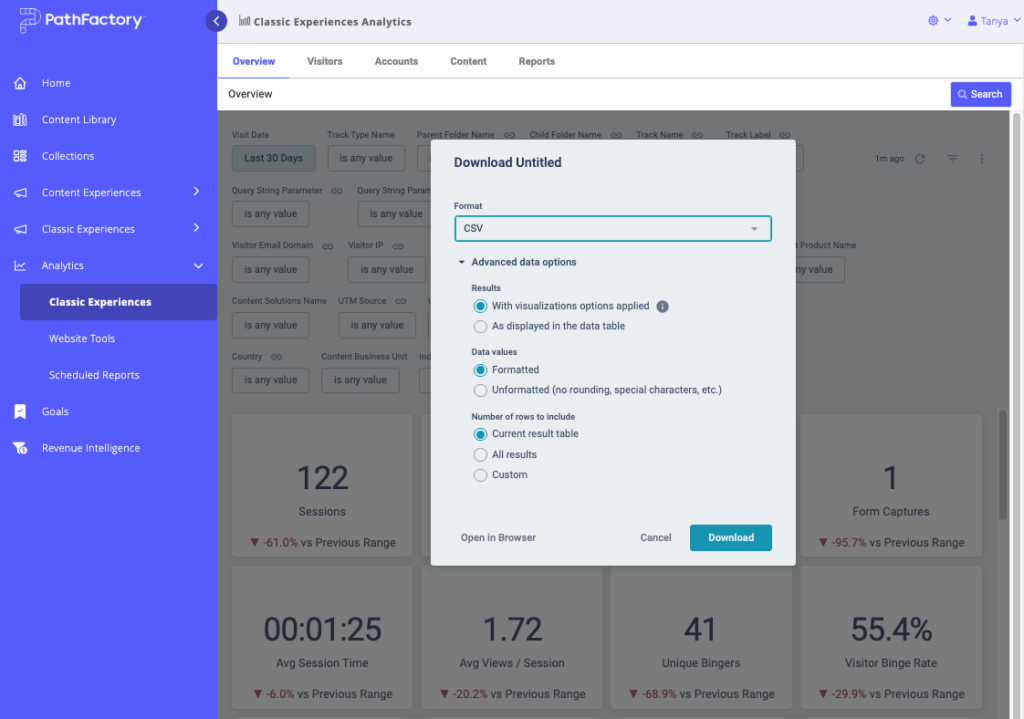
Download Data Reports
Author
When an Author logs in they are directed to the Content Library page.
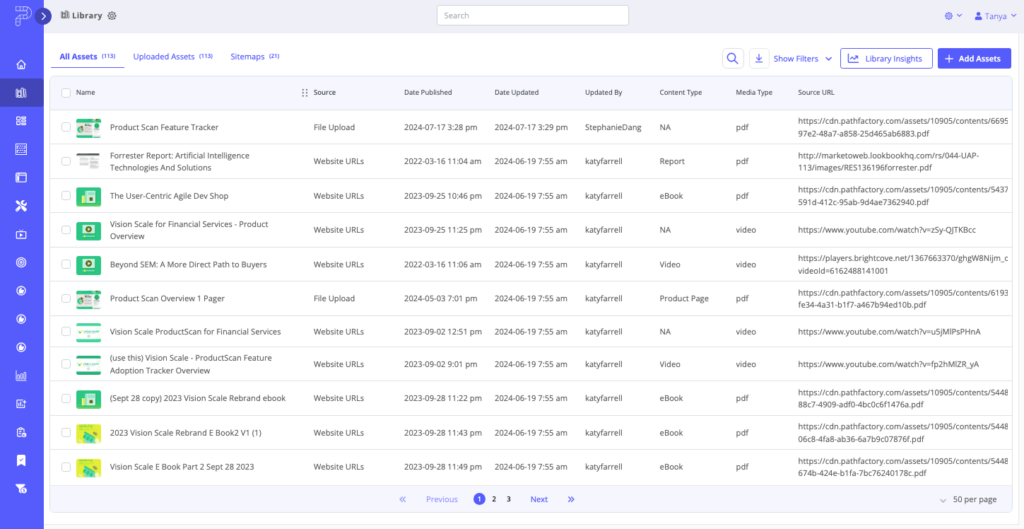
Authors have all of the same capabilities as a Reporter, plus access to:
- Create, edit and delete permission for Website Tools (based on the subscription type for the given organization)
- Create, edit and delete content within the Content Library
- Create, edit and delete all experience types within the Standard Experiences (formerly Campaign Tools) module and events within the VEX module, based on the subscription type(s) your organization has
- All platform settings (General, User Experience and Data Configuration) as well as Standard Experiences and Virtual Event settings, based on the subscription type(s) you have
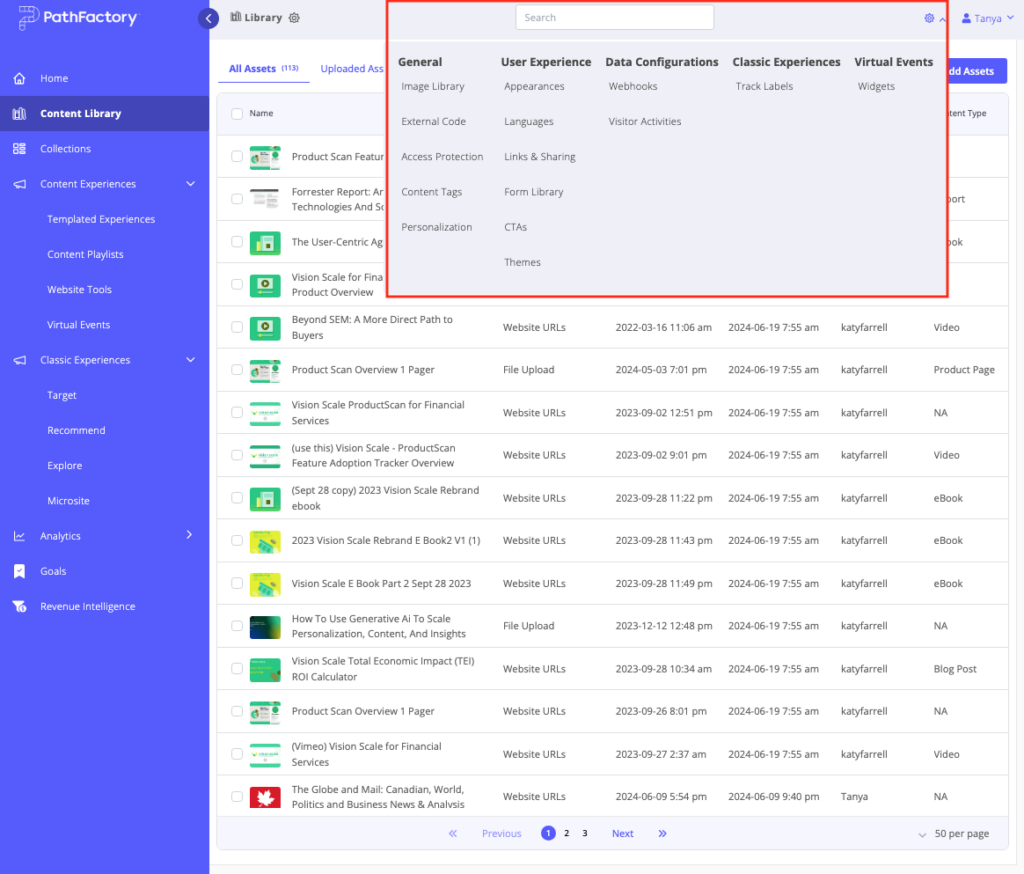
- Authors can access the content tag configuration page to view all existing tags, but it will be in view-only mode and they will not have the option to create new tags or edit existing ones.
- Authors can access the Track Labels configuration page under Standard Experiences to view all existing labels, but it will be in view-only mode and they will not have the option to create new labels or edit existing ones.
Admin
When an Admin logs in, they are directed to the Content Library page. Admins have all the capabilities of a Reporter and an Author, plus additional abilities, including:
- Creating, editing, and deleting content tags and Custom Categories
- Accessing buying signal dashboards within Revenue Intelligence (viewable by Revenue Team users).
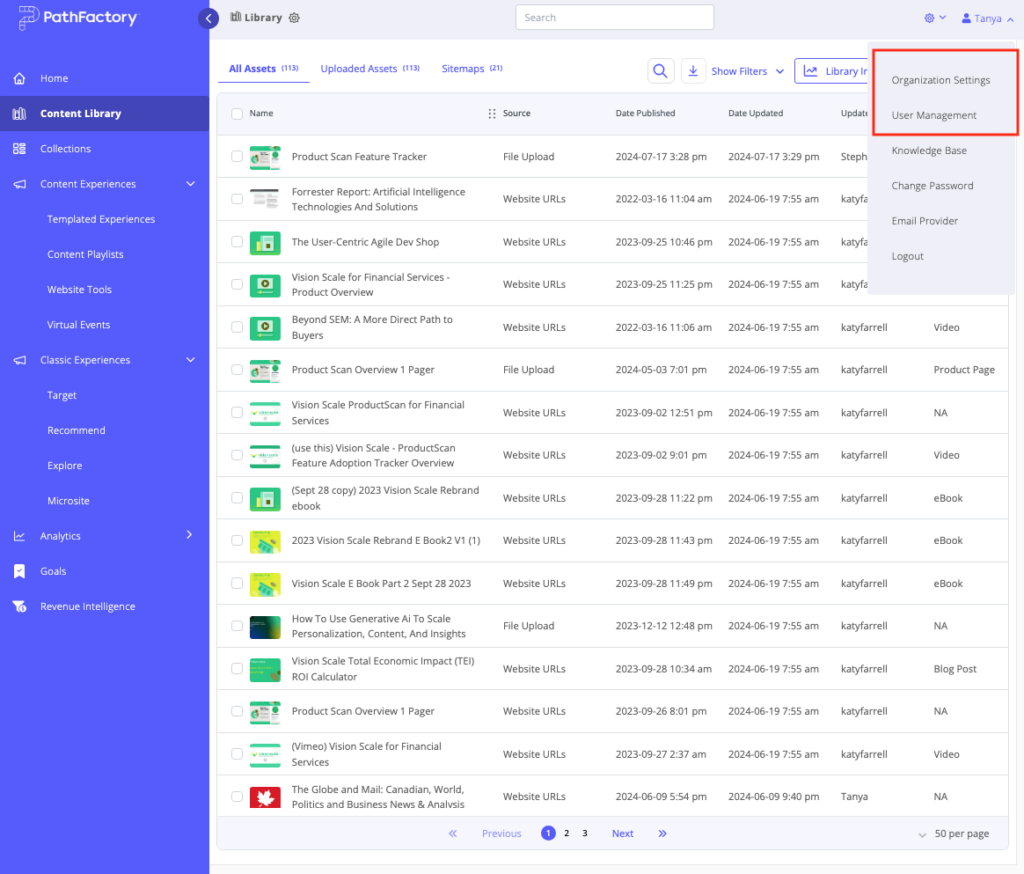
- Accessing Administrative Controls, which include Organization Settings and User Management.
Note: Admins cannot activate Content Plays; this feature is specific to the Revenue Team role.
In addition, Admins have access to our Administrative Controls, which includes Organization Settings and User Management. If you are an Admin on your organization’s account, you can access these areas by clicking on the drop down option underneath your username in the top right corner.
User management
In the User Management section, Admins can:
- Create, edit, and delete custom roles.
- Add and manage users.
Scroll down to our Custom Roles section of this article to learn more about creating custom role types and visit our separate article on how to add new users.
Within User Management, Admins have flexibility to control the type and level of access they provide to various users in their organization. This is especially beneficial when the organization is performing training, as the Admin can grant access based on the level of training that’s been provided. This role also provides flexibility for the Admin to provide different levels of access to different business units.
Organization Settings
Within the Organization Settings menu, you can define the following general settings on the Settings tab:
- Connect PathFactory to Google Analytics. This integration allows you to track and analyze visitor interactions with your content within Google Analytics, providing valuable insights into audience behavior and campaign performance.
- Add a fallback URL for Content Experiences. This setting ensures that if any links to your Content Experiences are broken, users will be redirected to a specified fallback URL. This helps maintain a smooth user experience by preventing 404 errors.
Note: Any broken links to your Content Experiences will redirect to the URL you enter here. Ensure you enter a full URL, including either http:// or https://. - Add a Sharing Domain URL. This setting lets you specify which domain should be used when sharing content, ensuring consistency in how your content is accessed and shared.
- Configure which Sharing Domains appear in Share Link menus for Classic and Content Experiences. System Admins can customize which Sharing Domains are visible to users when generating and sharing live experiences. This allows for better control by hiding domains intended for testing or staging purposes, reducing the risk of user error. By default, all Sharing Domains are set to appear, but users can now select or deselect domains in the Organization Settings to manage which are available in Share Link menus.
- Add a Canonical URL Domain. From this dropdown list, select the preferred domain name that you want search engines to consider as the authoritative version of your website’s content. This setting is crucial for SEO, as it prevents duplicate content issues by ensuring that search engines index and rank the correct version of your website.
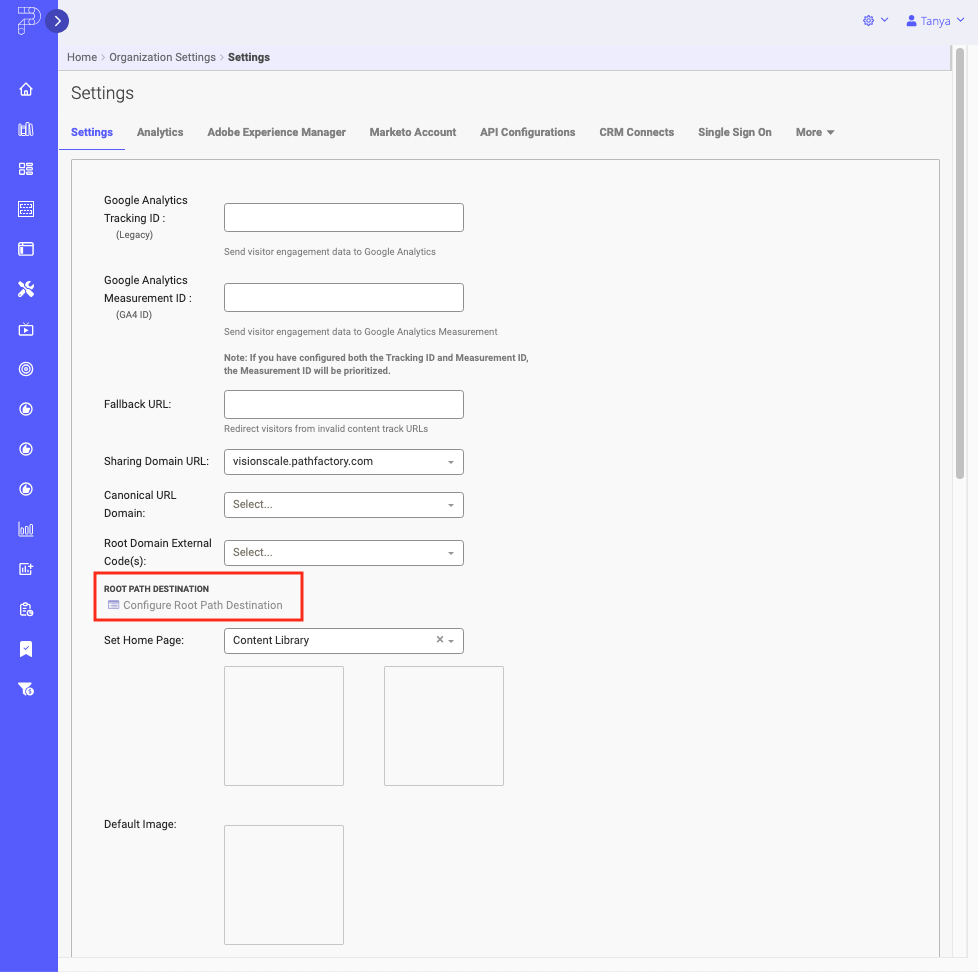
- Add Root Domain External Code(s). To modify the root domain, select the Root Path Destination item on the Settings tab. This allows you to configure the base URL for your content, which is essential for organizing and managing how visitors access content.
-
- To modify the root domain, select the Root Path Destination item on the Settings tab, as shown in the screen capture below.
Root Path Destination
- To modify the root domain, select the Root Path Destination item on the Settings tab, as shown in the screen capture below.
-
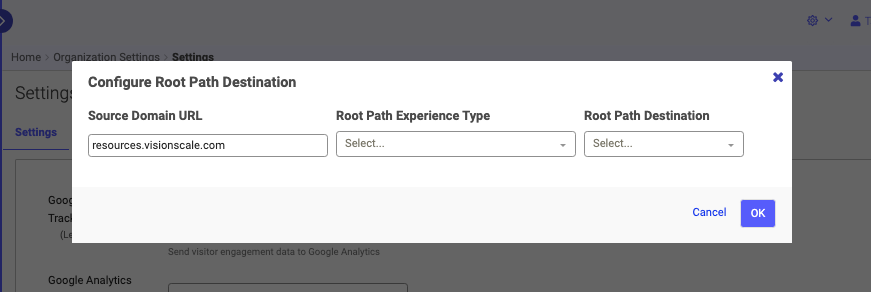
- After you click on Root Path Destination, a popup menu appears for you to enter the Source Domain, Root Path Experience Type, and Root Path Destination.
Configure Root Path Destination popup menu
- After you click on Root Path Destination, a popup menu appears for you to enter the Source Domain, Root Path Experience Type, and Root Path Destination.
-
- To save the new settings, click Ok. To leave without saving, click Cancel.
- To save the new settings, click Ok. To leave without saving, click Cancel.
- Force HTTPS links for all Content Experiences. This setting ensures that all content is served over a secure HTTPS connection, protecting data of users within your organization and visitors to your experiences. Contact support at support@pathafctory.com for assistance in enabling this feature.
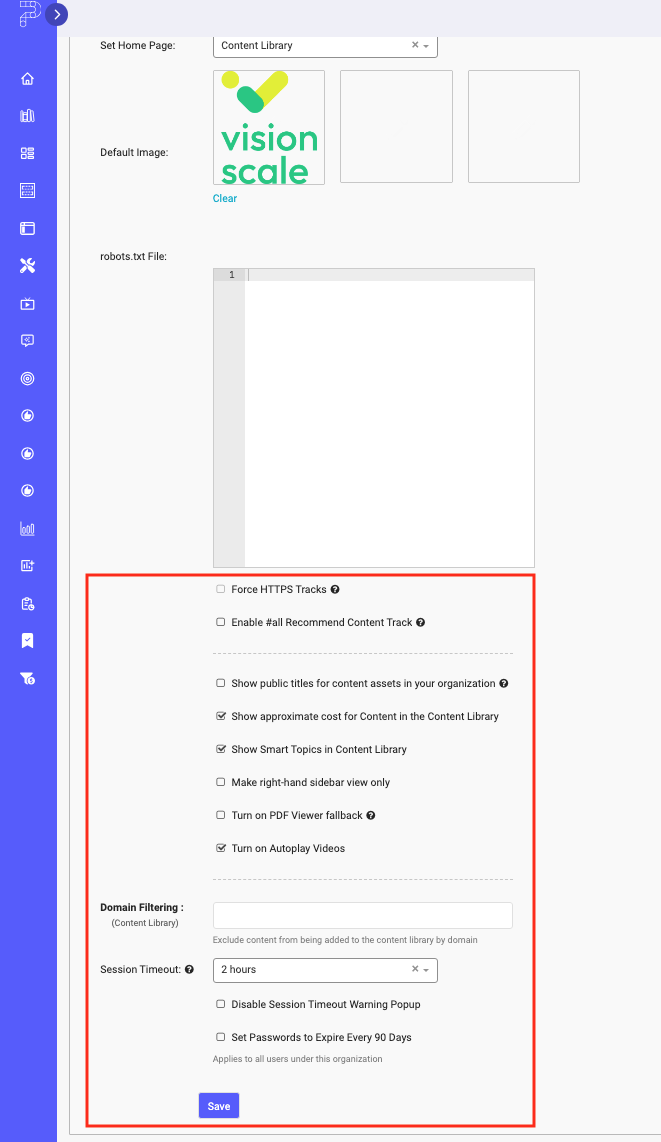
- Enable or disable the #all Recommend Content Experiences that pulls together all content automatically from the Content Library. This option lets you toggle whether a dynamic content track that aggregates all content from the Content Library is automatically created, which can be useful for broad content recommendations.
- Show or hide the public content asset titles, approximate cost for content and Smart Topics. This setting allows you to control the visibility of content asset titles, estimated costs, and Smart Topics to users. Hiding these elements can streamline the user interface or keep certain details private.
Set whether user passwords will expire every 90 days. This security feature ensures that users regularly update their passwords, reducing the risk of unauthorized access to the system.
Note: Users will still be able to add estimated cost to content assets; turning off estimated cost only prevents the cost from being displayed.
Analytics Settings
- Setting a time zone for your instance
- Exclusions to your analytics that are being displayed in reports
Additional Configurations
Marketing Automation Platform (MAP) account credentials and behavior. The name of the MAP tab will depend upon which MAP you use.
Note: The name of the MAP tab will depend upon which MAP you use.
- Generating API keys
Note: API configurations are only available to those who have purchased the PathFactory API add-on. Contact your CSM, or click here for more information on API keys.
-
- Content availability within PathFactory for Sales, and a Chrome Extension for team members that do not have a PathFactory login
- Enabling your cookie consent
- Linking your PathFactory and 6sense or Demandbase accounts
- Defining custom query strings that can be appended to the end of your various PathFactory links before sharing
- Setting an expiry date for a visitor’s access protection authentication
- Setting the default search engine directive for all experience types, based on the subscription type(s) you have
Note: Setting your search engine directive defaults will not retroactively apply the state you defined to your existing experiences, Microsites, Explore pages or virtual events. Only experience types created after you set the search engine directives will have this default applied moving forward. And, even if you set a default, you will still be able to change this at an experience, microsite, Explore page or virtual event level.
Custom roles
In addition to default roles, as an Administrator you can add your own custom roles to the user roles list by setting permissions and permission types at the feature level. This puts the autonomy in your hands and is especially beneficial when you’re training your teams and you want to grant access based on the level of training that’s been provided, or when you want to provide a custom level of access to different business units. All of this allows for PathFactory roles to better suit your team’s structure and specific needs.
To set up permissions for a single user, follow these instructions.
- Click on your login name on the top right of the screen. From the dropdown menu, select User Management.
- On the screen that appears, select the User Roles tab.
- To add a new user role, click the +Add User button on the top right.
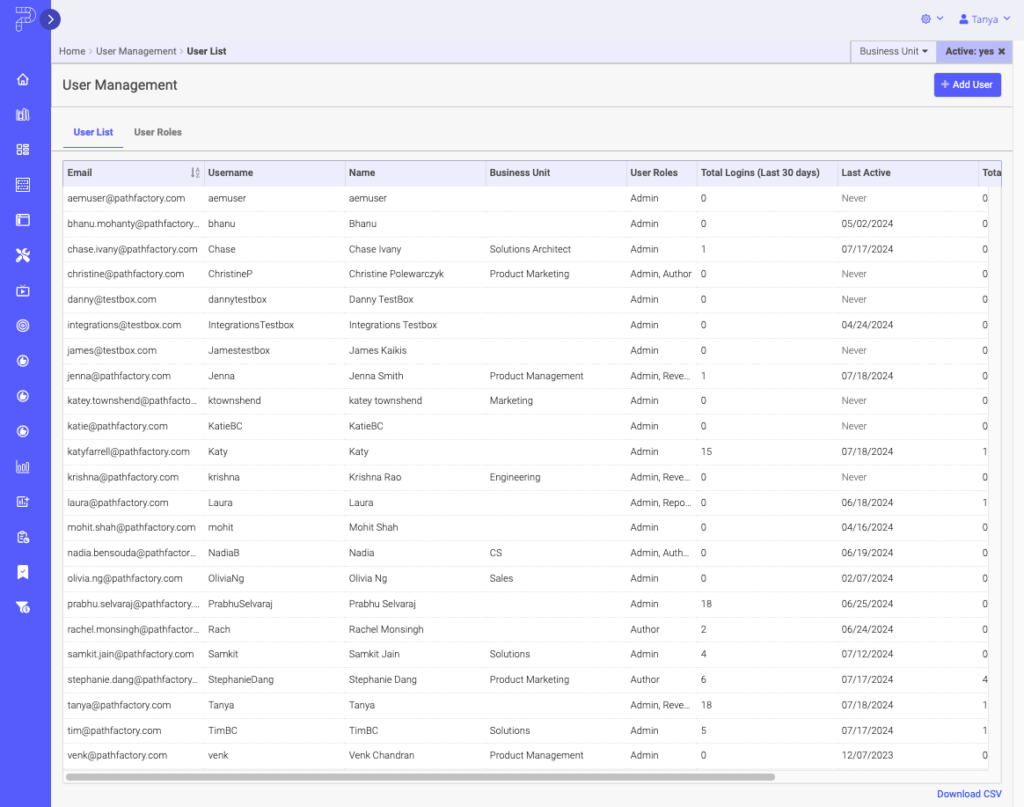
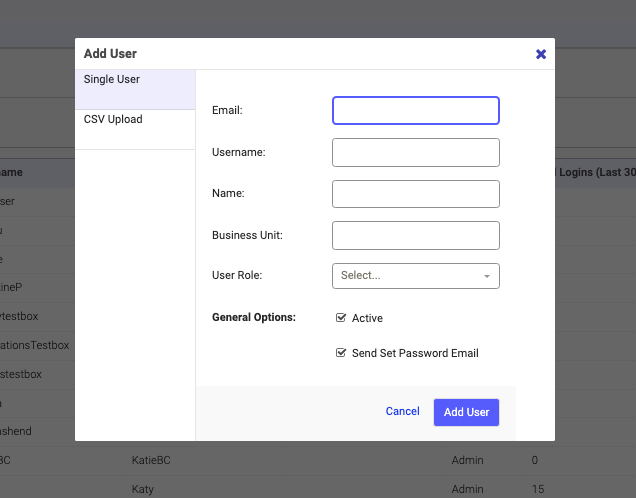
You can then define the name of your custom user role as well as whether you want to clone this new role from an existing one in the list, or set it up from scratch.
Once the role is added you’ll be able to select which Product Permissions you want available for this role, along with Platform Settings, Analytics Permissions, and Administrative Controls. Click Save when you are finished with your selections.
View-only Permission
You can leverage custom roles to provide users with view only access.
View-only permissions are available across almost all platform features, allowing you to further enhance your governance practices. Give your team members access to see what content is available or review settings for your various experiences without allowing them to create, edit, or delete anything. This lets you increase visibility around elements such as content attributes, form strategies, appearance configurations, and more while still ensuring version control.
To apply view-only permissions, simply check the View box under each feature permission set, and leave Create/Edit/Delete unchecked.
User Management for Themes
For users to access and modify the Theme files, the administrator will need to set up the permission level.
Note: To allow access to Themes for a user who is not an Admin or an Author, you must create a custom role.
- On the main menu, click your login name and then click User Management.
- On the screen that opens, click the User Roles tab.
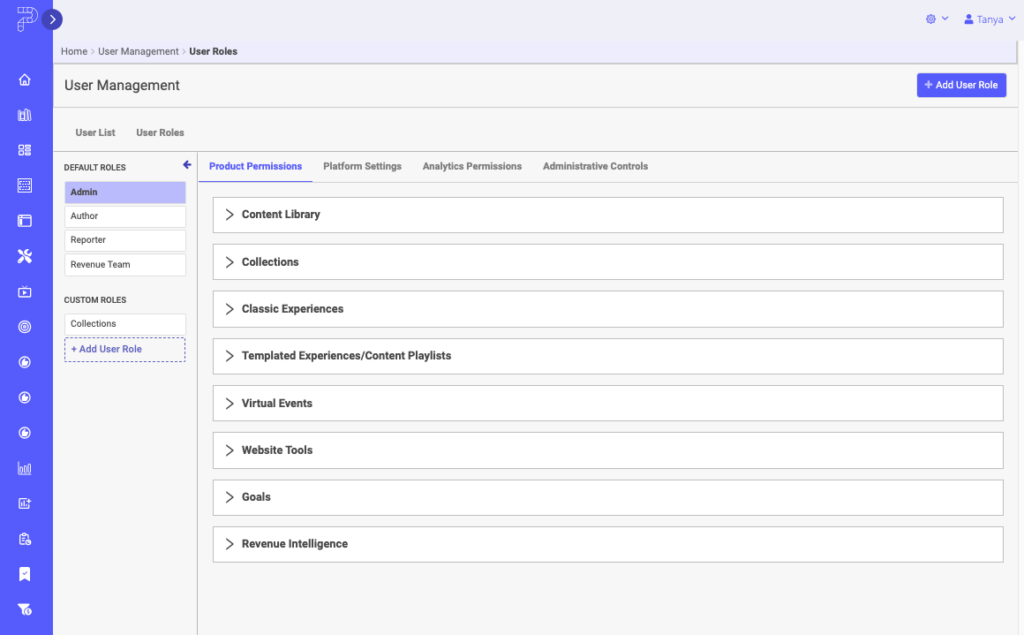
- To add a new user role, click the +Add User Role button on the top right.
- Enter a name of your choosing, and then from the dropdown list, select a role from which you want to clone the permissions, either Admin or Author. When you are finished, click Add User Role.
Note: Verify all the settings if you’re cloning from Admin or Author, as for the new custom role you may not want to give all the access. - You’ll see the role you just created in the list of User Roles. You’ll notice when you hover your mouse over it that there is a pencil and a trash can icon, so that you can modify the name or delete the user role.
- Select the Platform Settings tab.
- Expand the User Experience Settings by clicking on its associated arrow. Expand the Themes section.
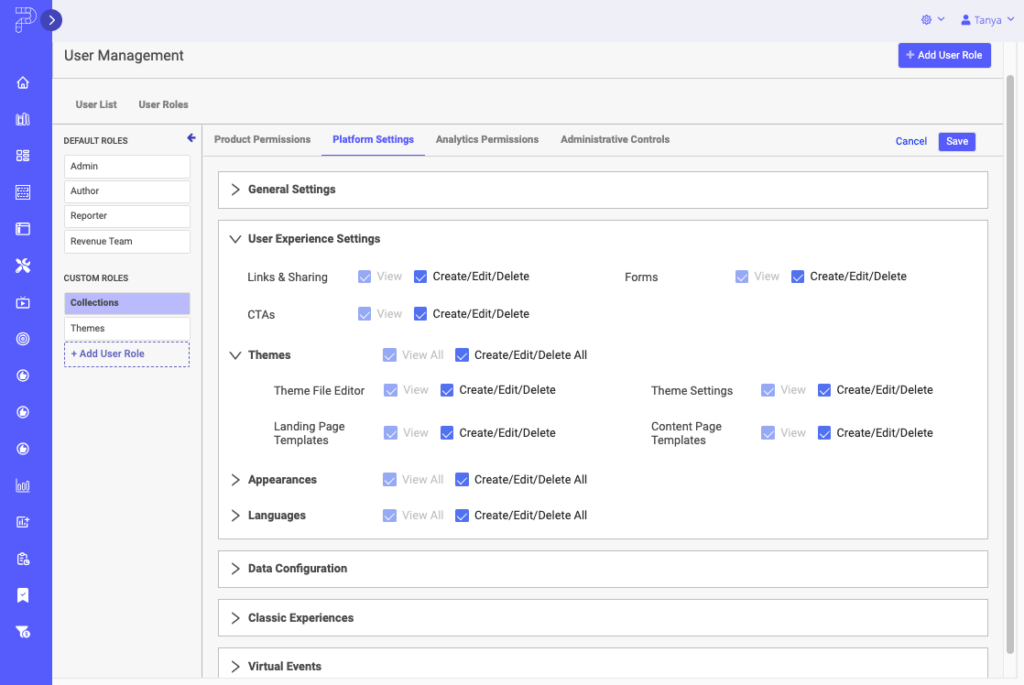
- Here you can see the checkboxes available for different permission levels within the Themes.
Note: For the custom role, you can grant access to modules within Themes that the given user may need to access.
- For the Admin role, the checkboxes for Create/Edit/Delete are automatically active.
- For the Author role, the checkboxes are all automatically set to View.
Views: 18
