To use the Cookie Consent feature in a Content Track you must first:
- Enable Cookie Consent in Organization Settings.
- Customize the look and messaging of your Cookie Consent (optional).
- Toggle On Cookie Consent for each Classic Experience (Content Track) or Templated Experience.
Important: Make sure you read the Cookie Consent Checklist to ensure you are implementing the new Cookie Consent feature everywhere necessary.
Have questions about Cookie Consent in PathFactory? Check out the FAQ!
Want to use a 3rd party cookie consent provider? Read this article instead.
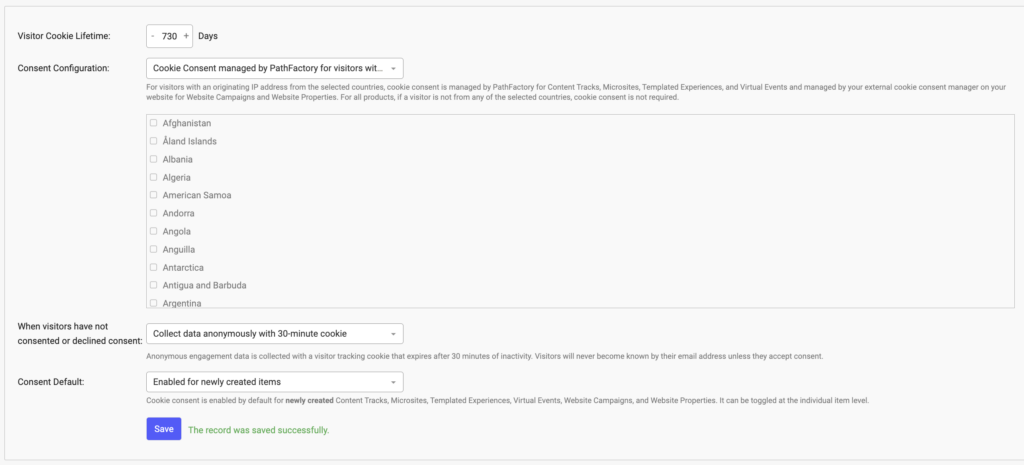
Globally Enable Cookie Consent
Note: Enabling Cookie Consent does not affect the availability of the Cookie Message function. Turning on Cookie Consent in your Organization Settings means that you will now have the option to add Cookie Message or Cookie Consent to your Experiences (Classic and Templated Experiences).
- Select Organization Settings from the drop-down menu under your username.
Note: You must be an admin user to access Organization Settings.

- Click Cookie Consent.

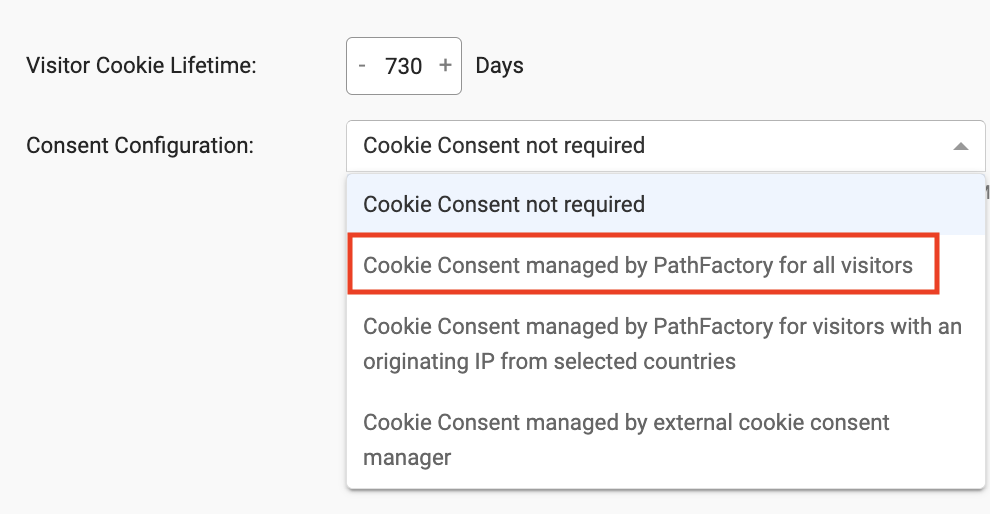
- Decide which visitors you want prompted with Cookie Consent:
- If you want all visitors to be prompted with Cookie Consent, select Cookie Consent managed by PathFactory for all visitors.
- If you want Cookie Consent to appear only for visitors with IP addresses from specific countries, select Enable Cookie Consent for web visitors with an originating IP from selected countries, and then select the countries.
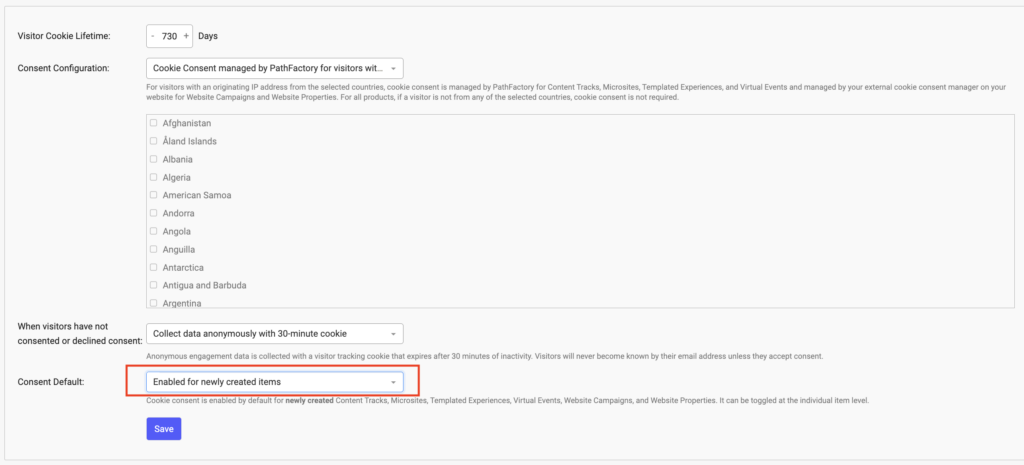
- If you want all newly created content tracks to automatically have Cookie Consent turned on, check the box for Enable for newly created items. This will only affect Experiences created after this point; it will not turn on cookie consent in existing Experiences.
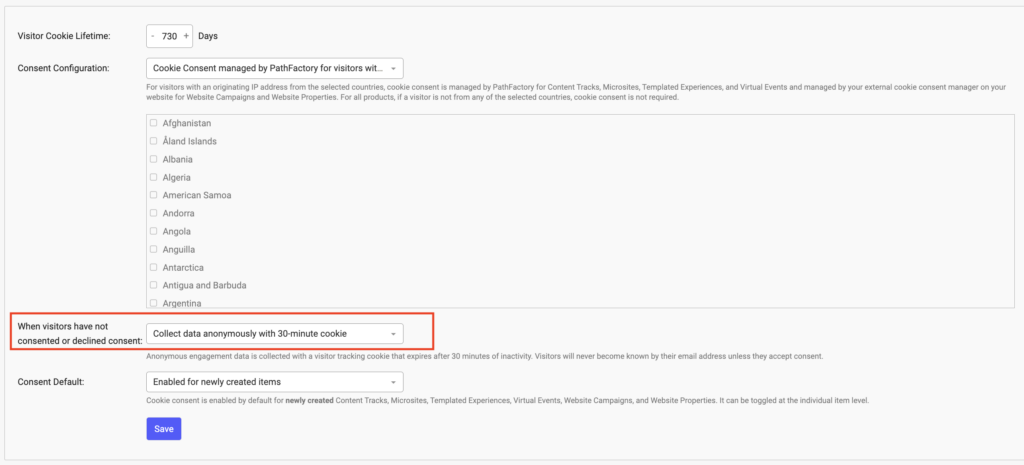
- If you want to collect visitor data without consent, select Collect data anonymously with a 30-minute cookie. Engagement data will be collected with a visitor tracking cookie that expires after 30 minutes of activity. Visitors will never become known by their email addresses unless they accept consent.
- If you want all visitors to be prompted with Cookie Consent, select Cookie Consent managed by PathFactory for all visitors.
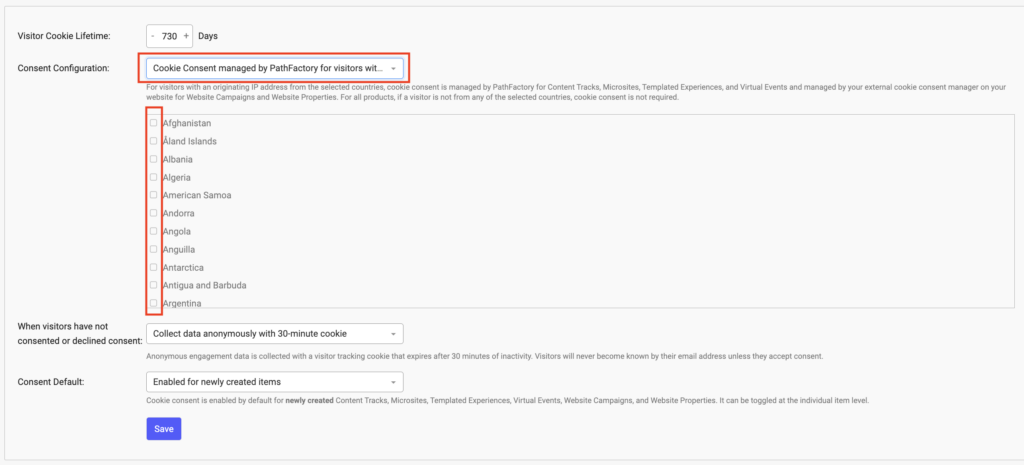
- Click Save. A confirmation message will appear.
How to Enable Cookie Consent for a Templated Experience
Once you have enabled cookie consent, you may then toggle it on or off for individual Templated Experiences.
Note: To change the messaging or appearance of your Cookie Consent, you can do so within Theme settings.
To activate cookie consent for a Templated Experience, follow these steps.
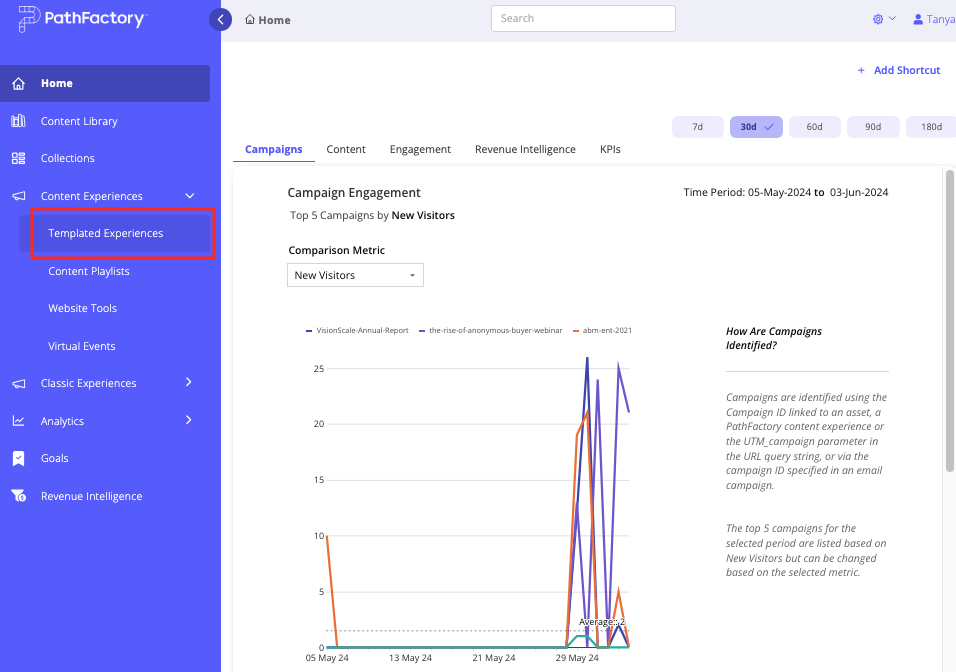
- Click on Templated Experiences on the side navigation menu.
- In the list that appears, select the checkbox for the Templated Experience you want to edit, and then select the Edit icon, as shown below.
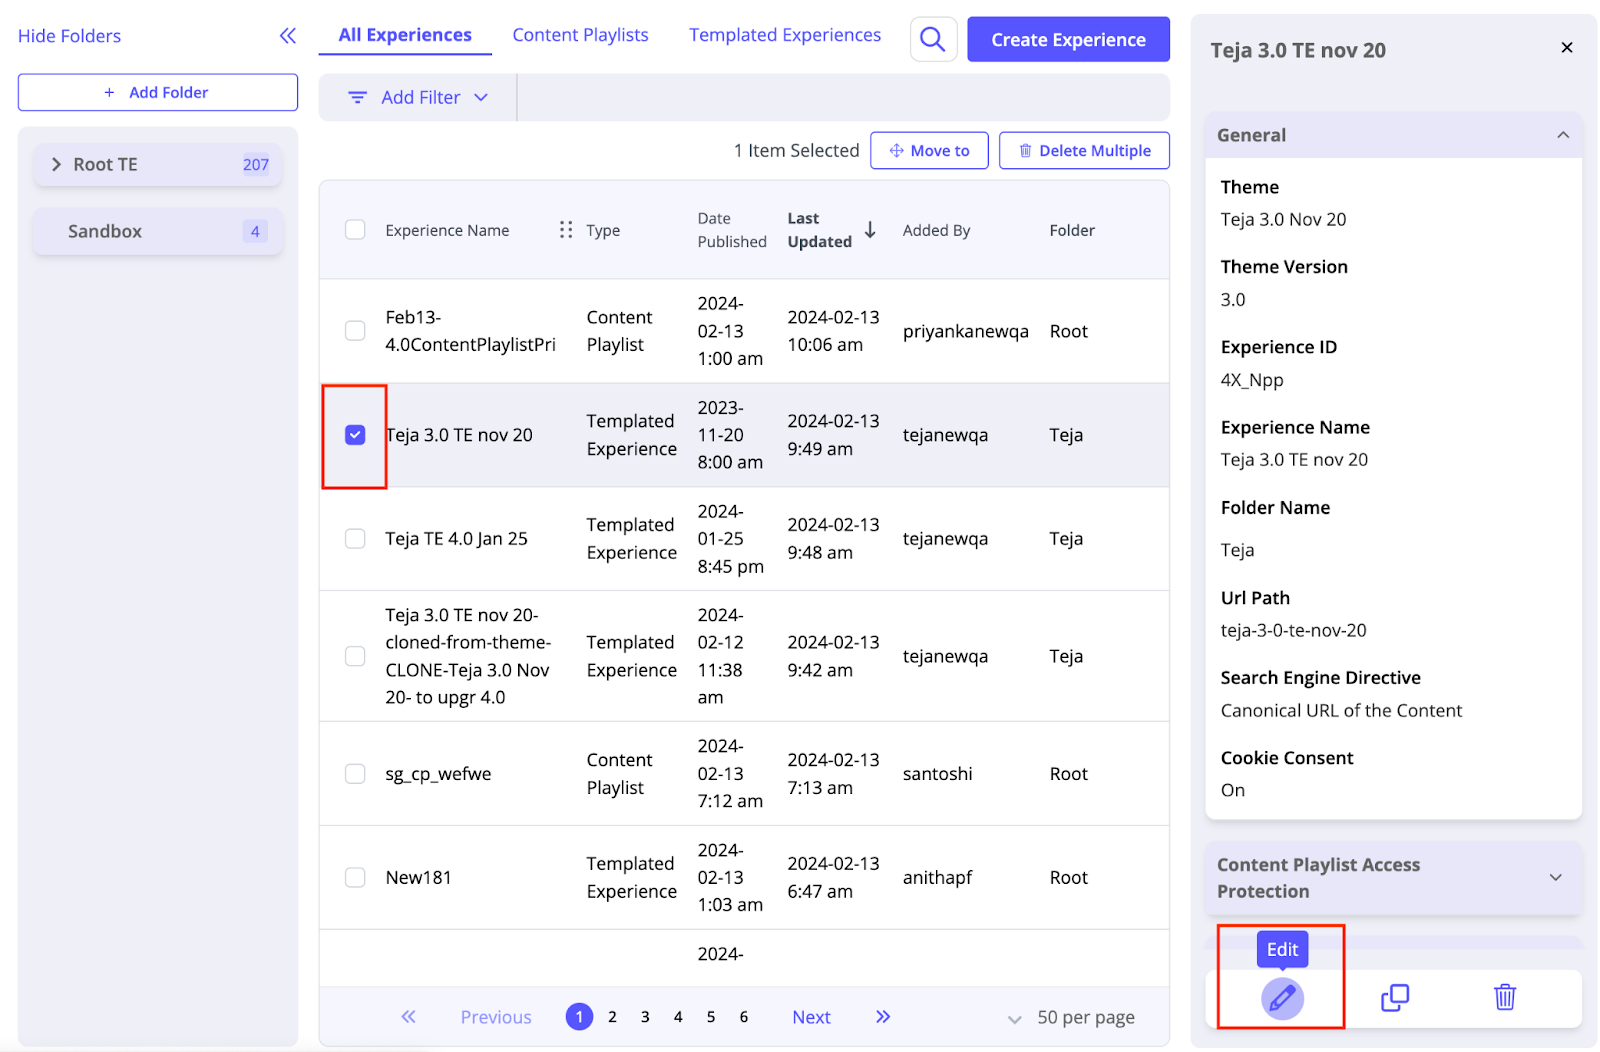
- On the Details tab, select Edit.
Edit button
- Locate the Cookie Consent toggle and turn it on or off, depending on your tracking goals.
Cookie Consent toggle
- Scroll down the tab to find and click Save, or select Cancel to exit without saving.
How to Enable Cookie Consent for a Classic Experience
Once you have enabled cookie consent, you may then toggle it on or off for individual Classic Experiences (Recommend and Target tracks). To toggle on cookie consent for a Recommend or Target track and customize the message that is displayed, follow these steps.
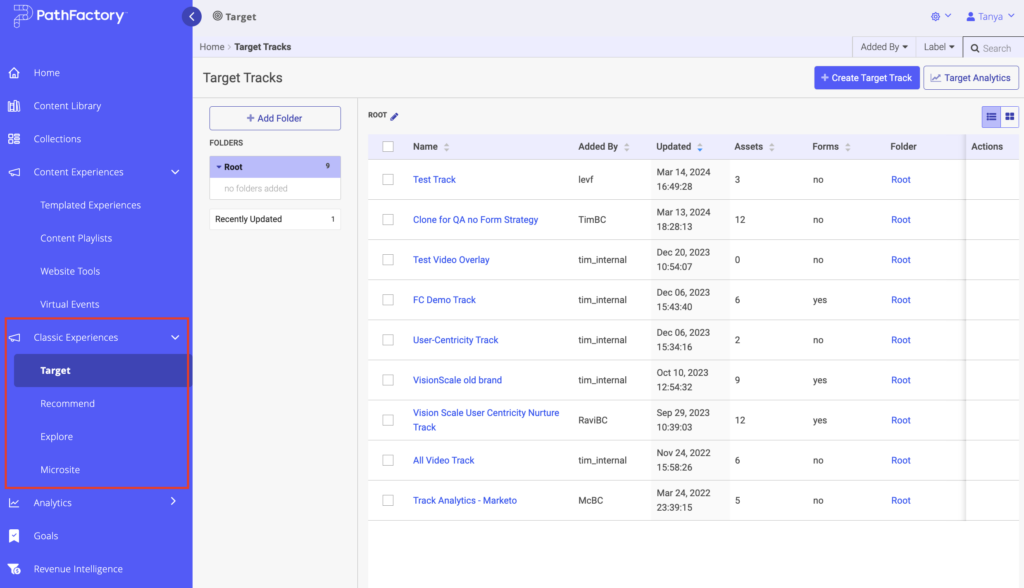
- Select the Content Track you want to edit by expanding the left menu panel. Scroll to the Classic Experience menu and expand it. From there, select the type of Experience (Target or Recommend) you want to edit.
2. From the list of tracks that appears, click on the title of the track you want to edit.
3. With the track open, look for the cookie setting on the left panel.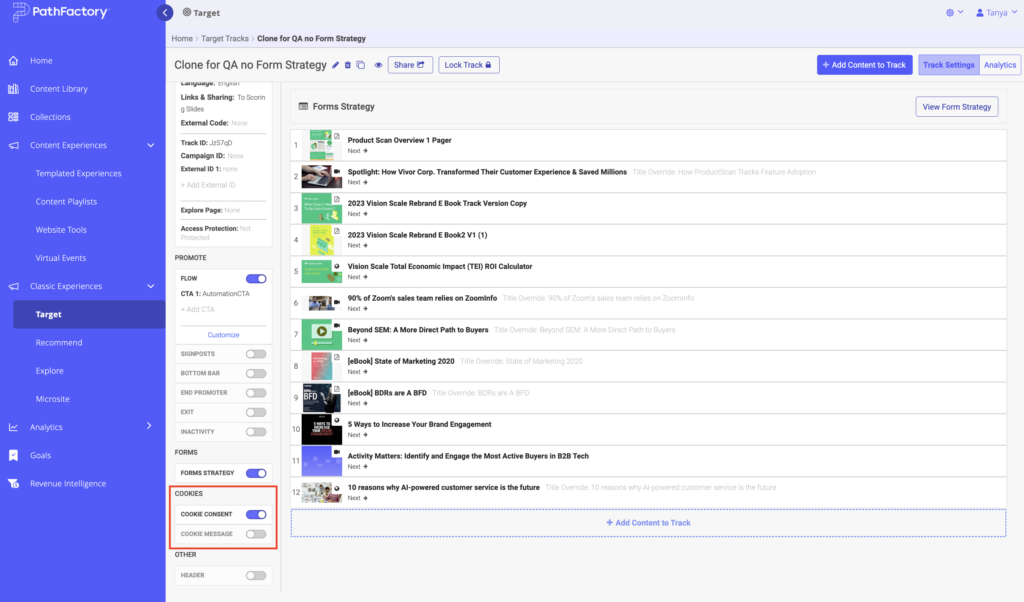
- To capture consent from visitors to use cookies on their experience, toggle on Cookie Consent.
- To inform visitors that their web experience is using cookies, toggle on Cookie Message.
- To craft a custom cookie information message, toggle on Cookie Message and then click Customize. A popup menu appears for you to compose a custom message. By using this option, cookie consent is also turned on.
Note: Your changes are automatically saved.
How to Modify the Appearance of Cookie Messages For Classic Experiences
Note: The instructions below describe how to modify the appearance of cookie messages for Templated Experiences. If you want to change the default text that appears in cookie messages for Classic Experiences, you can do so in Languages. You can change the default styling for cookie messages in Appearances.
The instructions below show you how to modify the cookie message appearance for Templated Experiences to match your organization’s branding and style. To do this, you must edit the Theme file. Follow these steps.
- Open the Theme you are using for your Templated Experience.
- On the Theme Settings tab there are edit menus on the right panel. Expand the Cookie Consent menu.
Cookie Preference Center
- Using the menus provided, you may edit the appearance of the cookie message to match your branding, for a seamless visitor experience.
Views: 255