PathFactory enables third-party cookie consent providers to manage the “vid” persistent cookie within a PathFactory Experience.
Using a set of functions integrated into the Experience, PathFactory works alongside your consent provider’s scripts to:
- Check the visitor’s current cookie consent status.
- Update or set the visitor’s cookie consent status as needed.
|
Note
|
Don’t have an external cookie consent provider? Use PathFactory’s built-in cookie consent function! |
Set Up Custom Cookie Consent
Follow the steps below to set up cookie consent for your organization.
- Select Organization Settings from the drop-down menu under your username.
Note
You must be an admin user to access Organization Settings. 
Organization Settings menu item - Click the Cookie Consent tab, then select Cookie Consent managed by external cookie consent manager.

Cookie Consent Managed by External Cookie Consent Manager - In the text box that appears, enter scripts from your consent provider in conjunction with PathFactory consent functions.
Note
See the Code Samples below on how to use setPfConsent() and pfConsentStatus() with a 3rd party consent provider. 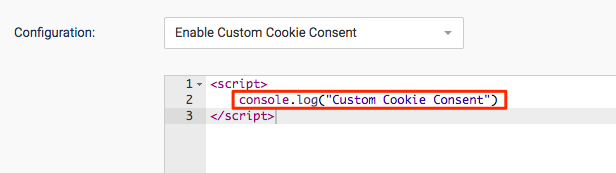 Code Example
 - You may optionally select an option for collecting visitors consent for data collection.

Cookie Consent Behavior
Collect Limited Data Anonymously (30 Minute Cookie)
Do Not Collect Data
Collect Engagement Data Only (No PII)
Gather interaction data without storing Personally Identifiable Information (PII), ensuring privacy compliance while maintaining valuable insights.
5. You may also optionally select a default setting for data collection for all PathFactory Experiences.

Consent Default Enabled Automatically for all Products
Cookie consent is automatically enabled for all Content Tracks, Microsites, Templated Experiences, Virtual Events, Website Campaigns, and Website Properties. It cannot be toggled at the individual item level.
Enabled for Newly Created Items
Cookie consent is automatically enabled for all newly created Content Tracks, Microsites, Templated Experiences, Virtual Events, Website Campaigns, and Website Properties. It can be toggled at the individual item level if necessary.
Not Enabled for Newly Created Items
Cookie consent is not enabled by default for newly created Content Tracks, Microsites, Templated Experiences, Virtual Events, Website Campaigns, and Website Properties. It can be manually toggled at the individual item level.
Note: This ensures that all new Content Tracks created after this point will have Cookie Consent toggled on automatically. If you do not select this option, you must manually toggle Cookie Consent for individual Content Tracks.
Code Sample: Generic Implementation
If you are using a custom cookie consent implementation on your website, you can use the function below to interact with PathFactory’s consent settings.
Your consent provider scripts should request tracking consent from the visitor and pass the result to the setPfConsent function.
//Add the script for your consent provider here

function setPfConsent(status){
if(pfConsentStatus()!=true &&status==true)
    return pfCookieResponse(true);
if (pfConsentStatus() != false && status==false)
    pfCookieResponse(false);
}

pfOnJukeboxLoad.then(function() {

//run consent functions here.
If your consent manager returns true,
run setPfConsent(true),
if it returns false, run setPfConsent(false) });
Code Sample: TrustArc Implementation
The TrustArc script contains 2 parts.
First, PathFactory checks consent from TrustArc when the Content Track loads.
PathFactory then adds a listener to check again if a visitor updates their preferences in TrustArc on the Content Track.
We are getting the visitor’s consent status from the notice_gdpr_prefs cookie dropped by TrustArc.
Add the following scripts to the text area in the Cookie Consent configuration section:
<script async="async" type="text/javascript" src='//consent.truste.com/notice?domain=YOURDOMAIN.com&c=teconsent&text=true'; crossorigin></script>

<script>
//Level of consent required: 0=required, 1=functional, 2=advertising
var cookieCategory = 2;

function getCookie(cname) {
  var name = cname + "=";
  var decodedCookie = decodeURIComponent(document.cookie);
  var ca = decodedCookie.split(';');
  for(var i = 0; i <ca.length; i++) {
    var c = ca[i];
    while (c.charAt(0) == ' ') {
      c = c.substring(1);
    }
    if (c.indexOf(name) == 0) {
      return c.substring(name.length, c.length);
    }
  }
  return "";
}

function setPfConsent(status){
if(pfConsentStatus()!=true &&status==true)
    return pfCookieResponse(true);
if (pfConsentStatus() != false && status==false)
    pfCookieResponse(false);
}


pfOnJukeboxLoad.then(function() {
  setPfConsent(getCookie("notice_gdpr_prefs").indexOf(cookieCategory)>=0);
});
//Register with the API for automatic updates of user preferences (for the settings you care about)
//--OR-- if the API is loading, then this will send an update when the API is done and has loaded the user preferences.
      window.addEventListener("message", function(e){
          try{
            var json = JSON.parse(e.data);
                        if (json.source=="preference_manager"&&json.message=="submit_preferences"){
                      setPfConsent(getCookie("notice_gdpr_prefs").indexOf(cookieCategory)>=0)
           }
           }catch(e){}
           }, false);
  </script>
Code Sample: CookiePro Implementation
The CookiePro script dynamically updates script tags in the HTML tied to the different cookie categories. Simply add the script tag below along with the CookiePro banner script. When the visitor has consented to being tracked, the script tag’s type will change from text/plain to JavaScript and the PathFactory opt-in will execute.
Add the following scripts to the text area in the Cookie Consent configuration section:
<script type="text/plain" class="optanon-category-2">

pfOnJukeboxLoad.then(function() {
if(pfConsentStatus()!=true)
 pfCookieResponse(true);
});
</script>
Enabling Custom Cookie Consent for Templated Experiences
In order for these cookie consent scripts to execute, an Experience must have Cookie Consent toggled On.

How to Customize Cookie Consent Menu Appearance
Note: While the Cookie Settings menu appears in all Classic and Templated Experiences, you may alter its appearance only in Classic Experiences.
After your visitor has accepted cookies, they are given tracking options on a Cookie Settings menu, an example of which is highlighted in the screen capture below.

When the visitor clicks on the Cookie Settings gear icon, a menu appears so that they can personalize the tracking settings.

To modify the appearance of this menu in terms of colors and styling, follow these steps.
- On the main navigation menu, click the gear icon and then select Appearances.

Appearances menu item - In the Appearances Configuration menu that opens, select the Cookie Consent tab.

Appearances for Cookie Consent menu - Use the edit menus to set the fonts and colors for the Cookie Consent Settings menu and the Cookie Preference Center.
- When you have finished your edits, you can lock in the changes by clicking Save Cookie Consent Settings. To exit without saving, click Reset Settings.
How to Customize Cookie Consent Menu Appearance for Templated Experiences
To edit the appearance of a cookie consent message for a Templated Experience, you must edit its associated Theme file.
For more information on how to customize a Theme file, read How to Create/Configure a Theme File.
Views: 508