Microsite builder expands on how Explore pages are used by PathFactory customers and improves on Explore with a more robust and advanced feature set.
With microsites you can:
- Include more than one content track on a page.
- Tie multiple pages together with navigation.
- Use your own custom code to add page sections and elements.
Create a microsite
Microsites are part of the Standard Experiences (formerly Campaign Tools) module.
- Navigate to Standard Experiences > Microsite Builder.

Microsite Builder menu - Select + Add Microsite. The Add Microsite dialog appears.
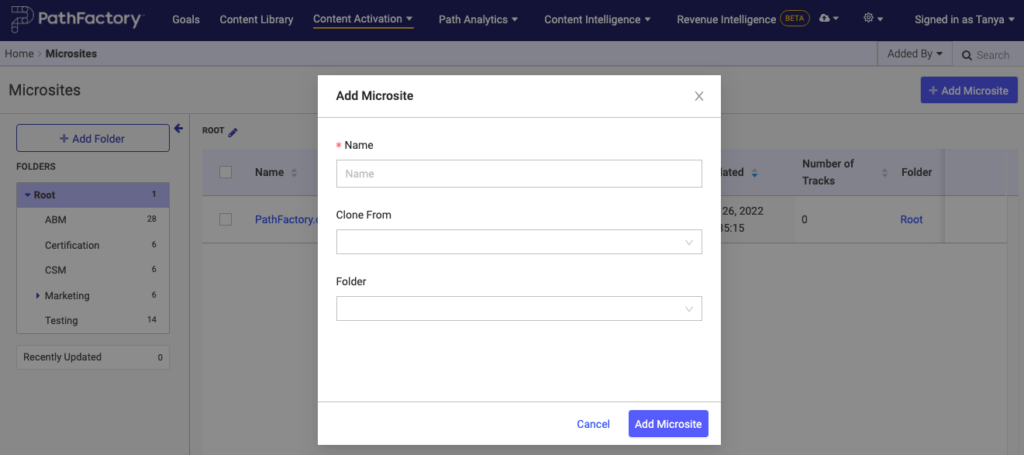
Add Microsite menu - Enter a name for the site. You can also Clone From an existing microsite. If you choose to clone, you can select exactly which items you wish to copy over to your new microsite.
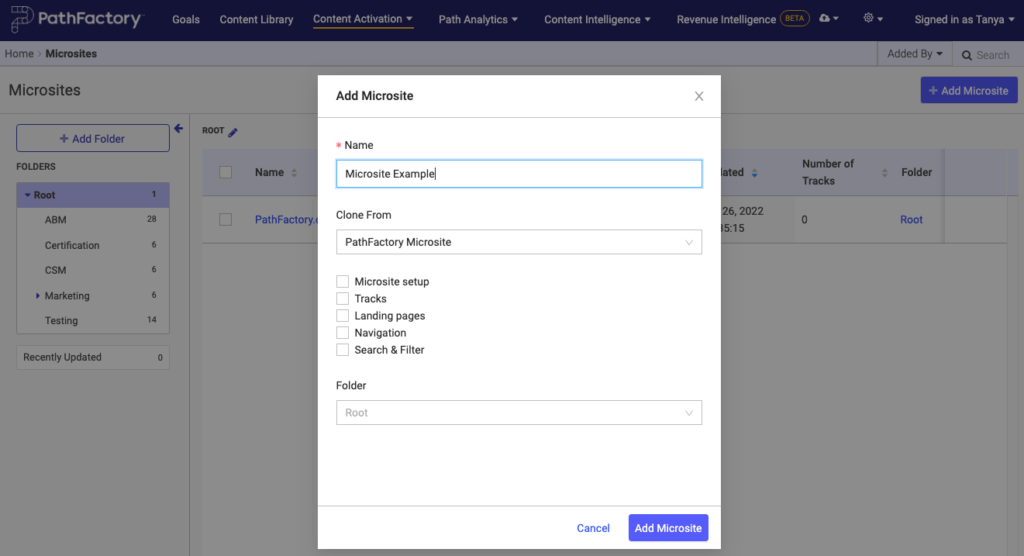
Microsite Clone options - Choose a folder the site will be saved in. Then click Add Microsite.
- When you’re happy, select Add Microsite. A new screen opens, on the setup tab, for your new microsite. This tab is very long and detailed. To see its entirety, scroll down.
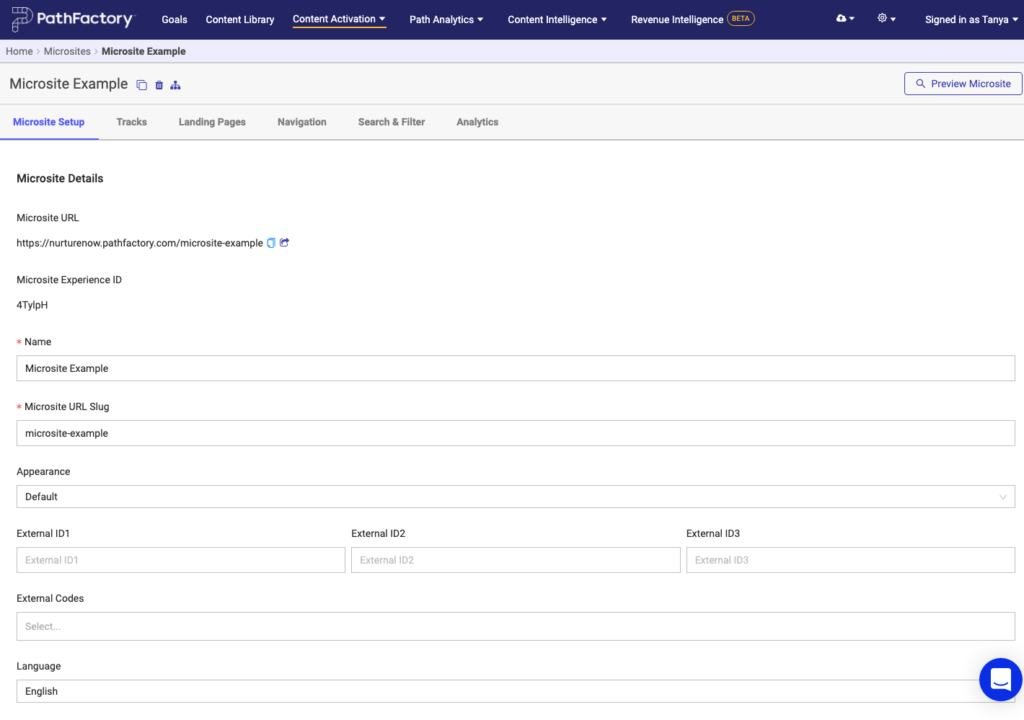
Microsite Setup tab
Now that you’ve created your site, it’s time to dive in and customize it.
Customize a microsite
After creating a microsite, you can customize it extensively. We’ll walk through all the options.
If you are customizing the microsite right after you have created it, you are already on the Setup tab. If not, click Content Activation, then click Standard Experiences, and finally select Microsite Builder. You’ll see your new microsite in the folder where you saved it.
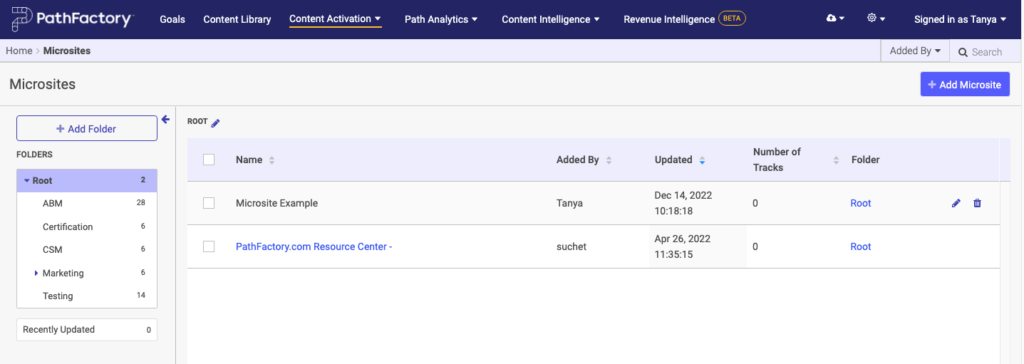
Select the name of the microsite you wish to customize. You are brought to a new screen. Notice the tabs along the top of this screen. These tabs represent all the different settings you can customize.
Let’s walk through each tab.
Microsite setup tab
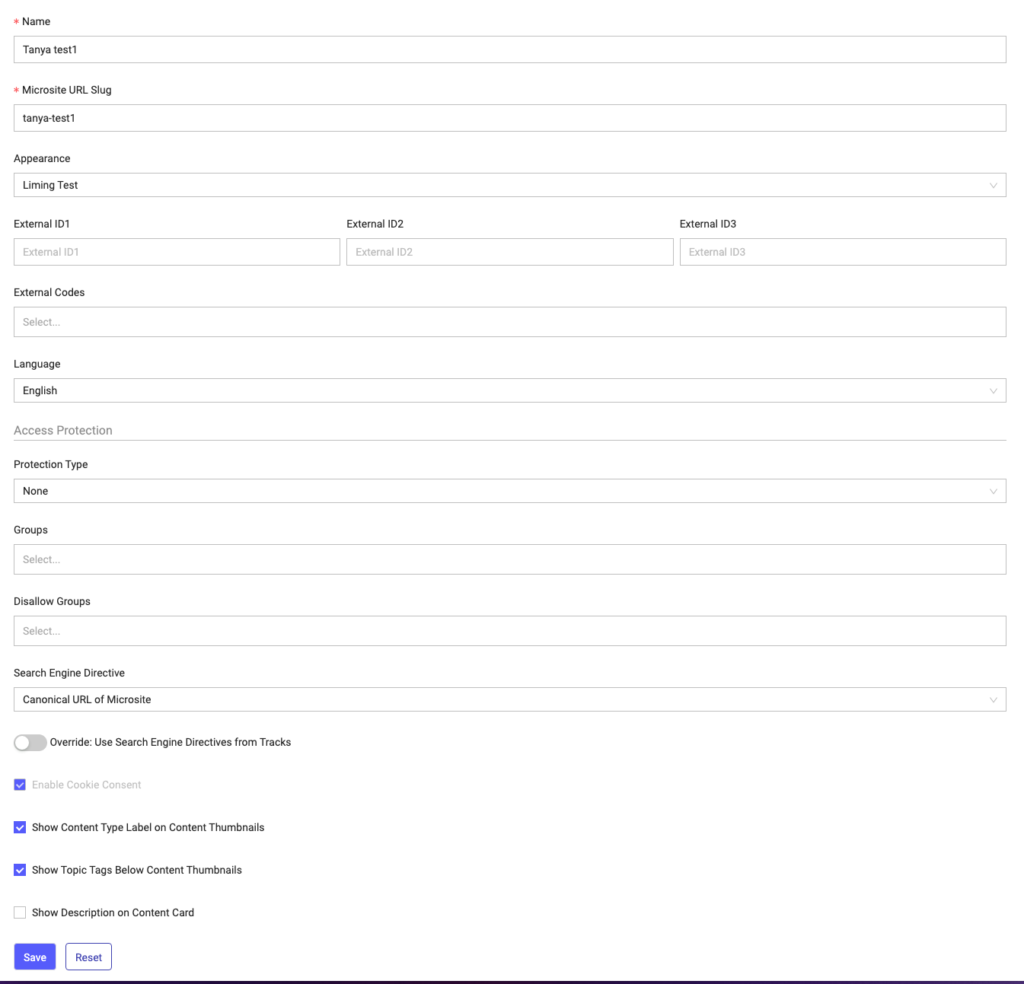
- Microsite URL – Here you can see and share the URL of the Microsite using the copy and share icons located beside the microsite URL. Note: the URL you share here will be the microsite homepage, which is defined on the Landing Pages tab in a section below.
- Name – provides a field to change the name of the Microsite.
- Microsite URL Slug – allows you to change the URL slug of the microsite. This is important because it is automatically used as part of the URL of the microsite. It appears immediately after the subdomain for the microsite. It’s important that you don’t change the URL slug after you’ve deployed microsite to avoid breaking the URL.
- Appearance – This is where you can choose which appearance settings are applied to the Microsite.
- External Codes – You can use this setting to choose any external code snippet(s) you had defined in External Code. Note that External Code applied globally will still apply even if it hasn’t been selected.
- Language – Set the language for the microsite.
- Protection Type – Here you can choose whether you want to apply any access protection to the Microsite you’re building, and which type of access protection you wish to apply.
- Groups – Choose which groups (as configured in access protection) are able to access the microsite.
- Disallow Groups Choose which groups are unable to access the microsite.
- Search Engine Directive – Choose how you want search engines to treat your microsite. Read about PathFactory and SEO for more information on the different options.
- Enable Cookie Consent – Enabling cookie consent adds your Cookie Consent setup to the microsite to ensure you are following your preferred opt-in policy and method.
Tracks tab
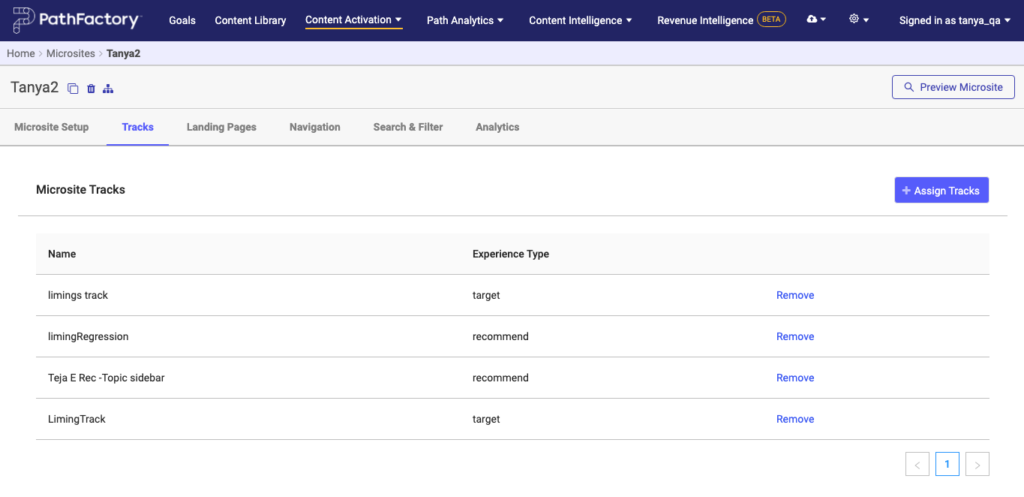
The tracks tab allows you to assign existing Target or Recommend tracks to the microsite and thus to make them available within the landing page editor. In order to add either Target or Recommend tracks to a landing page, they first need to be assigned to that microsite. Start by selecting + Assign Tracks.
A modal appears where you can select any Target or Recommend content track you wish to assign and make available. Note: you can type within the Tracks text box to search for specific content tracks to add (rather than needlessly scrolling through a long list!).
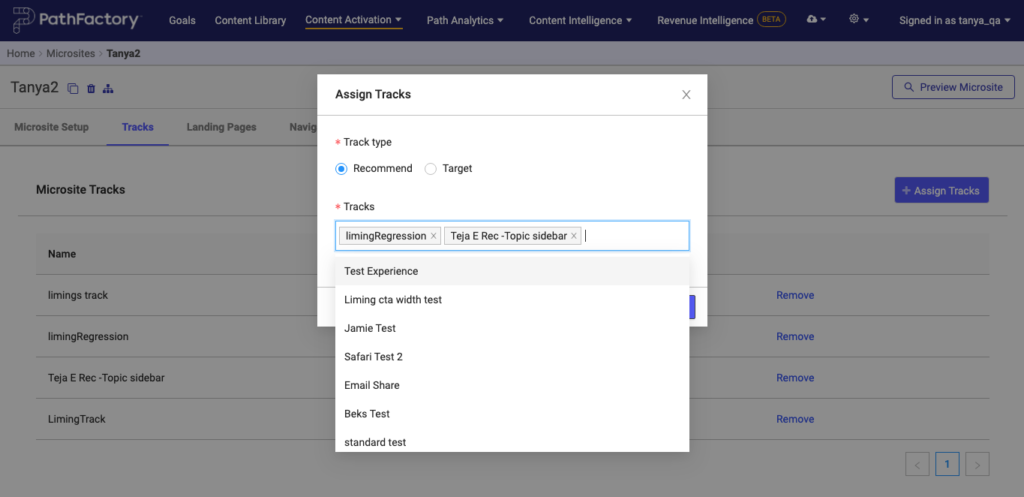
When complete, select Submit.
You can remove tracks from the microsite by selecting the remove button next to a track in the list view.
Landing pages tab
Landing pages shows you all the landing pages that comprise the microsite.
In the top right, select + Add Page to create additional landing pages.
Each landing page can be customized individually. Let’s review your options.
- URL – In the URL column you’ll notice buttons to copy or share the URL of that specific page in the microsite
- Home Page – The ‘Set as Home Page’ button allows that particular page to be set as the home page of the microsite. This will be the destination URL of the logo in the header of all microsite pages, and will be the default destination of the main microsite URL shown in the Microsite Setup Tab.
- Modify Page – This allows you to edit the content of the page using the landing page editor.
- Edit – This produces a modal window where you can edit the Name of the page and the URL Slug.
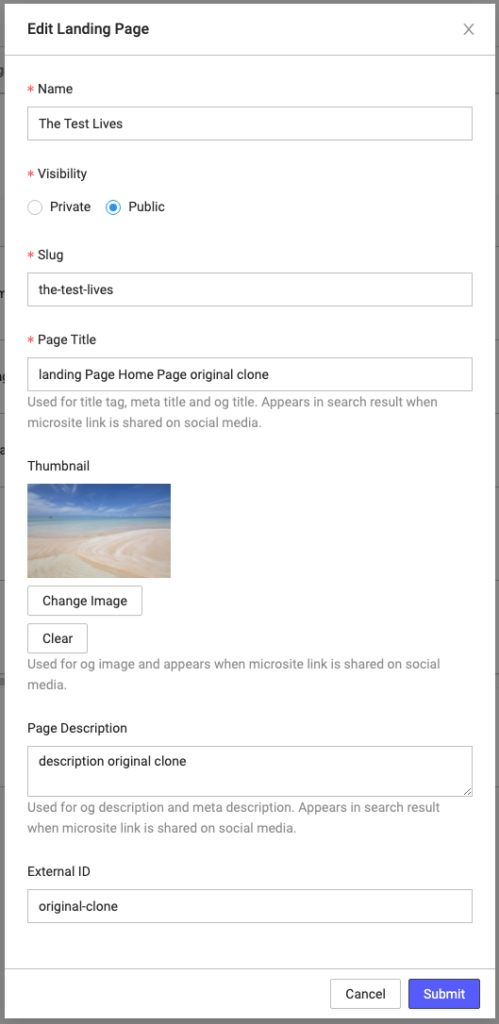
Edit Landing page settings - Remove – Selecting this button permanently deletes the page from the microsite.
To build out your landing pages, you’ll use the landing page editor. Read Use the microsite landing page editor for more information.
Navigation tab
Navigation provides a way to tie the various landing pages of your microsite together and allows you to link to pages outside of your microsite. Here is a simple example of the navigation in a microsite:
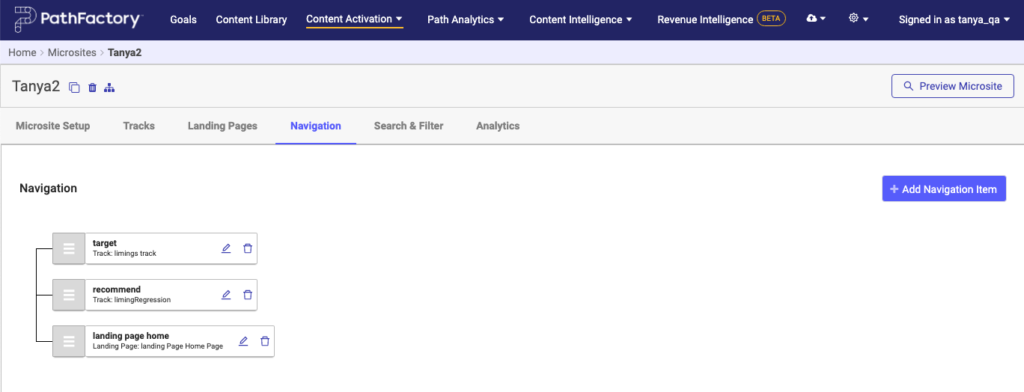
You can build a visual tree structure for your navigation (shown below) which will automatically be generated as navigation for your visitors within the header (as shown above).
Start by selecting + Navigation Item. A dialog appears where you can give the new navigation item a name and choose the type, and then the destination.
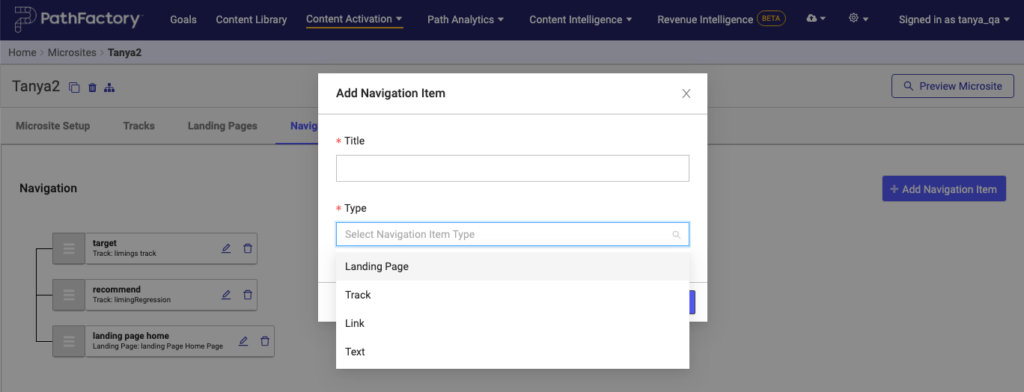
The name you choose will be what the visitor sees within the navigation so be sure to use an external facing name. Type allows you to choose what type of page will be linked to from this navigation item. You can choose from the Landing Pages within this microsite, any Content Track added to this microsite, or any URL. Once you’ve chosen a type for the item, you’ll be able to choose the specific destination. When complete select Submit, and you’ll see a new navigation item in the visual tree structure. You can then drag and drop these items to create a nested navigation structure.
Note: You are allowed to go only three layers deep on the navigation as that is all that our user interface has been designed to accommodate.
Selecting Remove on the right side of each navigation item deletes the item from navigation permanently. Of course it can easily be re-added using the instructions above.
Note: only the navigation item is deleted, not the content track or landing page itself.
Search and filter tab
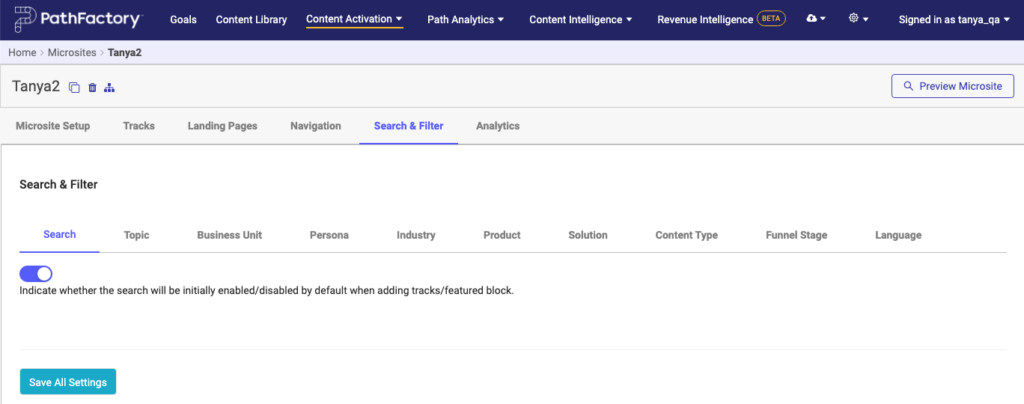
Use the on-page navigation to cycle through the search and filter options. You can turn on each feature individually.
Analytics tab
To access your microsite analytics, simply navigate to the Analytics tab and you’ll be able to see the number of sessions, unique visitors, page views, total view time and content tracks associated with the Microsite. There will also be three tables available, one breaking down the performance of each track, another breaking down the performance of each asset, and a third showcasing the engagement of each visitor.

