Microsites are an excellent way to create tailored, immersive experiences for your audience. Whether you’re looking to showcase a product portfolio, deliver a series of educational resources, or guide users through a multi-step campaign, microsites provide the tools you need. Let’s walk through the process of creating and customizing a microsite step by step.
Microsite builder expands on how Explore pages are used by PathFactory customers and improves on Explore with a more robust and advanced feature set. microsites offer greater flexibility and functionality, allowing you to:
- Include more than one content track on a page.
- Tie multiple pages together with navigation.
- Use your own custom code to add page sections and elements.
Process Overview
- Create a Microsite.
- Customize Governance, Appearance, and Settings.
- Add Content Tracks to the Microsite.
- Design a Landing Page for the Microsite.
- Set Up Navigation and Links.
- Enable Search and Filter Features.
- Monitor Microsite Performance Analytics.
Step 1. Create a Microsite
This initial process lays the foundation for your microsite. To begin, follow the steps below.
- Expand the left menu bar and then select Microsite.

- A list of microsites appears.

- To create a new microsite, click Add Microsite.

- In the popup menu that appears, enter a name for the site. If you’d like to clone an existing microsite, click the Clone From dropdown menu and select an option from there.

- From the Folder dropdown list, select the folder in which you want to store the microsite. Then click Add Microsite.
Note: If you plan to create multiple microsites, choose a descriptive name and a folder in which to store them.
Step 2. Customize Governance, Appearance, and Settings
After you click Add Microsite, a new screen opens on the Microsite Setup tab, for your new microsite. This tab is very long and detailed. To see its entirety, you’ll need to scroll down.
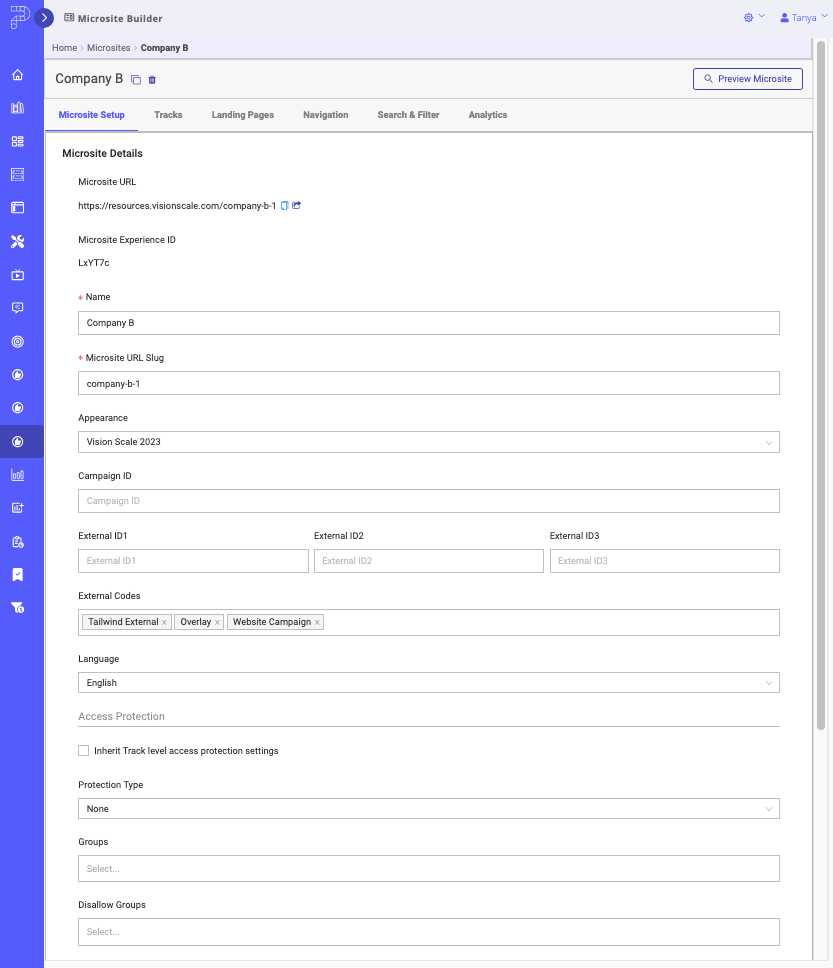
The setup tab contains several options to configure your microsite.
- Microsite URL: Share the microsite URL using the copy and share icons beside it. This URL points to the homepage defined on the Landing Pages tab.
- Name: Change the microsite’s name if needed.
- Microsite URL Slug: Modify the URL slug, which appears after the subdomain in the microsite’s URL. Avoid changing this after deployment to prevent breaking the URL.
- Appearance: Choose the appearance settings for the microsite.
- External Codes: Select any external code snippets to include (note that globally applied code will still apply even if not selected here).
- Language: Set the language for the microsite.
- Protection Type: Choose and apply access protection if needed.
- Groups: Select which groups can access or are restricted from accessing the microsite.
- Search Engine Directive: Decide how search engines should treat your microsite. Read more about PathFactory and SEO for details.
- Enable Cookie Consent: Activate this checkbox to apply your Cookie Consent setup to the microsite, to ensure you are following your preferred opt-in policy and method.
After configuring the settings, click Save at the bottom of the tab to lock in your changes. If you need to start over, click Reset. Once the setup is complete, proceed to add content tracks in the next step.
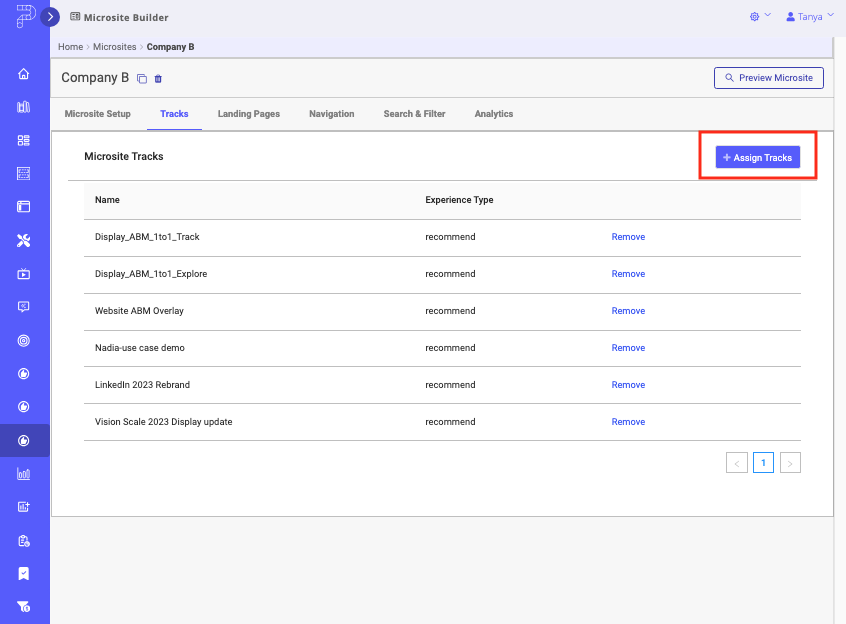
Step 3. Add Content Tracks to the Microsite
On the Tracks tab is where you add content tracks to your microsite. By adding them here, the content tracks are available to display on the microsite’s Landing Page that you will create later in this process.
- On the Tracks tab, select Assign Tracks.
- A popup menu appears. Depending on the track you want to add, select the Recommend or Target radio button. Next, select the Tracks dropdown list. From there you will select the content tracks you want to include with the microsite.
Note: You can type within the Tracks text box to search for specific content tracks to add (rather than scrolling through the list).
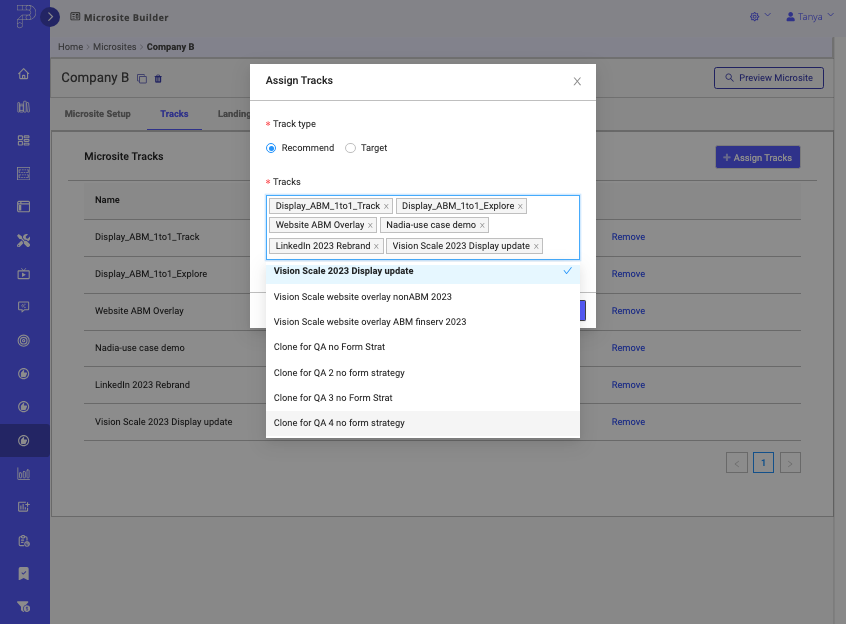
- To save these content tracks, click Submit. To exit the process without saving the content tracks, click Cancel.
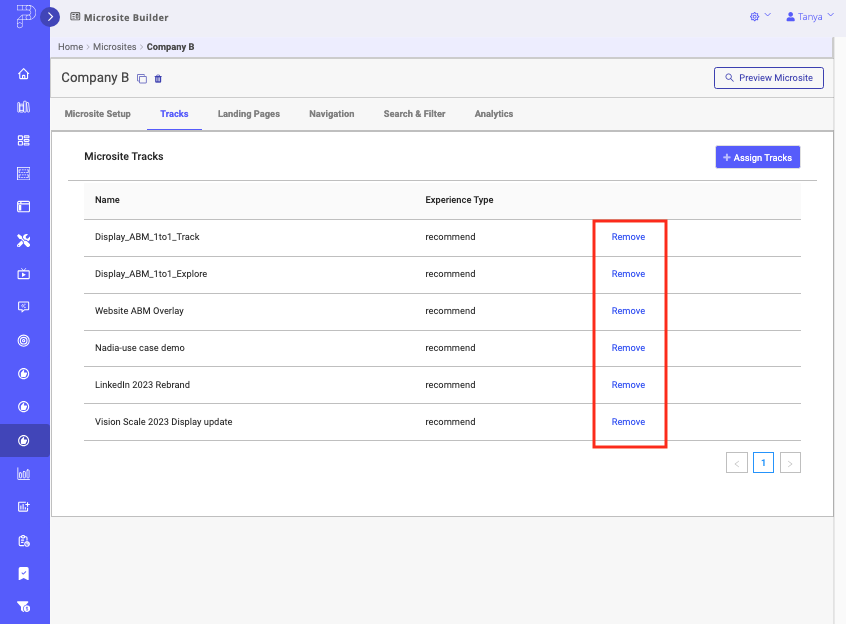
Note: You can remove tracks from the microsite by selecting the Remove link next to the track in the list view, as highlighted in the screen capture below.
Step 4. Design a Landing Page for the Microsite
Now you are ready to create a Landing Page to showcase your content tracks. Follow the steps below to get started.
- Select the Landing Pages tab. You’ll see a list of all Landing Pages that currently exist for the microsite.
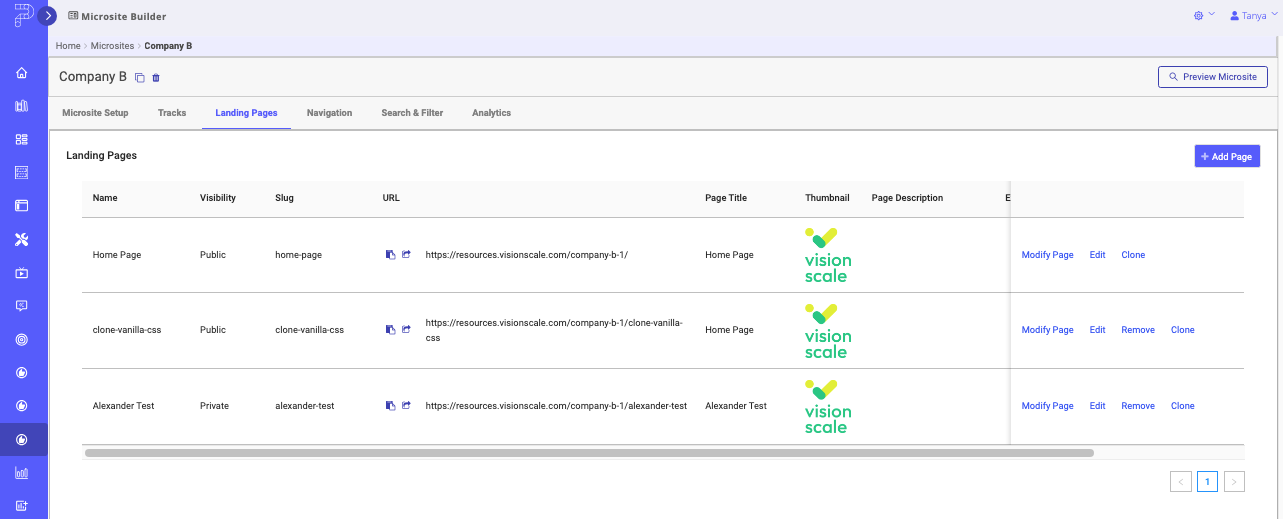
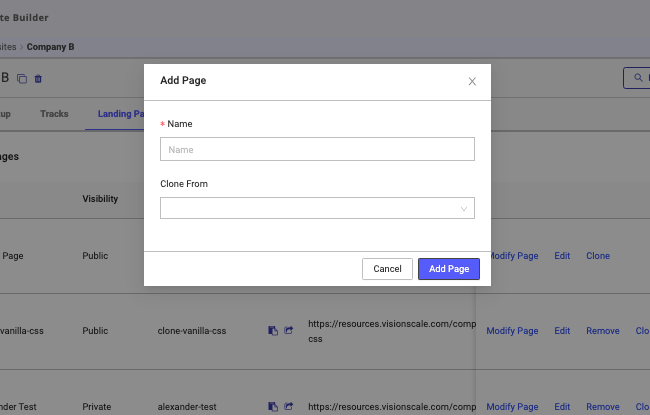
- To create a new Landing Page, click Add Page.
- To modify a Landing Page contents and appearance, click its Modify Page link.
- To retitle a Landing Page, change its image, description, slug or External ID, click its Edit link.
- To delete a Landing Page, click its Remove link.
- Home Page – The Set as Home Page link allows that particular page to be set as the home page of the microsite. This will be the destination URL of the logo in the header of all microsite pages, and will be the default destination of the main microsite URL shown in the microsite Setup tab.
- If you click on Add Page, a popup menu appears for you to enter a name for the Landing Page and an option to clone from an existing Landing Page. When you have finished entering information, to save the Landing Page click Add Page. To exit the process without saving, click Cancel.
To build out your Landing Pages, you’ll use the Landing Page Editor. For details on how to build Landing Pages, read Use The Microsite Landing Page Editor.
When you have finished creating or modifying the Landing Page, you are ready to add navigation items to the microsite.
Step 5. Set Up Navigation and Links
On the Navigation tab you can insert links to other microsite Landing Pages, content tracks, URLs and text on your microsite.
- Begin by selecting Add Navigation Item. A popup menu appears.
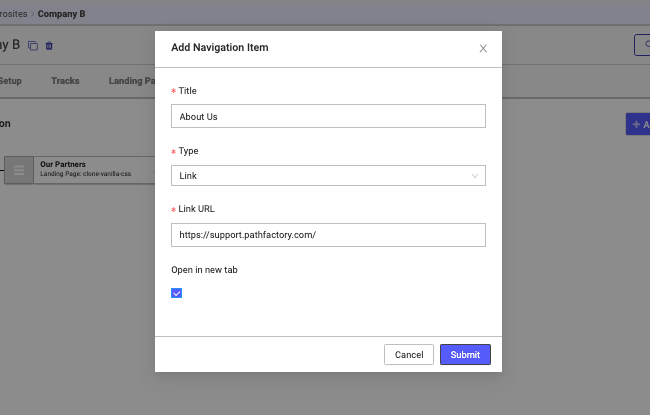
- Enter a Title for the new navigation item. The visitors will see this name, so be sure to use an external-facing title.
- Select which Type of item you want to connect to; Landing Page, Track, Link, or Text. Once you’ve chosen a type for the item, you’ll be able to choose the specific destination.
Note: You can use Text items to group related links under a common heading. For example, if your microsite has several pages or tracks related to a specific topic, you can use a Text item as a non-clickable section header that visually separates these links from others in the navigation bar. - To have the navigation item open into its own tab, activate the checkbox labeled Open in a New Tab.
- When you have finished entering the information, to save it click Submit. To exit without saving, click Cancel.
- If you have clicked Submit, you’ll see the new navigation item in a visual tree structure on the Navigation tab. You can then drag and drop these items to create a nested navigation structure.
Note: You can add up to three layers to the navigation structure.
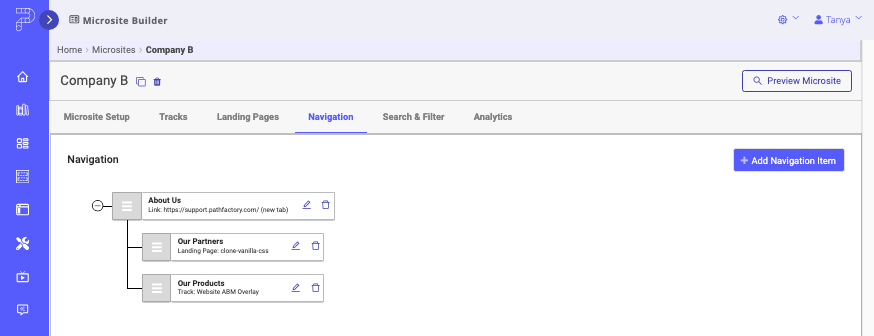
- To delete a Navigation item, click on its associated trash bin icon. To edit a Navigation item, select its pencil icon.
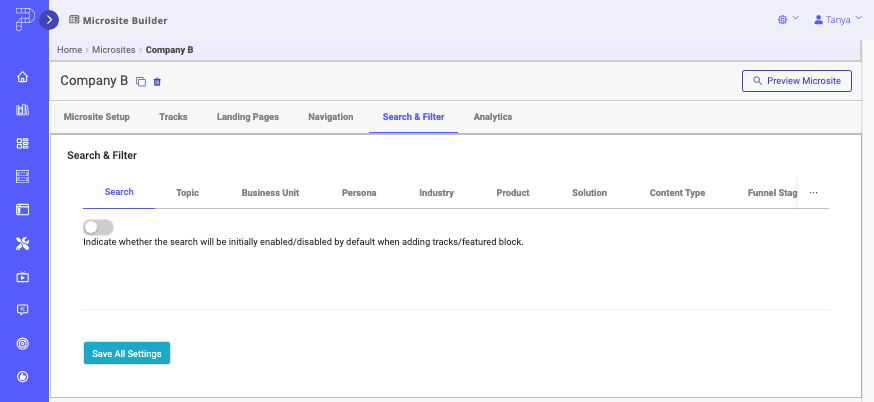
Step 6. Add Search & Filter Options to the Microsite
On this tab use the on-page navigation to cycle through the search and filter options. You can turn on each feature individually.
Step 7. Monitor Microsite Performance Analytics
To view analytics on the performance of your microsite, click on its Analytics tab. There you’ll be able to see the number of sessions, unique visitors, page views, total view time and content tracks associated with the microsite, and more.
For details on the analytics and how to view them, read the section, Visitors & Accounts, in the article, Creating, Analyzing & Sharing Data Reports
Views: 241