Welcome to the latest advancements in PathFactory. With our 2023 Release V, we have added the following functionality to PathFactory:
Enhanced integrations between Salesforce and PathFactory For Revenue Intelligence for more streamlined content play workflows and the ability to access PFRI contacts and opportunities within embedded views in Salesforce.
New fields/data are now available via API v3 updates that integrate and share valuable visitor and page view endpoint data, particularly for Adobe Experience Cloud and Demandbase connections.
Overlay and UTM parameter options are now available for Website Campaigns within Standard Experiences to provide Increased control of content titles in Website Tools with the new ability to manage multiple prefix/suffix rules.
Preview and sharing options in Templated Experiences for enhanced customization.
Elevated content asset security with the introduction of the Content Security Policy (CSP) toggle.
PathFactory for Revenue Intelligence Enhancements
Enhanced Governance Options for Content Plays
This update gives PathFactory administrators more flexibility in how they govern users’ content sharing capabilities within PathFactory for Revenue Intelligence (PFRI). Administrators will now be able to choose whether users can generate a Content Play link to share from another system (email app, sales outreach tool, etc.), or send it within an email directly from inside the PFRI experience, or both.
For more information read the section Governance Options for Content Plays within the article How to Use PFRI Content Plays. If you are just starting out with PFRI, Administrators can access our updated article, Adding the PFRI Package into Salesforce.
New PFRI Contact & Opportunity Embed Views Within Salesforce
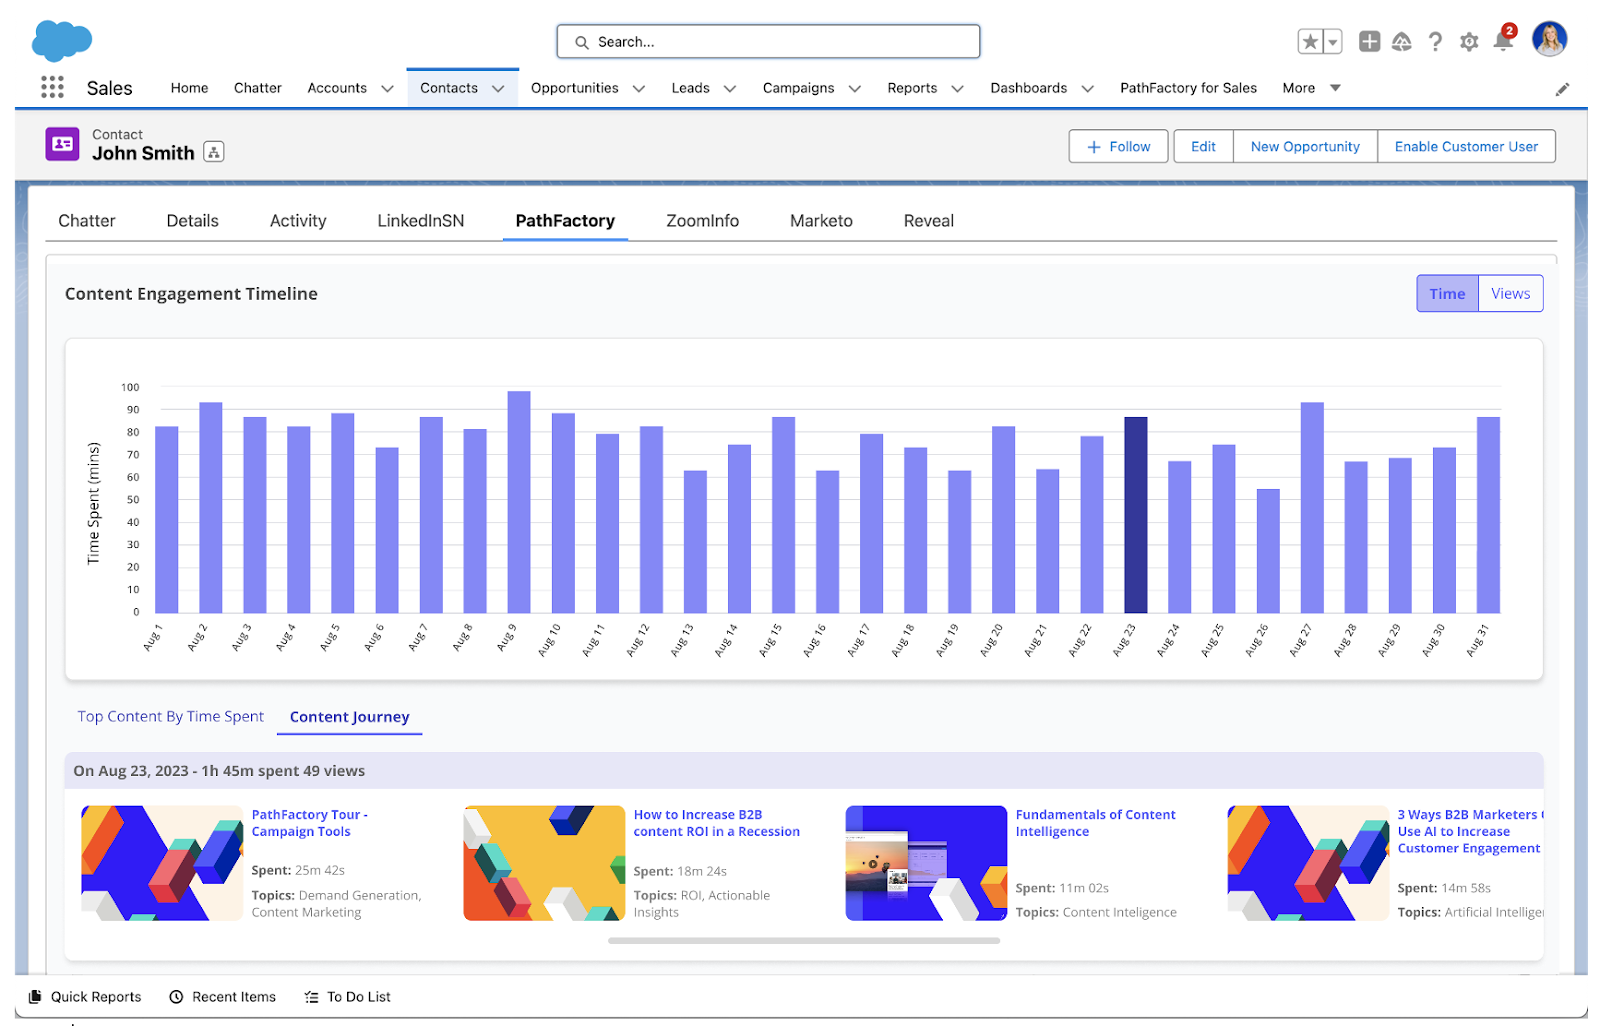
Users with a Revenue Team role type and Salesforce access will now have the ability to see the following PathFactory for Revenue Intelligence (PFRI) dashboards directly in Salesforce.
Buyer Details Dashboard on Salesforce Contact Pages
Individual Opportunity Dashboard on Salesforce Opportunity Pages
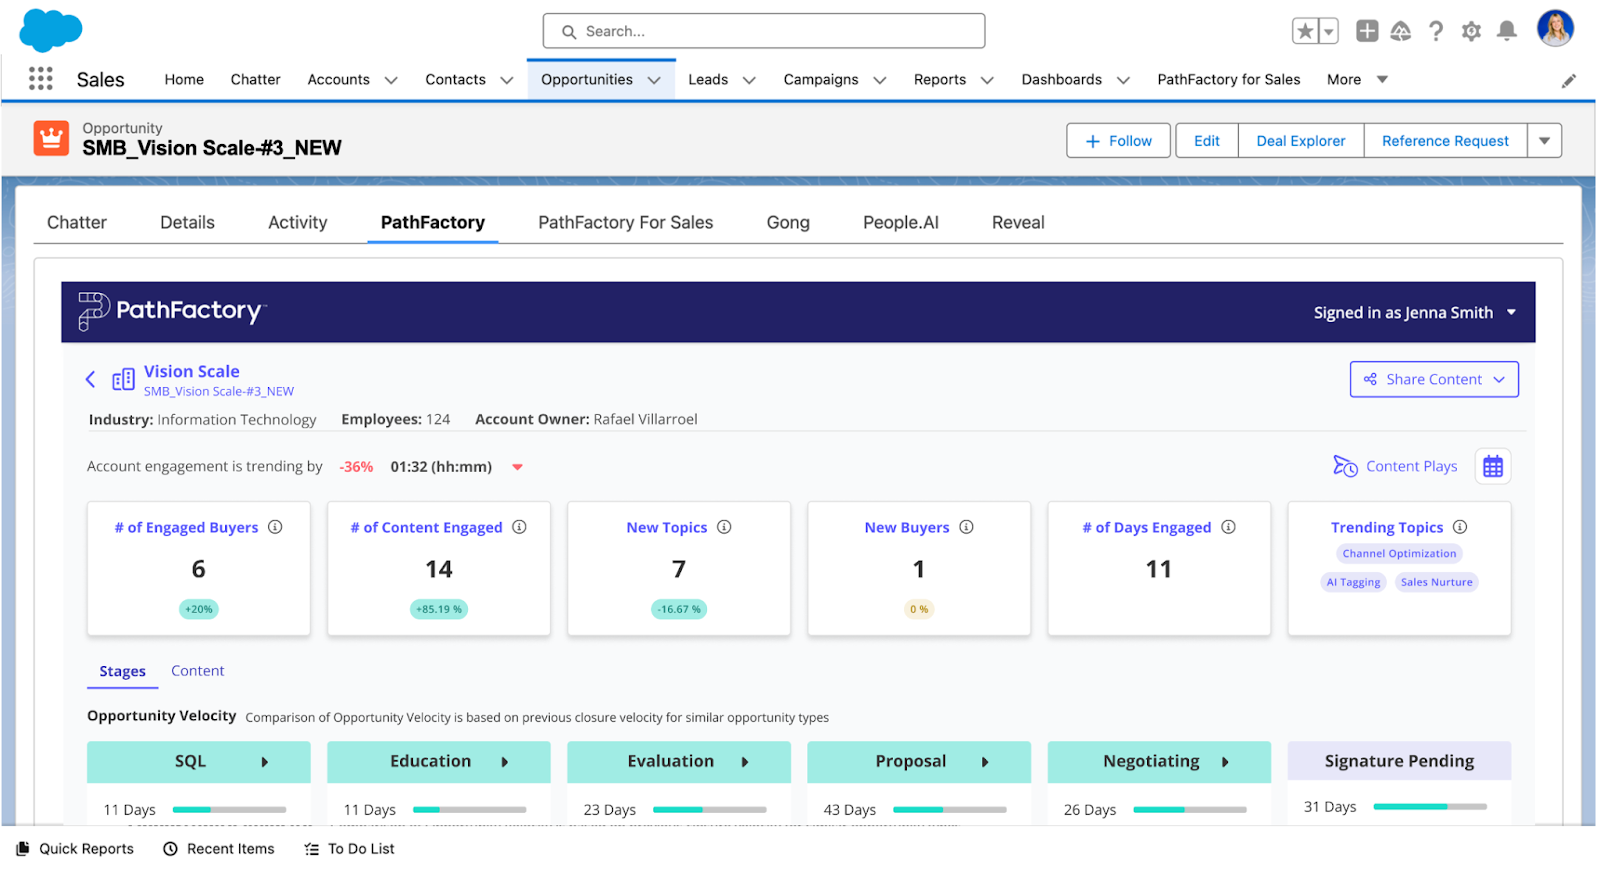
These updates provide access to critical buyer and opportunity level content engagement insights for users (i.e., sellers) who are completing the majority of their workflows in Salesforce with no need to log into PathFactory directly.
For these dashboards to display on the applicable Salesforce pages, your Salesforce administrator will need to update the PFRI managed package within Salesforce and add the new embeds to the respective page layouts. Contact your Customer Success Manager or Solutions Engineer for the updated package link and read Adding the PFRI package into Salesforce for more details.
For a walkthrough of how to navigate to the dashboards within Salesforce, read the How to Access PFRI within Salesforce section of Getting Started with PFRI.
New Fields Available in PathFactory’s API v3
Customers taking advantage of PathFactory’s API v3 to share content intelligence data with their other systems can now make use of new fields available in the Visitor and Pageview endpoints. These fields are listed below.
Visitor Endpoint Update: PathFactory’s code has been updated to identify and pull the Adobe Experience Cloud ID (ECID) for any visitors that are engaging with a PathFactory experience when there is an ECID present. We then associate that ECID to our own Visitor ID in our database so it can be passed through the API. This way, if you leverage ECID for your unique visitor identity in other platforms, you can easily join PathFactory engagement data with it in those places.
- VISITOR_ECID
Page View Endpoint Update: We’ve added many new fields to enhance the engagement insights you are able to collect from PathFactory. This includes fields for customers that use Demandbase within PathFactory experiences to identify visitor firmographic data.
- EXPERIENCE_TYPE
- QUERY_STRING
- PAGE_VIEW_IN_SESSION_INDEX
- NORMALIZED_URL
- DEMANDBASE_SID
- DEMANDBASE_COMPANY_NAME
- DEMANDBASE_ANNUAL_SALES
- DEMANDBASE_EMPLOYEE_COUNT
- DEMANDBASE_INDUSTRY
- DEMANDBASE_WEB_SITE
- IP_2_PROXY_ISPROXY
- WEBSITE_EXPERIENCE_UUID
- CAMPAIGN_ID
- EXPERIENCE_CAMPAIGN_ID
- ENGAGEMENT_SCORE
- UNIFIED_ENGAGEMENT_SCORE
For the full list of fields available as well in our API read PathFactory’s article REST API: Fields, Definitions, and Endpoints.
Website Campaigns
Enable Overlay for Website Campaigns in Standard Experiences
Website campaigns can now help increase content engagement without taking the visitor away from the web page they started on. This new feature allows an easy toggle to open the content experience as an overlay. Once the overlay is closed, the visitor returns to their previous place on the original web page they were visiting.
To use this new feature, follow these steps.
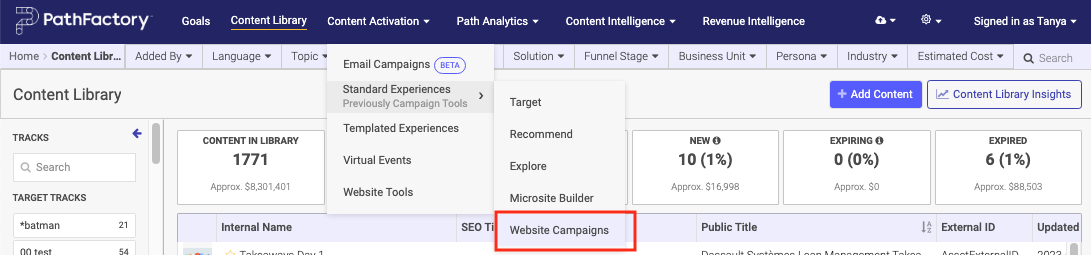
- On the main navigation menu, select Content Activation, then select Standard Experiences, and finally select Website Campaigns.
- From the list of Website Campaigns that appear, click on one to edit.
- A panel on the right appears, to list the settings for that Website Campaign. You’ll notice in the Promoter Settings section a new option labeled Open Content Experience, as highlighted in the screen capture below.
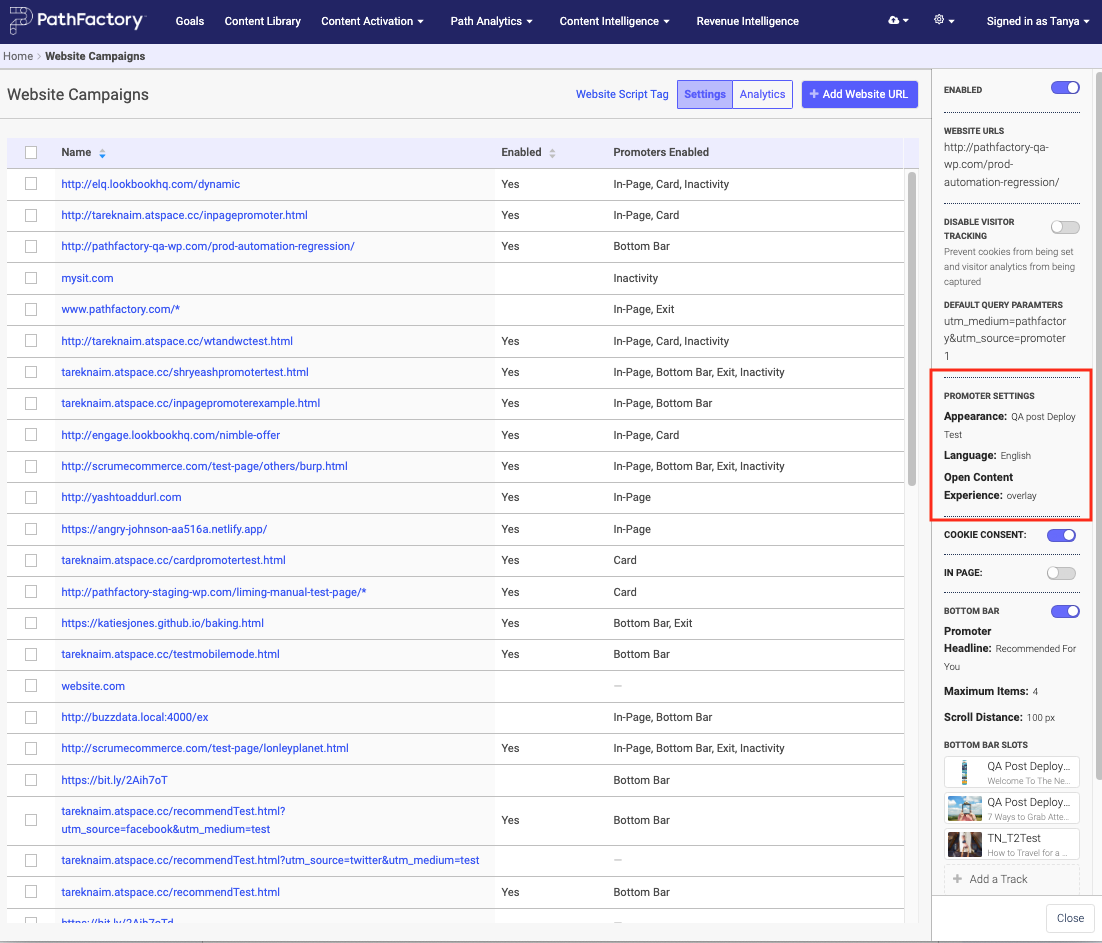
- Here you can select how you want the content to appear. When you click on the selected setting, in this case overlay, a dropdown menu appears.
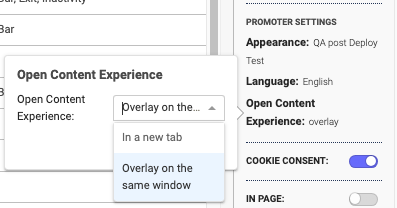
- From here you can select In a new tab or Overlay on the same window. If you want to keep your visitors from viewing a new tab and losing their place in the Website Campaign, select Overlay.
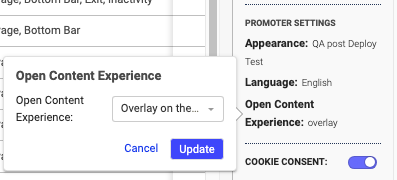
- To save your changes, select Update. Otherwise, select Cancel.
Enhance Website Campaigns By Adding UTM Parameters
You can now seamlessly incorporate UTM parameters into Website Campaigns experiences. This improvement enables you to add a predefined set of UTM parameters to Website Campaigns to enhance visitor data collection and minimize the occurrence of null values in Query string reports. As a best practice, PathFactory recommends marketers always add UTM parameters to any PathFactory experience URL for proper tracking and performance analysis.
As a reminder, UTM parameters are tags appended to URLs to facilitate visitor tracking and reporting for Experiences. When a visitor clicks on a link that includes UTM parameters, PathFactory uses the UTM information, along with any other tracking/analytics tools integrated with your PathFactory instance (e.g., Google Analytics, Marketing Automation, etc.) to capture valuable insights into how the visitor reached your Experience and how different channels, campaigns, sources, etc. are driving engagement. For more information on what information is collected and where to view the analytics, read How Do I Use UTM Parameters With My Content Tracks?
Note: UTM parameters that are retained on the Website page and passed to PathFactory during a click-through to a website promoter take precedence over an appended UTM. By adding a UTM parameter to your Website Campaign, you are creating a backup data collection function in case there isn’t an existing UTM present.
To add a UTM parameter to a Website Campaign using Website Tools, follow these steps.
- On the main navigation menu, select Content Activation, then select Standard Experiences, and finally select Website Campaigns.

- On the screen that appears, select a Website Campaign to modify.

- You’ll notice the panel on the right side of the screen updates to display tracking options.

- Enter the name of the UTM parameter you want to append to this Website Campaign, and then click Save.
Remove Prefixes from Content Asset Titles in Website Tools
You can now use content from multiple sources at scale without having to clean up their titles one by one to delete any internal identifiers. When content is brought into the PathFactory library from a website, we import the titles as well. The titles can come through into PathFactory as such: “Company Name Security eBook Saas Connect EU.”
With this new functionality, you can set up a rule that detects and excludes Company Name from the asset title so that it displays as “Security eBook Saas Connect.” You can add multiple prefix and suffix management rules so that you can exclude multiple keywords from the titles the visitors see.
Previously, you could add only one content rule at a time. To add a rule to a Collection, follow these steps.
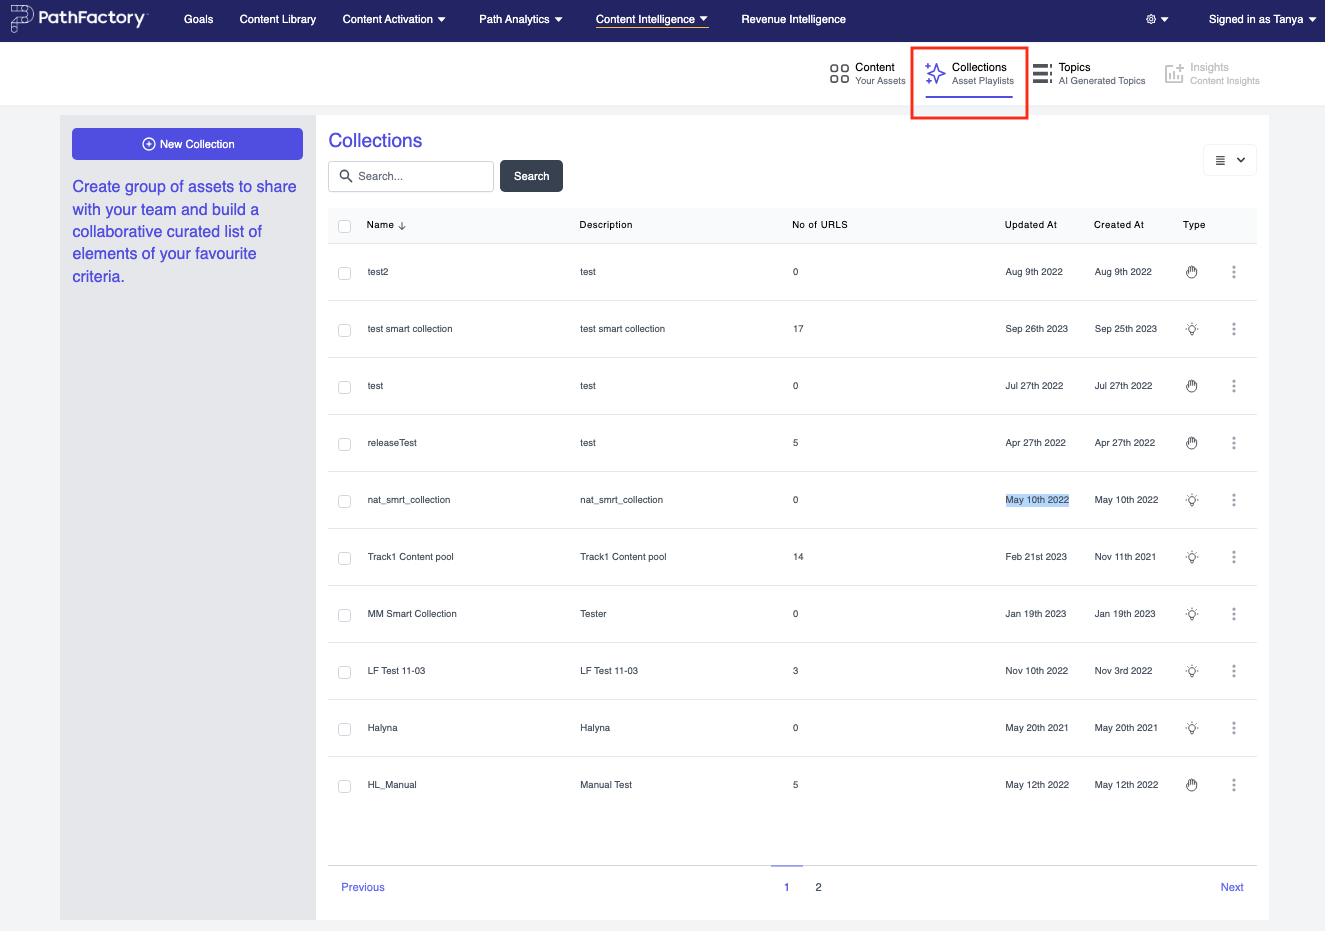
- On the main navigation menu, select Content Intelligence and then select Website Content Library.
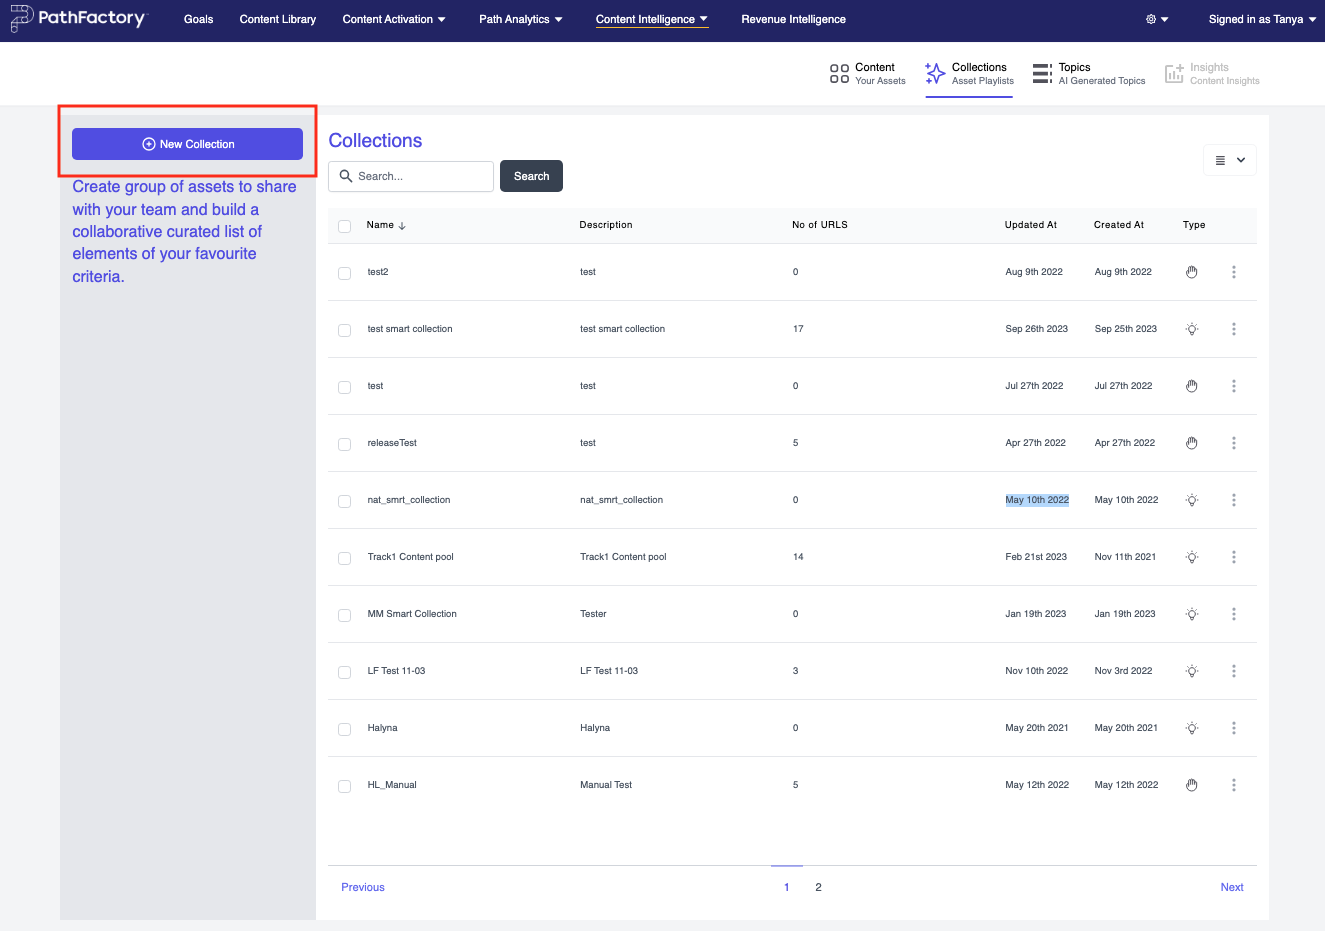
- Click Collections.
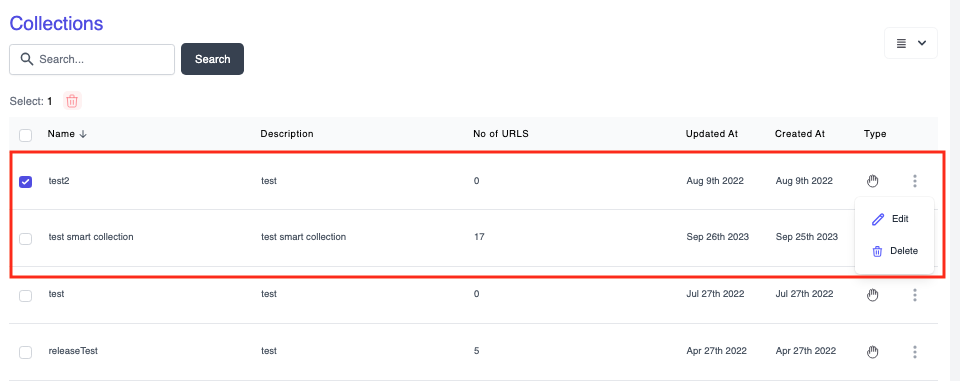
- To create a new Collection, skip this step. To edit an existing Collection, select its checkbox to activate it and then click its associated 3 dots. From the menu that appears, select Edit.
- If you are editing an existing Collection, skip this step. To create a new Collection, click the New Collection button as shown below.
- The Choose Collection Type menu appears.
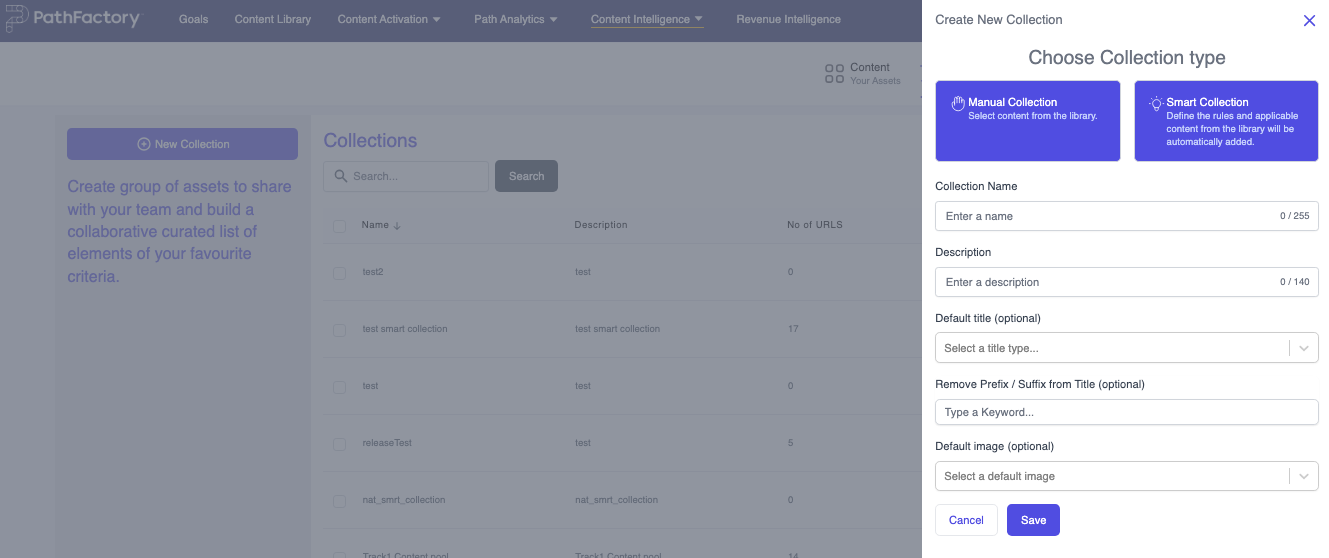
- Here you can select a Manual Collection or Smart Collection.
- Manual Collection – this option enables you to select specific assets to add to the collection.
- Smart Collection – this option lets you automate asset selection based on rules you create, which will be explained in the next step.
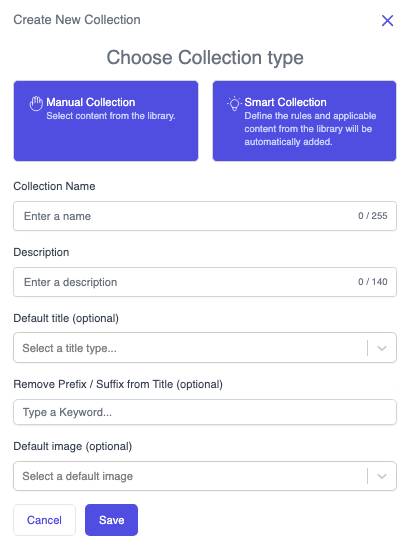
- Enter a Collection Name, Description, and Default title. To see options available for Default Title, click the down arrow to reveal them.
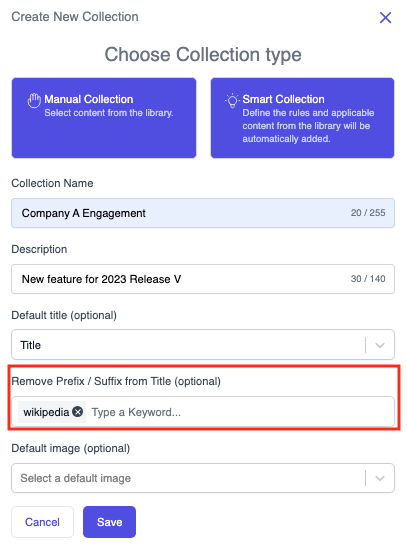
- In the Remove Prefix / Suffix from Title field, enter keywords that often appear in the content asset titles you have chosen. For example, you may want to exclude the word ‘wikipedia’ from asset titles whenever it appears in this Collection. In that case, you would enter that keyword in the Remove Prefix field as shown below.
Templated Experiences – Preview and Share Options Available on the Content Configuration Tab
We have added more options for customizing the content assets that are added to your Templated Experiences by adding two sub-tabs to the Content Configuration tab: Content Assets and Collections. Within each Templated Experience, you can manage and modify the content assets and the Collections of assets that are included with the given track.
With this additional functionality, you can preview and share links for content assets and collections that you are sharing through Content Pages and Content Playlists. You can use the preview option to prevent any tracking to prevent counting those views in the analytics.
To access the new subtabs, follow these steps.
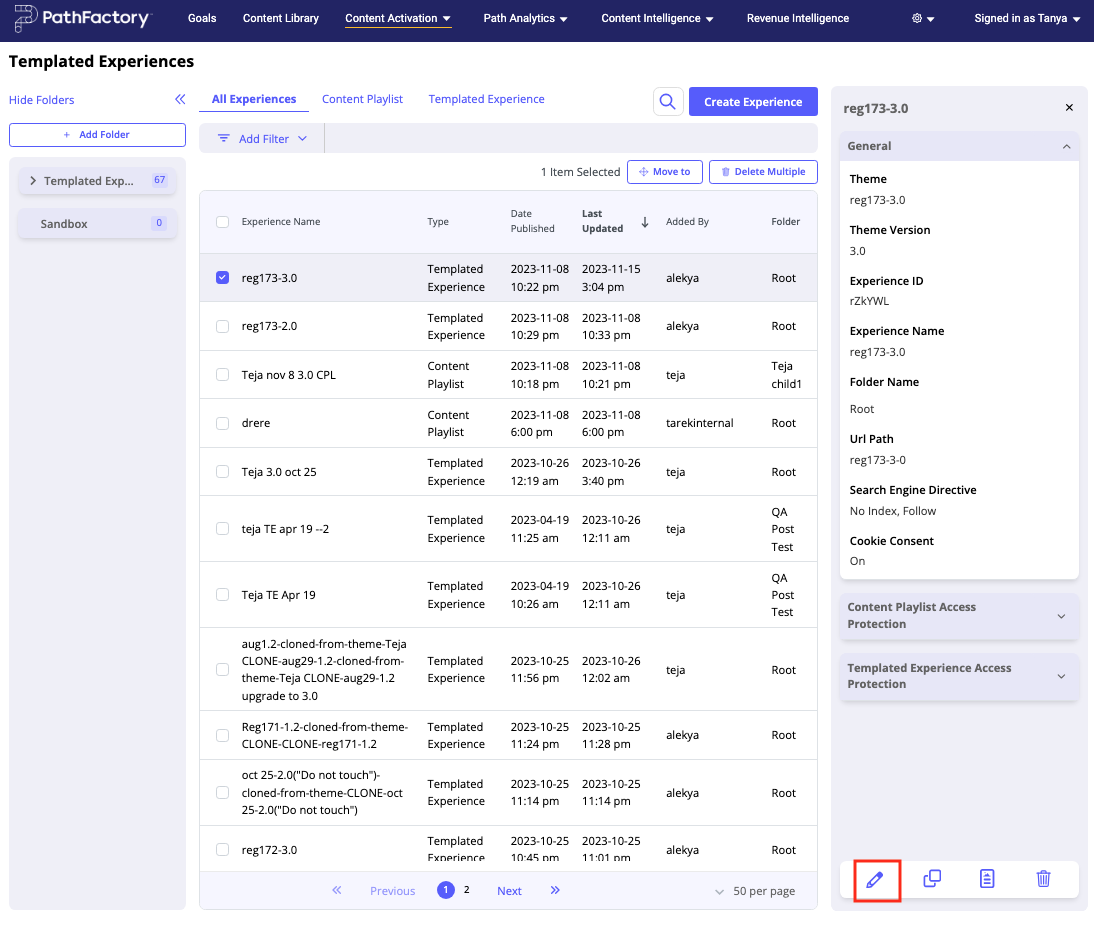
- Open Templated Experiences.
- Select an Experience to modify by selecting its checkbox. Then select the edit icon at the bottom of the right-side panel.
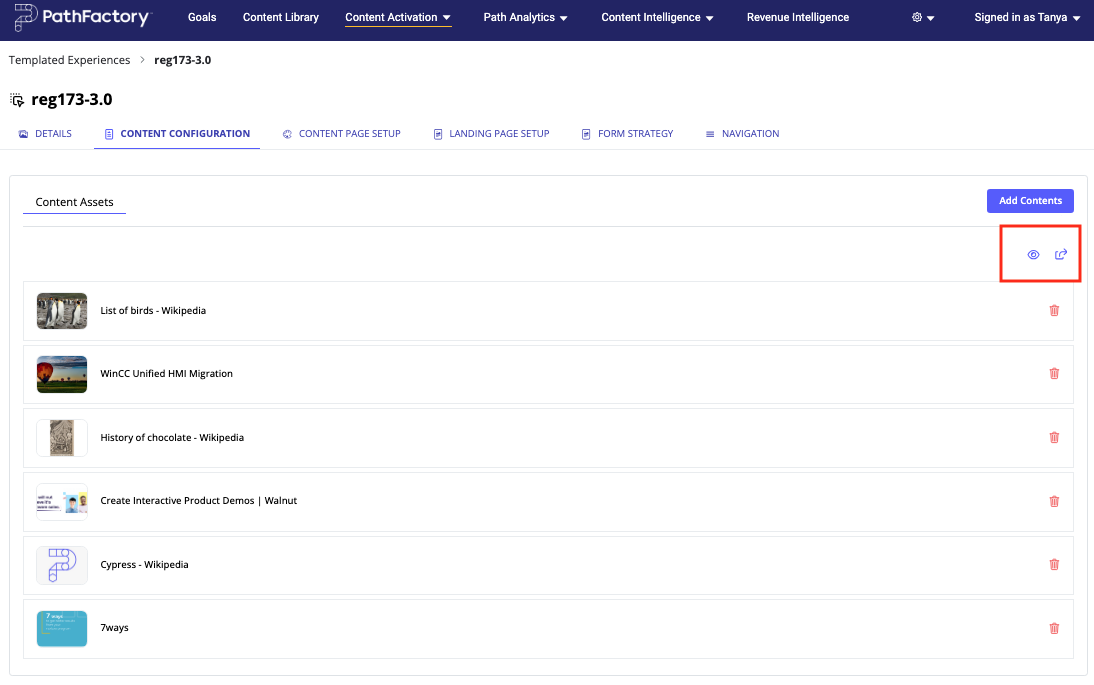
- On the Content Configuration tab, you see a new subtab called Content Assets.
- You’ll see the preview and sharing icons as highlighted in the screen capture below. To remove a content asset from the experience, click its associated trash bin icon.
Collections
This sub-tab lists the collections of assets you have included in the given Templated Experience, the Description, Type, date last updated, and how many assets are in each collection.
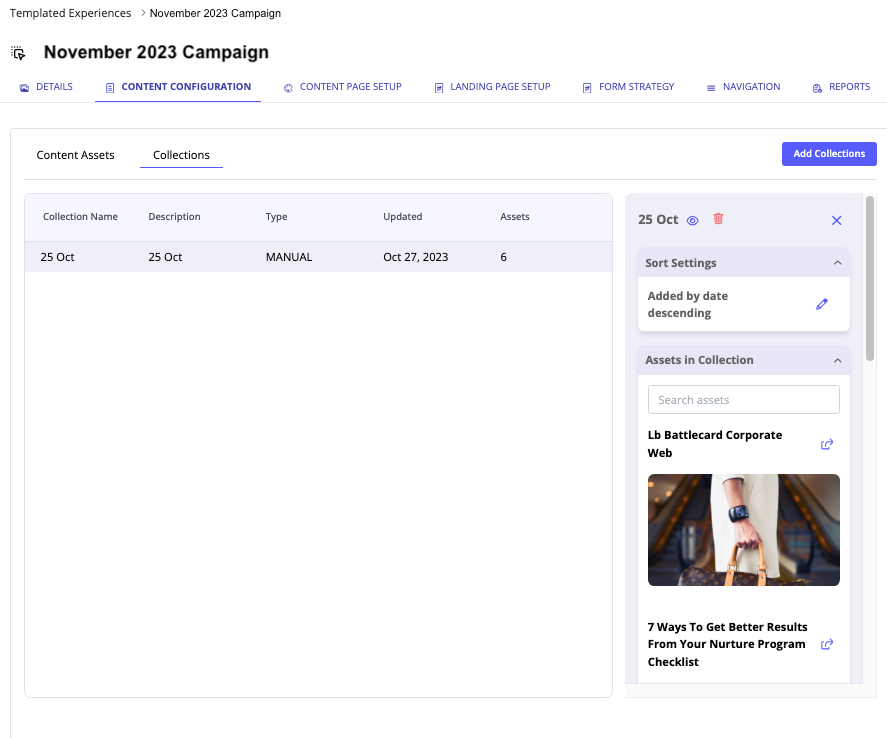
When you click on an existing Collection, the right pane enables you to perform the following tasks.
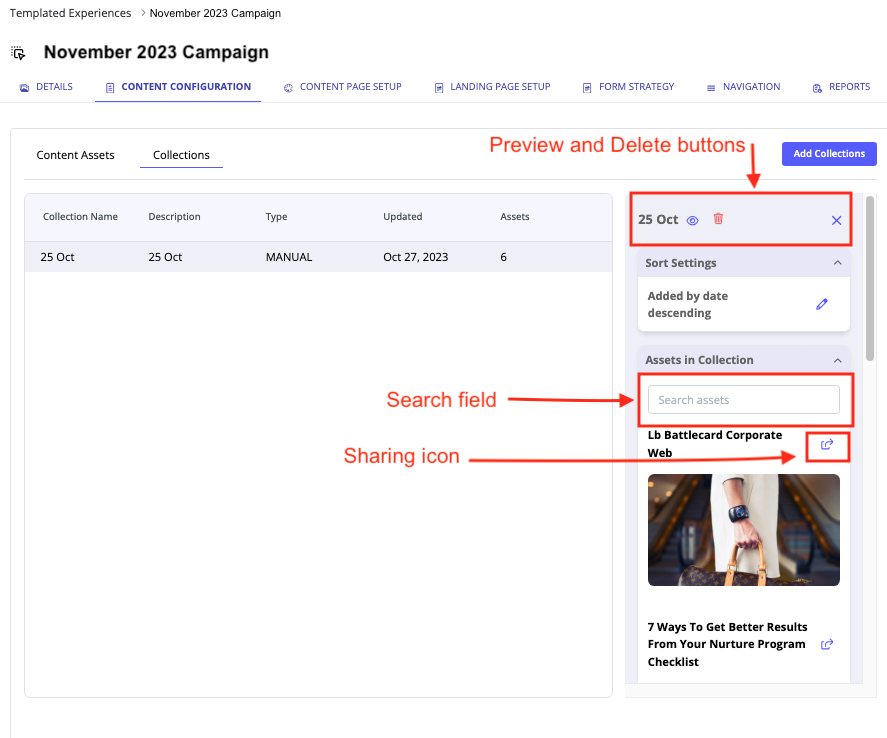
- Preview the Collection by clicking on the eye icon as highlighted in the screen capture below.
- Add more Collections to the Templated Experience by clicking on the Add Collections button. This takes you to a list of existing Collections from which you can choose to add to your Templated Experience.
- Delete the Collection from the given experience.
- Search for assets in a Collection using the search field.
- Share an individual content asset by clicking on its sharing icon.
Content Security Policy (CSP) Toggle For Asset Governance
Both Content Security Policy (CSP) with the directive “Ancestry Self” and the X-Frame-Options header are security measures designed to control how web pages can be embedded or framed by other pages. A CSP toggle is now available to PathFactory customers. This feature is a one-time instance configuration handled in the backend of the application (Client HQ).
Note: This feature is for Administrators only. To activate the CSP header, contact your CSM. To find out more about CSP and how it works, read CSP: Frame-Ancestors.
The advantages of Implementing Content Security Policy (CSP) – Ancestry Self are as follows.
- Functionality: CSP is a web security standard that allows a website to declare which sources of content are considered trusted. The Ancestry Self directive, when applied to iframes, means that the content inside the iframe is allowed to interact with its own ancestry, or parent frame.
- Interactivity: With Ancestry Self, the embedded content can communicate with and be aware of the frame it’s hosted within. It enhances security by restricting the iframe’s interactions to its own parent frame.
- Granularity: CSP offers more fine-grained control over security policies and can be configured for various types of content (e.g., scripts, styles, images).
Views: 95