We have introduced the following new features in Release I.
- Business Unit is a new User Profile category within User Management to help your organization better group and manage User permissions.
- More permissions are now available for Custom Roles that provide more granular governance for Modules and Folders
- The PathFactory merchandising message has been modified to appear only for Administrator roles to avoid confusion for new Users.
- Video Closed Captioning is now available for Brightcove videos, including a choice of languages to display.
New User Profile Field – Business Unit
We have added a new field to User Management called Business Unit as an additional identifier for your Users. This field now appears as a column on the User Lists you have within User Management, next to the Name column. By assigning a Business Unit to your Users, you can use that grouping to manage permission levels within your PathFactory instance.
By assigning Users to Business Unit groups, you will be able to more easily manage their access. Instead of modifying permissions per User, you can modify per Business Unit.
Let’s walk through the process of assigning a Business Unit to a User.
How to Add Users to a Business Unit Group
To add a Business Unit identifier for a new User, follow these steps.
- On the main navigation menu, click on your Login name and then select User Management.
- On the screen that appears, you are viewing the User List tab.
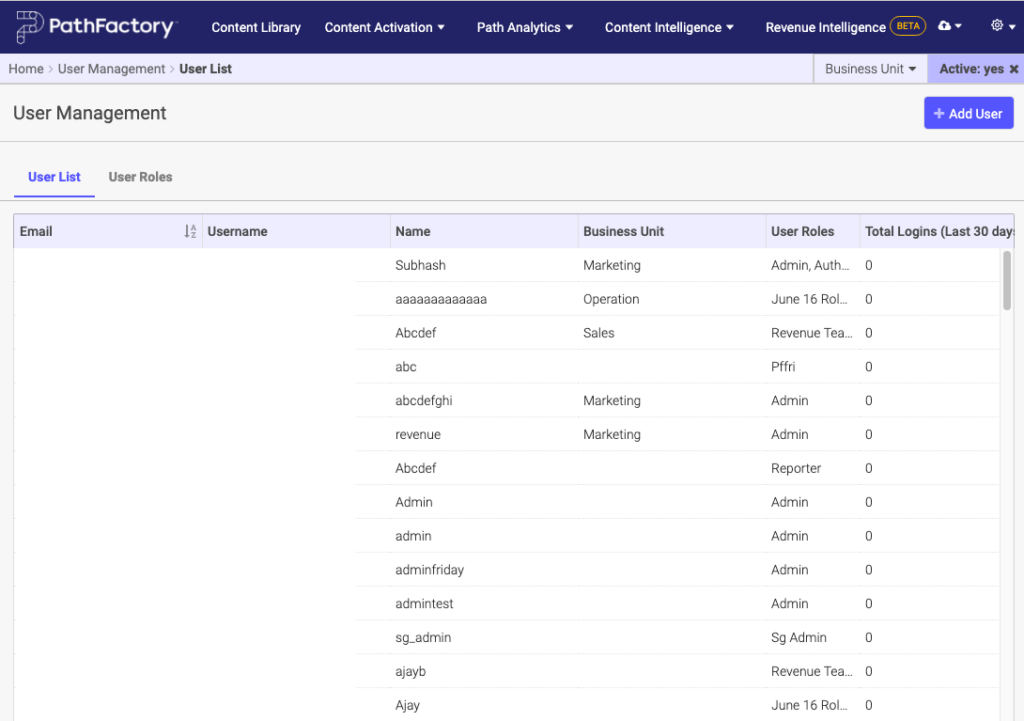
- You’ll notice there is a new column, Business Unit, next to the Name column.
- To add a new User, click + Add User on the top right of the screen.
- The Add User popup menu opens.
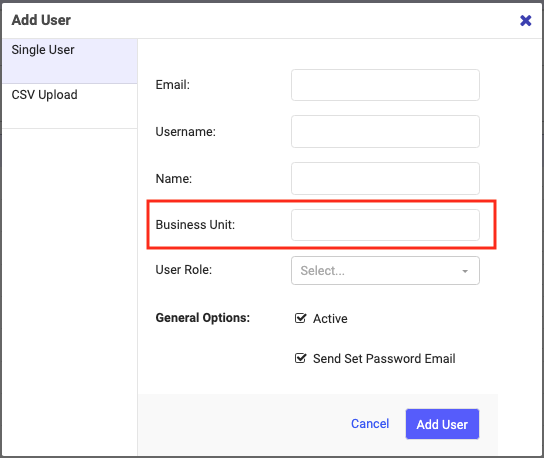
- When you are finished adding the information here, click Add User. Your new User appears in the list. You may have to scroll down the page to see it.
Note: We have added a Business Unit field to our CSV Upload format as well. To find instructions about CSV Upload, read CSV Upload How-To.
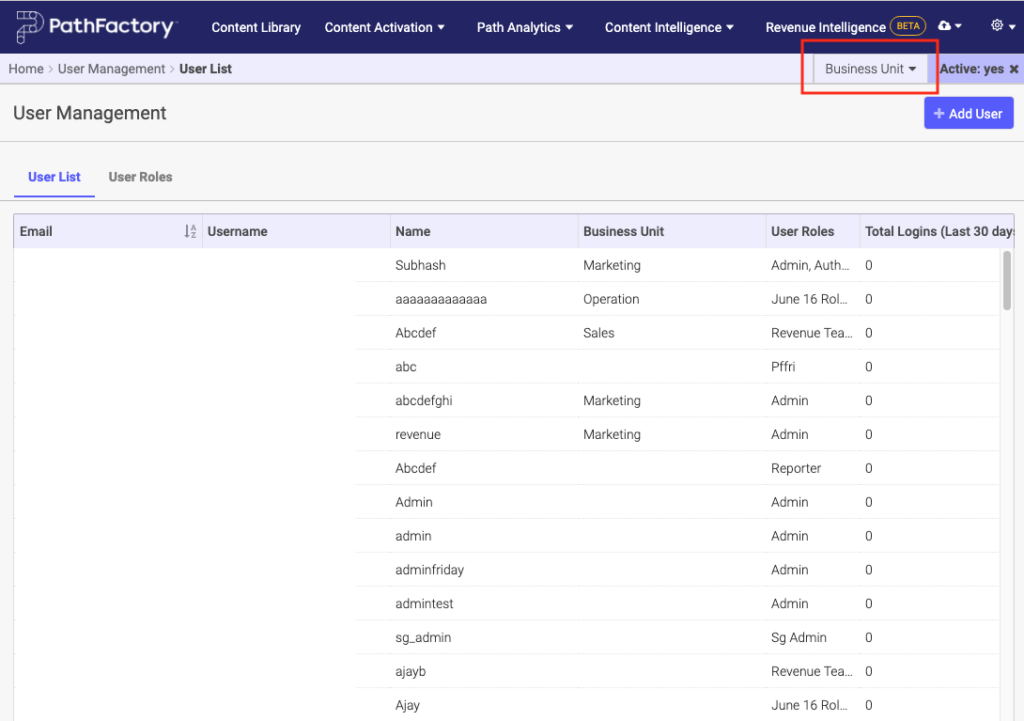
You might also notice on the User Management main page there is a new filter for Business Units, as shown below. To see all of the Business Units that have been created at your organization, click the down arrow beside the Business Unit list.
How to Update an Existing User Profile to Add Business Unit Details
To update an existing User profile to include their Business Unit, follow these steps.
- In your organization’s User List, select a User. On the right side panel you see details for that User.
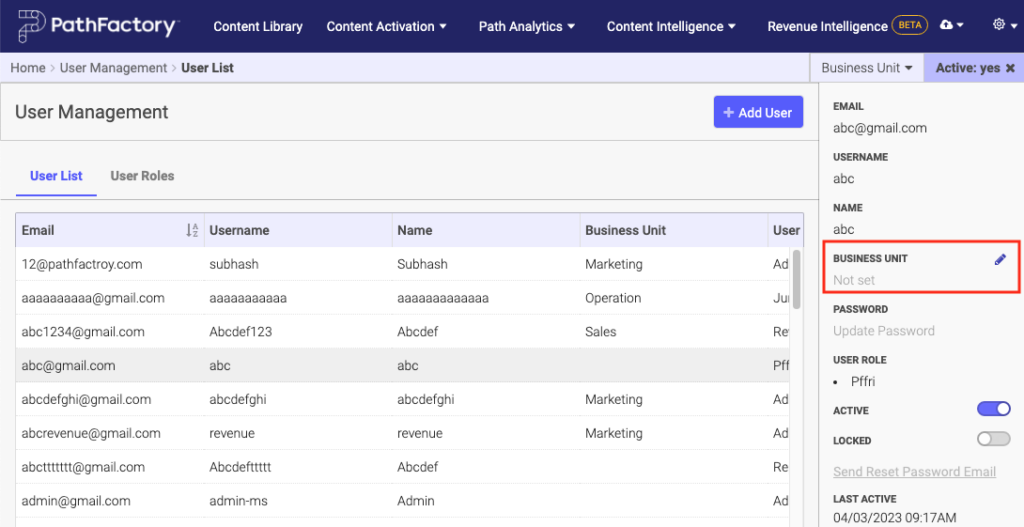
- As you can see in this example, there isn’t a Business Unit assigned to the selected User. Hover your mouse over the Business Unit item on the right side panel, and then click the pencil icon that appears.
- Click on the pencil icon and then you can assign a Business Unit to a User. In the example below the Business Unit is Marketing.
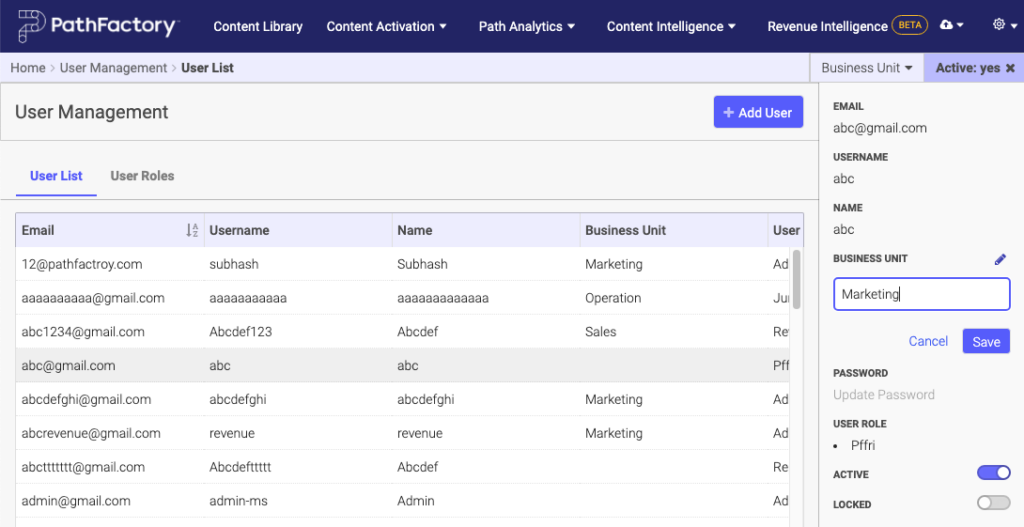
- Click Save to apply the changes.
New Permission Levels for Modules and Folders
This enhancement provides organizations with the capability to set User permissions at the Folder level to further control the scope of access Users have.
As your enterprise increases adoption of PathFactory, you may have a more matrixed and complex set of Users for the same PathFactory instance. This is commonly seen in enterprise customers where the organization owns a single instance for all of their groups across multiple regions or divisions.
Using the updated governance setup, the following access levels are now supported:
- Permission to View Only or Create/Edit/Delete Experiences associated with the User’s Business Unit and/or Folder.
- Permission to View Only for those Experiences outside of the User’s Business Unit and/or Folder.
- Permission to Clone Experiences outside of the User’s Business Unit/Folder.
Restricting Folder access can be configured only for custom roles, not for default roles. For a refresher on User roles, read What are the Different User Roles?.
To find out more about how to use our new governance, read How to Configure Permissions and Governance for Custom Roles.
Merchandising Message Limited to Administrators
Previously, if a User tried to access a feature their organization didn’t have access to, they were shown a synopsis of that feature to find out more about it. We have received feedback that this message was confusing for new Users, because they were unsure about what the messages meant. To address this concern, we now display the merchandising message to Administrators only.
Virtual Events (VEX) Closed Captioning
We have added captions for videos created in Brightcove format, for use in simulive virtual events. Previously, viewers of these videos could not toggle captions on or off, and captions did not display by default.
This enhancement allows your viewers to toggle on or off captions for your videos and select a language for the captions from the language options you made available to them when you set up the session. If closed captions aren’t an option for a video, the Closed Captioning (CC) button will not appear.
For more information about using simulive sessions in PathFactory, read Create a Simulive Session.
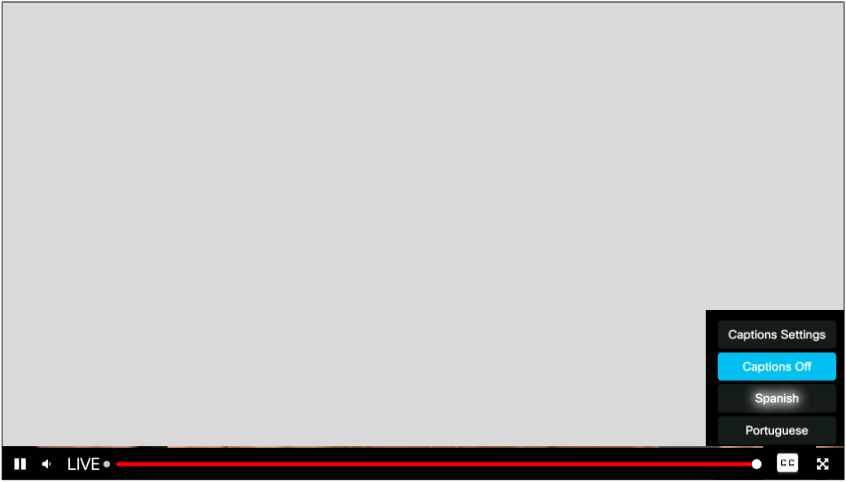
Using this new functionality, when your viewers open a video they will notice along the bottom of the video player there is a button labeled CC on the bottom right of the video screen.

This button lets you turn closed captions on (or off), and lets you select a language from the available languages listed, in which to view the captions.
To set up your closed captions and language options for a Simulive VEX session, follow these steps.
- Open a VEX event you wish to edit.
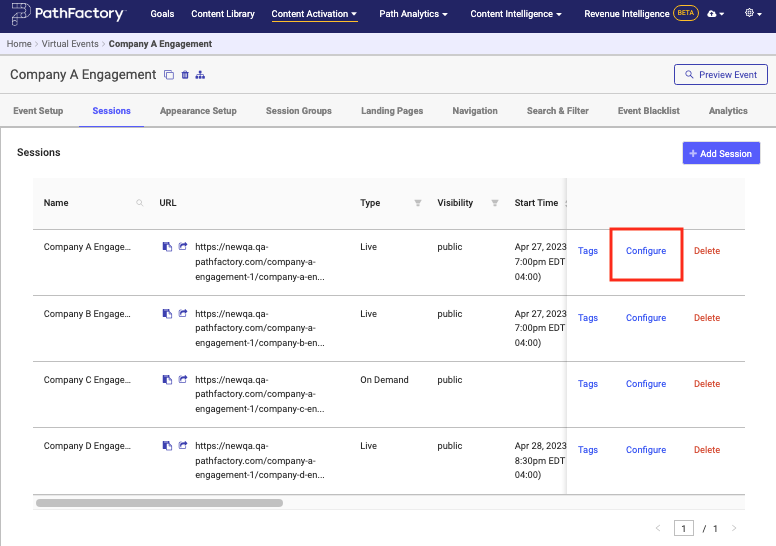
- Within your VEX event, click the Sessions tab.
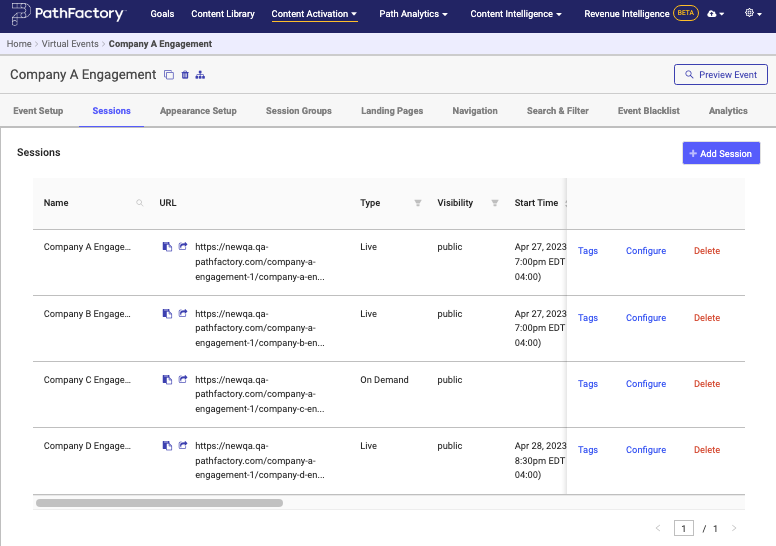
- Select a Session from the list and then click its associated Configure link.
- Scroll to the Live Session section as shown below.
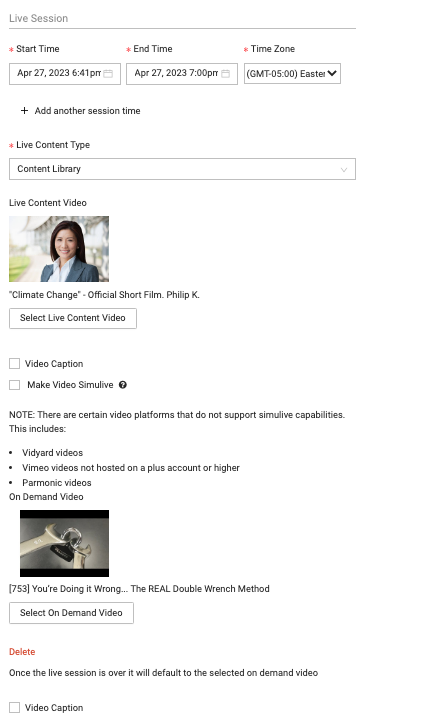
- In the Live Content Type dropdown list select Content Library.
- Next, click the Select Live Content Video button.
- Find the video you want to use for this session. There is a search bar provided to help you filter your search results if needed.
- Next, select the checkbox for Video Caption, as shown below.
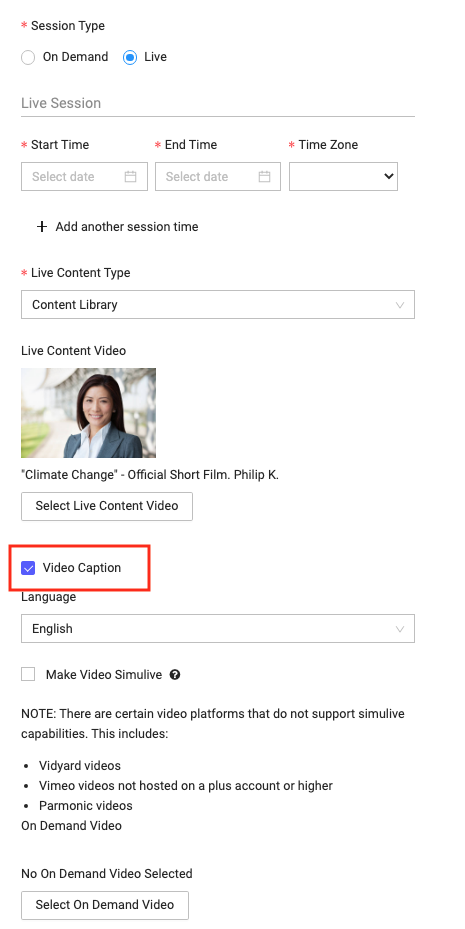
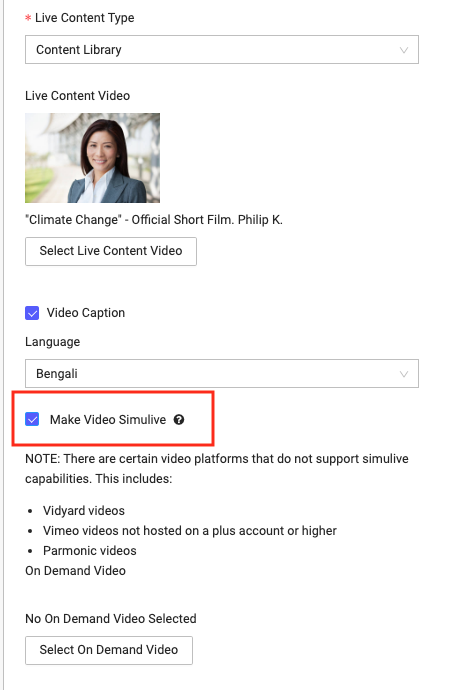
- Now click on the Language dropdown list to select one alternate language for the closed captions. English is automatically selected as the default language when you turn on the closed captioning. To add another language to display, select it from the dropdown list.

- Select the Make Video Simulive checkbox.
- When you are finished with your session settings, click Save.
Now you are ready to proceed with the rest of your VEX event setup. Read more about VEX events in Create a VEX Event.
Views: 132