Guide and Concierge serve recommended content to your visitors. To learn more about these components, read Introduction to Guide and Concierge.
To add Guide or Concierge to your website, you’ll first define the URL path where they’ll appear.
Define the URL path and general settings
- Navigate to Website Tools.
- Locate the website property you wish to manage and select Manage.
- On the right, select + Add Website Path.
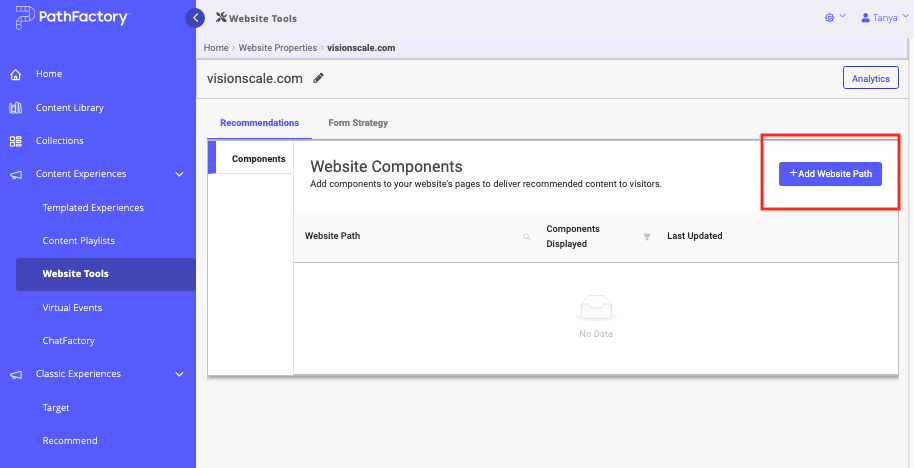
Add Website Path button - The Configure Component screen appears.
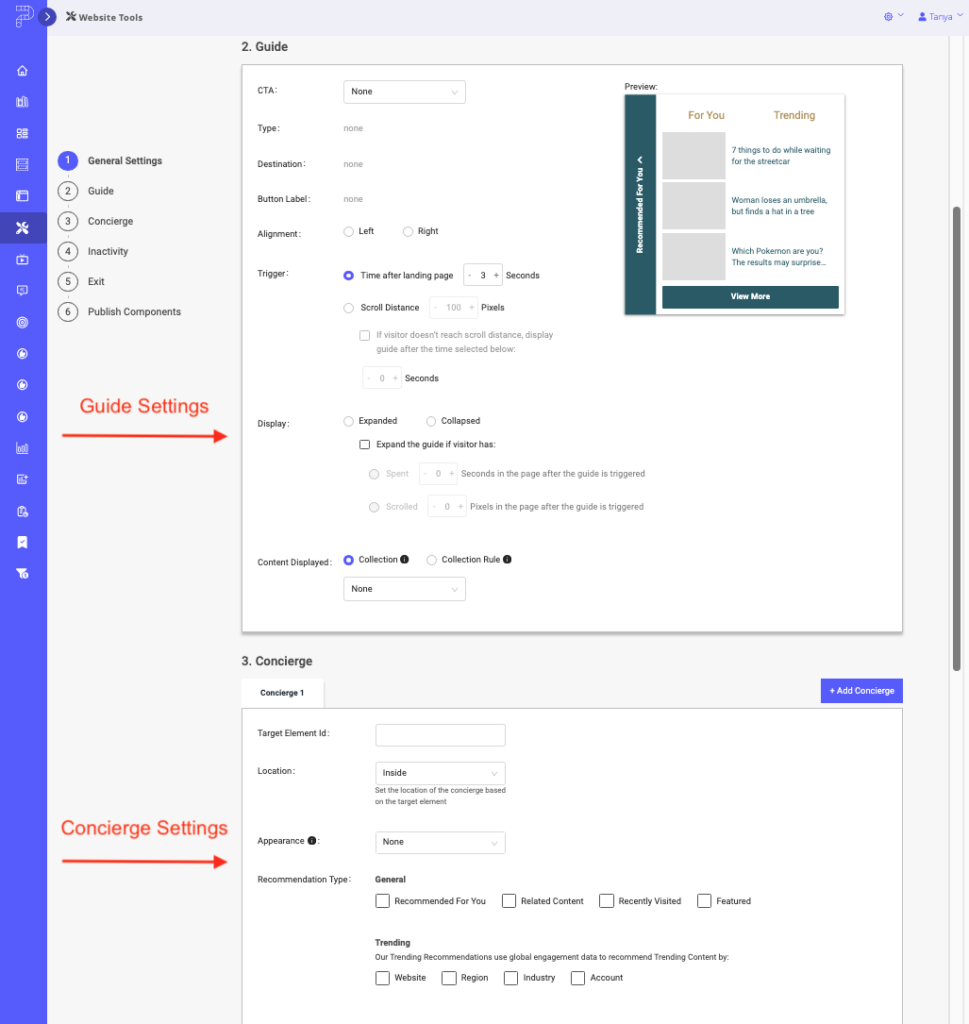
Guide and Concierge menus - In the General Settings section, complete the following fields.
- Website Path: enter the URL path you would like the components to appear on. You may use wildcards to refer to a group of pages that follow a certain path. For example, if your blog is hosted at
example-domain.com/blogand you wish show the components on all blog posts, enter blog/*. - Type: select which website components you want to appear. You can choose Guide, Concierge, or both for a given URL path.
- Appearance: select the existing appearance to apply to the component. To edit appearances or add a new appearance, read Change the appearance of Guide and Concierge.
- Language: select the language you would like to apply to Guide. For more information about localization, including adding more languages, read Localize Guide and Concierge.
- Collection: select the Collections you would like to recommend on this path or page. The same pool will be used for all components on the path.
- Website Path: enter the URL path you would like the components to appear on. You may use wildcards to refer to a group of pages that follow a certain path. For example, if your blog is hosted at
Configure Guide and Concierge
You’ll now set up the individual behavior for Guide and Concierge. This section takes you through the different options.
Configure Guide
Scroll to the Guide section. You can also use the left sidebar to jump to different sections of the configuration page. You can configure the following aspects of Guide.
CTA: select an existing CTA. To edit or add new CTAs, read Change CTAs in Guide. Once selected, the type of CTA, destination link, and CTA button text appear for your reference. If no CTA is selected, no CTA will appear on Guide.
Trigger: select which trigger will make Guide appear.
- Time after landing: Guide will appear a certain number of seconds after a visitor lands on the page
- Scroll Distance: Guide will appear after a visitor scrolls down a page a certain distance. Additionally, you can add a time condition that triggers Guide after a certain number of seconds if a visitor doesn’t reach the defined scroll distance.Note: If the scroll distance is greater than the height of the page, Guide will appear when the visitor reaches the bottom of the page.
Configure Concierge
Scroll to the Concierge section. You can also use the left sidebar to jump to different sections of the configuration page.
Concierge is a carousel that shows up to 10 pieces of content. You can add multiple carousels to your webpage, each of which can serve a different type of content, such as Recommended for You or Featured. For more information on the types of carousels, read Introduction to Guide and Concierge. To learn more about recommendations, read Introduction to the PathFactory Recommendation Service.
Let’s get started configuring Concierge. Concierge is inserted in your webpage at an injection point, defined by the target element ID in your page’s HTML code.
Note: Before you begin, please ensure you know the element ID of the area you wish to target on your chosen page.
On the webpage(s) of your specified URL path and give it a unique ID. By dedicating an HTML element to the carousels and giving it a unique ID, you can be sure PathFactory will not encounter a conflict with any other website plug-ins or CMS components.
If Concierge is configured correctly, upon visiting the page a visitor will see carousels showing within this.
- In Target Element Id, enter the target element ID.
If you want to Then Add one carousel, or multiple carousels in the same location on the page a. In Recommendation Type, select all carousel types you wish to display. A card representing each carousel appears below. b. Continue to step 2.
Add multiple carousels in different locations on the same page a. In Recommendation Type, select all carousel types you wish to display. They will stack on top of each other. b. Select + Add Concierge. You’re now on the Concierge 2 tab.
c. In Target Element Id, enter a unique target element ID for the second location.
d. Continue adding Concierge elements for each unique location on the page.
2. Complete the following additional configuration steps for each carousel type.
Recommended For You: edit the carousel headline and maximum number of items to be displayed.
Trending: edit the carousel headline and maximum number of items to be displayed.
Featured: edit the carousel headline and select the content that will be displayed. You can display any content assets from your PathFactory content library, including assets from a Target or Recommend track. If you wish to feature new content, you must first add it to your PathFactory Content Library.
- Select Featured Content. The Edit Feature Content dialog appears.
- Select Add Featured Content Item.
- Select Source. You can choose the content library, a Target track, or a Recommend track.
If you choose Then Content library i. Select the Select Content button. ii. Find the content asset you want to include. Use the search to filter your content.
iii. Select the Select Content button.
iv. Select Add.
v. Select Set Featured Content.
A Target or Recommend track i. Select Content Track and choose the track you want to pull content from. ii. Select Content and choose the individual asset.
iii. Select Add.
iv. Select Set Featured Content.
3. (optional) Change the order of the carousels using the up and down arrows.
More Customized Concierge Placement
You can specify where the concierge is placed, based on the defined target element. You can place Concierge BEFORE or AFTER a given element. For example, if you want to place Concierge before the footer, for example, you can now do that.
For scalability, you can place Concierge across many website pages at once. Consider a website with 1000 pages, but with a consistent footer element. Before, you would have to edit 1000 pages with a DIV to place Concierge on that page. Now, you can just select the footer element and specify that the Concierge resides before the footer element.
To use this feature, follow these steps.
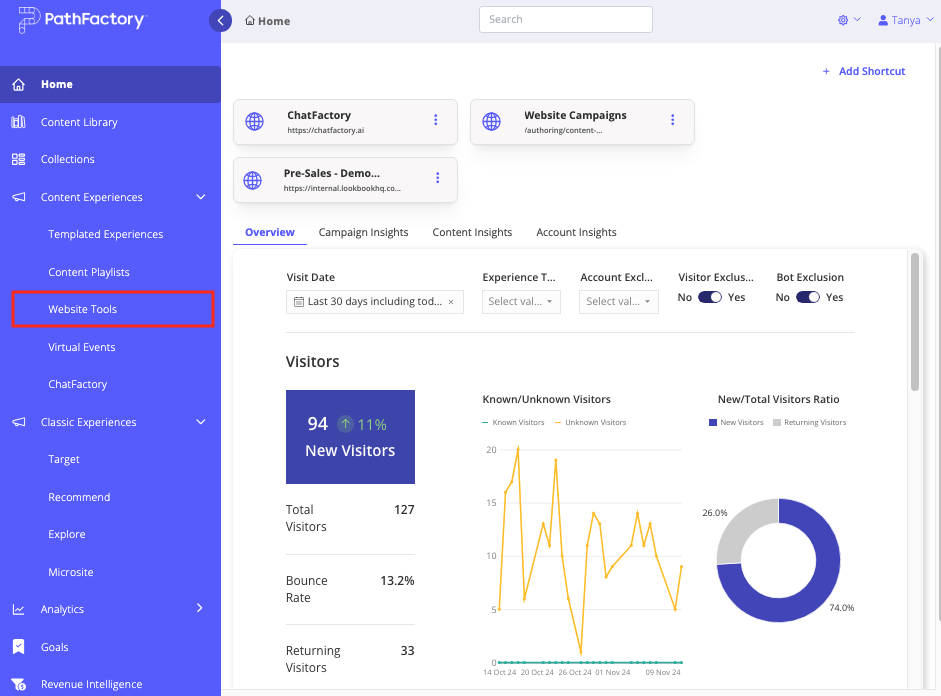
- On the main menu bar, click Content Activation, and then select Website Tools.
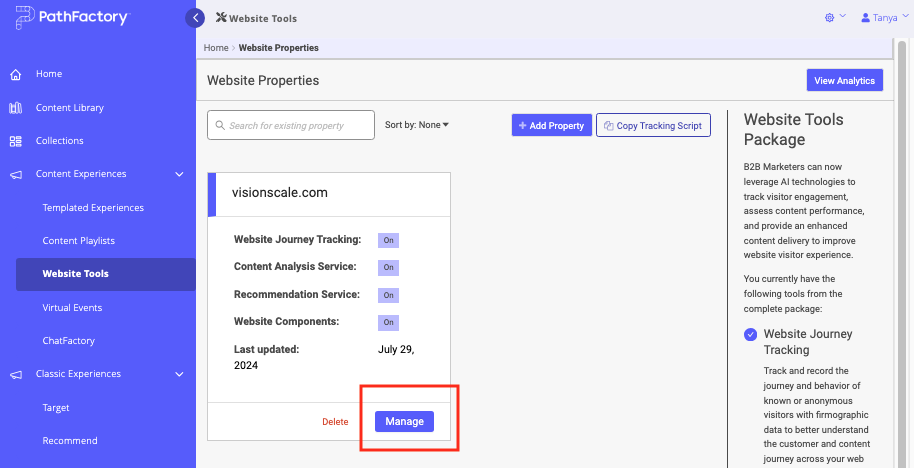
- Select a website you want to edit, and click its associated Manage button.
- On the next screen, beside the website you want to edit, click Add Website Path.
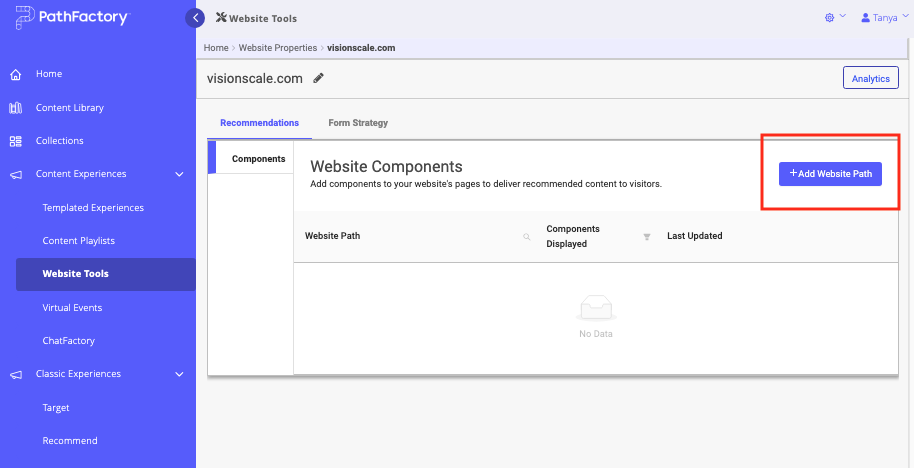
- On the next page, in the General Settings section, ensure the Concierge checkbox is selected.
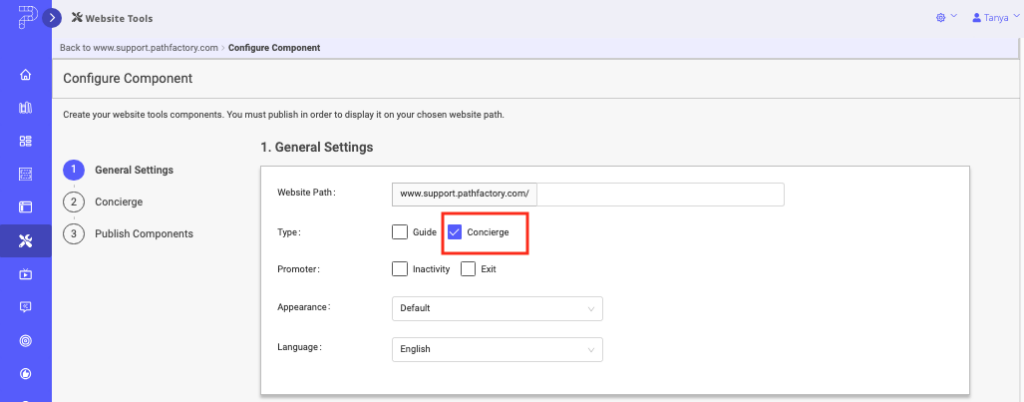
- Scroll further down to the Concierge section, and then configure your concierge settings.
- In the Location field, make a selection from the following options:
- After
- Before
- Inside
Note: Previously, the only option available was Inside.
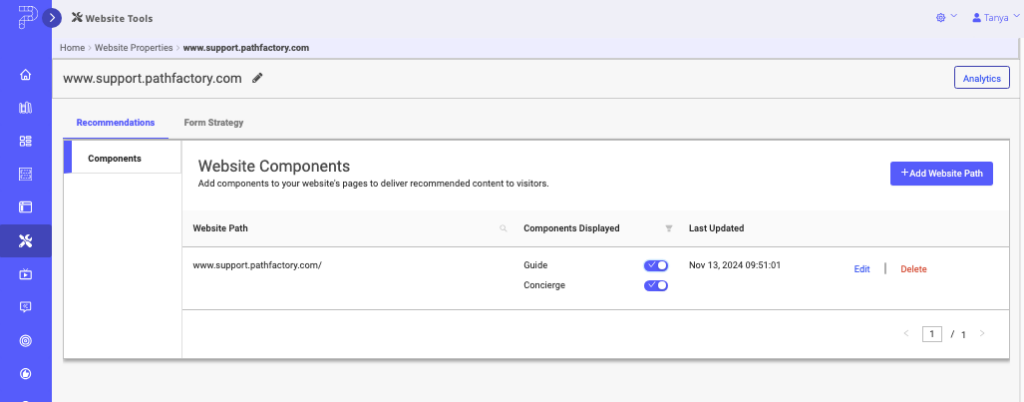
- When you are finished, click Save. You are returned to the Recommendations tab, Website Components for your chosen website. Ensure the toggle for Concierge is turned on (as shown below).
8. Time to check out your new concierge! Load your website to ensure it’s displayed correctly.
Publish
After you finish configuring Guide and Concierge, you’re ready to publish! You have maximum control over publishing your components. Perhaps you’re only ready for Guide to appear, or maybe you’re not ready for anything to appear on your site yet.
- Scroll to the Publish Components section.
- Select Display on Page and choose from the following options.
- Guide: Guide will immediately appear.
- Concierge: all Concierge carousels will immediately appear.
- Both: both Guide and all Concierge carousels will immediately appear.
- None: none of the components will appear. Choose this option to save your work so far.
- Select Save.
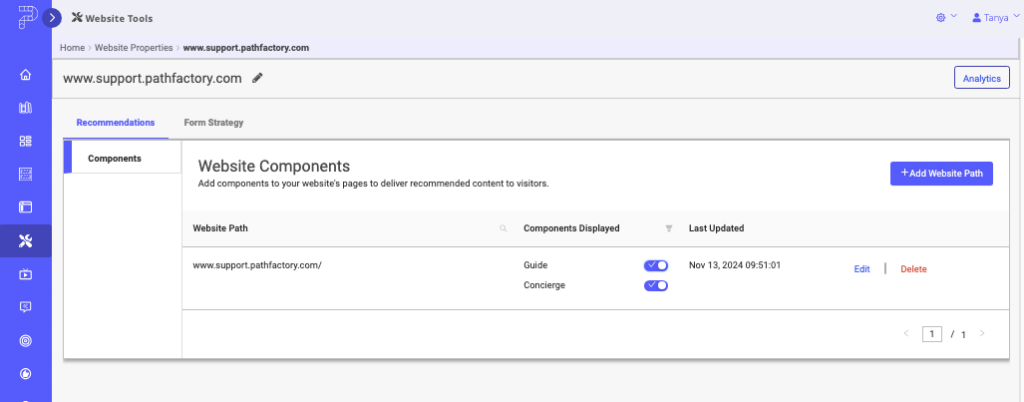
Now that you’ve set up Guide and Concierge, you can quickly turn them on or off from the Website Components screen using the toggle in the Components Displayed column.
Views: 421
