The content you add to your PathFactory Content Library, how you tag and organize it, and how well you manage asset hygiene and curation are all factors that drive the quality of your audience experiences, personalization capabilities, data and insights.
This guide explains how to use key features within your Content Library – from uploading and tagging assets to analytics and bulk operations.
Tagging and Taxonomy Management in Your Content Library
Content tags offer several benefits that significantly enhance the management and utility of digital assets within the Content Library. They improve efficiency by allowing you to quickly locate assets based on specific attributes such as language, funnel stage, or topic.
You can use content tags to enhance visibility of content assets by making tags visible to visitors in your PathFactory Content Experiences. For example, you can choose to display Topic and Content Type tags on the content assets in a Landing Page, Content Page, or Content Playlists.
Key Taxonomy Terms
Category: Categories serve as parents in classic taxonomy terminology. These are the larger buckets that you will use for tagging your content in association with important attributes like Persona, Product, Language, etc. There are two types of Categories available in PathFactory – Standard and Custom Categories.
Default Categories that come standard in PathFactory are as listed below:
- Topics
- Business Units
- Personas
- Industries
- Products
- Solutions
- Content Types
Tags: Tags are the taxonomy children of your Standard or Custom Categories in PathFactory. This structure allows you to define at a granular what your assets are about so that you can manage, activate and analyze your assets using this data. For example, for the Funnel Category, you can tag your asset as Top of Funnel, Middle Funnel, or Bottom of Funnel and then use these tags to fuel personalization and reporting insights.
How to Create Custom Taxonomy Categories and Tags
Before you get started configuring taxonomy governance or adding assets to your library, you’ll first need to orient yourself to the default/standard tags that are available in PF and add any custom taxonomy categories or tags that you may require that are unique to your business.
Creating a custom taxonomy and tag structure in PathFactory is essential before setting governance rules or adding and tagging content. In addition to using default taxonomy categories available in PathFactory today, you can create Custom Categories and associated tags based on the unique aspects of your market, business, products, services, audiences, customer lifecycle stages, and strategic goals.
For example, you could create Custom Categories based on audience segments (e.g., beginners, experts), or any other relevant criteria. You can select and apply Custom Categories and Tags to your content assets in the Content Library manually or using AI auto-tagging capabilities.
Establishing a well-defined taxonomy and tag structure in PathFactory is crucial before setting governance rules or adding and tagging content. Here is a general overview of the steps involved:
- Evaluate the default Categories within PathFactory, to see how they suit your business needs.
- Create Custom Categories: Add Custom Categories by entering a name and description for each category. These categories will serve as the primary organizational structure for your content tags.
- Define and Add Tags to the Categories: Once the Categories are created, define and add specific Tags to each category. These tags will further classify your content based on attributes relevant to your business needs.
- Review and Adjust: Review your Categories and Tags to ensure they align with your organizational requirements. Make any necessary adjustments to refine your taxonomy.
- Enable Automatic Tagging (Optional): If desired, enable automatic tagging to allow PathFactory’s AI to suggest and prioritize tags for your content assets. This enhances the efficiency and relevance of content recommendations.
Repeat these steps as many times as necessary to create all the Custom Categories and their associated child tags required for your business.
To create a Custom Category in your PathFactory Content Library taxonomy, follow the steps below.
- Click the gear icon and then select Content Tags.
- On the Content Tags Configuration menu, select Add Custom Category.
- A popup menu appears, prompting you to enter a Category Name and a Description.
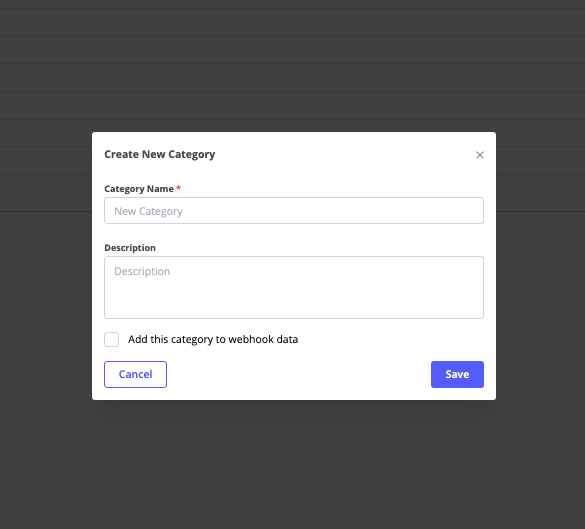
- To include this new category in webhook data, activate the checkbox located below the description field.
Note: Selecting the checkbox to include a Custom Category in webhook data ensures that content tagged with it will be tracked and sent through your webhooks, providing more accurate insights aligned with your specific taxonomy. However, if the category is used for internal organization only and doesn’t need to be tracked, you might leave this option unchecked to avoid capturing unnecessary data and complicating reports.
- To add this new Custom Category to the Content Library, click Save. To leave without saving the category, click Cancel.
- When you view the refreshed Content Tags Configuration menu, you see the new Category listed across the top alongside the other Categories. You’ll notice you can edit or delete the Category as needed.
- Next, define and add the tags you want to associate to any newly added Category you create. To do so, select the Category’s tab and then its corresponding Add button. In the example below, we want to define the tags that will be associated with a new Custom Category we have named Architecture. Below, we have selected the Architecture tab and then the Add Architecture button.
- After you click the Add button, you are prompted to enter a name for a Custom Tag. To save the tag name, click the checkmark. To cancel without saving, click the x.
- Repeat steps 7 & 8 as many times as you need to create any new parent-level Custom Categories you desire and their associated custom child Tags.
Setting Up Taxonomy Requirements in PathFactory
Next, before you start adding content to your PathFactory Content Library, you should configure the governance settings for your Content Library taxonomy and tags. To do so, navigate to your Content Library and then follow the steps below.
- Click on the gear wheel at the top left of your screen to open the configuration menu for the Content Library.
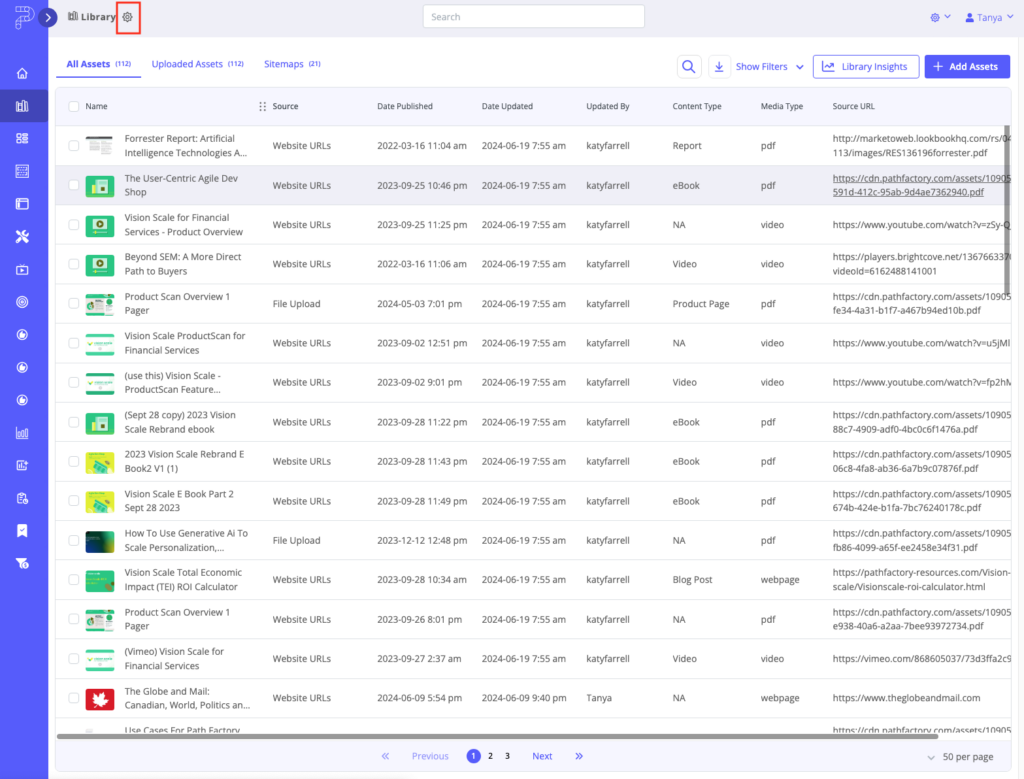
- Now you’ll see a list of configurations and Content Tag Categories and their classifications – whether they are Public or Internal, and its type.
- Required: Selecting this checkbox will ensure that this field will show on the first page of the Content Upload modal. Assets cannot be uploaded to the Content Library unless these fields are complete. Consider what fields you plan to use to support asset analysis, experience customization, or reporting views when deciding what is required vs. optional.
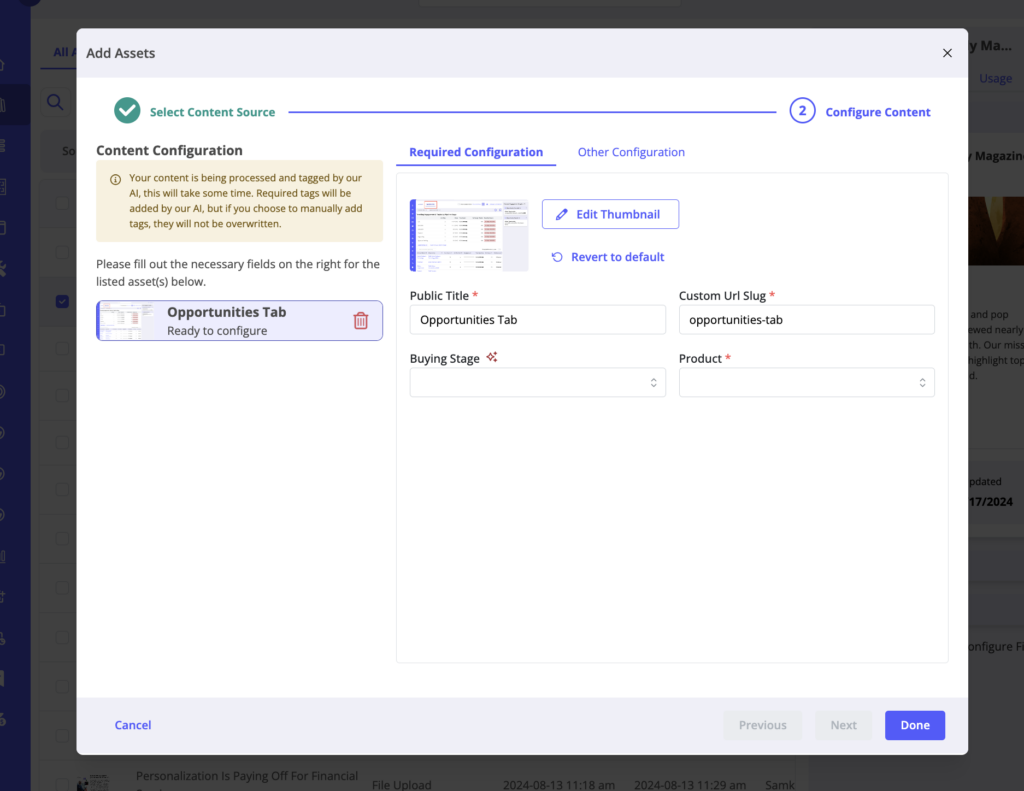
- Show on Other Configuration: Selecting this checkbox will ensure that this field will show on the second page of the Content Upload process. It is an optional field. Assets that don’t have this checkbox will be uploaded to the PathFactory Content Library. Fields can be configured at a later stage.
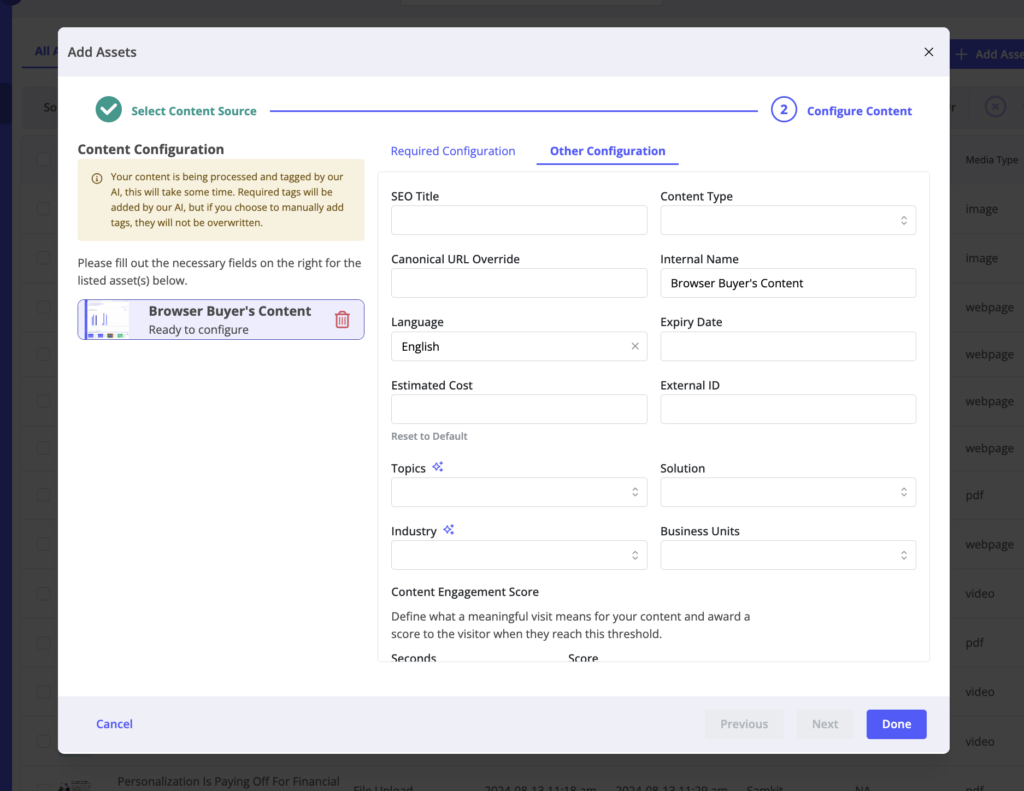
Note: De-selecting both Required and Show on Other Configuration will remove those fields from the Content Upload screen for anyone adding content assets in future. Do this to hide Tag Categories that you do not want included as part of your organization’s taxonomy.
- Show on Quick Pane: Selecting this checkbox will ensure that the field will appear in the asset’s QuickPane in the Content Library. The Quick Pane pops out from the right when you click on the asset to show its various configurations. This will make it easier for users to see and update tags:
- When you are finished configuring your Content Library Fields, save your changes to ensure they take effect in the Content Library.
Note: For content assets where all three options are deselected, those content assets will effectively be removed from the configuration steps that you offer to your users to streamline and customize your PathFactory Content Library, because they won’t appear anywhere in PathFactory.
How to Download the Taxonomy of the Content Library
Downloading and evaluating your content inventory and its related taxonomy and tags allows you to gain valuable insights into how your content assets are grouped and organized. By examining your inventory against your taxonomy, you can refine your content and tagging strategy to ensure they align with your marketing goals, content management requirements, and audience needs.
By downloading the taxonomy spreadsheet, you will see a CSV file that contains the following information about every content asset and its tags (including Custom Categories and tags) that exists in the Content Library, displayed in columns:
URL, Title, Thumbnail, Description, Content Type, Engagement Score, Engagement Time, Custom URL, Internal Name, SEO Title, Funnel State, Estimated Cost, Language, Business Unit, Persona, Industry, Product, Solution, Expiry Date, External ID, Topics, and Content UUID.
A taxonomy spreadsheet provides you with the following information.
- See how content assets are distributed across different categories and tags.
- Spot gaps in your tagging strategy and determine if important tags are missing from many content assets.
- Maintain consistency in tagging across similar content assets.
- Use the insights gained from taxonomy analysis to refine your content strategy for better organization and effectiveness.
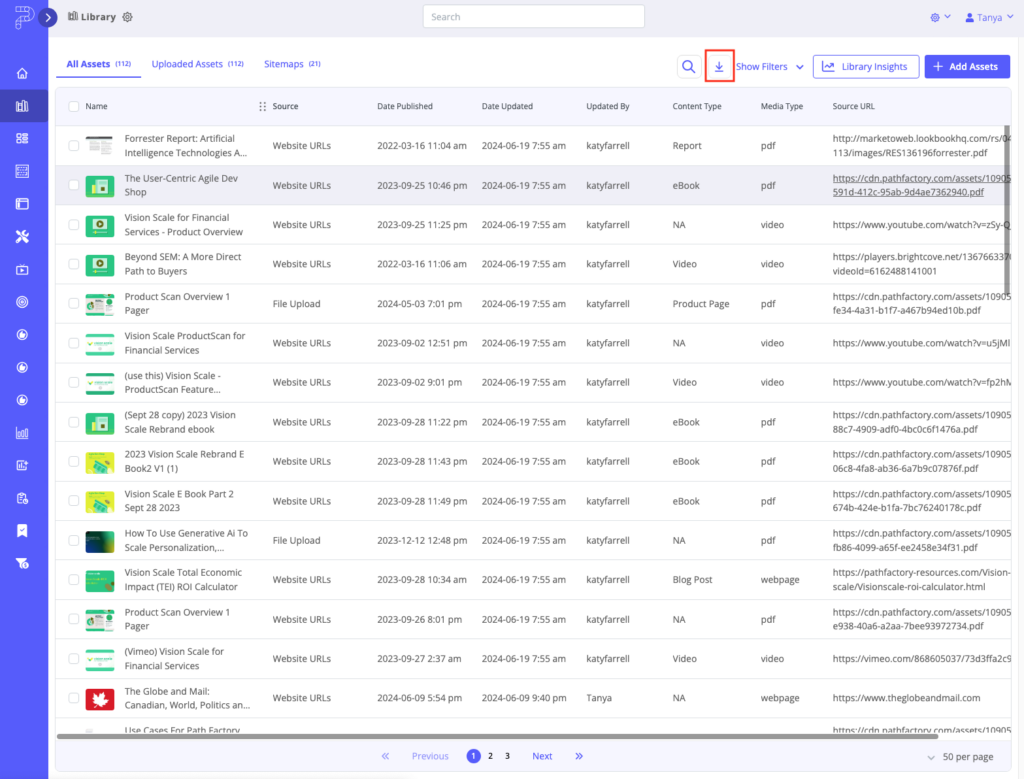
To download a taxonomy of the Content Library, click the Download button as highlighted in the screen capture below. This action downloads a file containing the taxonomy onto your computer that you can open in a spreadsheet application.
Note: If you want to download only a specific portion of the Content Library rather than the entire collection, you can filter the content to narrow down your selection. To do this, apply filters based on criteria such as content type, industry, or any other relevant metric. Once the filters are set, the library will display only the assets that match your criteria. You can then proceed to download just the filtered results, rather than the entire Content Library.
How to Tag Content Assets
Effective tagging of content assets is essential for maintaining an organized and efficient Content Library. Tags serve as identifiers that categorize and organize content based on specific attributes, making it easier to locate, manage, activate and analyze. This section will guide you through the process of tagging content assets.
To add tags to content assets, follow these steps.
- Open the Content Library, locate and select the content asset you want to tag.
- When you select a content asset, a quick pane menu opens on the right, where you can view the asset’s engagement, publishing date, SEO score, and more. You’ll notice two tabs: Details and Usage, as highlighted in the screen capture below.
Details Tab
On the Details tab is where you will add general information about the content asset, such as its Title, its Format, Thumbnail, and more.
Read below to find out about the three menus available on the Details tab: General Information, Public Information and Internal Information.
General Information Menu
On this screen, you’ll see the current thumbnail image and public title associated with the asset you’ve selected. This is automatically pulled from your content. To change the thumbnail image, public-facing title or description, hover your mouse over the element you want to edit and then click the pencil icon. Follow the prompts to complete the editing process.
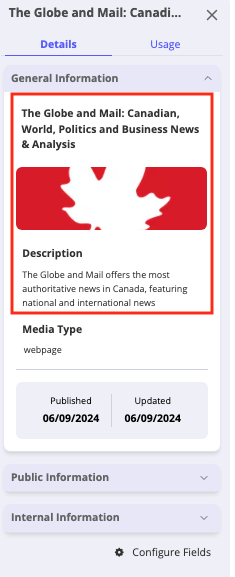
You will also see the asset’s Media Type (in the example below, the Media Type is a webpage), the date the article was published, and the date the article was last updated.
Public Information Menu
Each item in this menu is adjustable. Hover over the item you wish to edit and then select the pencil icon that appears.
Depending on the content assets’ internal settings, some or all of the following fields appear along with the content assets, depending on the type of content and tags that have already been added to the content..
SEO Title – A succinct, keyword-rich title to ensure search engine optimization.
Content Type – The format or nature of the content, such as article or video.
Topics – Descriptive keywords categorizing content assets.
Source URL – The original web address where the content is published.
Custom URL Slug – A concise, descriptive part of the web page URL.
Canonical URL Override – Directive specifying the preferred URL for indexing.
Internal Information menu
On this Details tab menu screen, you can add your tags to the given content asset, edit its Funnel Stages, Estimated Cost, and more. To edit any of these settings, including adding the content tags, hover your cursor over the given field and then click the pencil icon that appears.
Name – this is the name of the asset that is displayed internally (not client facing), and you may edit this title by hovering over it and then clicking the pencil icon.
Funnel Stages – The stages in a marketing or sales funnel where the content is relevant.
Estimated Cost – The projected expense associated with creating or distributing the content.
Language – From this dropdown list you may select one language as the default language for the given asset.
Tags – You may add tags to the content asset, such as Business Units, Personas, Industries, Products, and Solutions. Note: You can select multiple tags. Deselect tags by clicking on them again.
Expiry Date – You may set a date after which a content asset should no longer be considered current or relevant.
External ID – If there is a unique identifier that connects this asset to other systems, such as a CRM, or associates it with a specific campaign, you can use this field to enter that unique identifier. Note: Find out more by reading Adding External IDs and External ID Overrides to Content Experiences.
Engagement Score – A numerical measure of the level of interaction and interest generated by the content based on time spent interacting with assets.
Usage Tab
To see where the given content asset is being used, click the Usage tab on the quick pane. The items displayed in the menus are active, direct links to the content experience in which the content asset is included.
Quick Pane Icons
Along the bottom of the quick pane window, you can see icons that are quick links to other functions, as highlighted in the screen capture below.
Pencil – Edit the fields for the given assets.
Tag – View and add tags to your assets, either manually or with the help of AI. This feature allows you to review and approve AI-generated tags, ensuring your content is accurately and efficiently categorized.
Graph – View the engagement overview for the selected content assets.
Plus Sign – Add the selected assets to an Experience. Click the plus sign and follow the prompts to select the Experiences to which you want to add this content asset.
Trash Bin – Delete the selected content assets by clicking the trash bin icon and then following the prompts to complete the process.
How to Manage Thumbnail Images for Content Assets
To ensure every content asset has an attractive accompanying thumbnail image, you can set a default backup image to display for all content assets that have not had a thumbnail image manually applied or otherwise extracted from its URL source. Using this feature provides a fallback image that ensures all activated experiences have a thumbnail image to display.
If you manually add a thumbnail to a content asset or automatically extract one from a URL, PathFactory saves that image to its database to display with the given content asset wherever it appears within PathFactory Experiences.
Note: If you manually add a thumbnail to a content asset, the image associated directly with the asset will always supersede the default backup image and serve as the primary thumbnail for that content asset.
To add a thumbnail image to an asset, read How to Manage Assets on the Templated Experiences Content Configuration tab.
How to Automatically Apply a Default Image to Content Assets
If you have not manually saved a thumbnail to a content asset in your Content Library, PathFactory will automatically display the default image you’ve saved in Organization Settings.
To add a thumbnail to serve as a default image for content assets that do not have an image assigned to them, follow the instructions below.
- On the main PathFactory menu, click on your login name on the top right of the screen.
- From the menu that drops down, select Organization Settings.
- Select the Settings tab.
- Scroll down the tab to see the Default Image, as shown in the screen capture below.
- To add or change the default image, hover over the Default Image, and then click the pencil icon that appears.
- A popup menu opens.
To select an existing image:
- Search for a specific image or click on its icon to select it. To apply the new thumbnail, click Save. To exit without saving your selection, click Cancel.
To upload a new thumbnail image:
- In the popup menu, click Upload, then follow the prompts to select an image from your computer.
How to Sort, Search, Filter and View Content Library Assets by Categories and Tags
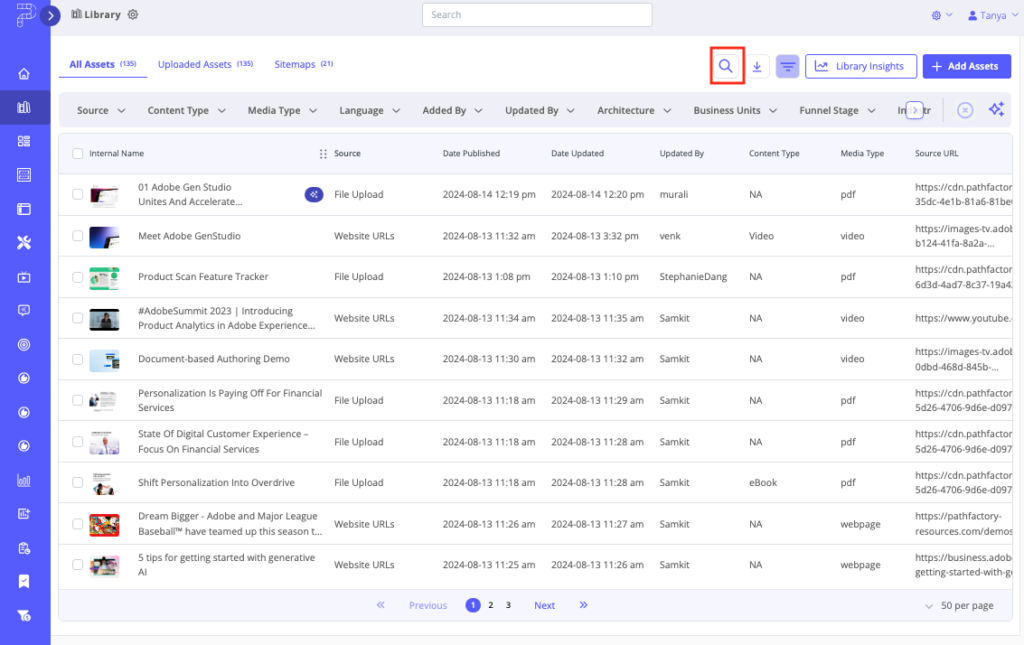
You can sort and filter your Content Library using any Standard of Custom Categories and Tags in your overall Library taxonomy. You can also use the search field in the Content Library to search by the Source URL or Custom Slug of the content asset.
To see the Content Library search field, click on the magnifying glass icon at the top of the Content Library. In the search field that appears, proceed to enter the content asset’s name or URL you are looking for.
Content Library Filters
Filters narrow down the list of content assets displayed by specifying certain criteria. For example, you might filter by asset type, category, or tags to focus on only those items that match your selections. Filters help you refine your search results and find specific content faster.
To sort and filter views of assets in your Content Library, follow the instructions below.
- Navigate to the Content Library from the left-side navigation menu.
Content Library menu item
- At the top of the Content Library, you will see a ribbon along the top that displays the filters available for you to narrow down the list of assets displaying.
Content Library filters
- Apply filters to the Content Library by choosing a Category and then selecting attributes within that Category you would like to use for filtering purposes. After adding each filtering selection, click Apply. The Content Library will instantly update to show content assets that match the criteria you defined.
Content Library Filters in a Category
Content Library Columns
Any user can choose and customize which columns they want to have displayed in their Content Library view. Like filters, editing the columns and their order customizes your view without affecting anyone else in your organization. While filters control which assets are shown, rearranging columns lets you decide which details (e.g., title, date created, author) are visible and in what order, allowing you to prioritize the information most relevant to you. Every user’s customized display preferences will be saved for each user.
To customize the columns, follow the steps below.
- To select which columns you want to display, click the columns icon as shown in the screen capture below.
Columns icon
- In the menu that appears, toggle on the columns you want to display (up to ten of them), and drag and drop them to put them in the order you want them to appear.
Note: The internal name column is required and is toggled on by default.Columns Selection menu
- When you are finished selecting and ordering the columns, to lock in the changes click Apply. To leave without saving, click Cancel. To revert to display the default view of columns, click Reset to Default. Your Content Library immediately refreshes to display your selections.
Adding Content Assets to Your PathFactory Content Library
Before you can build experiences in PathFactory, you need to add content assets to the Content Library. There are four ways to add assets to your PathFactory Content Library: Upload Individual Assets, Add Website URLs, Bulk Upload from a CSV file, or Add from an XML Sitemap.
Note: Unsure what types of content you can upload? Here’s a full list of the file types PathFactory supports.
Adding Individual Assets
To upload content assets to the Content Library, follow these steps.
- In the Content Library, click Add Assets.
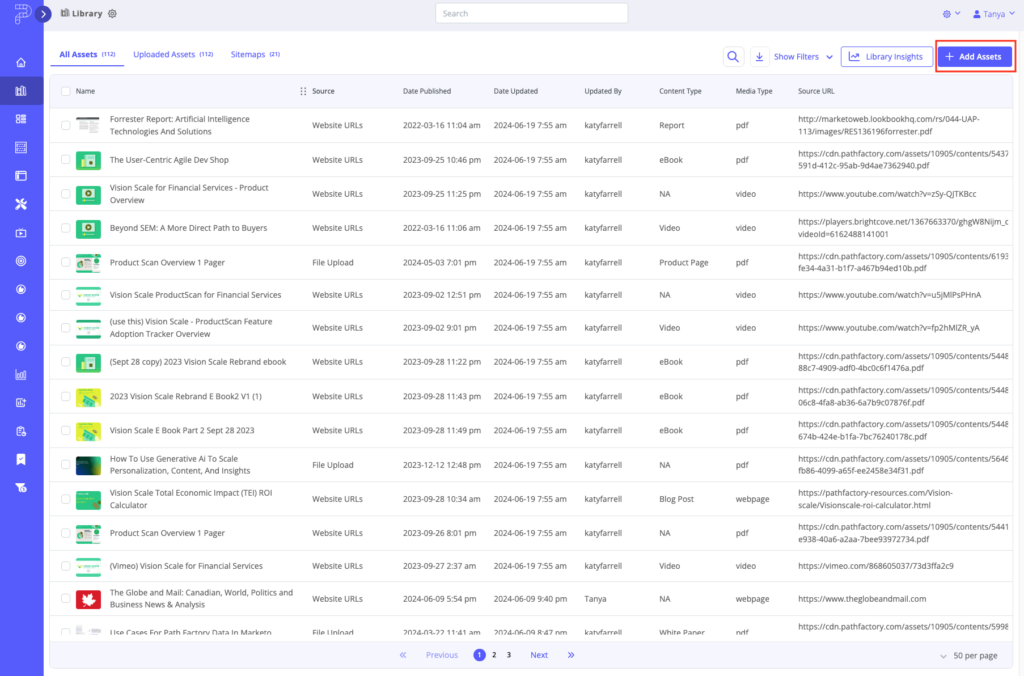
- A popup menu appears, so that you can select the upload method you want to use.
- File Upload – Best for single or multiple files from your computer, shared drive or cloud storage. For example, you might want to upload a PDF report, a PowerPoint presentation, or multiple images.
- Add Website URLs – Best for uploading assets directly from URL addresses. For instance, you could add a link to a page on your website, a whitepaper hosted on another website, an online article from a digital publication, and a third-party blog post. There is no character limit for this menu.
- Bulk Upload using CSV File – Best for uploading multiple assets simultaneously using our CSV template. This method is efficient for large batches of content, such as a collection of case studies or product sheets. Simply fill in the CSV template with the URLs and metadata for each asset.
- Add from XML Sitemap – Best for crawling a domain to create a Sitemap. This is particularly helpful for importing an entire website or a large number of web pages from a site.
- Depending on which option you choose, you’ll be prompted, step-by-step, on how to finish uploading your content assets.
Add Website URL(s) to Your Content Library
The following instructions guide you through adding a website URL address to the Content Library.
- Copy the URL to your clipboard.
- Go to your PathFactory Content Library, select Add Assets.

- On the popup menu that appears, click the Select button for Add Website URLs.
- Paste the links you want to add to your Library into the Website URLs field as shown below. This field has no character limit, so you can add as many URLs as you wish.
- Click Next.
- The Add Assets menu opens.
- On the Add Assets menu, there are three tabs for you to configure the attributes of the content asset you are uploading: Required Configuration, Other Configuration, and Tags.
- Required Configuration tab – on this tab you can select a thumbnail image for the content asset, enter a different title, and enter a custom URL slug you want to display.
- Other Configuration tab – on this tab, you can add attributes to the content asset, such as SEO Title, Canonical URL Override, Name, and more.
- When you have set up your new content asset, click Done.
Tip: You can use Google Files as URLs in PathFactory. Here is a quick tutorial to learn how to set up Google Files as URLs for import into your Content Library.
Bulk Upload or Update Assets Using a CSV File
Making bulk changes via a CSV file enables you to upload many assets at once and efficiently add/change categories and tags associated with those assets. Follow the instructions below to use the bulk CSV approach.
Note: You can also upload Website URLs in bulk using XML Sitemap or by including them on a CSV spreadsheet for upload.
- With the Content Library open, click Add Assets.

- A popup menu appears for you to select the upload method of your choice. In this case, click the Select button for the option labeled Bulk Upload Using CSV File.
- Upload CSV File menu pops up. On this menu, you have a few options that are listed and briefly described below the screen capture.
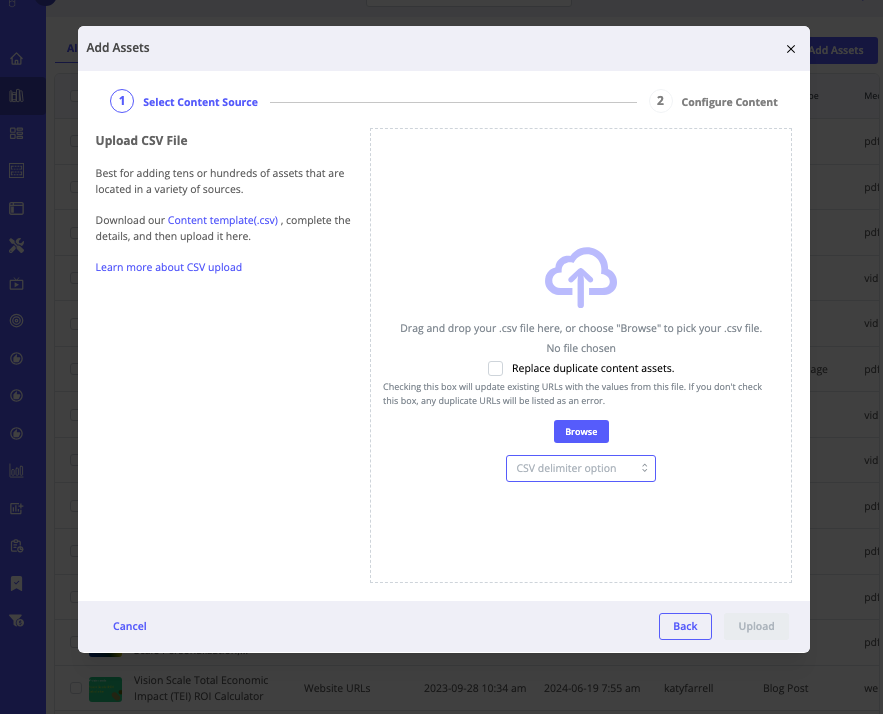
- CSV Delimiter Option – Click here to select Semicolon Separated Value (SSV) file format instead of the default CSV format.
- Download the Content Template (.csv) – Click this link to download a copy of the pre-formatted CSV template to your computer. This template includes all the necessary fields required to ensure your content is imported correctly into your Content Library.
Note: Custom Categories and their respective tags are uploaded and downloaded along with the rest of the Content Library categories and tags. - Once you have filled out the template, click the option to Browse to the CSV file on your computer. Find and select your file and click Open to upload it to PathFactory.
- Activate the Replace Duplicate Content Assets checkbox – By enabling this checkbox, when the uploaded CSV is processing, PathFactory compares the URL field in the CSV file and Source URL in the Content Library. If these two match, we consider them to be the same content, and update all fields for that content asset with the new information in the latest CSV file uploaded.
Asset Configuration and Governance Settings
Configuring your content assets is a crucial step in managing the Content Library. After you have uploaded your content assets, the next step is to configure them to ensure they are properly organized, easily discoverable, and optimized for both public viewing and internal use. This process involves setting up metadata, tagging, and various other settings that enhance the overall management and effectiveness of the Content Library.
We recommend as a best practice that you configure the Required and Optional tagging fields in the Content Library so that the proper information is captured about the asset when it is uploaded. But you can also use the instructions below to make modifications when needed.
Content Asset Configuration and Tagging
Configuring Content Assets to set up and organize the basic information and metadata for each content asset. Configuration tasks include:
- Setting the title, description, and thumbnail image.
- Specifying the content format, publication date, and update date.
- Adding SEO titles, source URLs, and custom URL slugs.
- Assigning funnel stages, estimated costs, and languages.
- Assigning optional and required tagging fields.
Tagging Content Assets manually by applying tags or labels to content assets to categorize and organize them based on certain attributes. Tags help in quickly locating and filtering content assets, improving AI and personalization, and surfacing valuable analytics and insights. Tagging tasks include:
- Adding tags related to business units, personas, industries, products, and solutions.
- Applying multiple tags to assets for better categorization and searchability.
Tagging Content Assets using AI enables you to more easily manage and organize your content assets. AI-Assisted Tagging applies your existing, approved taxonomy to assets you bring into the Content Library in any form. By automatically generating relevant tags based on the attributes of your content, AI Tagging significantly enhances your ability to categorize and retrieve assets quickly. This not only improves the searchability of your content but also optimizes personalization efforts and enables deeper analytics insights.
Note: To read step-by-step instructions on how to use AI-Assisted Auto Tagging to assign key attributes to your content assets, read How to Use AI to Auto-Tag Assets in Your Content Library.
To configure and tag content assets manually, follow these steps.
- Begin by opening the Content Library.
- Select a content asset to edit, and then click the pencil icon as shown in the screen capture below.
Note: You are able to begin configuring your content assets even if other assets are still being uploaded and processed.
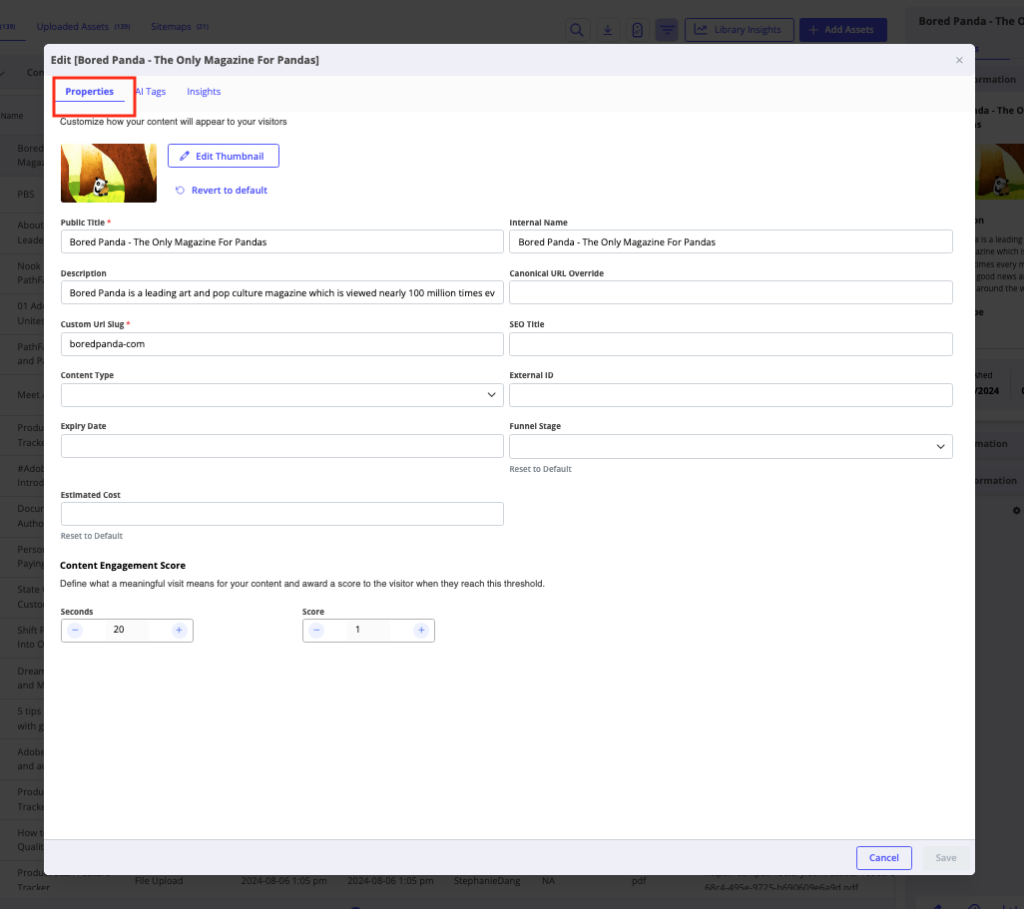
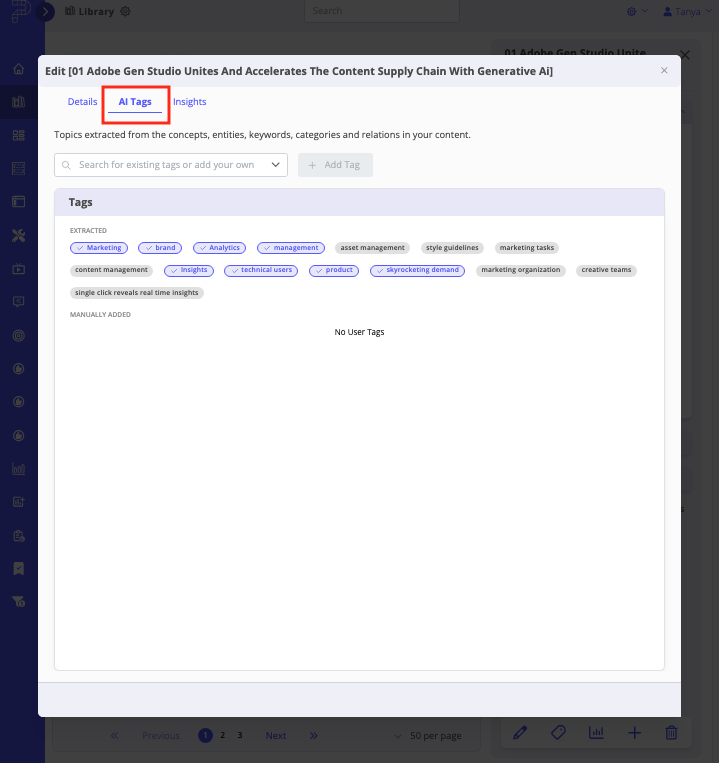
- You’ll notice there are three tabs on this configuration screen.
Properties – This tab enables you to edit basic information and metadata of your content asset. When you have finished setting up the Properties tab, click Save.
AI Tags – This tab enables you to view and add AI tags and add manual tags to the given content asset. To add a content tag manually, click Add Tag and follow the prompts to enter the name of the new content tag.
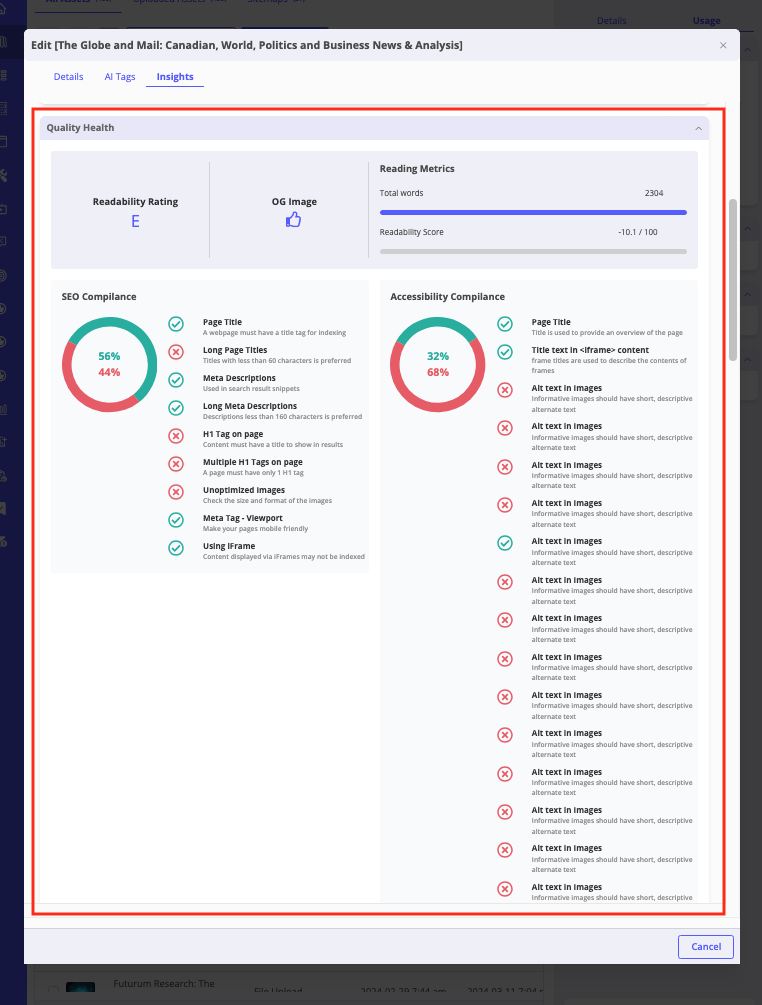
Insights – This tab provides at-a-glance performance data for a content asset. It includes metrics on user engagement, such as views, clicks, shares, and time spent on the content. Insights help you understand how well your asset is performing and guide you in making data-driven content strategy decisions.
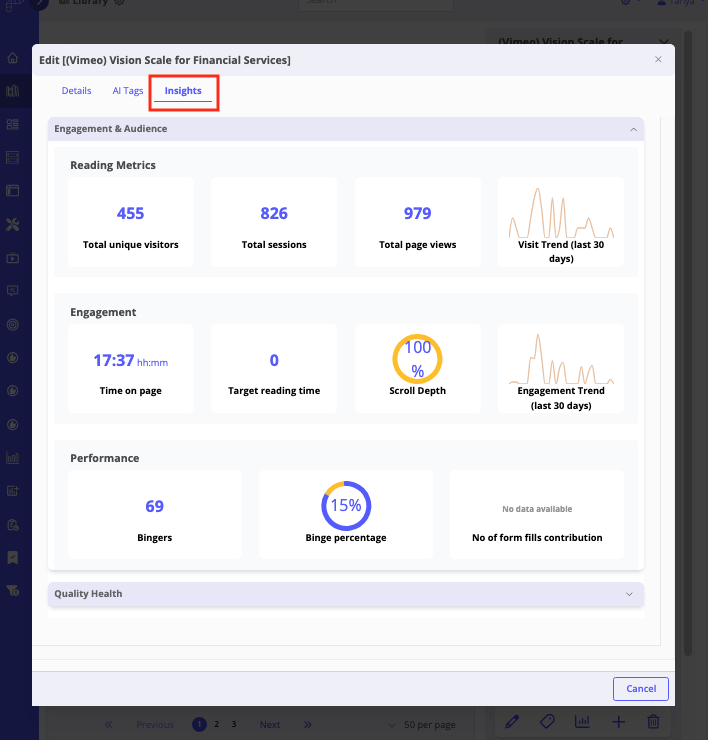
Quality Health – Located at the bottom of the Insights tab is the Quality Health menu. Expand this menu to view details about the asset including Readability Rating, Reading Metrics, SEO Compliance and Accessibility Compliance.
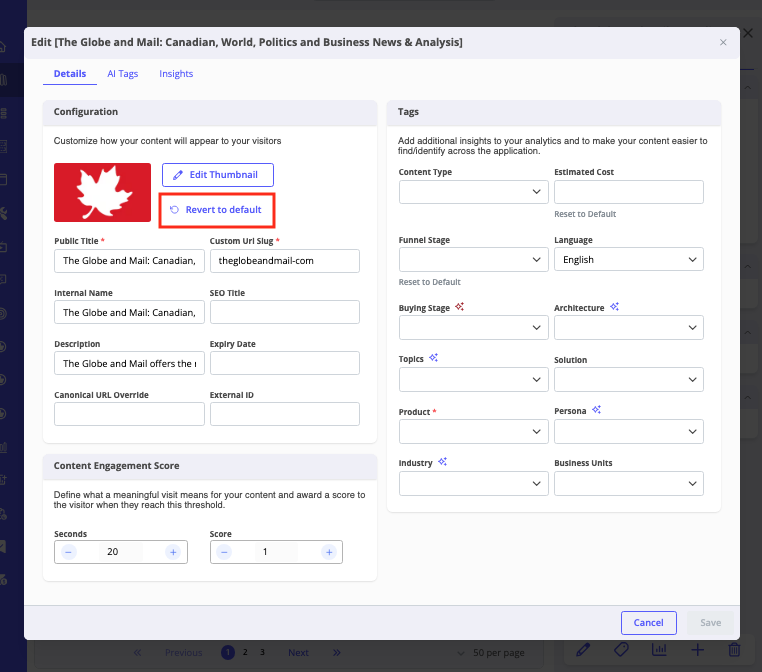
Note: To reset the content asset attributes without closing the configuration menu, click Revert to Default as highlighted in the screen capture below. This action will return all of the values to their last saved state.
How to Manage Governance and Security Settings for Content Assets in Your Content Library
Governance and Security settings in your Content Library provide administrative users with control over how content assets are accessed, configured and edited. These settings help manage permissions and enhance security. Follow the steps below to manage these features.
Note: To set up or modify Content Library governance, you must have administrative-level permissions.
- Click on your login name on the top right of the screen. In the dropdown menu, select Organization Settings.
- On the screen that opens, click the Settings tab.
- Scroll down to the Content Library settings, as shown in the screen capture below.
- The following governance options are available on this menu:
- Force HTTPS Tracks – Enabling this checkbox ensures that all content tracks are delivered over a secure HTTPS connection. This enhances the security and privacy of your content, protecting it from potential interception and ensuring compliance with modern web standards.
- Show Public Titles for Content Assets in Your Organization – When enabled, this checkbox ensures that the titles of content assets are visible to all users within your organization. This transparency helps in quickly identifying and accessing relevant content, fostering better collaboration and content management. Users can see both the external (public) asset name and the internal.
- Show Approximate Cost for Content in the Content Library – Selecting this checkbox displays the estimated cost associated with each content asset in the Content Library. This feature aids in budget tracking and allocation, allowing users to make informed decisions about content utilization and investment.
- Show Smart Content Tags in Content Library – Enabling this option displays Smart Content Tags associated with each content asset in the Content Library.
- Make Right-Hand Sidebar View Only – When this option is activated, the right-hand sidebar in the Content Library is set to a view-only mode. This means users can view information and metadata about content assets, but they cannot make any edits to attributes – e.g., thumbnail, description, etc..
- Turn on PDF Viewer Fallback – When toggled on, this feature causes any PDFs to load with the user’s native browser PDF viewer instead of using PathFactory’s PDF viewer.
Note: using the PDF Fallback viewer might prevent PathFactory from capturing certain engagement data, like the number of PDF downloads.
- Turn on Autoplay Videos – When this option is turned on, videos within the Content Library will start playing automatically when accessed. This feature enhances user engagement by immediately presenting video content without requiring manual playback initiation.
- To preserve these settings, click Save. To exit without saving, navigate to a different tab within Organization Settings.
Views: 276
