PathFactory webhooks capture and transfer engagement data to external systems, such as Marketing Automation Platforms (MAPs). They streamline data sharing, providing detailed insights into visitor behavior, form submissions, and content engagement. By using webhooks, you can gather and analyze granular data to refine your marketing strategies and enhance audience targeting.
Types of Webhooks
PathFactory provides five types of webhooks:
- Form Capture Webhook
- Visitor Session Webhook
- Visitor Activity Webhook
- Virtual Event Webhook
- Website Session Webhook
Below you’ll find descriptions of each webhook, its benefits and how it is triggered. To see a list of available fields for each webhook, read the article, Webhook Field Definitions.
Form Capture Webhook
This webhook captures data from submissions using native PathFactory standard forms. It sends the information entered by the visitor, along with additional details about where the form was submitted.
- Benefits: Collects valuable visitor information (e.g., name, position, contact details) to enhance marketing strategies.
- Trigger: The form capture webhook is triggered when a native PathFactory standard form submission occurs. This event will not trigger if an external form is used without setting up a corresponding standard PathFactory form.
Note: For form capture webhooks to successfully send data to an external system, you must set up a form on an external system. When you create a form capture webhook, you will be asked to provide the URL of the form. To learn more about managing forms, read the article, Adding Forms and Managing the Forms Library.
Visitor Session Webhook
This webhook captures detailed data about how much time visitors spend reading and browsing your content during a single session. A session begins when a visitor arrives on a PathFactory Experience and ends after 30 minutes of inactivity.
- Benefits: Provides an overview of visitor engagement with PathFactory Experiences and content assets during the session.
- Trigger: Fires 30 minutes after the visitor stops engaging with content.
Visitor Activity Webhook
This webhook captures visitor activities such as interactions within PathFactory Experiences, Web Properties, or Specific Collections.
- Benefits: Provides insights into specific behaviors and interactions, enabling more effective marketing strategies.
- Trigger: Fires when a visitor completes one or more predefined activities. Data is sent 30 minutes after the last engagement with a content asset.
Virtual Event Webhook (VEX)
This webhook captures visitor consumption data for Virtual Events and sends insights about session engagement.
- Benefits: Summarizes attendee engagement, including supplemental content views, time spent, and level of interest. Helps marketers update campaigns and share insights with sales teams.
- Trigger: This webhook is triggered 30 minutes after a visitor leaves a Virtual Event session. Specific visitor activities can be configured within the Event Fields settings.
Website Tools Session Webhook
This webhook records when visitors interact with PathFactory’s Website Tools on your website, and then provides you with details such as engagement metrics like session duration, activities, and UTM parameters. These insights help you better understand audience behavior and optimize personalized content strategies.
- Benefits: Enables a deeper understanding of visitor behavior across your website, helping you refine content strategies, optimize engagement efforts, and align marketing insights with business goals.
- Trigger: This webhook is triggered 30 minutes after a visitor leaves a website that has Website Tools.
How to Create a Webhook
To create a webhook, follow these steps.
- Click on the gear icon at the top right of the page, and select Webhooks from the dropdown menu.
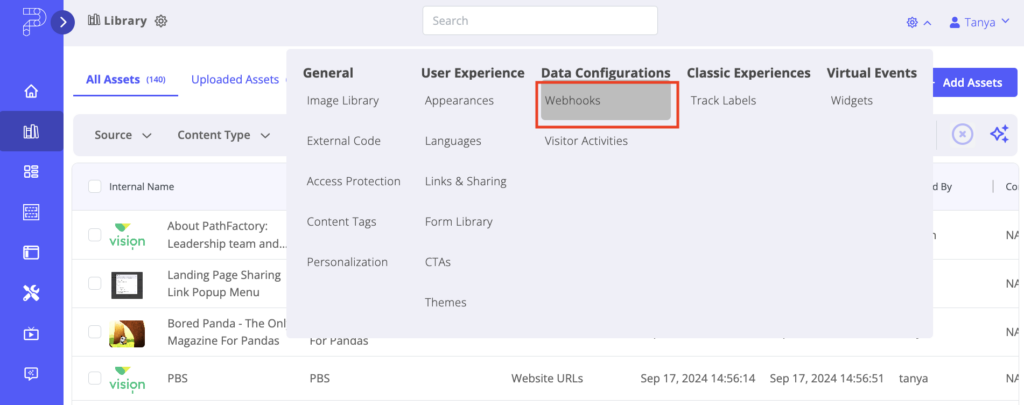
Webhooks menu item - Once you are in our Webhooks Configuration page, you can click on the Add Webhook button on the top right
Add Webhook
Add Webhook - The Add Webhook menu opens for you to add details for your new webhook. If your organization uses multiple MAPs (Marketing Automation Platforms), you will see two radio buttons, to specify how the webhook should be configured, as described below.
Note: If you do not have radio buttons on the Add Webhook menu, that means your Administrator hasn’t enabled this feature. In that case, skip this step and move on to Step 4.- Domain: Choose this option if you want the webhook to trigger based on the domain from which the data originates. This helps direct data from specific domains to the appropriate MAP instance.
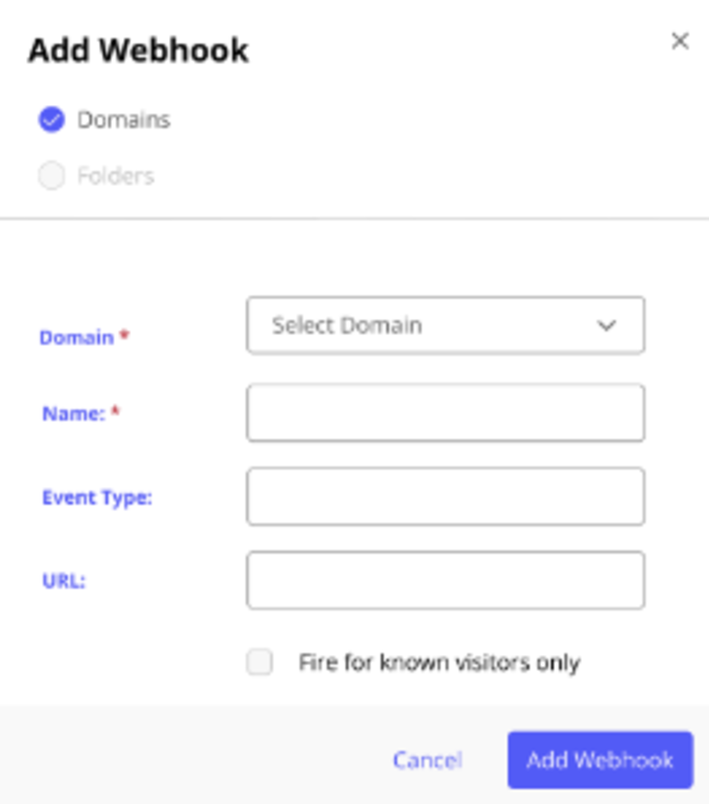
Conditional Webhook Domains - Folder: Choose this option if you want the webhook to trigger based on the folder where the data is stored. This helps route data from specific folders to the correct MAP instance.
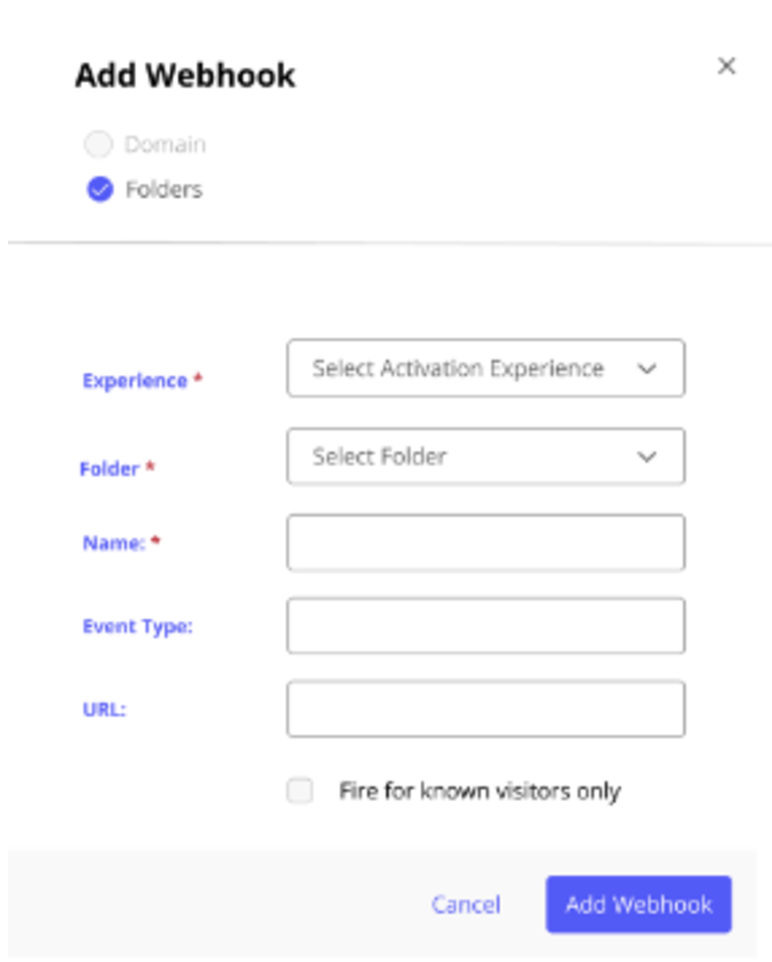 Conditional Webhook Folders
- Domain: Choose this option if you want the webhook to trigger based on the domain from which the data originates. This helps direct data from specific domains to the appropriate MAP instance.
- Enter a name for your new webhook.
- Click on the Event Type menu and select an option from the list: Visitor Session, Form Capture, Website Tools Session, Visitor Activity, or Virtual Event Session.
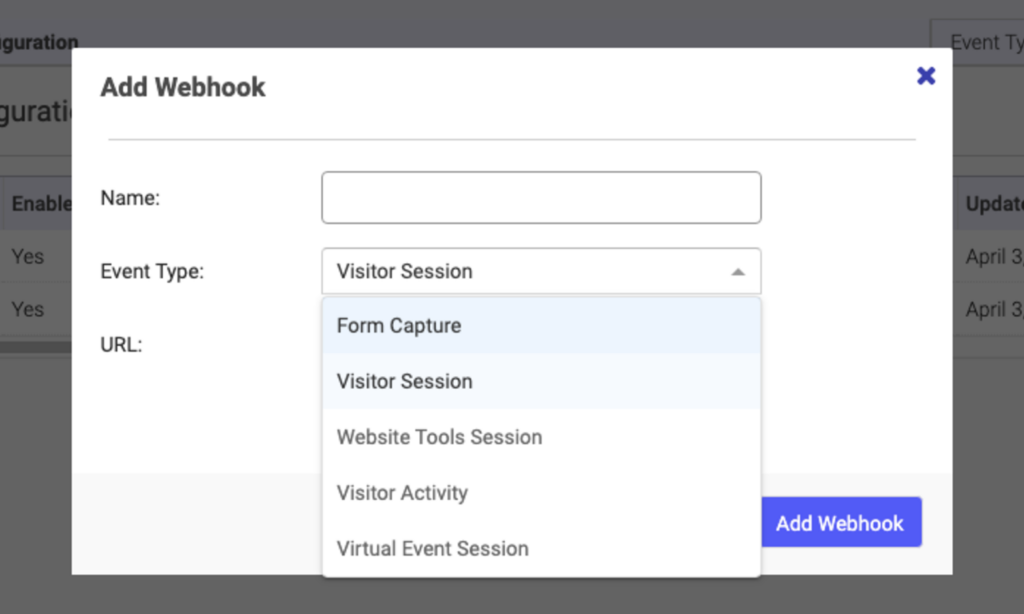
List of Webhook Types - By default the webhook triggers for only known visitors. If you want it to fire for all visitors, deactivate the checkbox labeled Fire For Known Visitors Only.
- Click Add Webhook to finish creating the webhook.
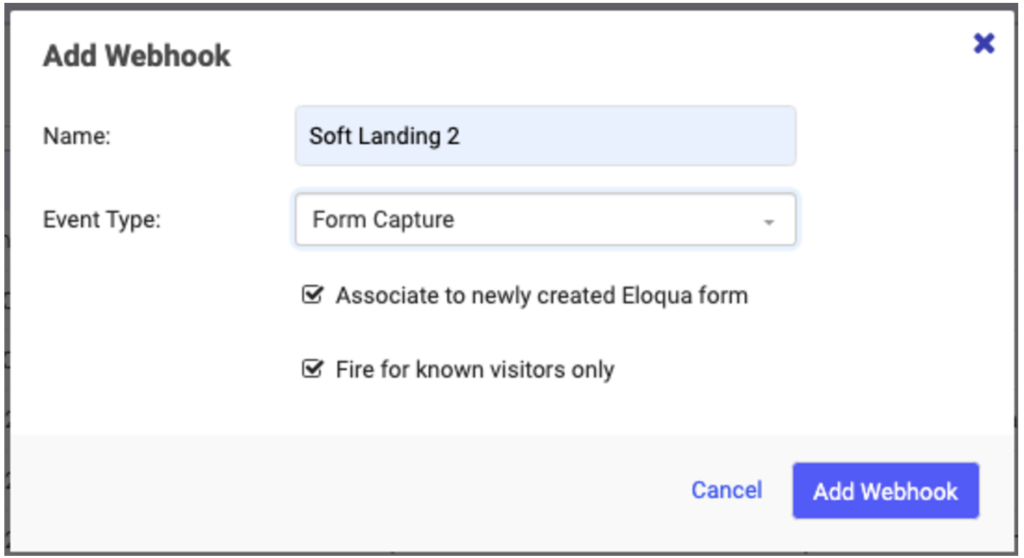
Add Webhook popup menu - Once created, the webhook is displayed in the list of webhooks. To view and adjust the configuration of a webhook, select it. A right side Quick Pane appears and displays its details. Edit as needed.
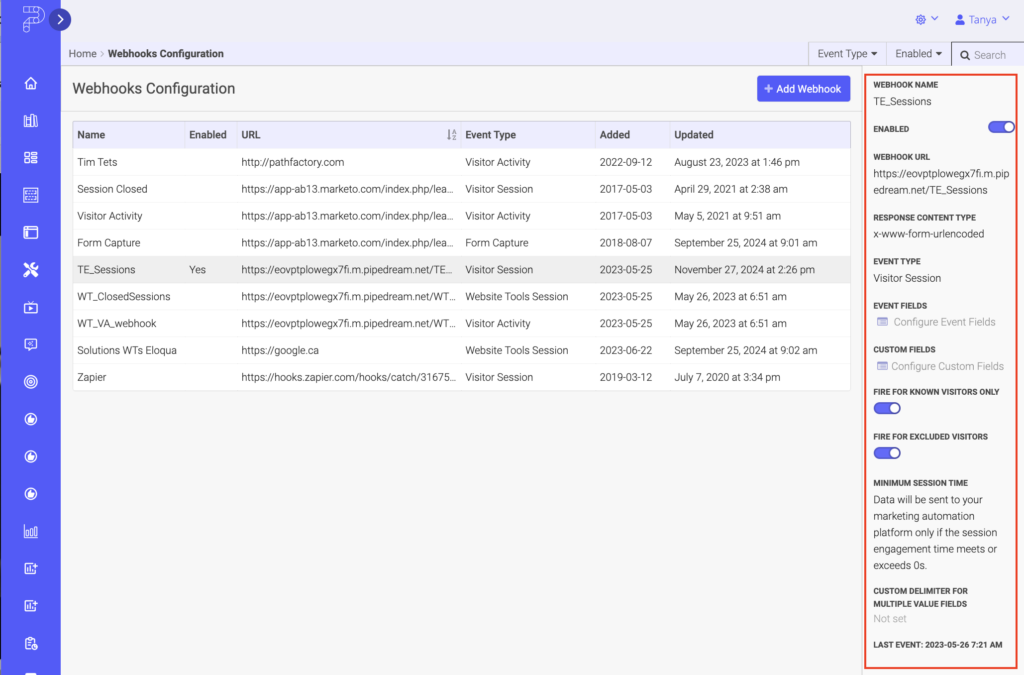
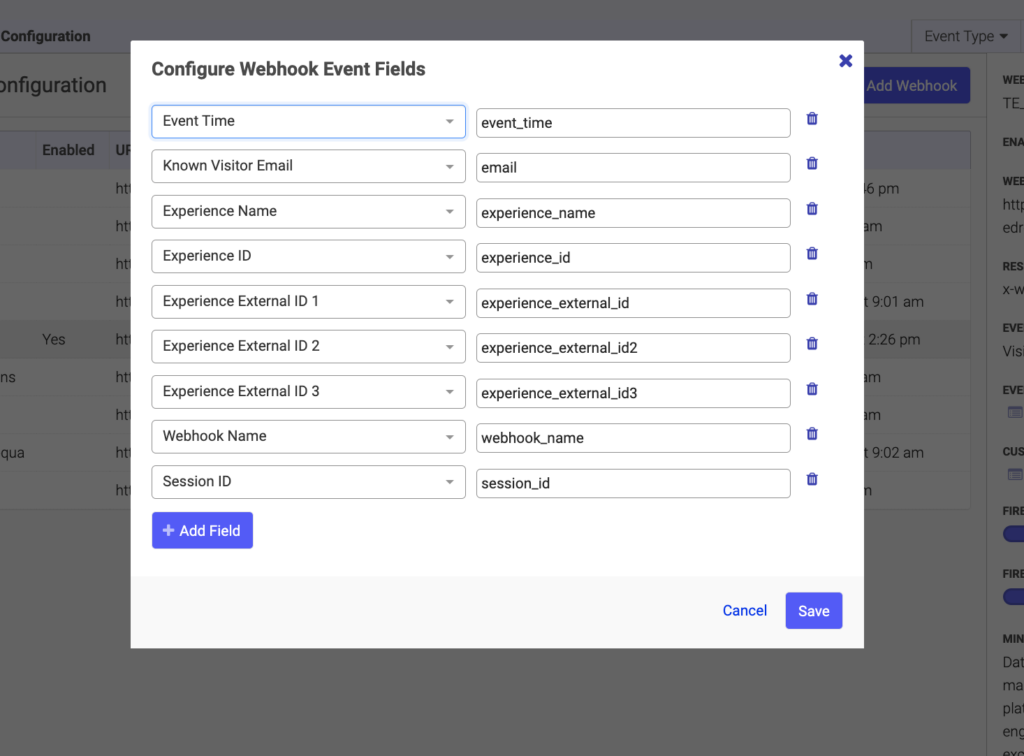
Webhooks Configuration menu - Select Event Fields.

Webhooks Event Fields - Configure any custom fields (optional) and click Save.
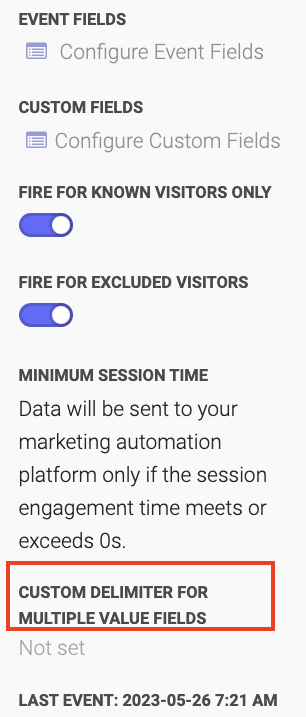
Webhooks Event Fields popup menu - The default setting for separating multiple values in a single field are square brackets. If you want to change the separator to another format, you can enter a custom delimiter such as a comma, colon, or semicolon.
Delimeter Values field - To activate the webhook, toggle on Enable.

Webhooks Enabled toggle
Now you are ready to test your webhooks to make sure they are working properly. To do this, follow the directions described in the next section.
How to Test Webhooks
When you have finished configuring a webhook, you can test it to make sure it’s capturing and transmitting data to your MAP as you expected. By following the general procedure below, you ensure that each type of webhook functions correctly and captures the intended data for external systems.
To test a webhook, follow the general steps below and adapt them as needed.
- Trigger the webhook by performing the action required to activate it, such as submitting a form, engaging with content, or interacting with a virtual event or website.Note: To test Website Tools webhooks thoroughly, ensure you simulate different scenarios (e.g., inactivity, exit) to verify both onsite behavior and data sent via this webhook.
- Wait for the data to be collected and transmitted.
- For Form Capture webhooks, wait 10 minutes.
- For all other webhooks, wait 30 minutes.
- If the data doesn’t appear as expected, verify the webhook configuration and re-test.
Pro Tip: Enhance Webhooks with Custom Categories
Custom Categories add power to your webhooks by providing additional context about visitor interactions. This feature enables you to capture more granular data and refine your segmentation, automation, and decision-making processes.
How It Works
When Custom Categories are added to your Content Library taxonomy, you can configure them to work with webhooks. This combination allows you to classify interactions more precisely and use those insights to improve your marketing strategies.
Example Use Case
Imagine a visitor interacts with three assets tagged with the following Custom Categories:
- Product Stage: Awareness, Evaluation, Purchase
- Feature Focus: AI Integration, Reporting Tools
The webhook captures this data along with metrics like engagement time and asset views, then transmits it to your Marketing Automation Platform (MAP).
How to Use This Data
- Nurture Campaigns: Automatically enroll the visitor in an Evaluation-stage campaign featuring content about Reporting Tools, tailoring the communication to their interests.
- Sales Notifications: Notify your sales team that the visitor is in the Evaluation stage and interested in Reporting Tools, equipping them with insights for a personalized follow-up.
By leveraging Custom Categories with webhooks, you can enrich your engagement data, make smarter decisions, and optimize your marketing efforts.
Views: 348
