Form settings that determine the visual and text styling and branding of forms that are set at the Theme level can now be universally applied to all external and custom forms for Templated Experiences.
Note: External forms are a type of form in PathFactory that are rendered from the URL of the MAP form. Custom forms are a type of form that are rendered from a block of Custom HTML. Standard forms are PathFactory-created forms. Standard forms are not connected to MAPs. For more information, see Introduction to Forms.
Step 1: Activate Header Toggle in Form
To allow the font overrides in the form header field in external and custom forms to occur via Theme settings, you must toggle on the form’s header in the Form Library.
- Open the Form Library by clicking the gear icon in the main navigation bar and then select Form Library.
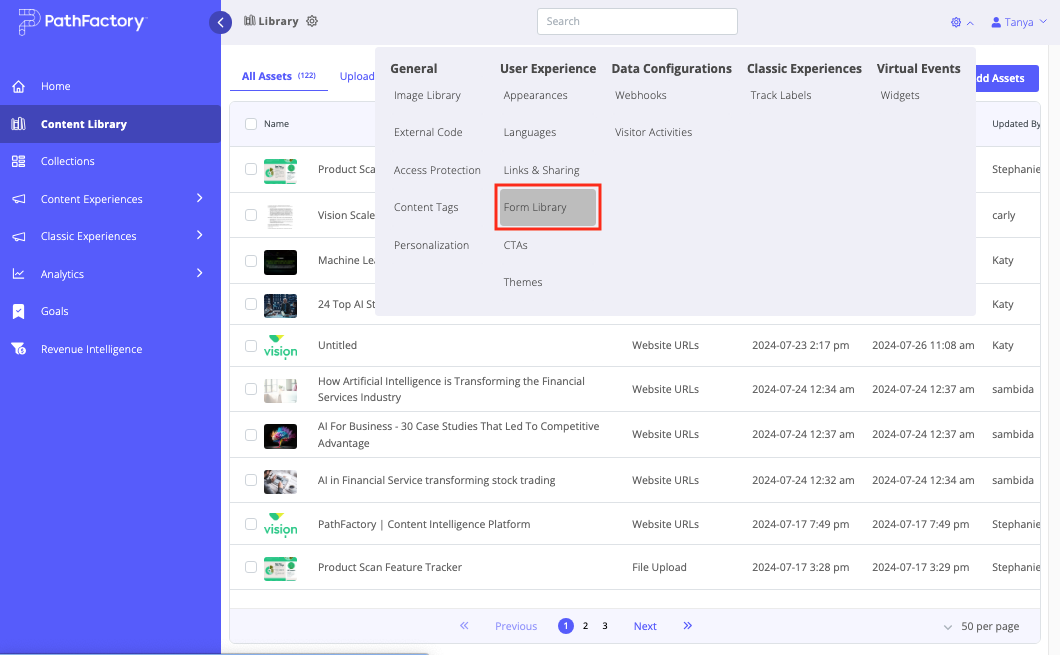
- Next, in the Form Library locate and select the form for which you want to enable appearance editing. You’ll notice the panel on the right side provides a dropdown list to select External URL or Custom HTML. Select the option appropriate for you.
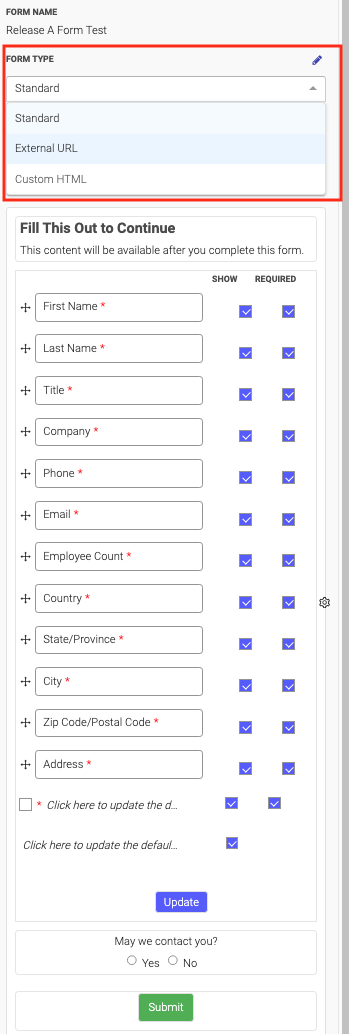
Note: To ensure the visitors’ data on the given form is captured and appears in PathFactory Analytics, mark the Email field as required.
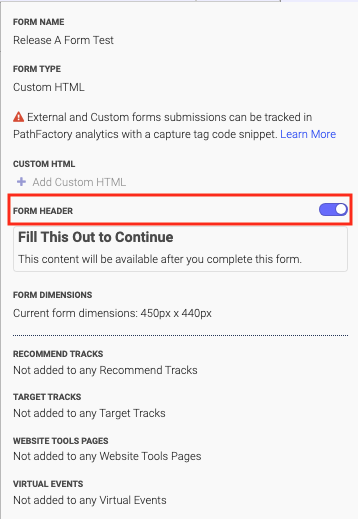
- Once you have selected the external or custom form option, and saved your selection, the header toggle appears. Activate the toggle as shown below.
Step 2: Customize the Font Type, Size, and Color for the Form
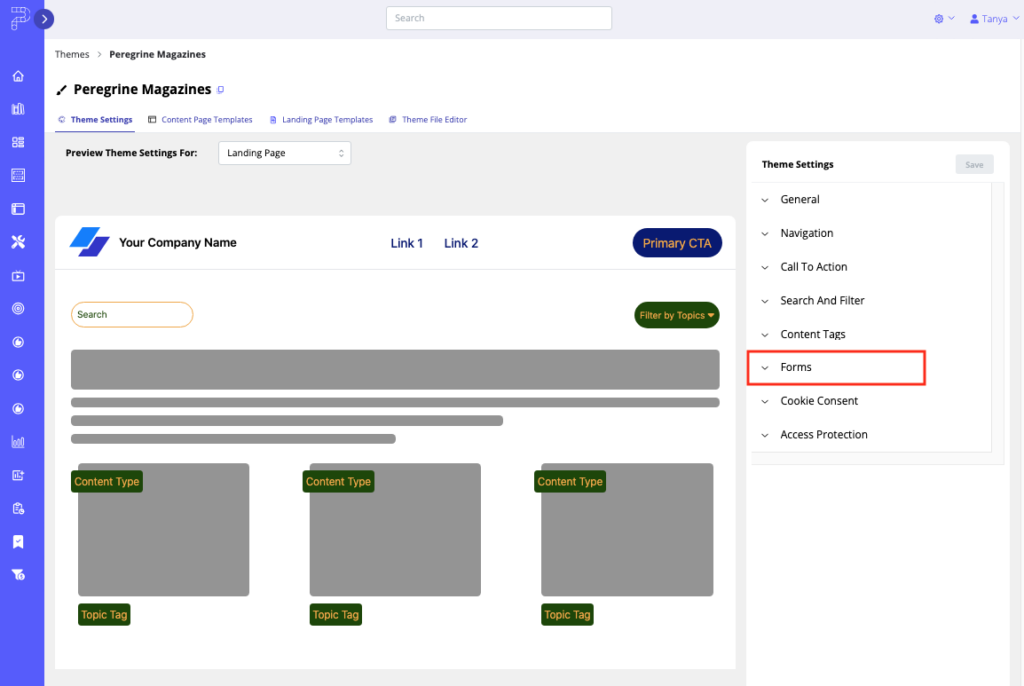
To customize some of the appearance settings for an external or custom form that will be served for your Templated Experience, edit the form settings within the Theme file.
- On the main navigation menu, click the gear icon.
- In the menu that drops down, select Themes.
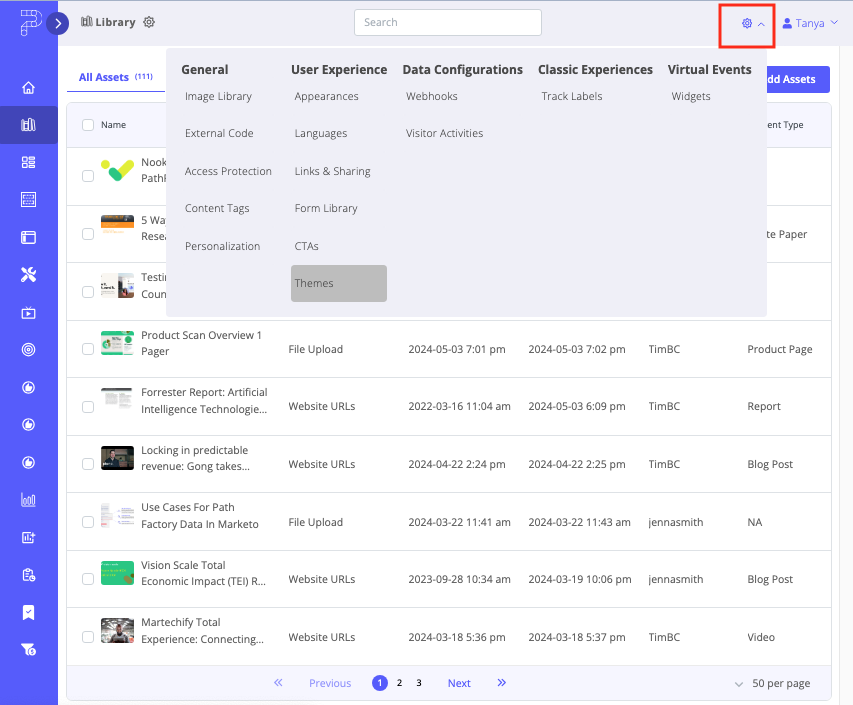
- Now you’ll see a list of all Theme files made available to you by your organization.
- Select the Theme file you are using for the Templated Experience.
- The Theme file opens. On the right side of the screen, select the Forms menu as shown below.
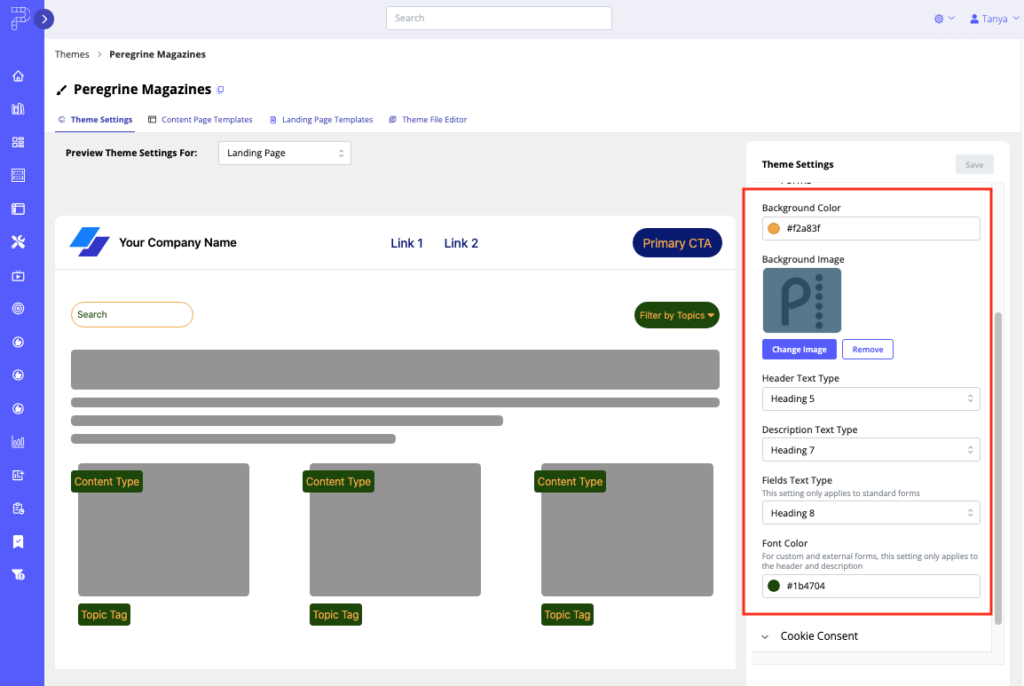
- Next, adjust the font types, font sizes and colors to suit your desired styling and branding. Using the editing buttons, you can set the font sizes and colors for the headers and descriptions.
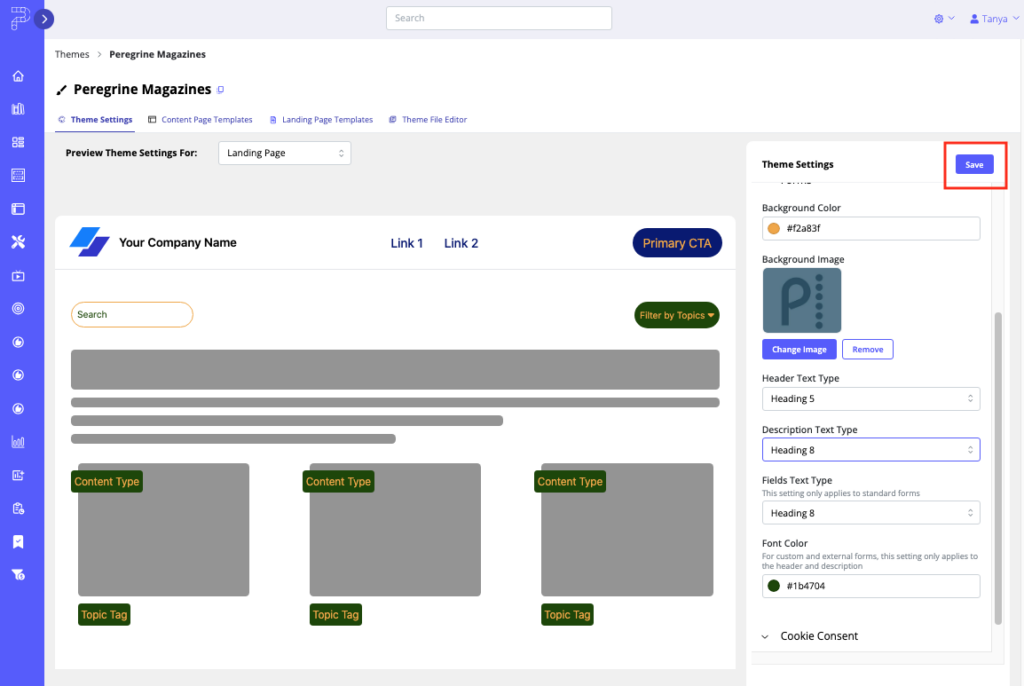
- To lock in the font type, font size and color settings, click Save.
- To exit without saving, navigate away from the current tab. In the prompt that appears, click Ok to confirm you do not want to save your changes.
- To see your form in action, open the Templated Experience to which you have applied the given Theme.
Note: You can customize an embedded form’s header and its description for individual Landing Pages. To find instructions on how to add a section to a Landing Page, read the section How to Build Landing Page Templates.
Note: For more information on how to use Themes, read Introduction to Themes.
Views: 47