Form Strategy in PathFactory controls how and where forms appear across all your PathFactory experiences. The same form behaviors apply to both.
This article covers:
- Form setup in the Form Library
- Experience-level gating
- Asset-level (content) gating
- Embedded forms on landing pages
Form Library Setup
Before using Form Strategy, forms must exist in the Form Library.
There are three types of Forms you can create. For instructions on how to create a form, click a link below.
Creating an external form from URL
Creating an external form from HTML
If you are using externally built Forms, be sure to add the Capture Tag code snippet. This ensures PathFactory receives external form fill data.
- Open the Content Library
- Navigate to Experiences → Form Library
- Add forms from your marketing automation platform (e.g., Marketo embed code)
Forms can include:
- Embedded form code
- Styling configured in PathFactory
- Optional header and description text
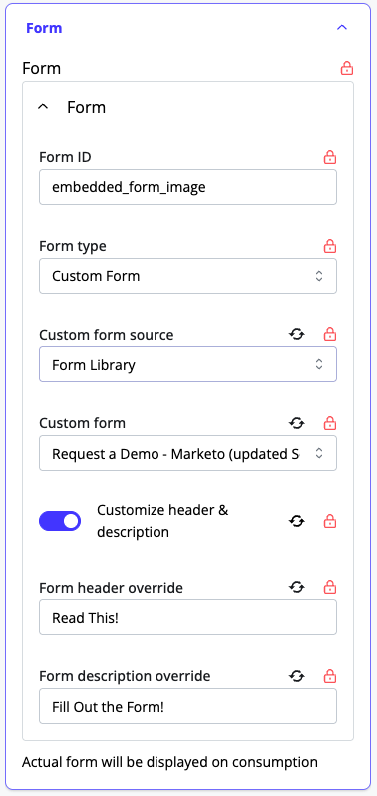
Form headers and descriptions can later be overridden at the experience level.

After that you’ve built your PathFactory standard Forms and/or added your externally built Forms to your Forms library, you are ready to add them to your content tracks!
Using Forms In PathFactory Experiences
Below is an overview of using Forms in your PathFactory Experiences that covers all the aspects of the article:
Experience Rules (Gating the Entire Experience)
Experience Rules apply a form gate across an entire experience.
Landing Page Behavior (Templated Experiences only)
- Exclude landing page: Form appears only after clicking into content
- Include landing page: Form gates the landing page itself
Configuration Options
- Select a form from the Form Library
- Customize form title and description
- Define display behavior
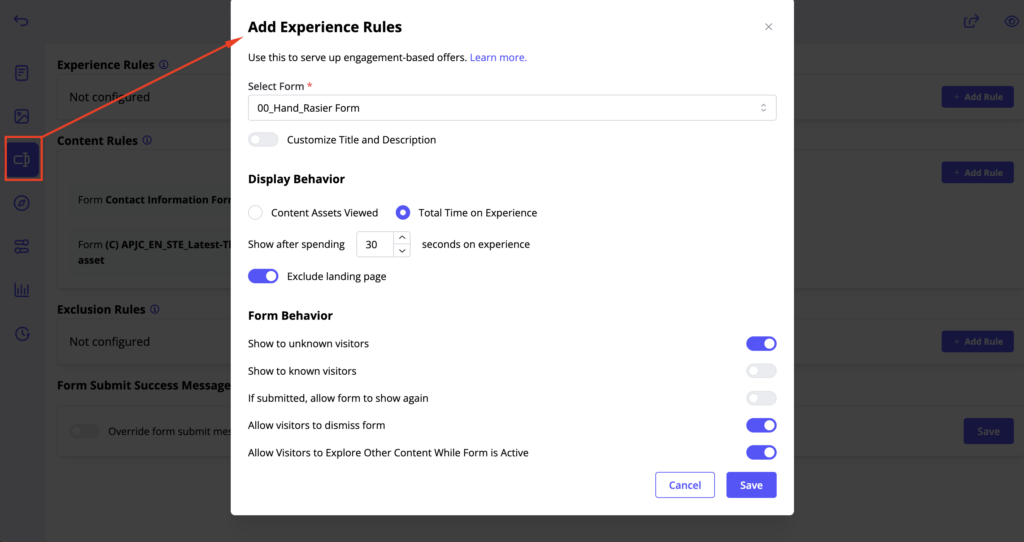
Form Display Triggers
Forms can be triggered based on:
- Total engagement time (e.g., 30s, 60s)
- Number of content assets viewed (form appears on that asset # eg. After viewing 2 assets = form appears on 2nd asset)
- Combination of time (total engagement time across all assets) + assets viewed (form appears on that asset # eg. After viewing 2 assets = form appears on 2nd asset)

Visitor Interaction Controls
Experience Rules support the following behaviors:
- Show form to known and unknown visitors
- Allow visitors to dismiss the form
- Allow or restrict content navigation while the form is active
If navigation is disabled, the content sidebar is inaccessible until the form is submitted or dismissed.
Content Rules (Gate Specific Assets)
Content Rules allow you to keep an experience mostly ungated while gating individual assets.
Use cases include:
- Analyst reports
- High-value campaign driver assets
Only the selected asset is gated; all other content remains accessible.
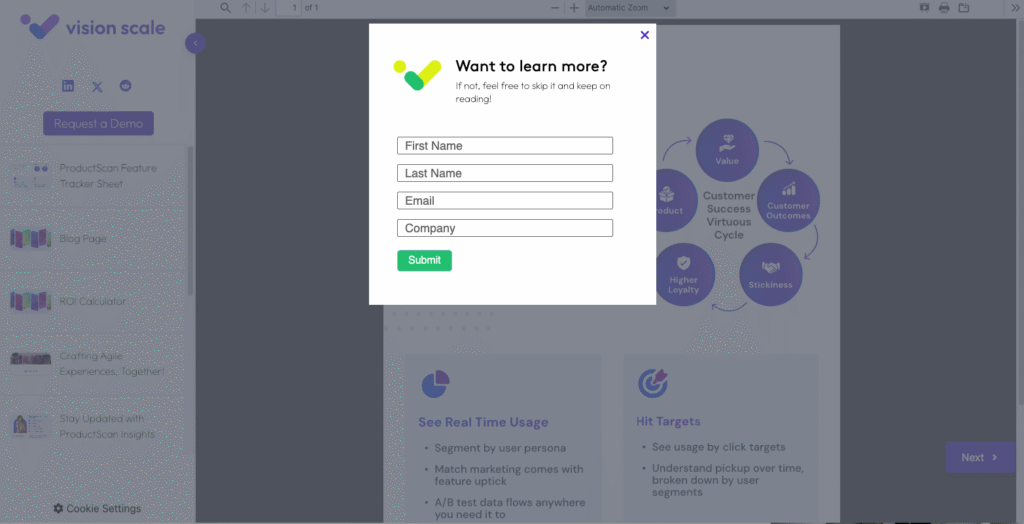
Embedded Forms (Landing Pages Only)
Embedded forms are available only on Templated Experience landing pages.
Supported Sections
Form sections are available out of the box, including:
- Form + Text
- Form + Image
- Form + Team List
- Text- Multi-column Section

Configuring an Embedded Form
- Add a Form section to the landing page
- Open the section settings
- Choose Form Type:
- Custom / External (MAP-connected)
- Standard (PathFactory native; not MAP-connected)
- Select a form from the Form Library
- Optionally customize header and description
For help optimizing form placement and conversion strategy, contact your Customer Success Manager.
Views: 326