For Release U, we are introducing the following new features:
- New data and dashboards in PathFactory for Revenue Intelligence – see more analytics at a glance, including new individual-level journey analytics and content influence metrics.
- Added customization for editing Templated Experiences Landing Pages – try out the new increased editing options.
- External code support for Templated Experiences – you can now use external code to track performance and engagement in Templated Experiences.
New PathFactory For Revenue Intelligence Home Page
Release U brings a refreshed look and feel to PFRI, including enhanced account-level dashboard data with new content attribution metrics and a drill down page that lets you see engagement insights at the individual buyer level in accounts. At a glance you can see the top 20 performing accounts and details about content performance and engagement.
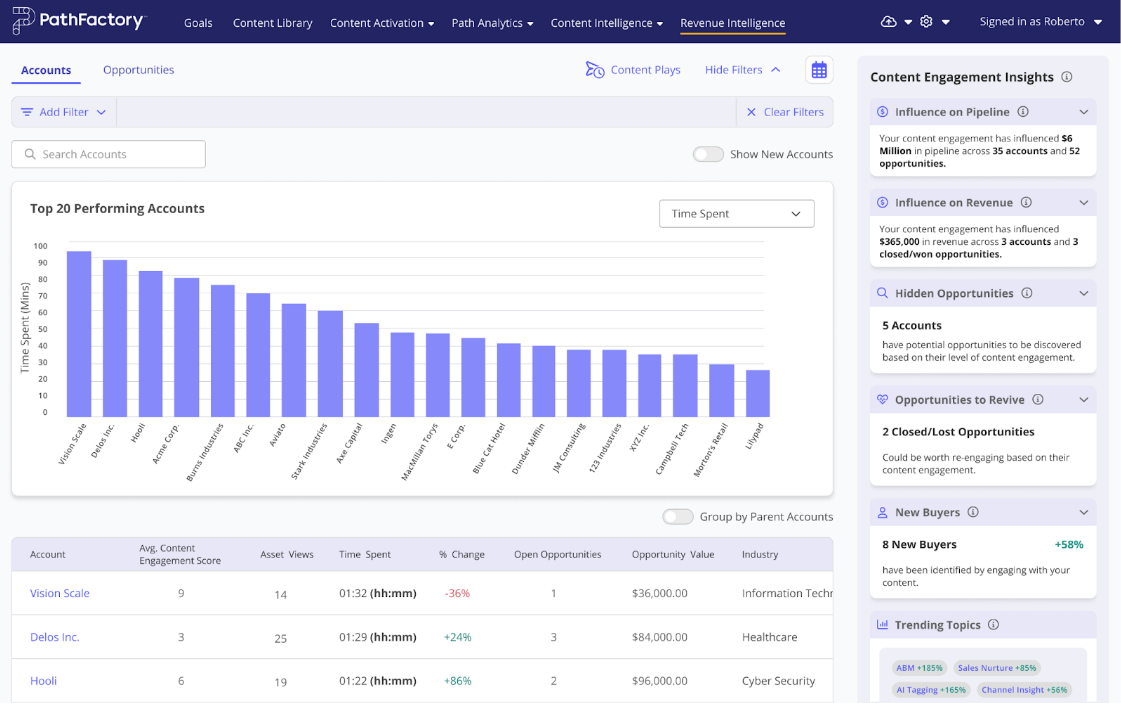
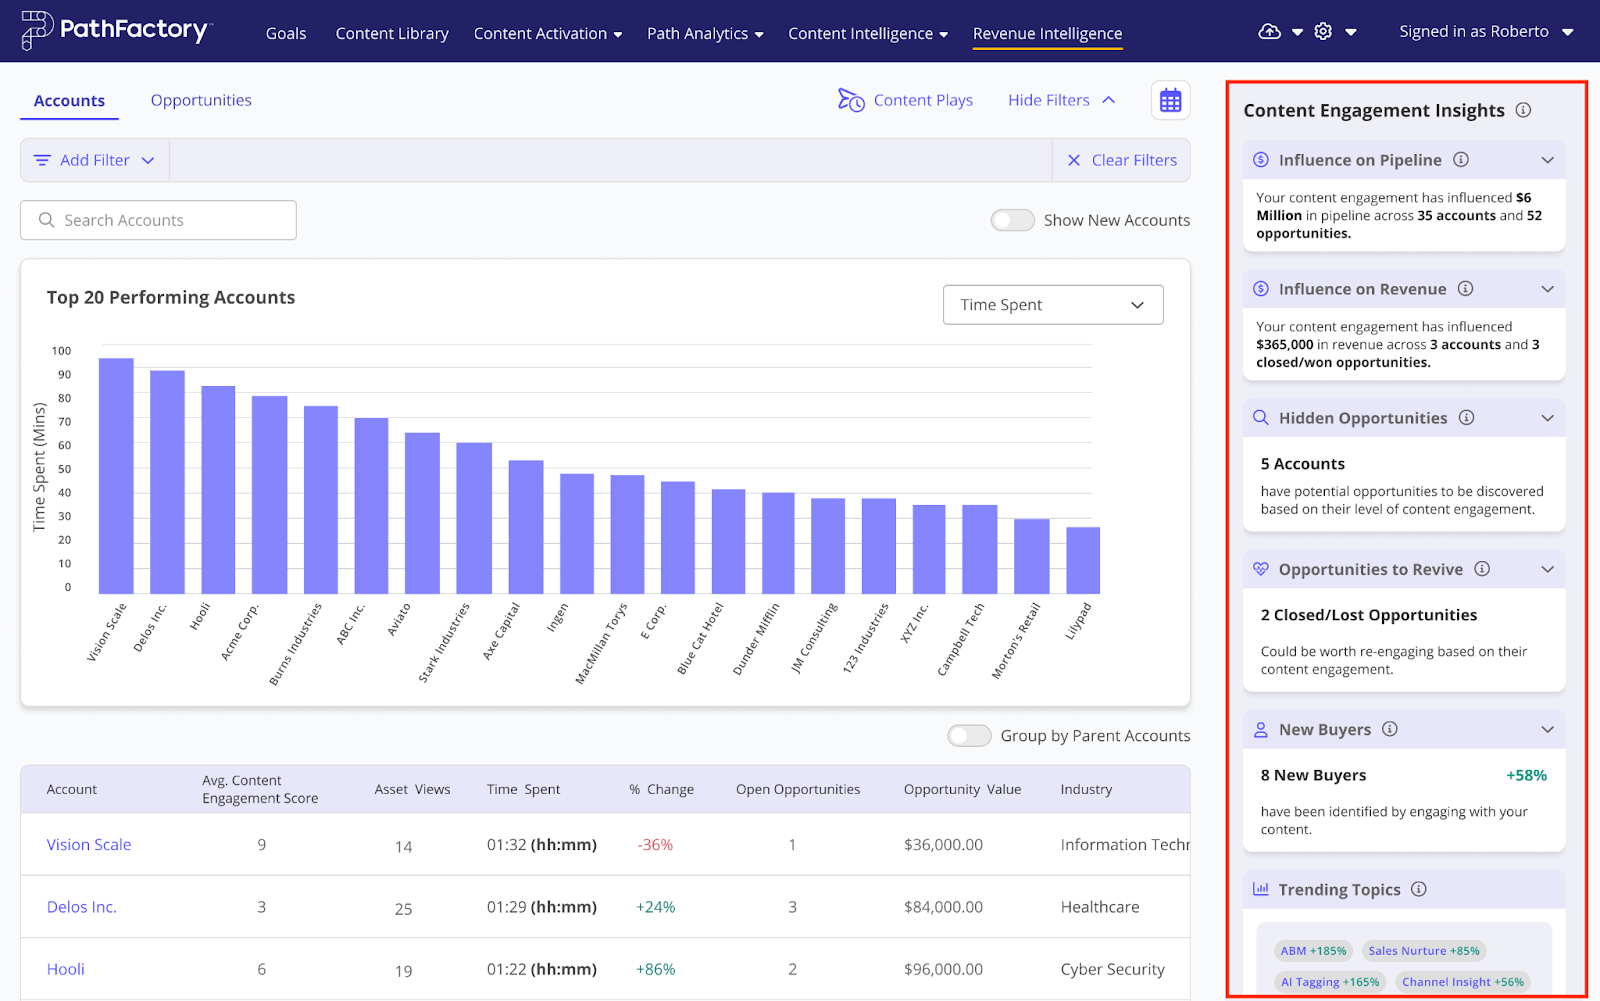
Content Engagement Insights
The Accounts overview dashboard in PathFactory for Revenue Intelligence (PFRI) displays new content influence and attribution metrics on a right side panel labeled Content Engagement Insights. You’ll notice sections for Content Influence on Pipeline, Content Influence on Revenue, Hidden Opportunities, and more. To see details for each section in the panel, expand its associated menu by clicking on its down arrow.
For more information about the new PFRI home page and definitions for the Content Engagement Insights panel, read Understanding Accounts, Opportunities & Buyer Insights Within PathFactory For Revenue Intelligence.
For more information about using Content Plays in PFRI, read How to Share Content Via Email or Sharing Links in PathFactory for Revenue Intelligence.
Buyer Details Dashboard
Release U introduces a Buyer Details dashboard that lets you see the specific content engagement and journey details for individuals engaging in any account.
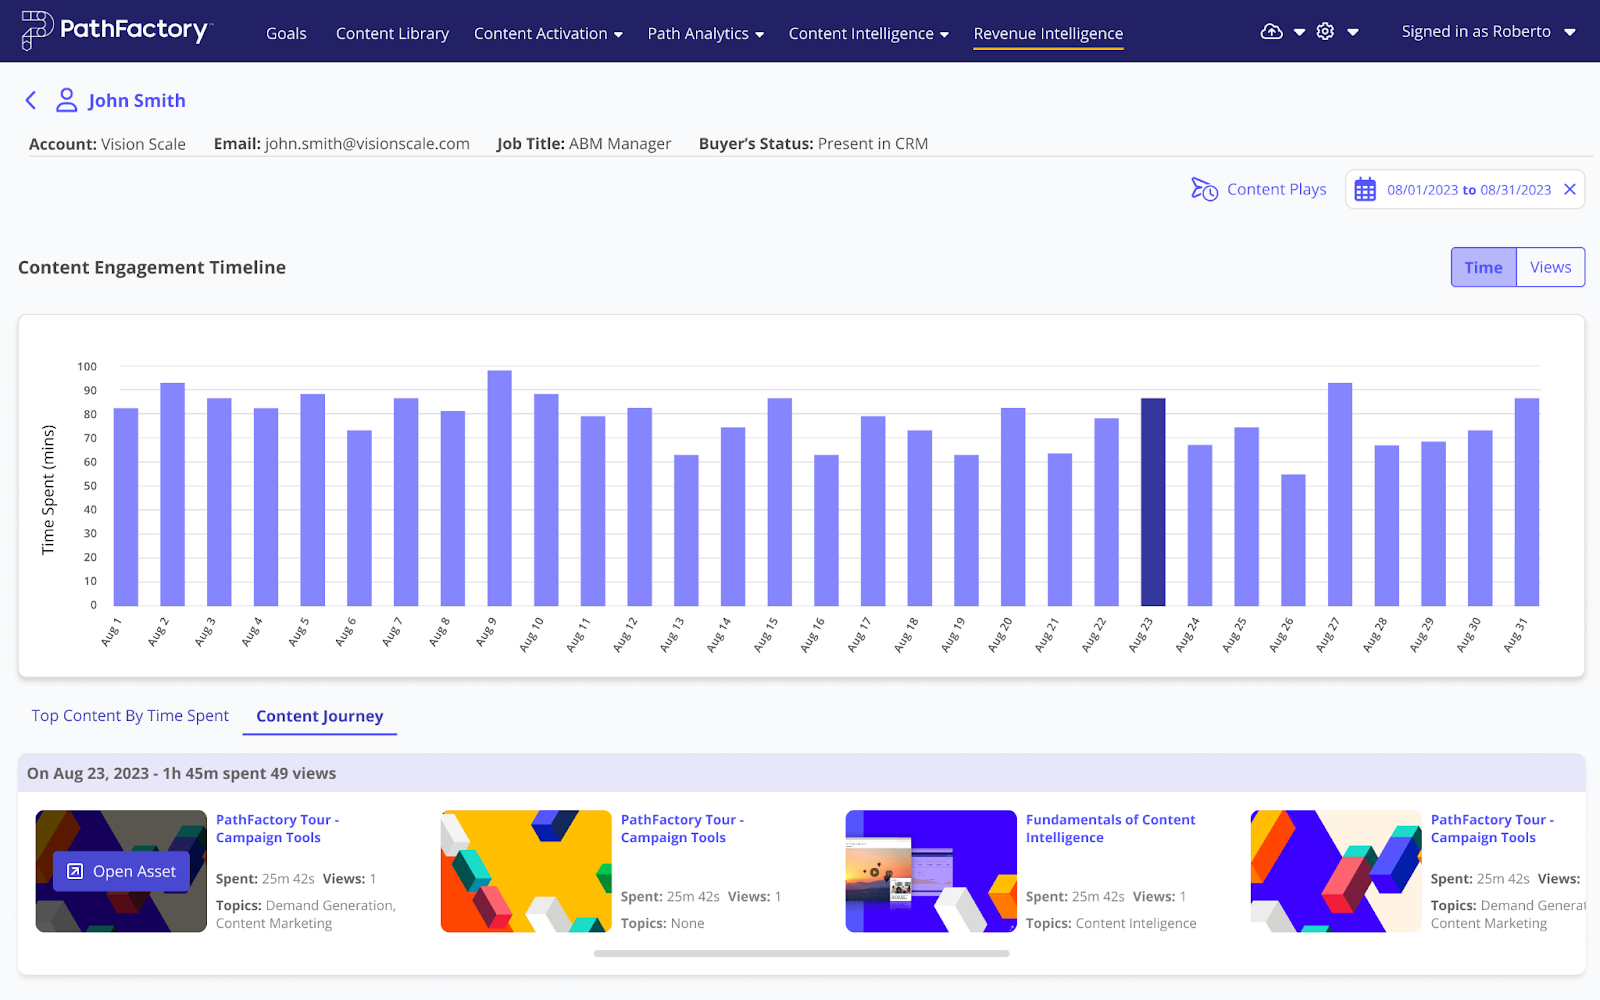
With this new level of engagement insights, marketers and sellers can understand what individual buyers are engaging with to ensure next actions and outreach align to buyer intent, interests and activity.
To find out more about the Buyer Details dashboard, read Understanding Accounts, Opportunities & Buyer Insights Within PathFactory For Revenue Intelligence.
New Templated Experience Landing Page Formatting Features
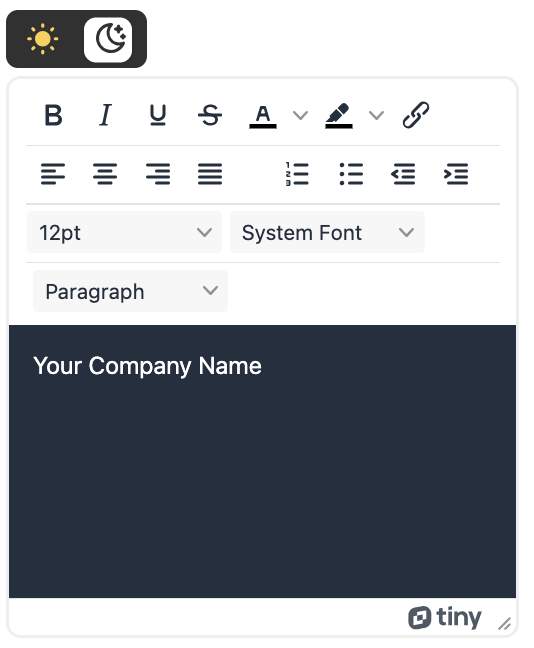
Light And Dark Modes in Tiny Editor
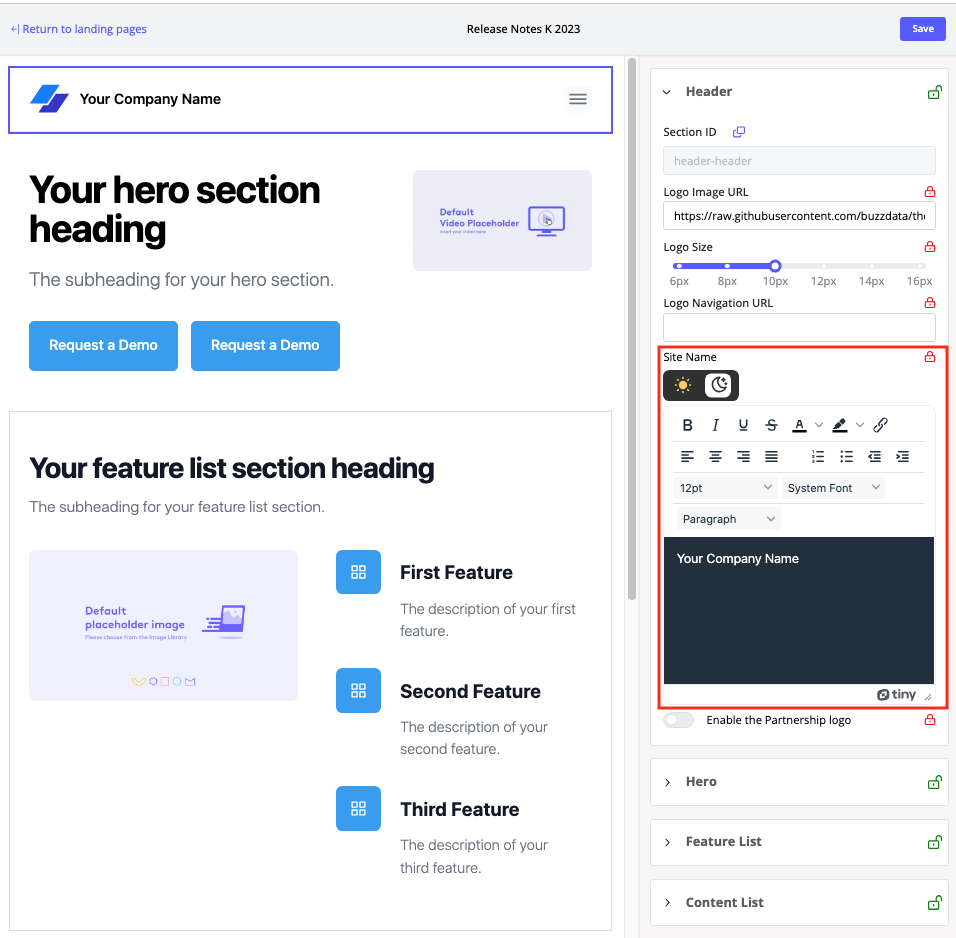
In the editing menus on the Landing Page Setup tab, we have added a toggle to change between light mode and dark mode for the window background color, so that you can switch back and forth between the two settings to accommodate the font color you are working with. To display a dark background in the tiny editor window, select the moon icon. For light mode, select the sun icon.
Below is an example of dark mode for the editing menu in the Header tiny editor.
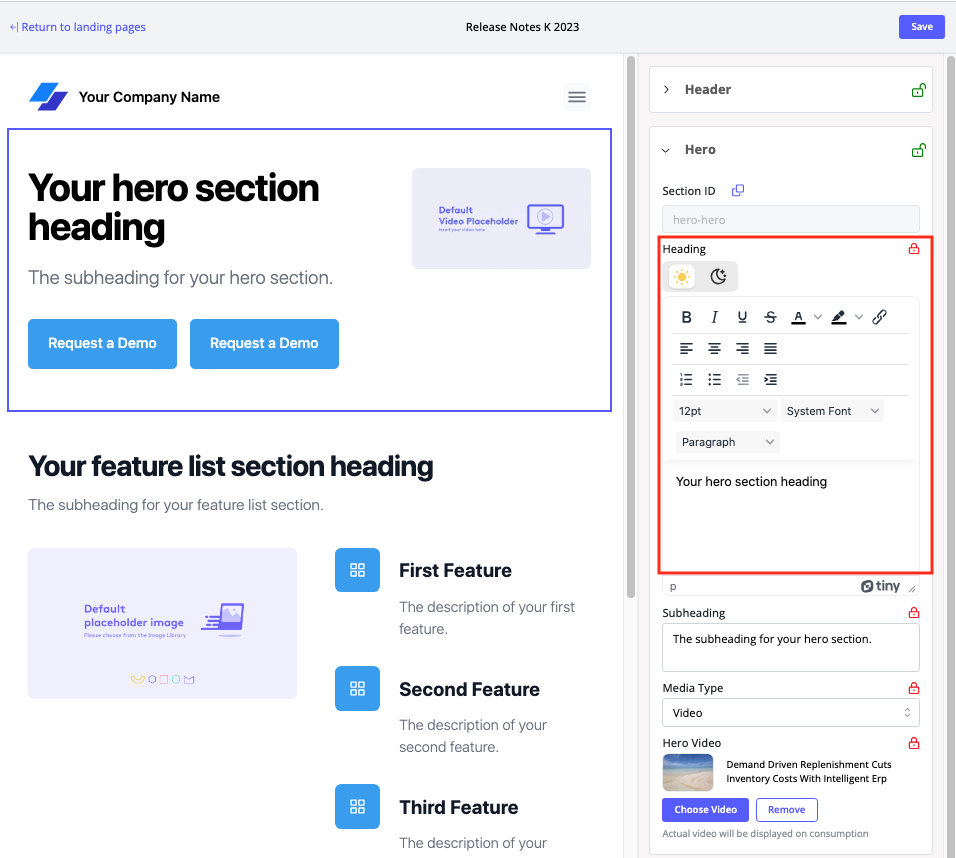
Below is an example of light mode in the Hero section tiny editor.
Open Text Fields Now Available For Custom Pixel Sizing Within Themes and Templated Experiences
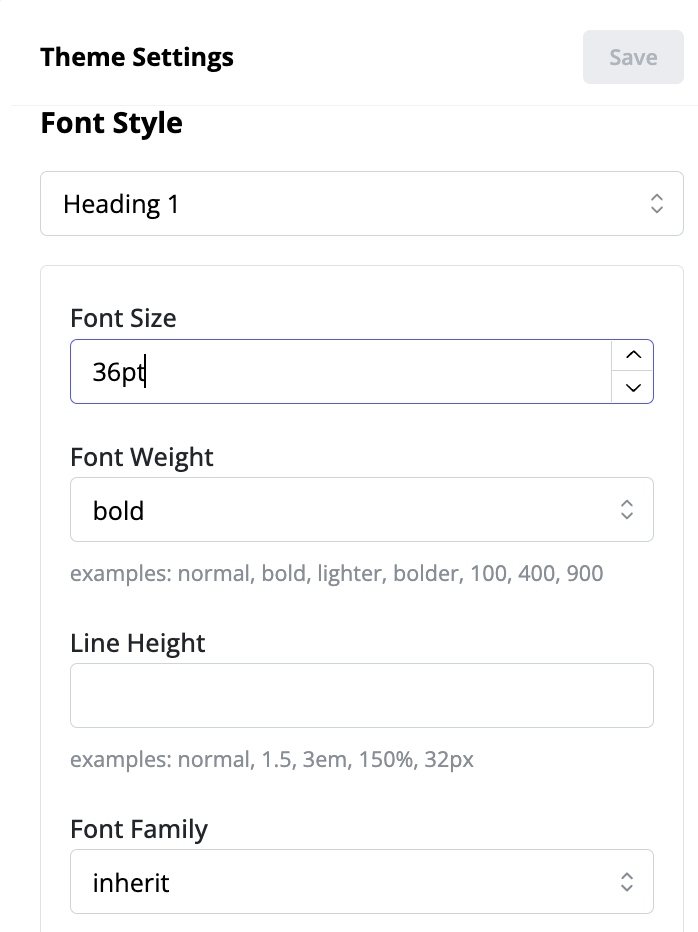
We have added more customization to the menus for editing Theme files, Content Pages and Landing Pages. We have added open text fields to the editing menus, enabling you to enter the exact pixel size and padding you need for your fonts, logos, and images.
You’ll notice the following fields within Theme files, Content Page and Landing Page editing menus. All now have fully customizable pixel size settings instead of a rich text editor:
- Padding
- Logo/icon/image size
- Border radius
- Font size – Theme files only.
- Transparency
Below is a screen capture of the pixel menu in the Theme Settings and Header section editing menu for a Landing Page.
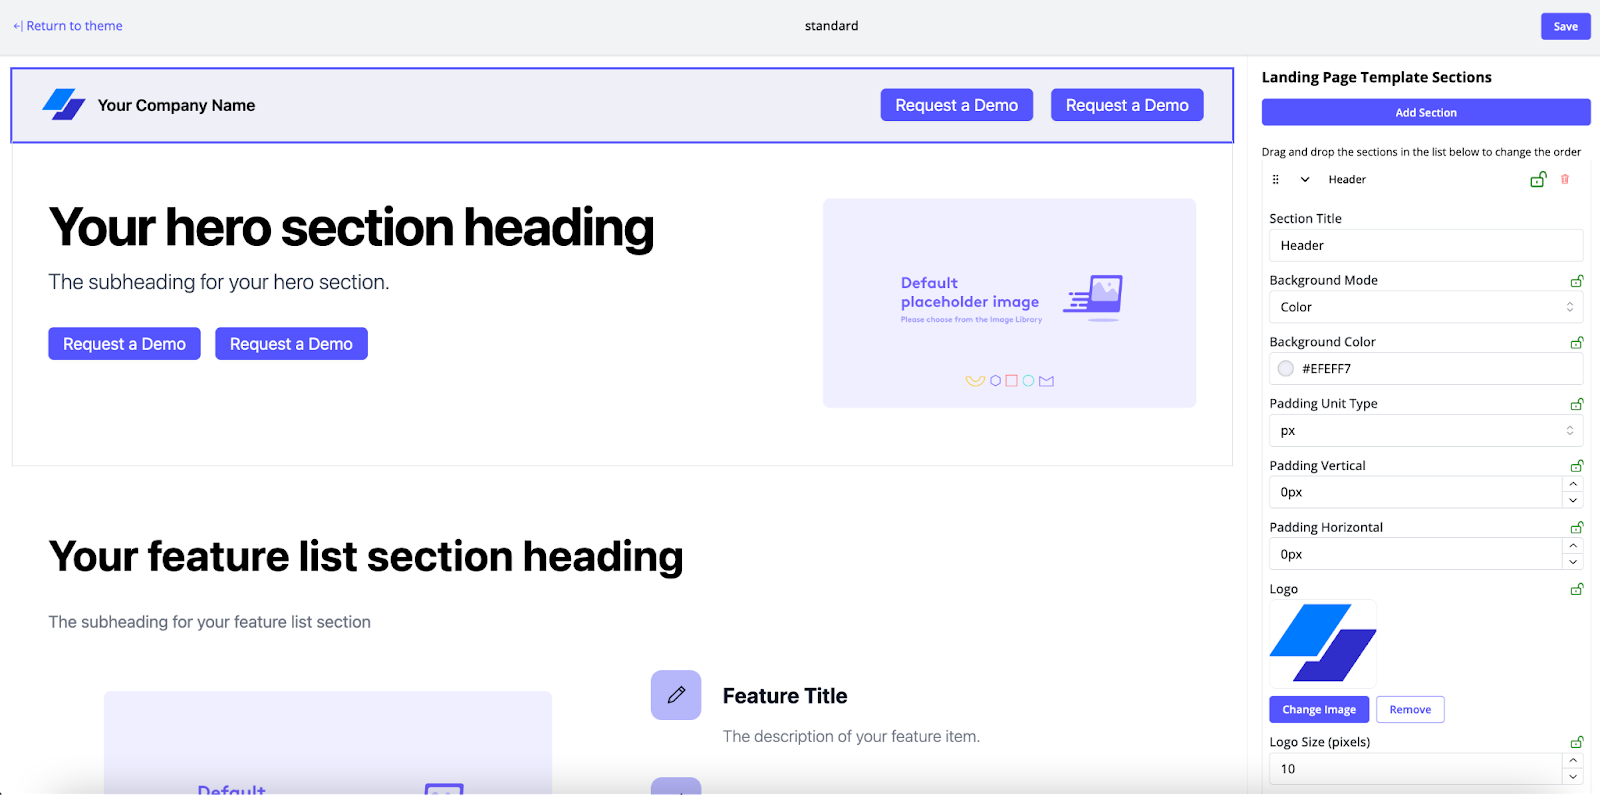
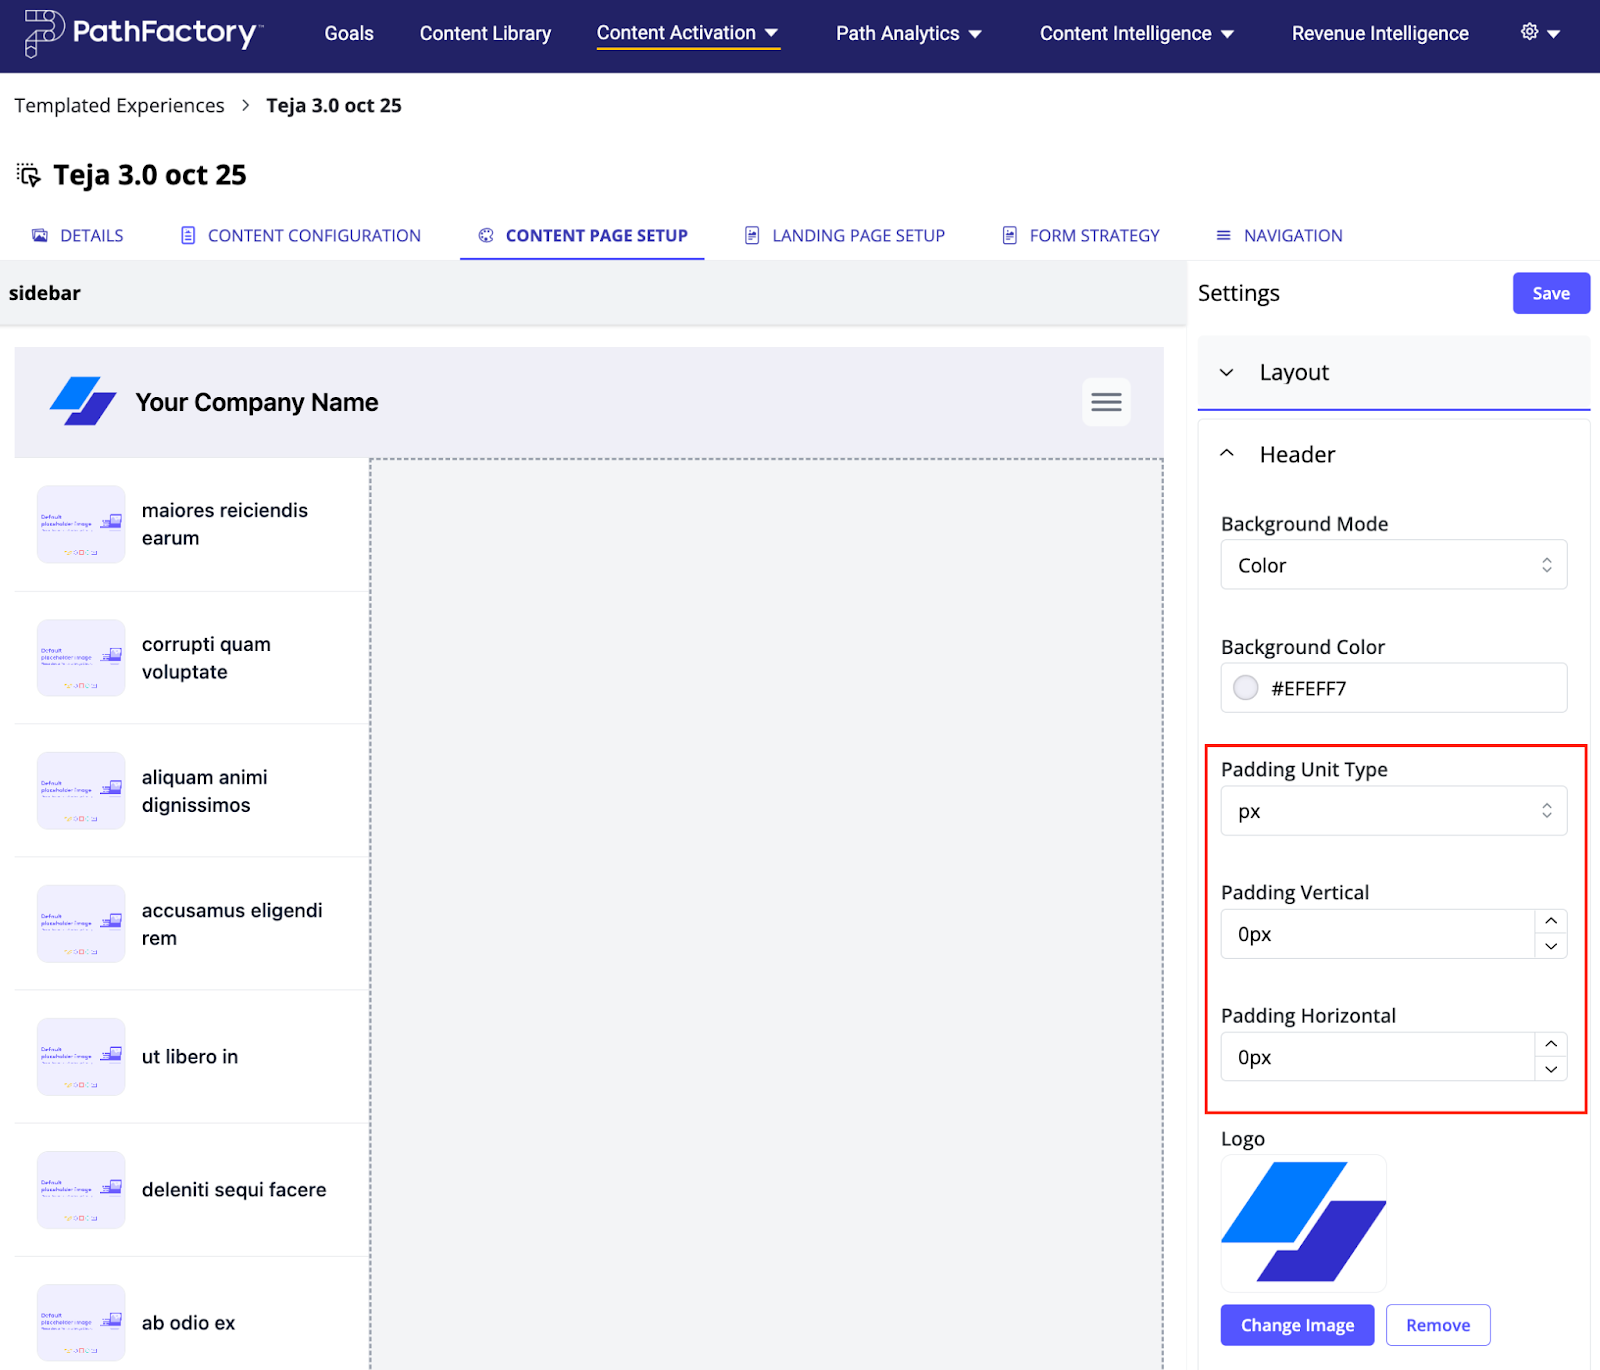
On the Content Page Setup tab, there are pixel settings available when you expand the Layout menu on the right side panel as shown below.
External Code Support for Themes and Templated Experiences
External code enables you to customize the look, feel, and function of your Experiences. These are snippets of HTML or Javascript code that you can insert into your Templated Experiences. Templated Experiences now support external code at the Global, Theme, and Experience level, for customers who have installed Theme V3 or higher.
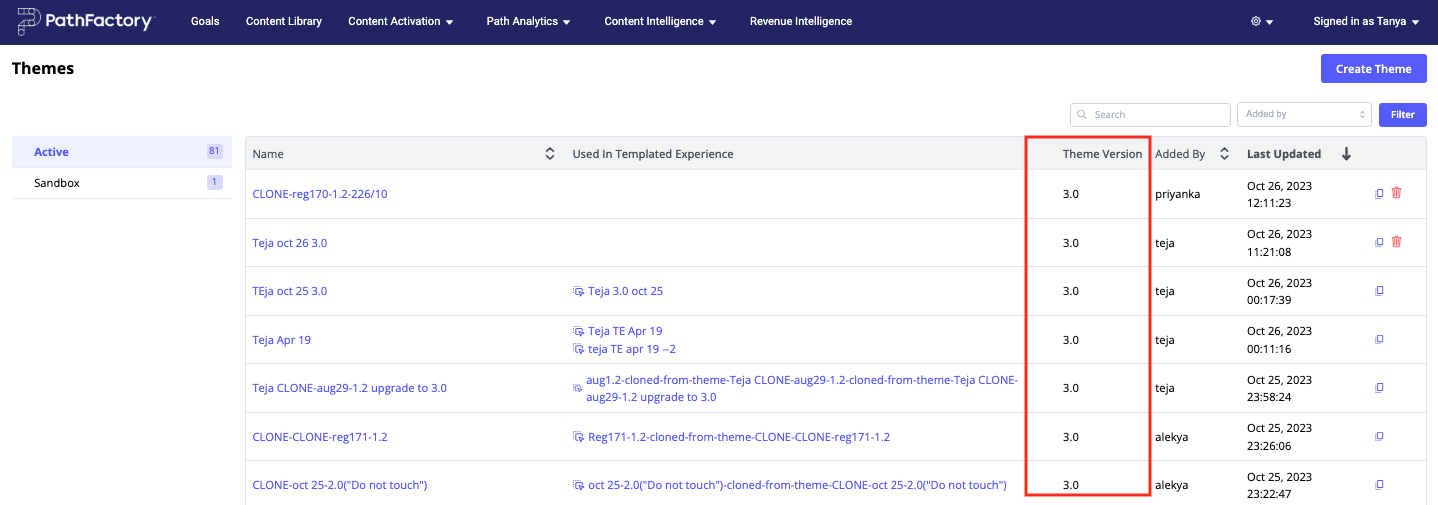
To check which Theme file version you are using, open your list of available Themes by clicking on the gear icon and then selecting Themes. In the window that opens, you’ll see a column labeled Theme Version, as highlighted in the screen capture below.
Note: For a refresher on this functionality, read Using External Code.
Our solution team applies various scripts such as “Drift tracking”, Google Analytics 4 (GA4) analytics tracking, GTM custom events, and segment tracking all through external code. Most of them, like GA4 tracking, happen at a global level whereas some, such as Drift tracking, is experience-specific where certain responses are triggered based on certain actions or events taking place.
How to Add External Code for Templated Experiences
Follow these steps to insert external code into Templated Experiences.
- Open the list of Templated Experiences for your organization.
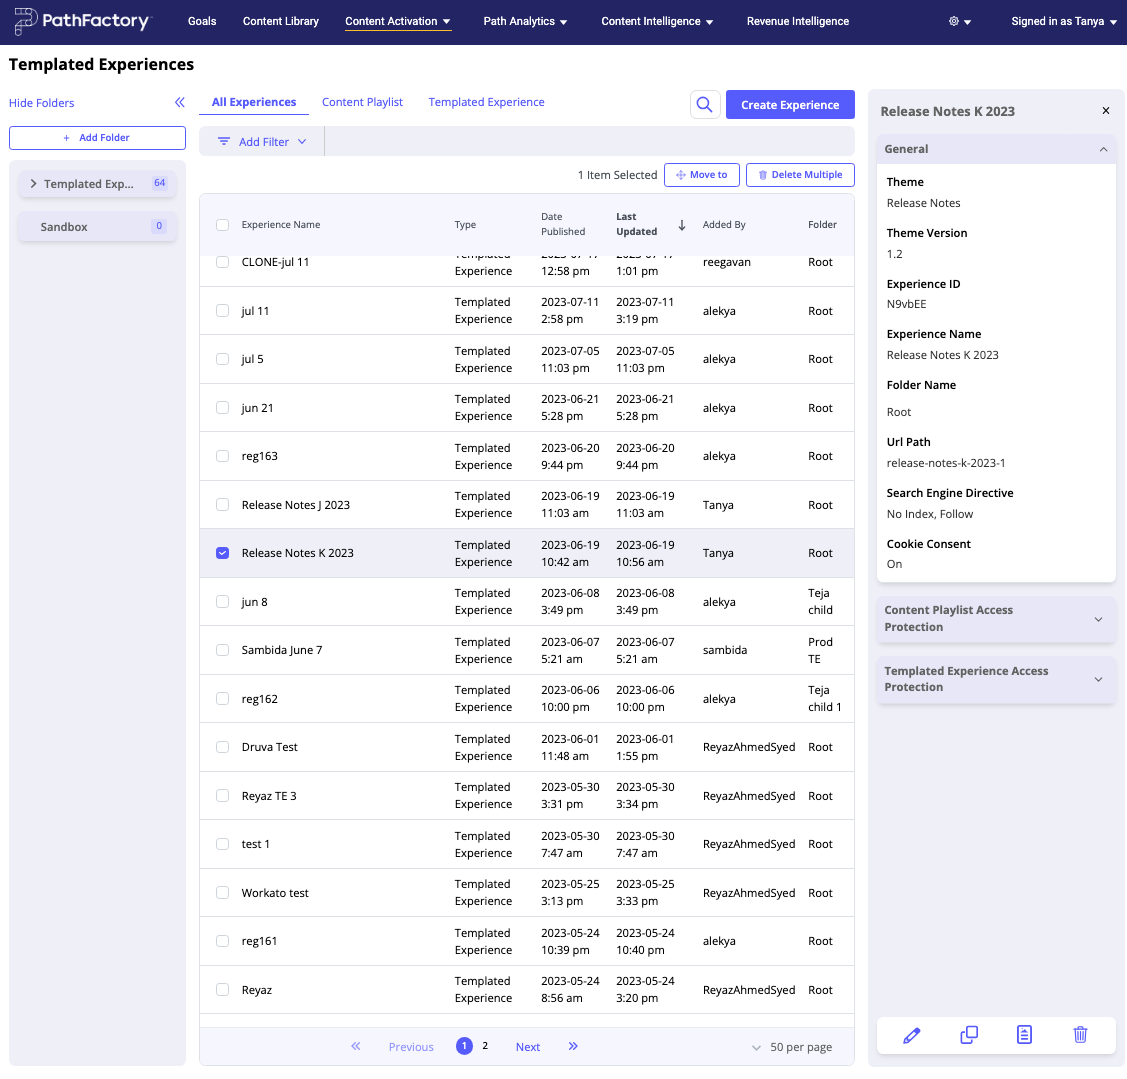
- Activate the checkbox beside the Landing Page you want to edit.
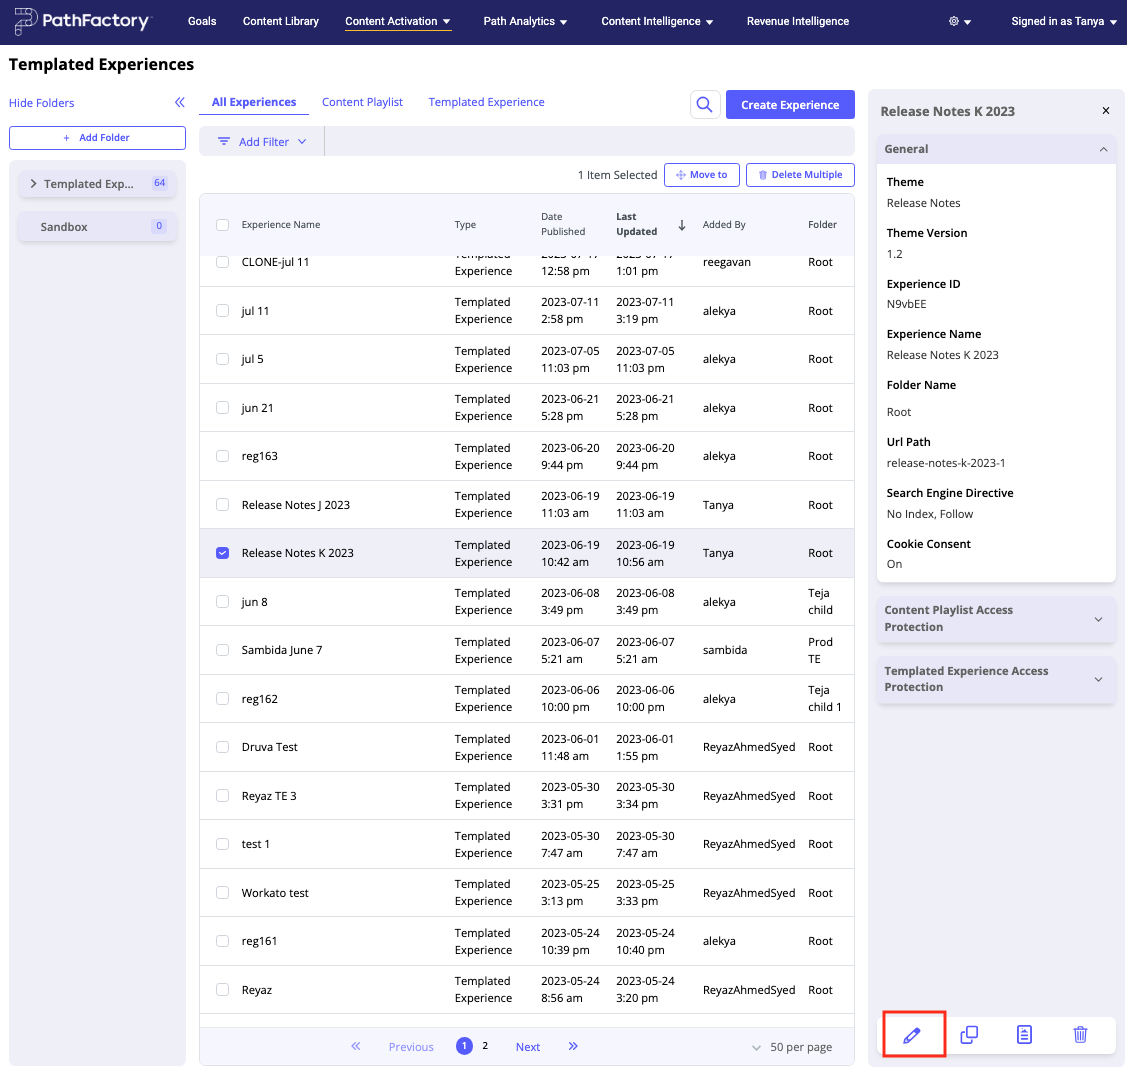
- With the checkbox selected, click the edit icon as highlighted below.
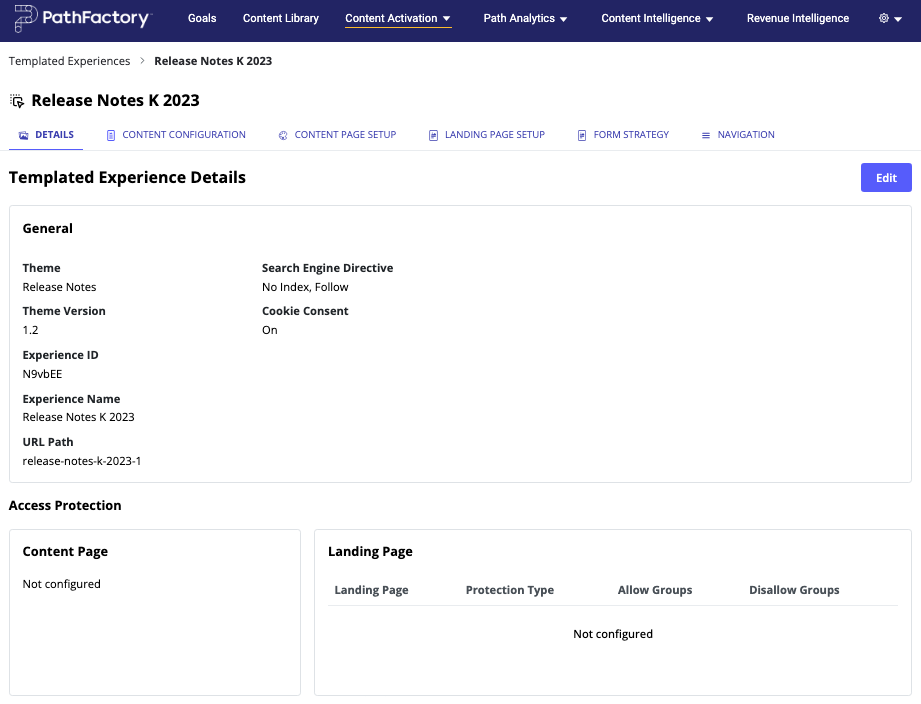
- The Experience opens on the Details tab as shown below.
How to Add External Code to a Landing Page
Follow these instructions to find out how to add external code to a Landing Page.
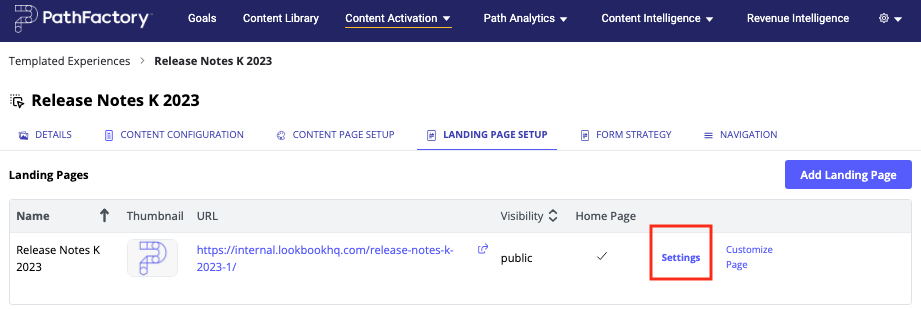
- On the Landing Page Setup tab, click the associated Settings link for the Landing Page you want to customize, as shown below.
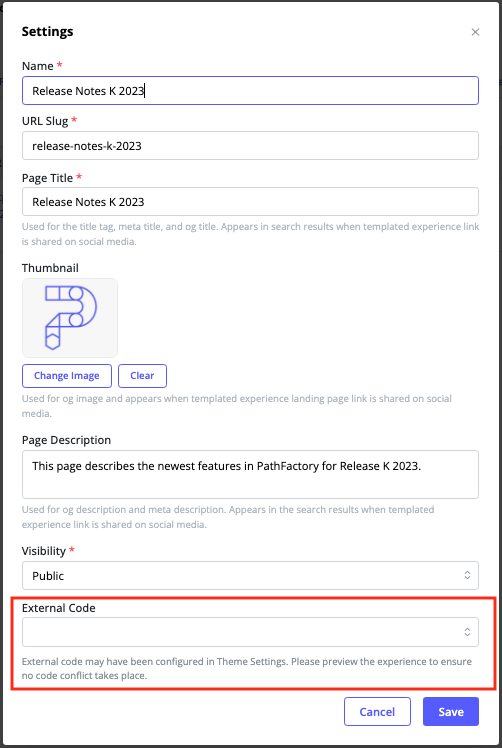
- The Settings menu opens. Enter the external code you wish to add in the field provided, or click the down arrow in the field to reveal a list of available external codes.
Note: Here you can also edit the Templated Experience name, URL slug, Page Title, Thumbnail image, Page Description, and Visibility (public or private).
- Enter or select the external code you wish to use, and then click Save.
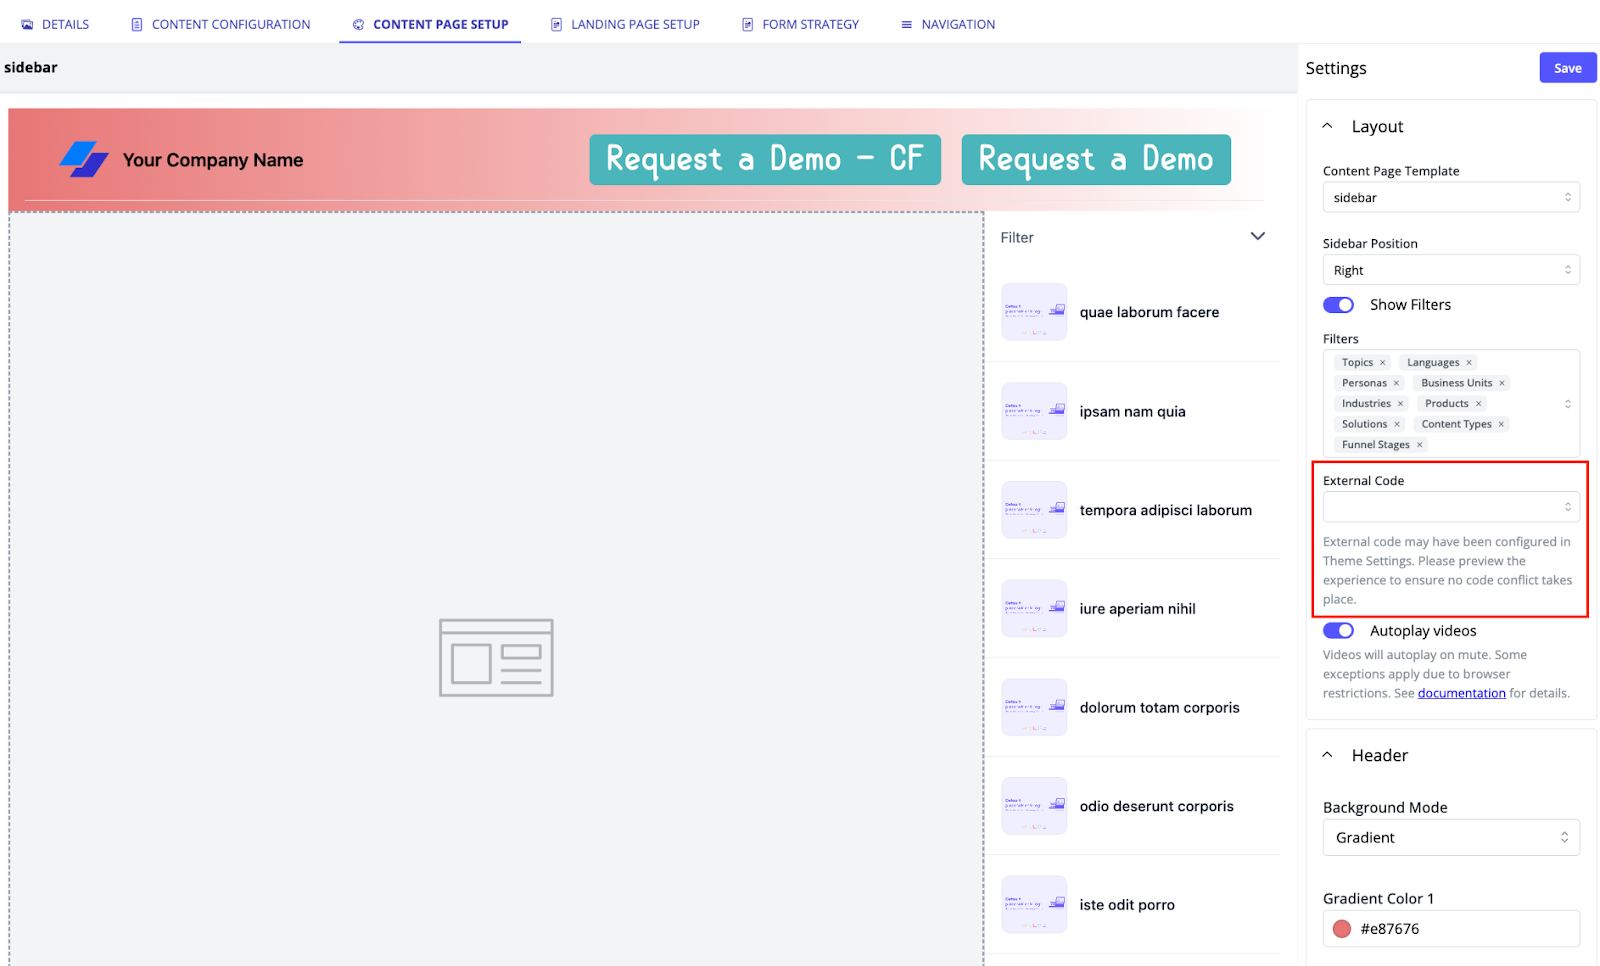
How to Add External Code to a Content Page
To add an external code snippet to track the performance of a Content Page, follow these steps.
- First, ensure there is content configured for your Content Page by visiting the Content Configuration tab.
- Now select the Content Page Setup tab.
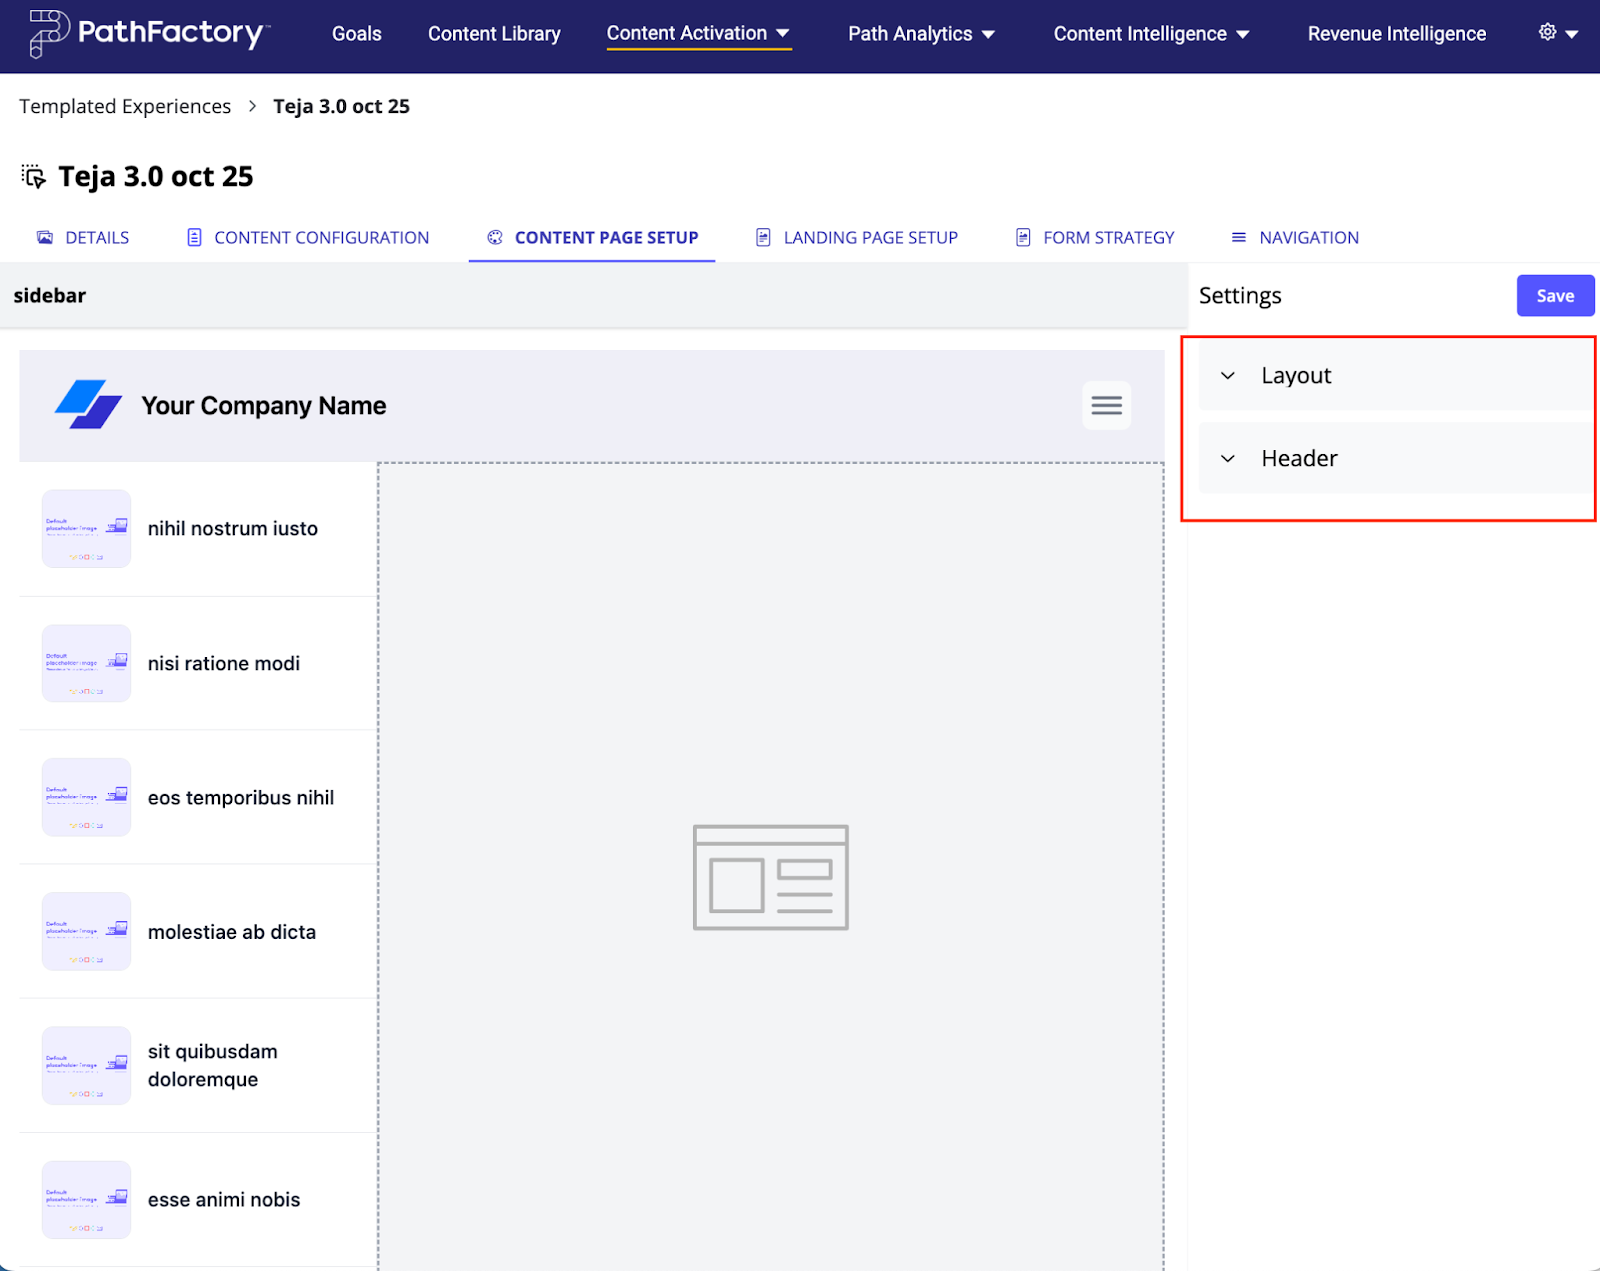
- Expand the Layout menu. You’ll see a dropdown menu for External Code. To select from a list of code available, click on the down arrow.
How to Add External Code to a Theme
Follow these instructions to add the external code to a Theme file. To manage the settings for the External Code, read Using External Code.
- On the main navigation menu, select the gear icon. In the menu that appears, select Themes.
- Select a Theme from the list that appears.
- With the Theme file open on the Theme Settings tab, expand the menu labeled General as shown below.
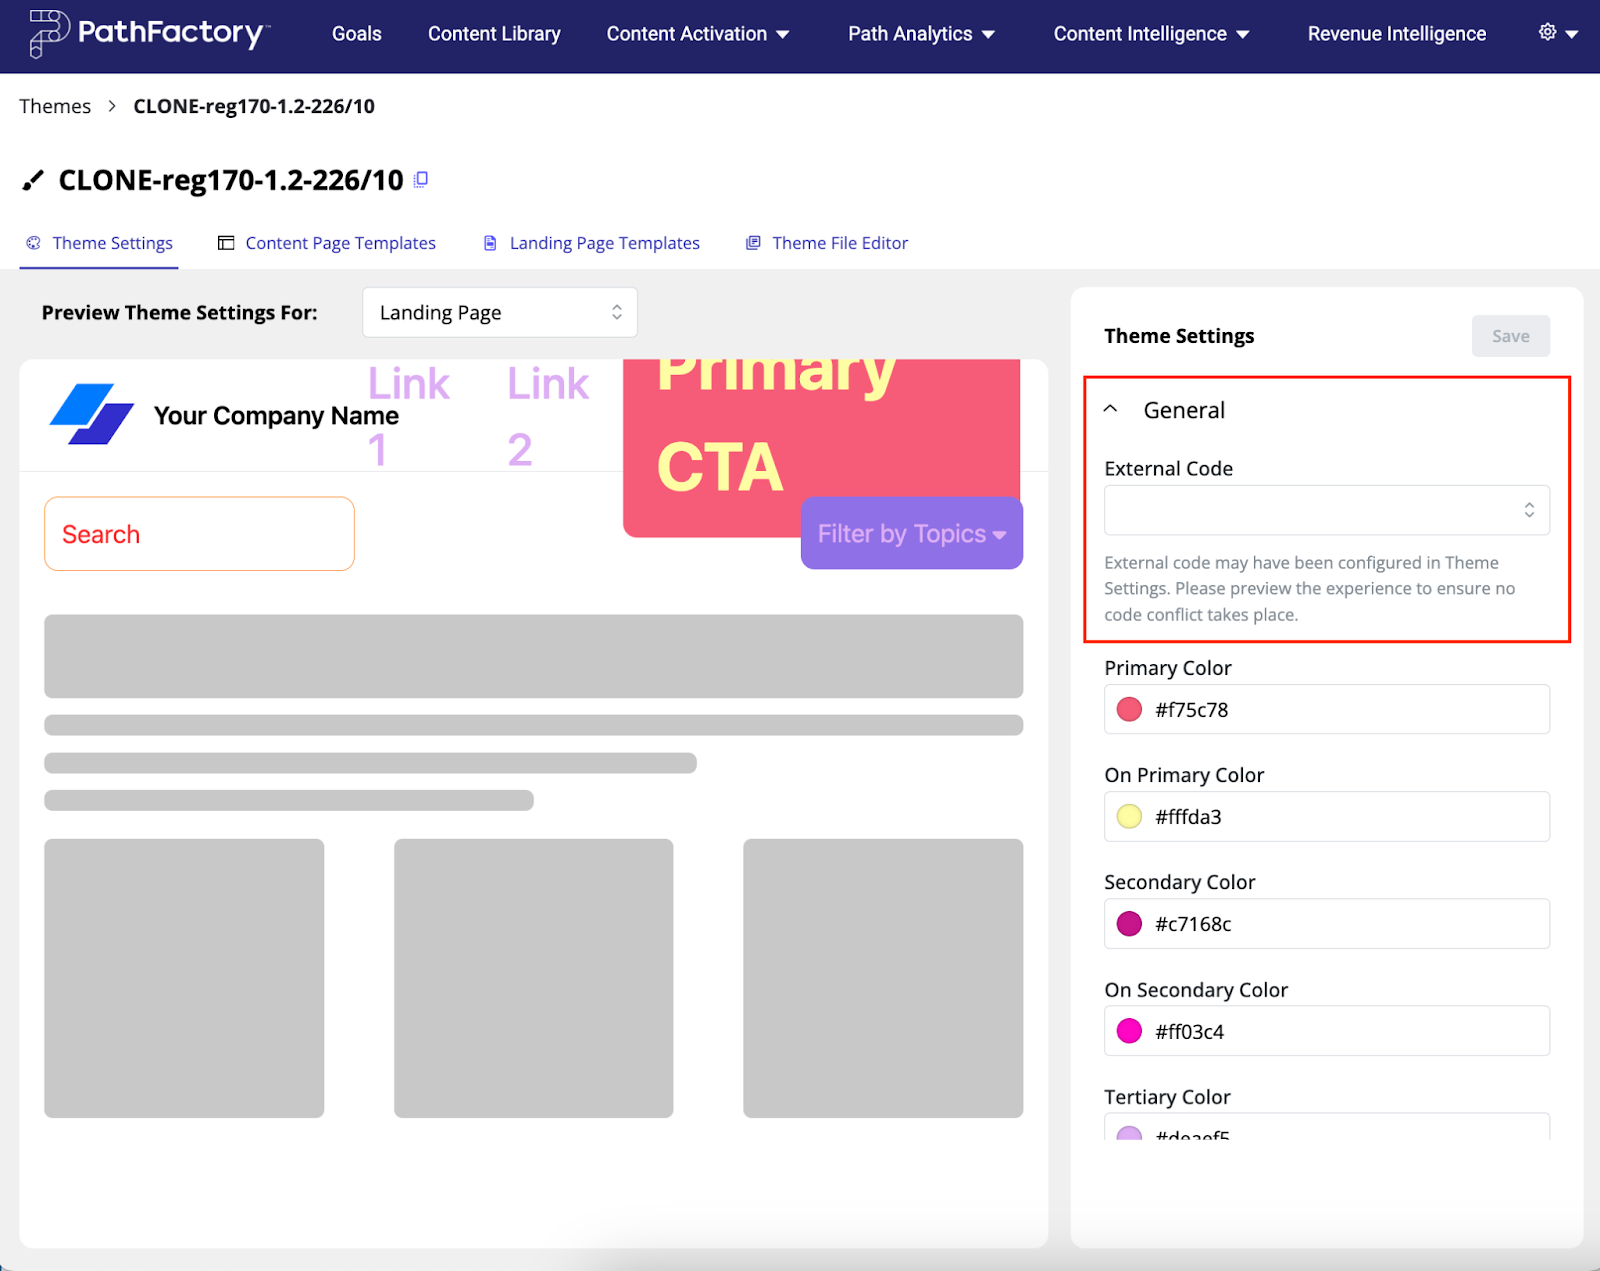
- Here you see a field labeled External Code. You can enter a code you have generated by clicking your mouse pointer in the field and then typing it there. Or, you can click the arrows on the External Code field and select an external code from the list of codes available, as highlighted in the screen capture below.
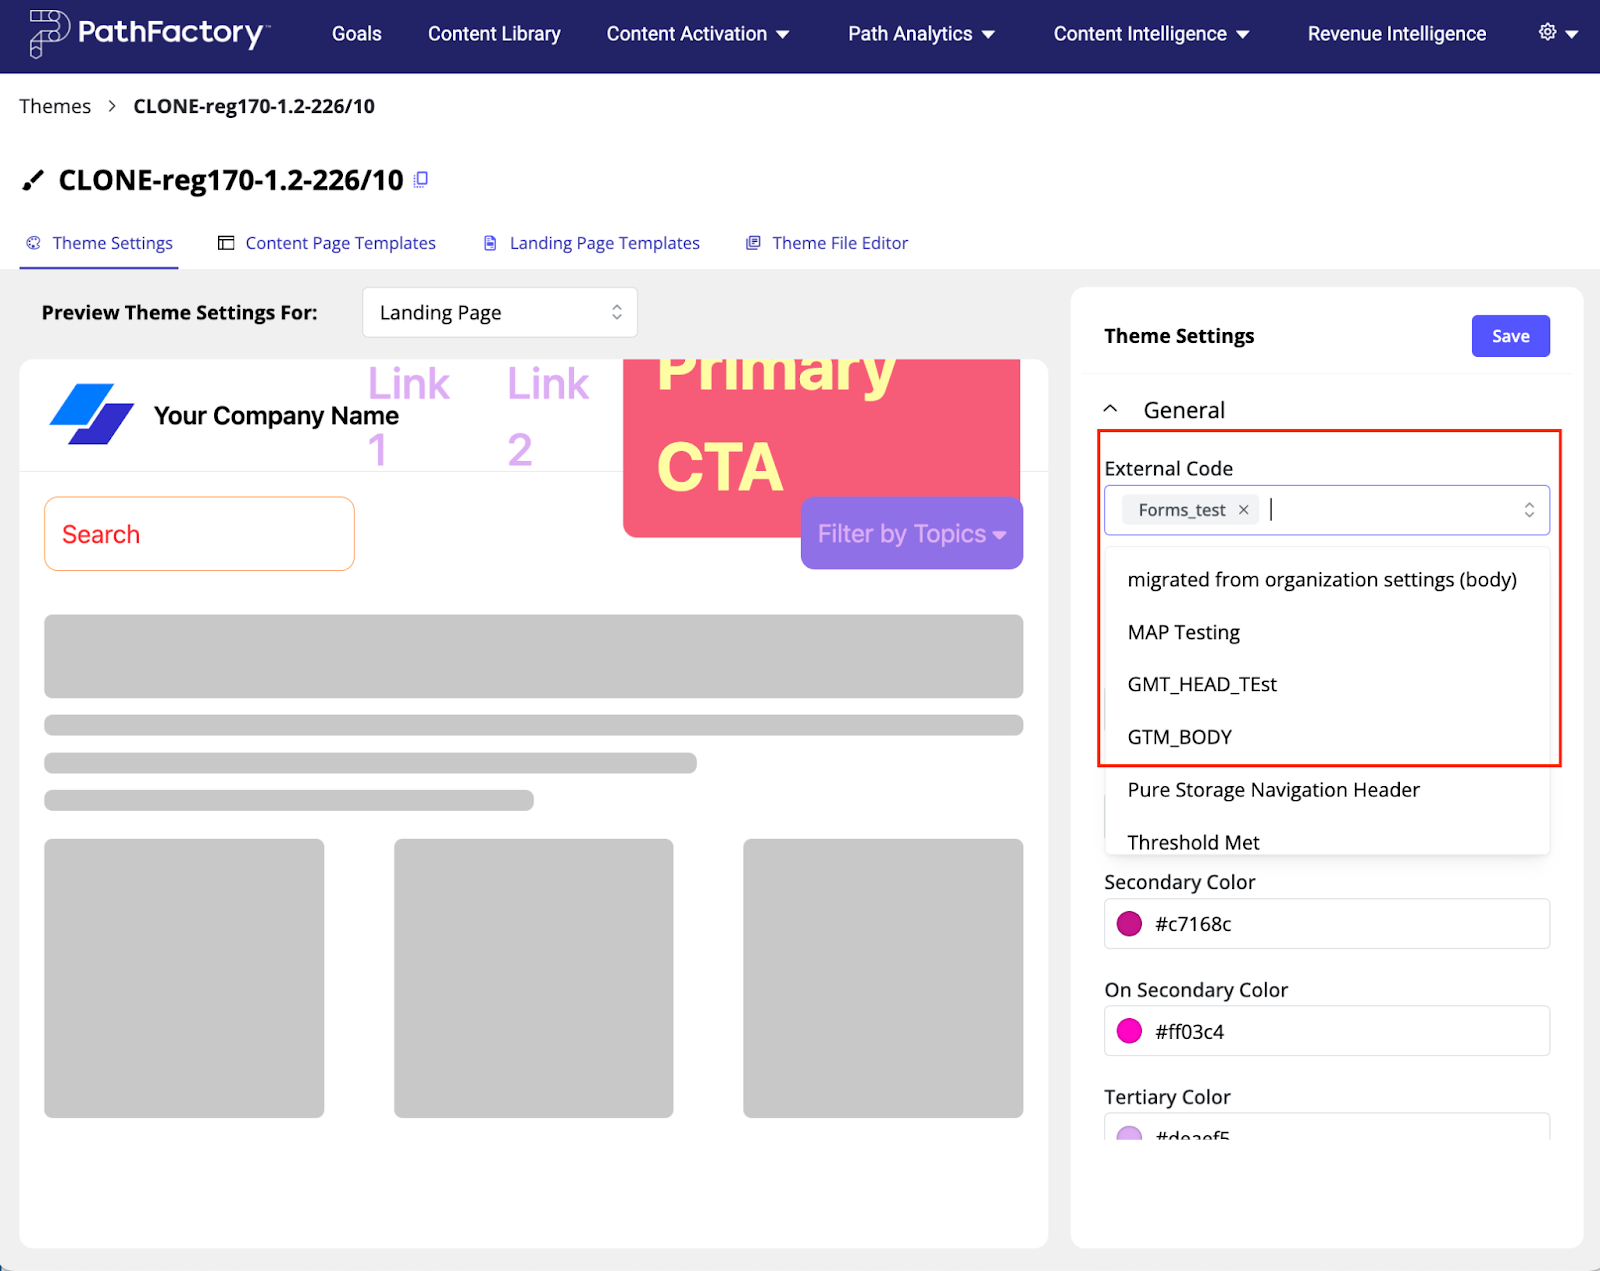
- Select or enter the external code and then click Save.
Views: 85