There are 2 different methods to have a Pardot form appear in a Content Track.
The first involves having the form appear in our Lead Capture frame (ie. adding the form to your Forms Library), while the second entails adding the form to PathFactory as an asset.
Method 1: Using a Pardot Form Landing Page
This method describes how to use HTML to embed Pardot form in a content track. By doing this, you are adding visitor information to your Pardot metrics and analytics that you can use to target your visitors. For example, you can create a Nurture campaign for specific market segments.
For this method, you will be creating the form in Pardot, and then adding it to PathFactory.
|
Warning
|
When using an external form in PathFactory you will need to add a PathFactory Capture Tag to your form confirmation page. This will ensure that PathFactory receives the form submission data and is able to identify the visitor. |
- As you are creating the form in Pardot, you’ll go through those steps in Pardot, and then on the Thank you Content tab, click on the code snippet icon on the right most corner, and then paste the following code there.
<script id="lookbook-capture-tag" src="https://app.cdn.lookbookhq.com/libraries/capture/capture.js" data-email="%%email%%"></script>
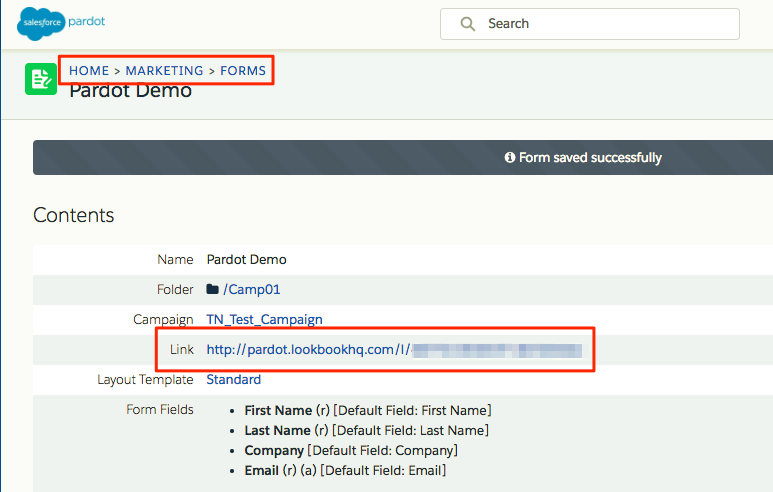
2. Now you have a form in Pardot that you can add to PathFactory. Copy the URL of the form (automatically created by Pardot). See screen capture below.
3. Log in to your PathFactory instance.
4. Click the Gear icon on the top right of the screen and then select Forms.

5. On the screen that appears, click +Add Form.

6. In the popup window, enter a name for your new form, and then click Add Form.

7. Now you see a right panel to finish configuring your new form. Notice the Form Type section on the panel.

8. Hover your mouse over the Form Type, and in the drop down list that appears, select Custom HTML. Then click Save.

9. The panel changes to show an option for Custom HTML. Hover your mouse over this option and then click + Add Custom HTML.

10. Copy the snippet below, and paste it into a PathFactory form as Custom HTML, replacing the URL in bold text below with your Pardot secure form URL:
<iframe src="https://go.pardot.com/l/00000/2020-05-13/0000dl" width="100%" height="100%" type="text/html" frameborder="0" allowTransparency="true" style="border: 0"></iframe>
<script>
    window.addEventListener("message", function(event){
        console.log(event);
        if(event.data.lookbookExternalForm){
            window.parent.postMessage(event.data, "*");
        }
        return true;
    });
</script>
Example
1. Copy the URL from your Pardot form.
2. Add your form to the Forms Library and select Custom HTML for Form Type.

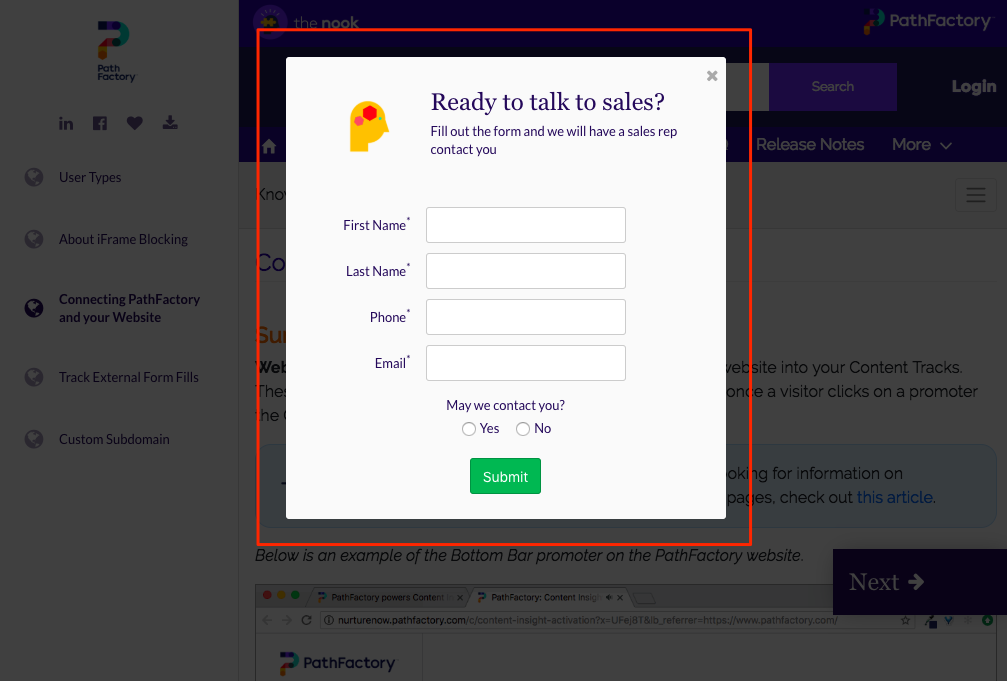
Your form will appear inside our Lead Capture frame on top of the Content Track, as shown below.
Method 2: Embedding the Form as an Asset
The other option is to add the landing page/webpage where the Pardot form is hosted as an asset, first by uploading to the Content Library, and then adding it to the content track.
Upload your Pardot form as a content asset using the form’s URL as shown below.
Example
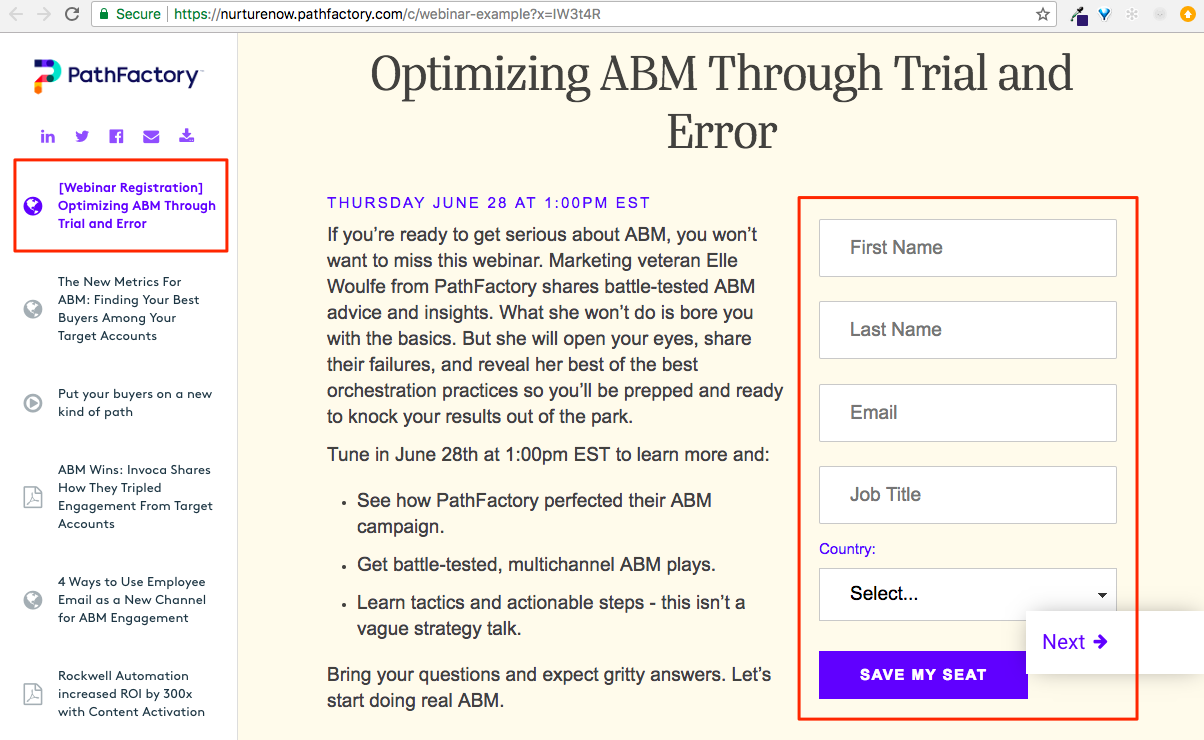
In this example, you have added your content asset form to the Content Track, and your form appears as an asset within the Content Track.
Views: 166