Segments give you the ability to identify and group visitors based on categories you define as significant. Each segment is made up of one or more rules. Each rule lets you define a category you want visitors to match with. You can add multiple values to each category. If you do so, those values have an or relationship. For example, if you create a rule for city equals Toronto Boston, it will match with visitors from Toronto or Boston.
If you create multiple rules, those rules have an and relationship, meaning a visitor will only match if it satisfies all rules. For example, if you create a rule for city equals Toronto and a rule for revenue range equals $5M – $10M, the account must match both.
Once you’ve created your segments, you’ll use them with routes to direct visitors to audience-specific content that is most likely to be of interest to them.
All non-geographic account identification within PathFactory is provided by 6sense by default. However, mutual customers of both PathFactory and Demandbase can have this information provided by Demandbase; contact your Customer Success Manager if you’re interested in setting this up.
For a full explanation of all available segment categories, read Introduction to segment categories.
This article covers:
- How to create a segment using standard rules
- How to create a segment with 6sense categories (for 6sense customers)
- How to create a segment using a Demandbase watchlist (for Demandbase customers)
- How to edit, copy, or delete a segment
Create a Segment
- Navigate to the gear on the top right of the screen, and then select Personalization in the menu that appears.
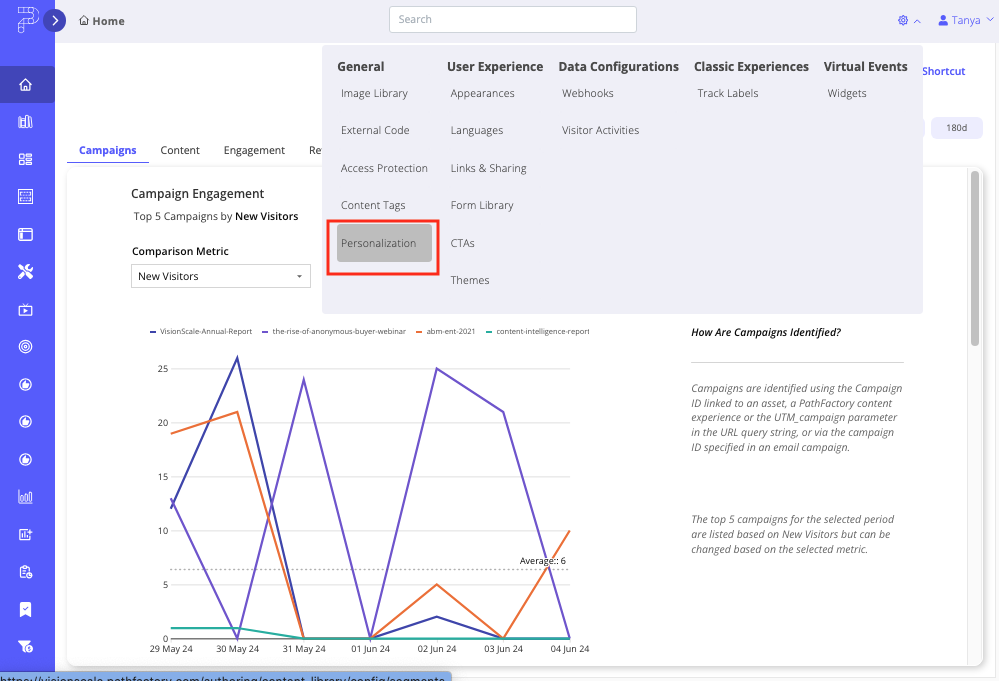
Personalization menu - In the top right of the menu that appears, select + Create Segment.
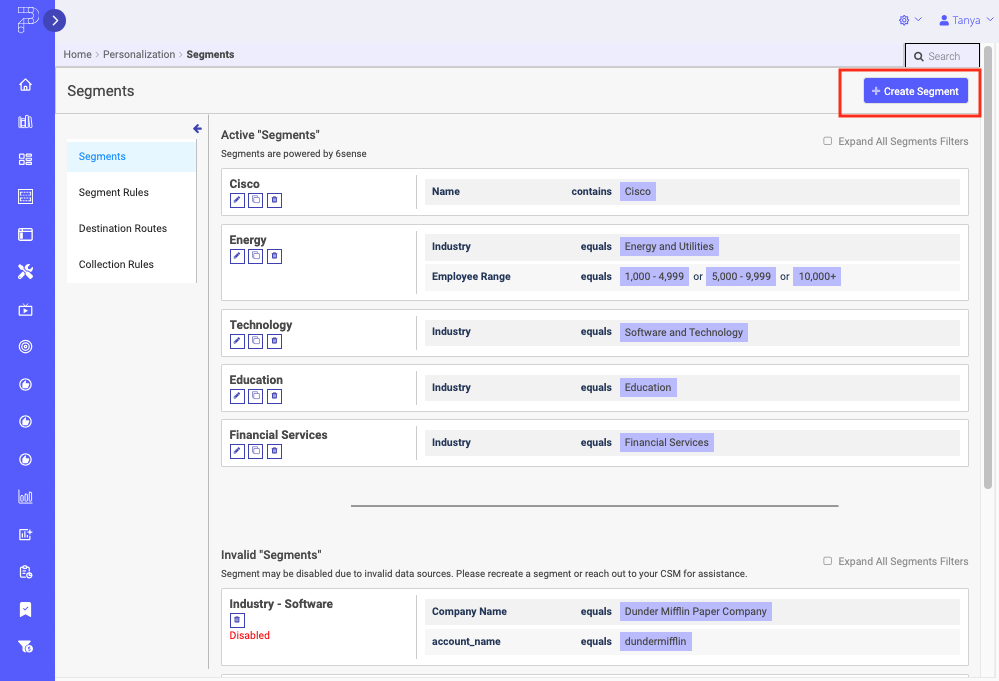
Create Segment - Enter a name for your segment. If you want to duplicate an existing segment, select Clone an Existing and choose the segment.
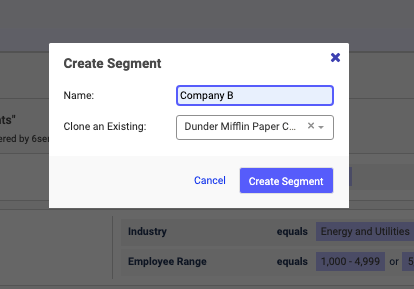
Create Segment popup menu - Select Create Segment to proceed with its configuration, or select Cancel if you want to exit without saving.
- You’ll now see the new segment in the list of segments. Note that you may have to scroll down the page to see it.
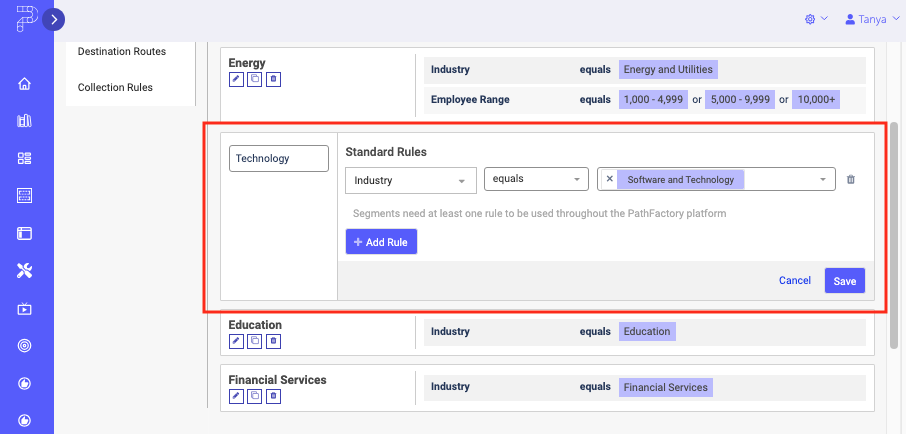
Technology Segment - Select + Add Rule.
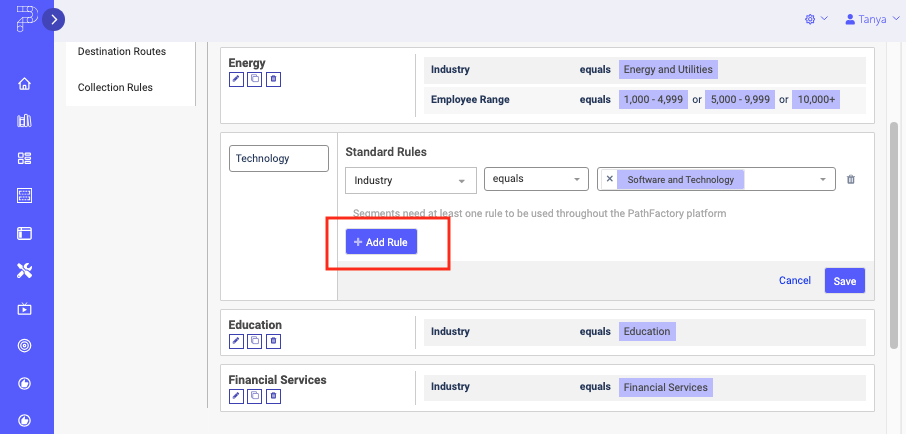
Add Rule for a Segment - Add a query parameter choose the category you wish to segment by. For example, if you want to target buyers who live in Central America, first select Region from the rules dropdown menu.

Region Segment Rule - Select Operator and choose the option that matches your intent. Different categories have different operators, but in general the following options are available:
- equals to include visitors who match the specified values
- does not equal to exclude visitors who match the specified values
- greater than for numeric categories
- less than for numeric categories
- contains to include visitors who at least partially match the specified values
- In Values, enter the values for your rule. After entering each value, press Enter.
- If you want to add another rule to your segment select + Add Rule. Repeat steps 6 through 8 for each rule you add to the segment.
- Continue adding rules to the segment until you’re happy. When you’re done, select Save.
Create a Segment Using 6sense Categories
If you are a customer who also uses 6sense, you have access to two additional segment options: 6sense Segment and Buying Stage.
| Note | This feature is only available to customers who are also 6sense customers. For more information, contact your CSM. |
The 6sense categories are highlighted in the screen capture below.
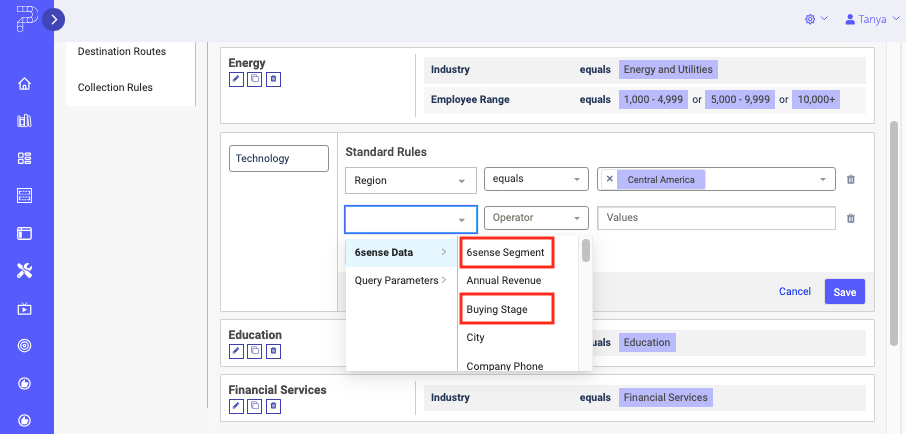
6sense Segment enables you to view the segment groups you have built within the 6sense platform from within PathFactory. You can then use these segments to route your traffic to specific PathFactory Experiences. To do this, ensure that the 6sense segment name matches exactly the same as in the Category list (the one on the farthest left side) in PathFactory.
Buying Stage enables you to set the segment to correspond with the buying stage you have defined in 6sense, allowing for more targeted and relevant engagement.
Create a Segment Using Demandbase Data
Segments using Demandbase data are created the same way as normal segments. The only difference is the Category matches the Demandbase watchlist category.
| Note | This feature is only available to clients who are also Demandbase customers. For more information, contact a support representative. |
- Once you have created a new segment in Demandbase, within PathFactory create a segment and then select Add Rule.
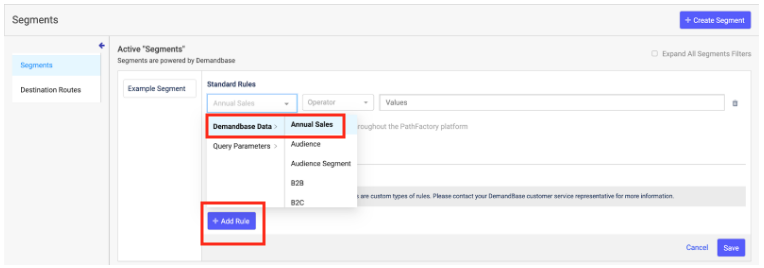
Demandbase segments - In the Category dropdown list, select the Demandbase segment. If you need to confirm these, contact your Demandbase support representative.
- Finish composing the rest of the rule by adding an operator and a value.
- When you are finished composing the rule, save your changes by clicking Save, or exit without saving by clicking Cancel.
Edit, Copy, or Delete a Segment
You can edit, copy, or delete an existing segment using the icons under the segment’s name.
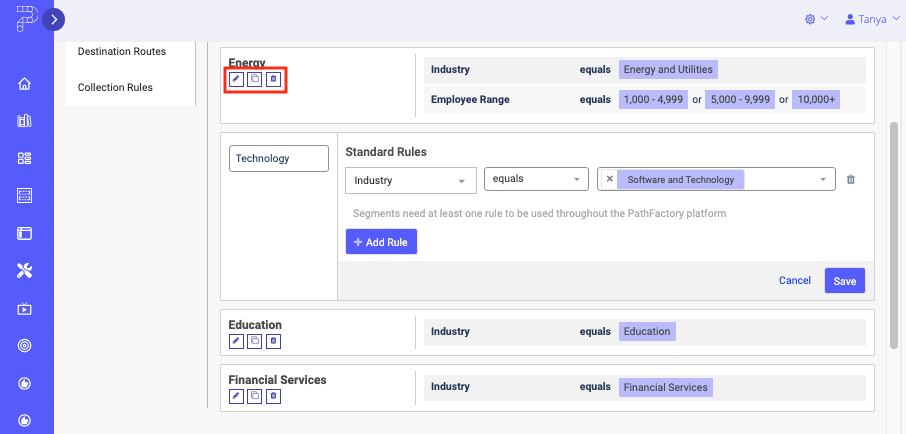
To edit a segment, select Pencil. Edit the segment, and select Save when you’re done.
To copy a segment, select Copy. Enter a name for the new segment. All the existing rules from the segment you copied will be included in the new segment.
To delete a segment, select the Trash can. In the confirmation dialog, select Remove Segment.
