Overview
You can update one, a few, or all existing contents in the Content Library.
How to Download a List of Content from the Content Library
To download a CSV file listing all content in your Content Library, follow these steps.
Access your Content Library and click the download button as shown in the screen capture below. Clicking the download button will automatically download a CSV file to your computer, listing all content assets currently residing in your Content Library.

The downloaded CSV file has the exact format as the CSV bulk upload template. An example of a CSV file is shown below.

- First, download your Content Library to a CSV file.
- After you’ve made your edits to the CSV file, return to the Content Library.
- Click Add Assets.

Add Assets - On the menu that opens, select Bulk Upload Using CSV File.

Bulk Upload Using CSV File option - On the menu that opens, add your CSV file by clicking Browse and then following the prompts to locate the file on your computer. On this menu make sure you activate the Overwrite all duplicate assets checkbox, highlighted in the screen capture below.

Add Assets via CSV menu
|
Warning
|
If a piece of content has fields which are filled out in the Content Library, but you then delete these values from the fields in the CSV file, once you reupload the CSV file those fields will be overwritten with the null values. If you don’t want to accidentally make changes to content you’re not editing with the CSV process, delete them from the CSV file before you edit and reupload it. Content cannot be deleted from the Content Library by deleting it from the CSV file. |
How to Upload Content Using the CSV Template
- In the Content Library, click Add Assets.
Add Assets Add Content button
- On the menu that opens, select the Bulk Upload Using CSV File option.
Bulk Upload - Next, select the link for the Content Template (.csv), as highlighted in the screen capture below. After you click the link, a copy of the CSV upload template is automatically downloaded onto your computer.

CSV Template Link - On your computer, find and open the CSV template and fill out the rows with your content assets.
Note
See below for tips on formatting your CSV template. CSV file example - Save your CSV file.
Note
Ensure that the file is saved as a CSV. 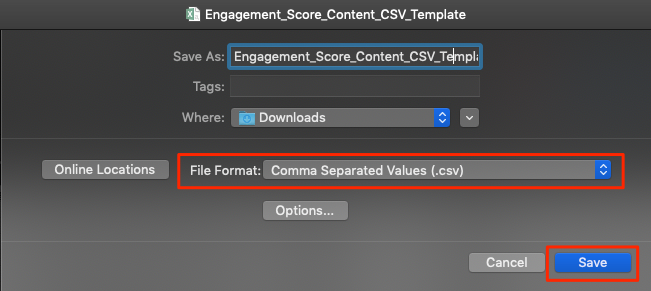 File save as
 - Return to the PathFactory upload page, click Browse. Also ensure you have selected the checkbox Replace duplicate content assets.

Add Assets Browse button - Follow the prompts to located and select the CSV file to which you added the material for the Content Library. Select the edited CSV file, and click Upload File.

Upload button - The menu updates to confirm you requested to upload a CSV file. To exit this process without finishing uploading the CSV file, click Cancel. To continue with the upload process, click Done.

Upload Confirmation menu - Your content assets will now be uploaded, and you will receive an email when the upload is complete.
Note
If there were any errors during the upload process, they will be noted in the email. Download the attached log to see what the errors occurred. See the CSV Upload Error Messages below to learn what each message means. 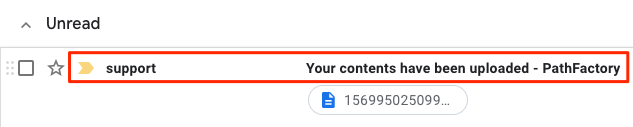 CSV upload process error message
|
Note
|
All fields can be edited in the Content Library once the content assets have been uploaded. |
One more thing to note:
- If you’re editing the CSV file in a text editor, press the enter key to create a new row (for each new content asset)
CSV Upload Error Messages
If there are any issues with the CSV file you upload, you will be notified via email once the upload process is complete. It will contain one or more of the following error messages:
| Error Message | Situation |
|---|---|
|
CSV cannot be empty |
File is empty |
|
CSV is improperly formatted or contains invalid columns |
File is improperly formatted |
|
CSV is improperly formatted or contains invalid columns |
CSV contains extra columns |
|
Uploaded CSV cannot be accessed |
Cannot access file on S3 |
|
CSV cannot contain duplicate columns |
CSV contains duplicate columns |
|
Must provide a content url |
URL field empty |
|
FOO is not a valid url |
URL field improperly formatted |
|
FOO returned invalid response (404) |
URL returns a non-200 response when navigated to. Ensure that you entered a valid URL |
|
Validation failed: Url already exists |
URL already exists as another content asset |
|
Validation failed: Url cannot be displayed in a content experience due to frame security policy |
URL webpage cannot be iframed |
|
Validation failed: Slug is invalid. Only alphanumeric characters, hyphens and underscores are allowed. |
Slug field contains non-alphanumeric characters |
|
Validation failed: Title can’t be blank |
Title field empty |
|
Validation failed: Title is too long (maximum is 255 characters) |
Title field is longer than 255 characters |
|
Couldn’t find ContentType |
Content Type does not exist with the given name |
|
Validation failed: Engagement weight is not a number |
Engagement Score field is not a number |
|
Validation failed: Engagement weight must be greater than or equal to 0 |
Engagement Score field is less than 0 |
|
Validation failed: Engagement weight must be less than or equal to 8 |
Engagement Score field is greater than 8 |
|
Validation failed: Engagement threshold is not a number |
Engagement Time field is not a number |
|
Validation failed: Engagement threshold must be greater than or equal to 0 |
Engagement Time field is less than 0 |
|
Validation failed: Internal title is too long (maximum is 255 characters) |
Internal Title field is longer than 255 characters |
|
Funnel Stage value should be the following options: Bottom of Funnel, Middle of Funnel, Top of Funnel |
Funnel Stage does not exist with the given name (Top of Funnel, Middle of Funnel, Bottom of Funnel) |
|
Validation failed: Estimated cost is not a number |
Estimated Cost field is not a number |
|
Validation failed: Estimated cost must be greater than or equal to 0 |
Estimated Cost field is less than 0 |
|
Validation failed: Estimated cost must be less than or equal to 9,223,372,036,854,775,807 |
Estimated Cost field is greater than 9,223,372,036,854,775,807 |
|
Validation failed: Language must be a known language |
Language field is not found on our list of known languages. |
|
Invalid Business Unit |
Business Unit does not exist with the given name |
|
Validation failed: Expiry date is invalid. Please use the format YYYY-MM-DD |
Expiry Date field is incorrectly formatted |
|
Validation failed: Expiry date must be in the future |
Expiry Date field is in the past |
Views: 246