Release Date: November 21, 2023
Explore the latest enhancements designed to elevate your customer-facing experiences with Release W. From Templated Experiences to Virtual Events and Platform Updates, we’re introducing features that streamline customization, enhance navigation, and offer more control over your content and digital experiences.
Templated Experiences Improvements at a Glance
Rename Landing Page Templates and Theme files – Customize the names of your Landing Page Templates for improved clarity and organization.
Link to Specific Sections Within a Landing Page – Configure Call-to-Action buttons to direct visitors to specific sections on a Landing Page, enhancing navigation.
Clear Formatting In the WYSIWYG Editor – Streamline content creation by removing formatting from text copied into the WYSIWYG Editor.
Additional Font Sizes Available in the WYSIWYG Editor – Enjoy a broader range of font sizes in the WYSIWYG Editor for enhanced text formatting on Landing Pages.
Default Theme Pre-Added to Help Users Explore Templated Experiences – Quickly start creating Landing Pages and Content Pages with a default Theme, eliminating the need to create one from scratch when getting started with Templated Experiences.
Use a Collection to Create a Templated Experience – Streamline Templated Experience creation by using Collections for efficient asset selection and management across experiences.
Filters Added to the Content Page – Experience improved filtering options for enhanced content management on the Content Page.
Display Content Tags as Labels on the Thumbnail – Content tags are now visually represented as labels on thumbnail images for quick content overview.
VEX Improvements at a Glance
Cross-Device Registration for VEX – Simplify registration by checking for the visitor’s email address across devices, providing a seamless experience.
VEX Experience Social Sharing Icon Settings – Configure social sharing icon settings at the Event Level for more granular control within VEX Experiences.
Platform Improvements at a Glance
Fallback URL – Set up a fallback URL to redirect visitors from the root URL to a designated web address.
Redirect Rules – Easily add, edit, or delete Redirect Rules for enhanced control over website navigation.
Templated Experiences Enhancements
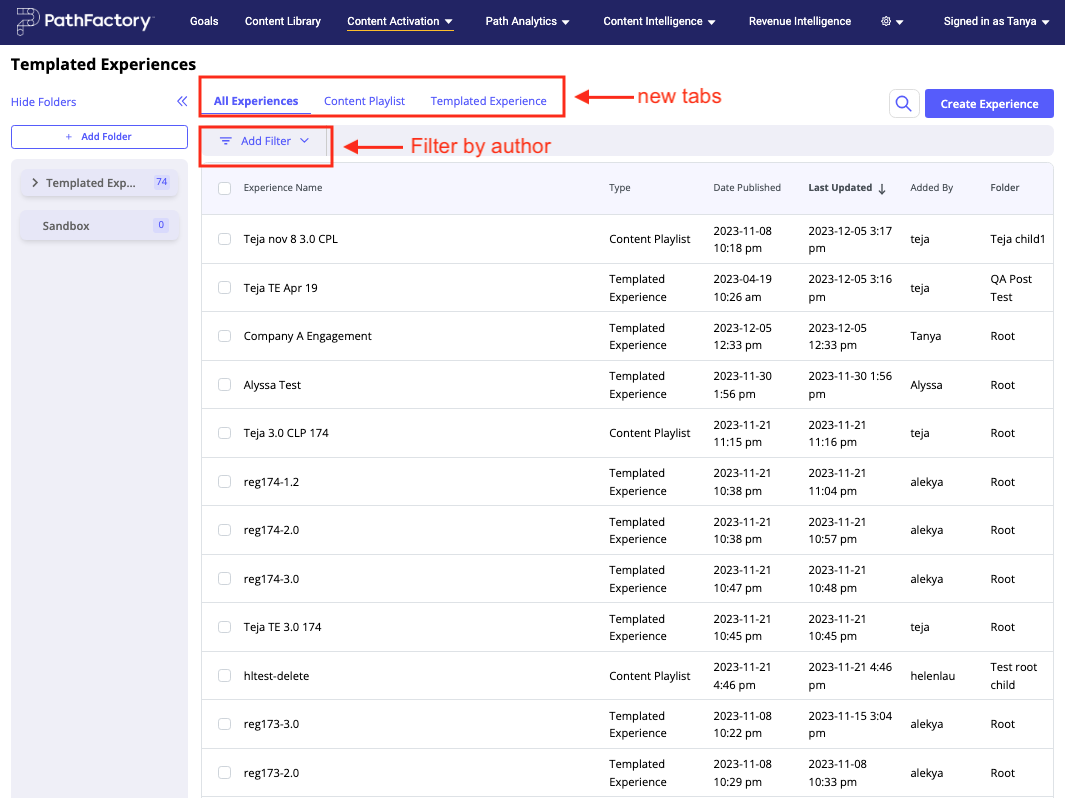
New Templated Experiences Home Page
We have added the following three tabs to the Templated Experiences Home Page to enable you to more easily find a specific Experience.
- All Experiences – a list of both Templated Experiences and Content Playlists in a master list that you can sort by column.
- Content Playlists – a filtered list that displays content tracks.
- Templated Experiences – a filtered list that displays Templated Experiences.
You’ll also notice a Filter dropdown menu that lets you search for Experiences created by a specific author.
Rename Landing Page Templates
This enhancement allows users to customize the names of their Landing Page Templates. Previously, users were constrained by the inability to modify template names post-creation. This feature is especially beneficial for maintaining clear naming conventions and indicating which template suits a specific Experience or Experience type.
To rename a Landing Page Template, follow these steps.
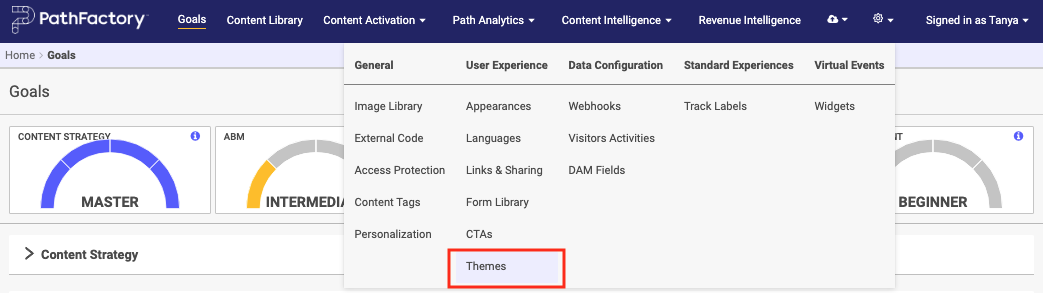
- On the platform settings, select Themes.

- On the Theme window that opens, select a Theme and navigate to the Landing Page template you want to rename.
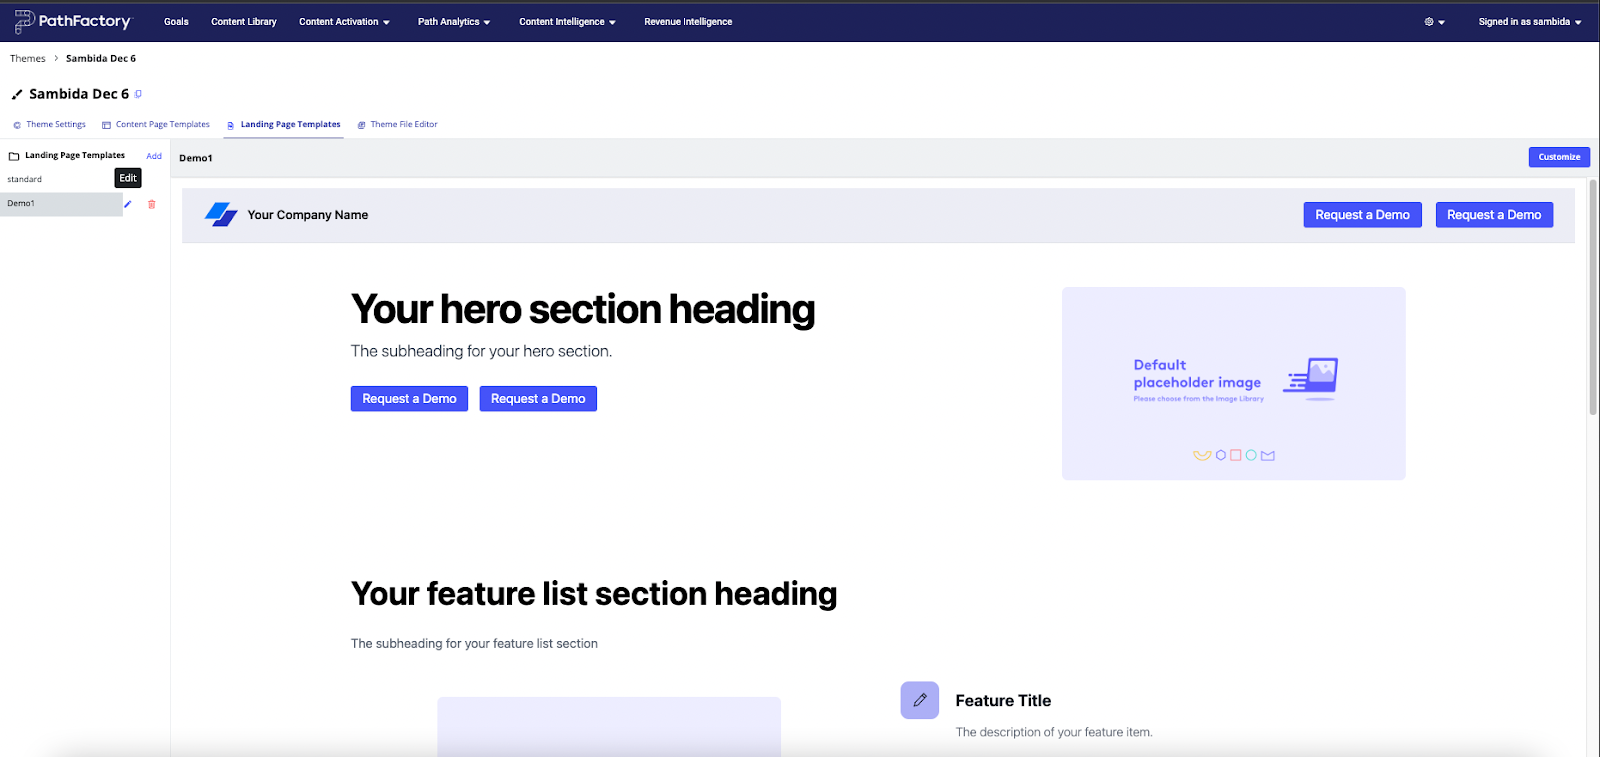
- You’ll notice when you hover on the Landing Page template name, you’ll see edit and delete icons.
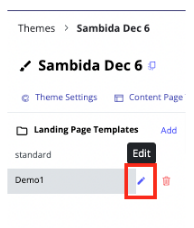
- To rename the template, click on the edit icon, which will open the Edit Page Template Name menu.
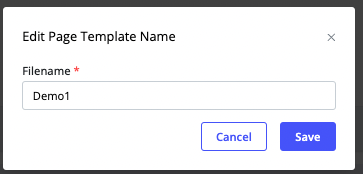
- Enter the new name for this Landing Page template.
- To save the new name you have entered, select Save. To cancel this name change, select Cancel.
Rename Theme Files
Previously, you could not rename a Theme file after you had created it. Now you can assign a working title for your Theme file and rename it later on to indicate which teams should be using this Theme file, what type of Experience in which to use it, or name it after a campaign.
To rename a Theme file, follow these steps.
- Clicking on the gear icon and in the menu that appears, select Themes.
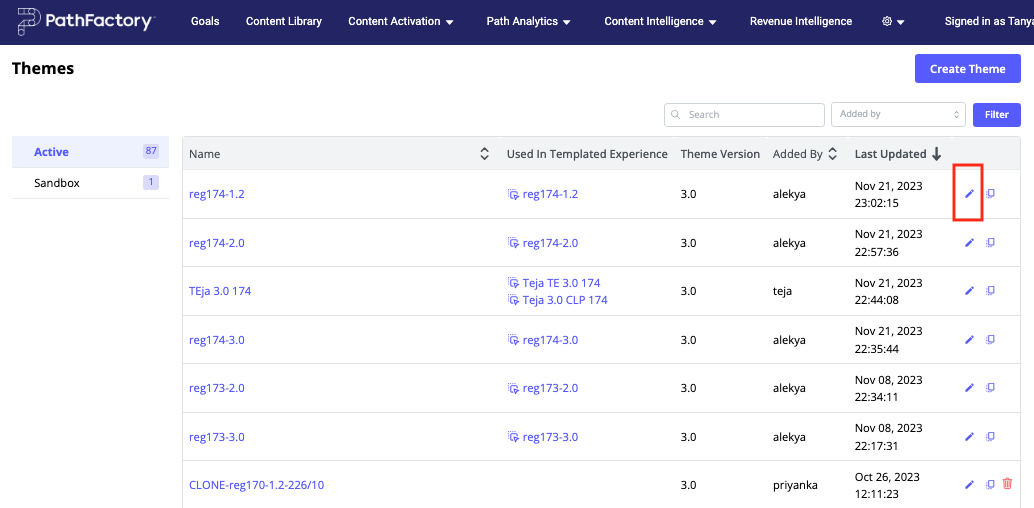
- Now you see a list of Theme files. Locate the Theme you want to rename, and click its associated pencil icon as shown below.
- A popup menu appears, for you to enter a new file name.
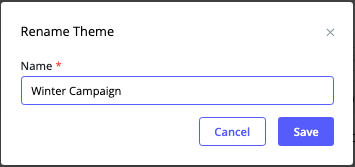
- To lock in the new name, click Save. To leave this process without saving, click Cancel. You can rename a file as many times as you want.
Link to Specific Sections Within a Landing Page
You may now configure Call-to-Action (CTA) buttons to direct visitors to specific sections on a Landing Page through anchor links, enhancing navigation within Templated Experiences. This is useful when you have a very detailed or lengthy Landing Page, so you can create links within the page to improve navigation.
To link a CTA button to a specific section on a Landing Page, follow these steps.
- Open a Templated Experience to edit and select its Landing Page Setup tab.
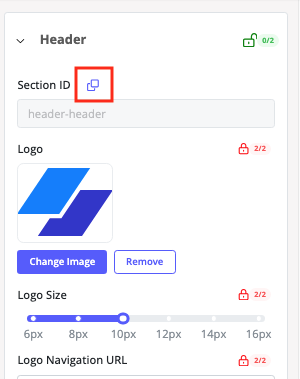
- On the editing menus on the right side panel, each section has its own Section ID link. To copy the link, click the copy icon. Below is an example of the Section ID link in the Header section of a Landing Page.
- To add this link to the CTA, scroll down to the CTA section of the editing menu and expand by clicking on the menu’s arrows.
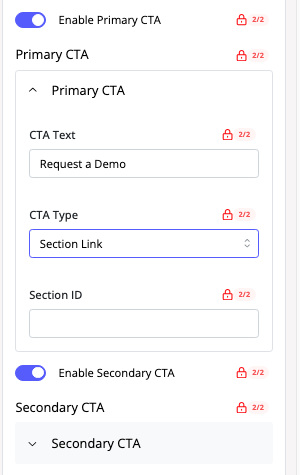
- Turn on the toggle for Primary CTA, and then fill in the following information:
- CTA Type – in this dropdown menu select Section Link.
- Section ID – in this field, paste the Section ID of the section you want to link it to.
- When you are finished specifying the appearance, color, and the section link, click Save. Now when you open the Landing Page, it will contain a section link in the CTA to link to another section within the same Landing Page.
Clear Formatting In WYSIWYG Editor
You can now remove formatting from text copied into the WYSIWYG Editor from external sources, streamlining your content creation and editing processes.
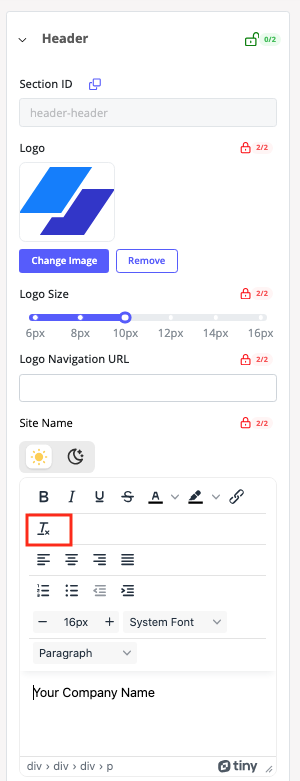
Within the text editor, located in the editing menu for both Landing Pages and Content Pages, the editing menu now has an option to clear formatting for selected text. Highlight the text you wish to reformat, and then click the clear formatting button as shown below.
More Font Sizes Available in the WYSIWYG Editor
The WYSIWYG Editor now offers a broader range of font sizes, providing you with more flexibility in formatting text within the Experiences.
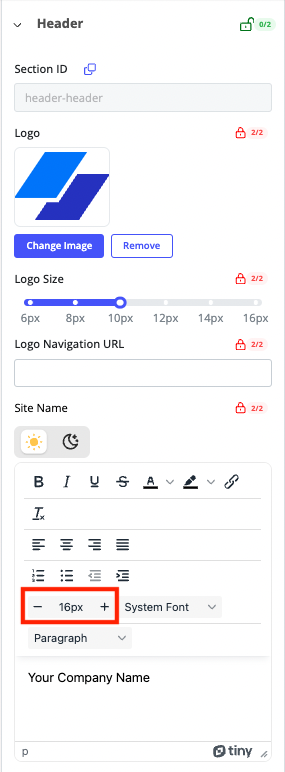
On the Landing Page editor, you’ll notice font size has been updated to an open text field where you can add the font size per your needs. You can also click on the “-” or “+” to decrease or increase the font size at an increment of 1.
Default Theme Pre-Added to Help Beginners Explore Templated Experiences
We have added a default Theme to Templated Experiences, so that you can get started creating Landing Pages and Content Pages right away. You may explore Templated Experiences without the need to create a Theme from scratch—a helpful starting point for testing and initial exploration.
To access the default Theme, follow these steps.
- On the main navigation, click the gear icon and then select Themes.
- The Themes page opens. You’ll see a default theme listed there that you can modify and use right away.
To learn more about creating and using Theme files, read Introduction to Themes.
Filters on the Content Page
We have added an option for you to display filters on Content Pages. This function lets your users drill down to the information they are most interested in, within the Experience.
Note: This feature is available to organizations using Themes that are version 2.0 or higher.
To display filters on a Content Page, follow these steps.
- Open a Templated Experience or Content Playlist and go to its Content Page Setup tab.
- Expand the Layout menu as highlighted below.
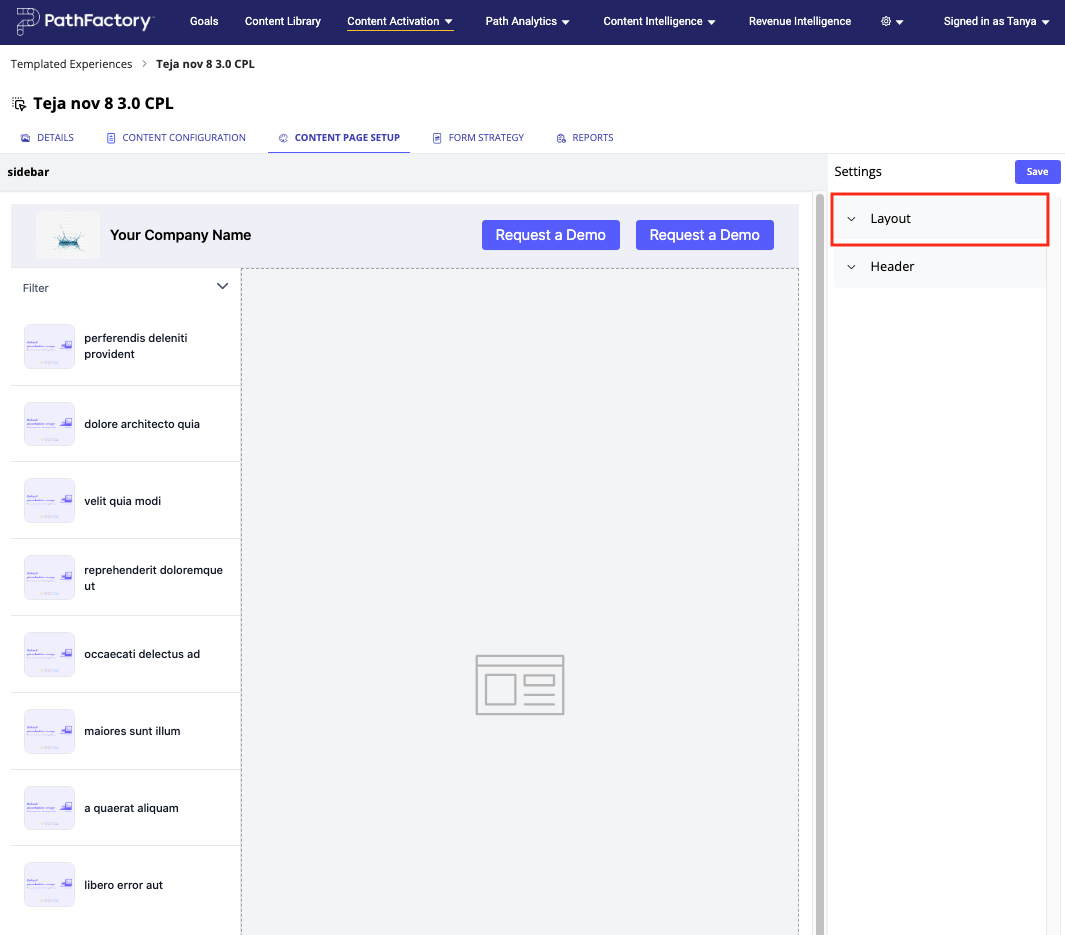
- With the Layout menu expanded, you can see the Show Filters toggle.
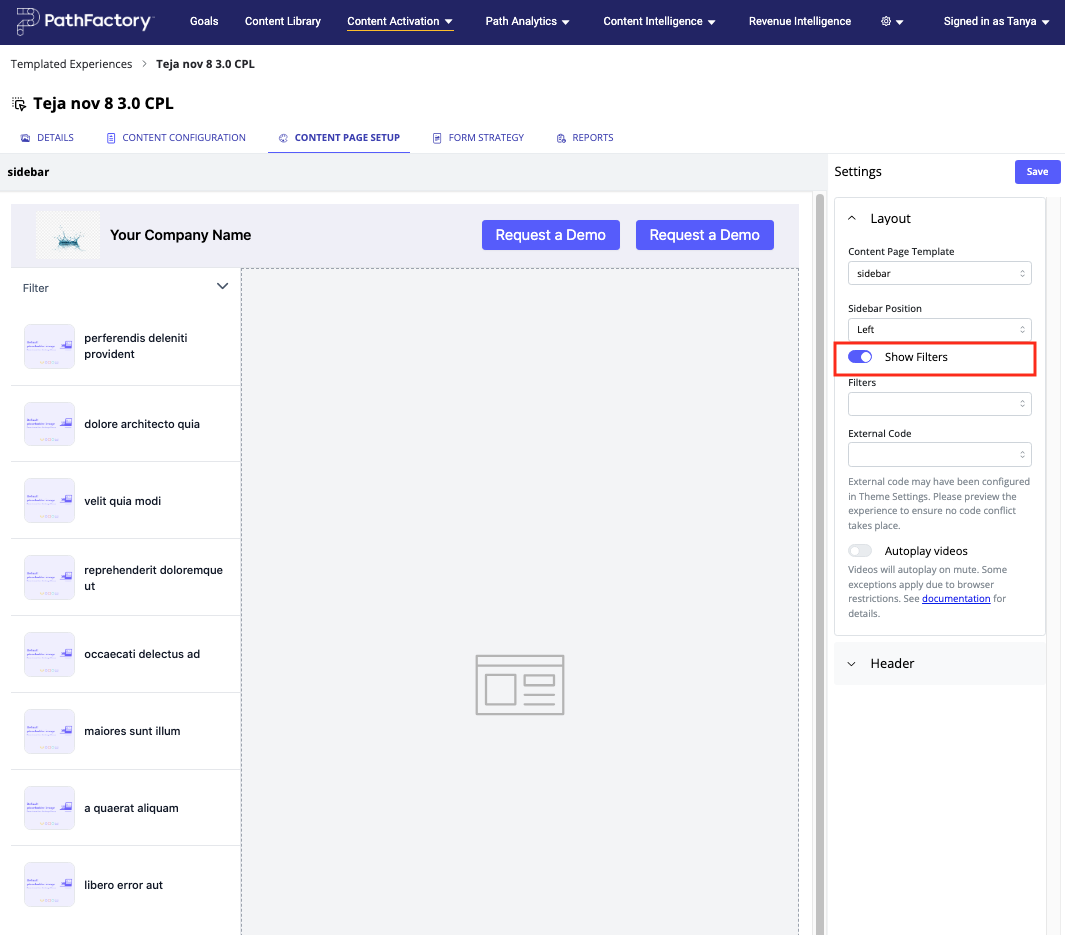
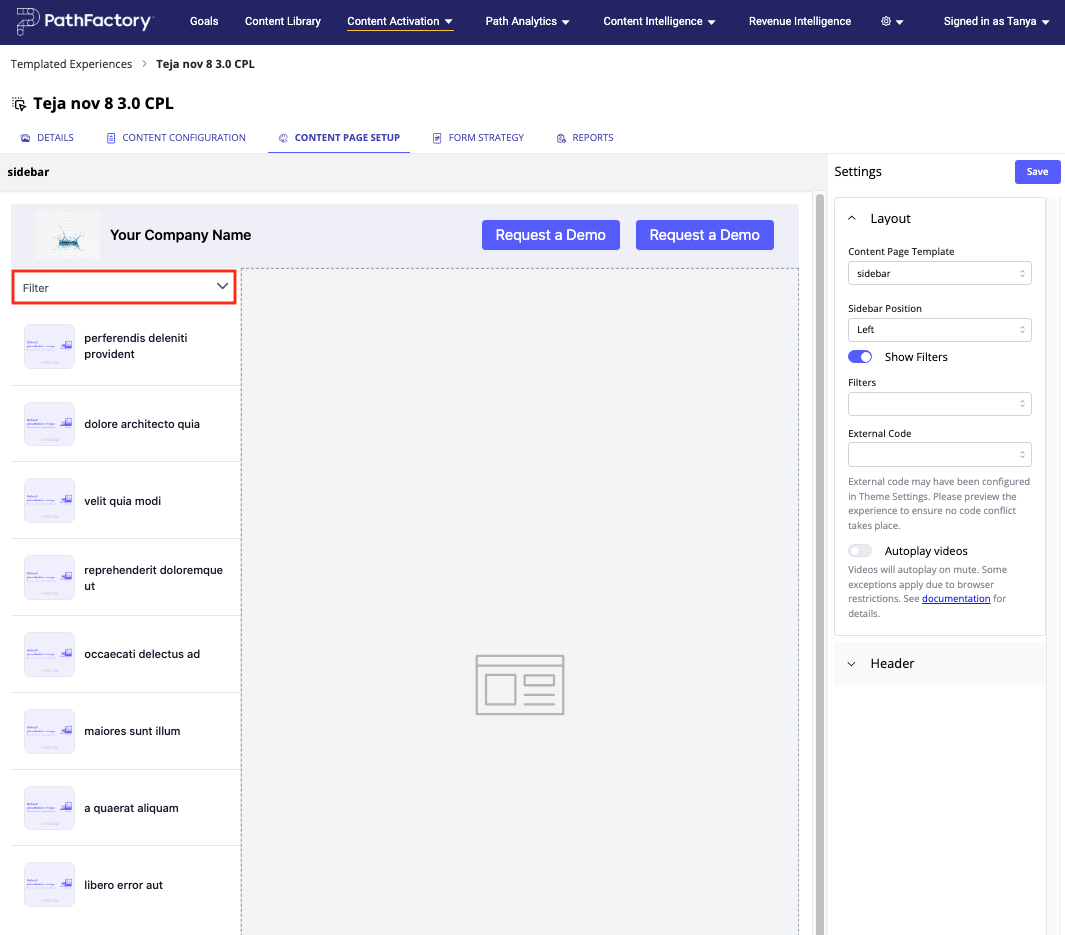
- If you turn on the Show Filters toggle, you will notice a Filter option appear on the left panel as highlighted below. Your visitors will see this Filter option when they view the Content Page to narrow down to the preferred number of content assets they are interested in viewing. Filter options are based on what’s configured in the Content Page.
- Choose Filters and then in the dropdown menu you can select which tags to include. Content tags are assigned at asset level.
Virtual Events Enhancements
VEX Experience Social Sharing Icon Settings
Social sharing icon settings within VEX Experiences can now be configured at the Event Level, offering more granular control compared to the Session Level.
To set up these sharing settings for a Virtual Event, follow these steps.
- On the main navigation menu, click Content Activation and then select Virtual Events.

- From the list of Virtual Events that appears, select one to edit.
- On the Event Setup tab, scroll down to the Links and Sharing section.

- Activate the toggle as shown below. Two new dropdown menus appear: Configuration and Location. Use these menus to specify the format and location of the link icons.
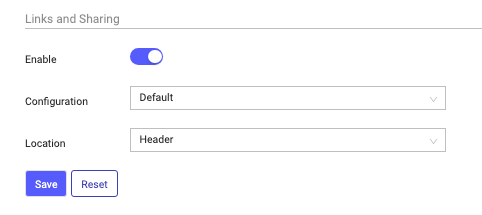
- When you are finished inputting the information, click Save. To return the tab to its default settings, click Reset.
Cross-Device Registration for VEX
Simplify the registration process by checking for the visitor’s email address across devices, eliminating the need for redundant form filling. This enhancement ensures a seamless experience for users interacting with the Virtual Event Platform (VEX) from different browsers or devices.
Our VEX platform allows visitors to register for webinars, but asks them to register and fill out the full form again if they visit from another browser or device. This improvement prevents that situation from happening.
To update settings in a VEX session to check for duplicate email addresses, follow these steps.
- Open a Virtual Event to edit by clicking Content Activation and then selecting Virtual Events.
- On the Event Setup tab, scroll down to the Form Strategy section.
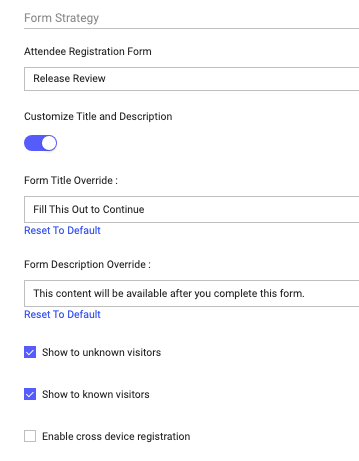
- Activate the checkbox labeled Enable cross device registration.
By enabling this option, your visitors will not have to fill in multiple registration forms, no matter which device they are accessing the Virtual Event from. We have added a link to the form interface so that a visitor who has already registered for an event can click Already Registered. After their email is confirmed, the registration form is dismissed.
Platform Enhancements
Root Domain Fallback URL
The Fallback URL is a feature that enables you to set up a designated web address to redirect visitors in case they navigate to the root URL of an experience. This feature is particularly useful in scenarios where visitors might access the main URL of a website or an experience but need to be directed elsewhere. The Fallback URL serves as a fail-safe, guiding users to a specified destination instead of displaying an error page or an incomplete experience.
This feature also keeps you from having to create an explore page or microsite for this type of scenario.
To set up a Fallback URL for your root URL, follow these steps.
- Configure a new root URL in the organization settings, Settings tab.
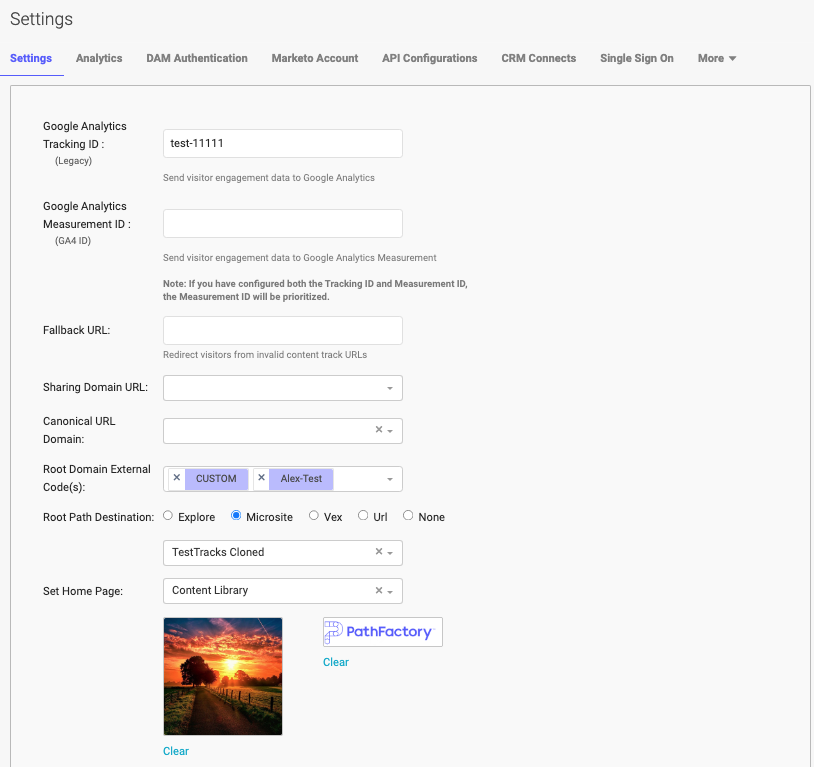
- In the Fallback URL field, enter the web address you want visitors to see instead of the root URL.
- To test the Fallback URL, open a browser and navigate to the root URL of an Experience.
Redirect Rules
Redirect rules can help you better manage your website. For example, if you are restructuring a website, changing page URLs, or updating the site’s architecture, redirect rules ensure that visitors are automatically directed to the new locations. This prevents users from encountering broken links or dead ends.
Redirect rules also help prevent the creation of duplicate content by guiding users to a single, canonical URL.
To add a redirect rule to your website, follow these steps.
- On the main navigation menu, click on your login name, and then select Organization Settings.
- Locate and click on the tab labeled Redirect Rules.
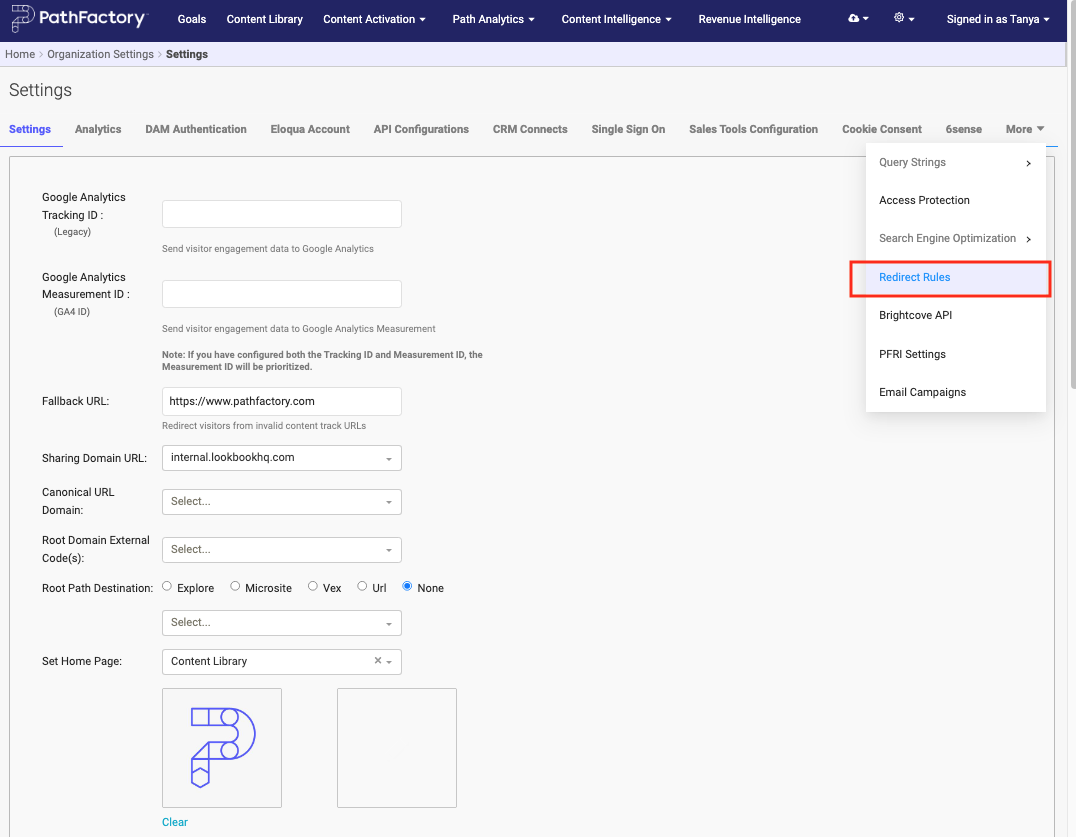
- The Redirect Rules tab opens. On this tab you can add a redirect rule, or you can edit or delete an existing rule, using the interface options highlighted in the screen capture below.
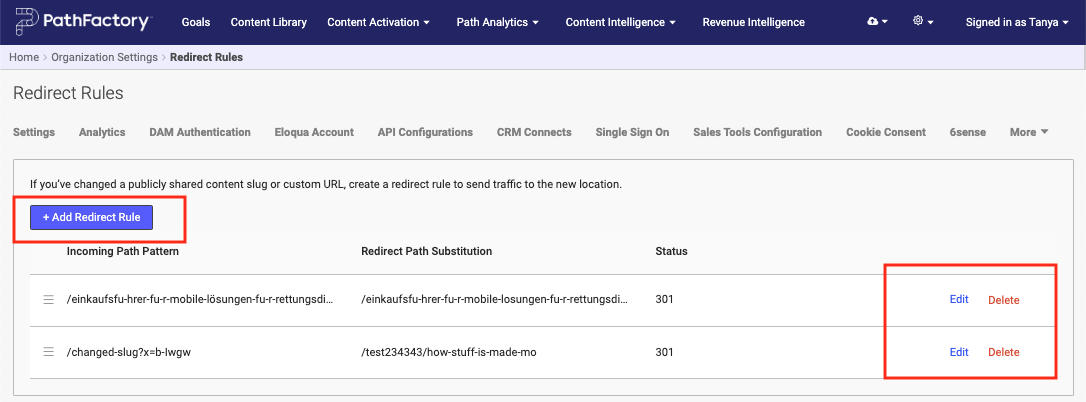
- If you click on +Add Redirect Rule, the following menu appears.
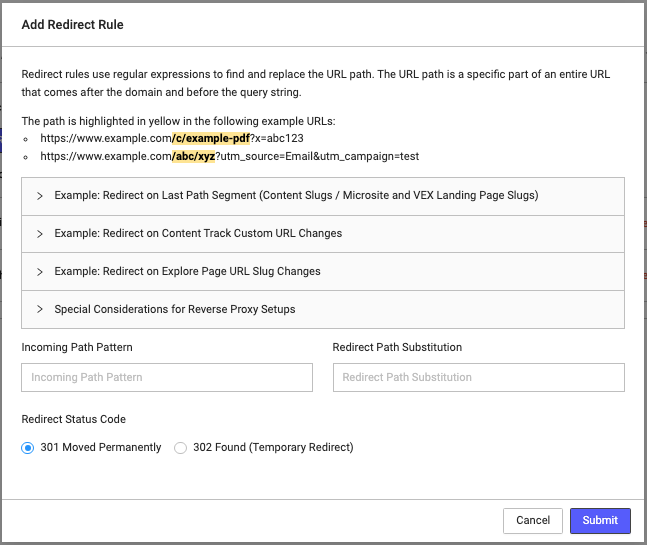
- To see formatting and examples for four redirection types, click on the arrows to expand the menus.
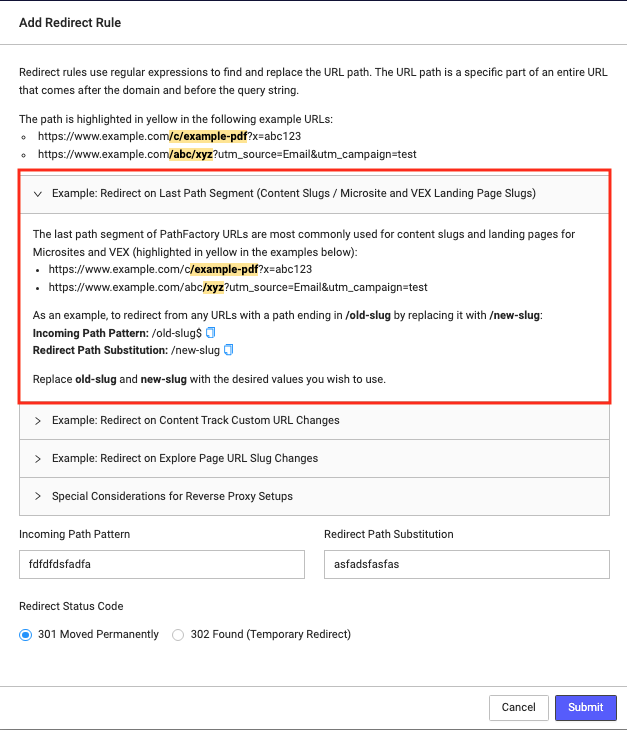
- When you have finished entering the required information, click Submit to save your changes. To leave without saving, click Cancel.
Views: 112