For this release, we are introducing some functionality to enable more customization and better tracking of campaign performance for Experiences.
- Experience ID is now accessible for Templated Experiences, enhancing identification and integration capabilities.
- Flow Promoters for Exit and Inactivity have been integrated into Website Tools, expanding engagement and retention options.
- Bulk Update Options are now offered for Virtual Event session tags, streamlining tag management.
- Microsite tracks now inherit track level protection settings, ensuring security in Recommend tracks.
- Virtual Events now include video run times conveniently displayed as overlays on Brightcove videos.
- Thumbnail Image Aspect Ratio is now customizable for images in Bottom Bar, Card, Exit, Flow, Sidebar, Signposts, and Topic Sidebar, which provides flexibility for Flow Promoters in Microsites and Standard Experiences.
Experience ID for Templated Experiences and Marketo Form Submission Exports
In PathFactory, the Experience ID functions as a unique internal identification number that can be used as a unique identifier and tracking mechanism for any Experience. When a form submission takes place within a Templated Experience, the Experience ID will get sent to Marketo.
This inclusion of the Experience ID is essential for improved tracking and integration, offering valuable insights into each Experience’s performance. To view the Experience ID that has been assigned to your Templated Experience, open it. On the Details tab, you see the ID listed there.
Note: This ID is read-only and cannot be modified.

Exit & Inactivity Promoters for Website Tools
Note: Your company must have access to Website Tools to use this feature.
We have added Website Campaign Inactivity and Exit Promoters to Website Tools. Previously, these promoters were available for Recommend and Target tracks within Campaign Tools only.
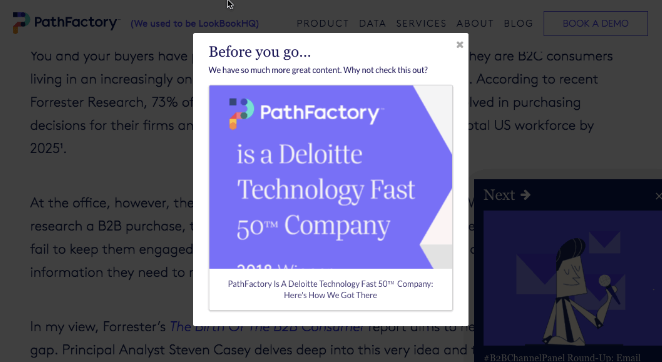
Promoters help recapture visitors’ attention with an offer as they are leaving the Experience. Below is an example of an Exit Promoter. The “Suggested Content” window appears as the visitor begins to navigate away from the web page, to encourage a reaction.
Below is an example of an Inactivity Promoter. When configured, an Inactivity Promoter will flash a message on a tab when it has been left inactive by the visitor for a specified period of time. The use of this type of Promoter encourages a visitor to return to an Experience for additional engagement.

How Add a Promoter to a Website Using Website Tools
Starting with Release R, users can set up an Inactivity or Exit Promoter on pages that feature Website Tools, to improve the campaign’s effectiveness.
To read more about Flow Promoters, read our article, Introduction to Promoters.
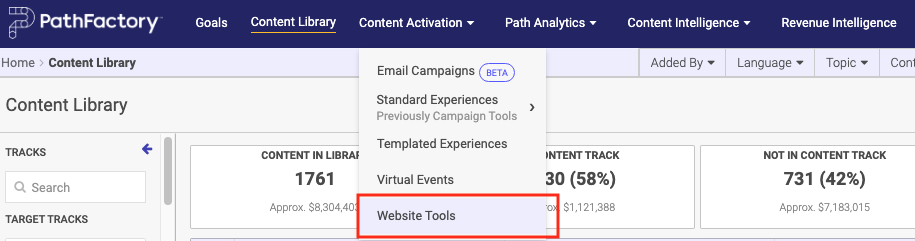
- On the main navigation menu, click on Content Activation and then select Website Tools.
- Now that the Website Properties window is open, you can see all of the tracking scripts (properties) that are available to you. To edit an existing script, click its associated Manage button. To add a new script, click +Add Property.
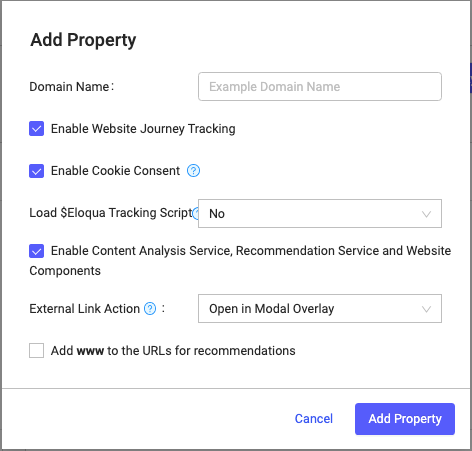
Note: Ensure you have activated the checkboxes for Enable Website Journey Tracking, Enable Cookie Consent, and Enable Content Analysis Service.
- Click Add Property. You see the new property listed with all of the other ones.
- Now click the property’s associated Manage button. A window appears, listing all scripts associated with that website property.
Note: If there aren’t any scripts associated with the property, click +Add Website Path to proceed.
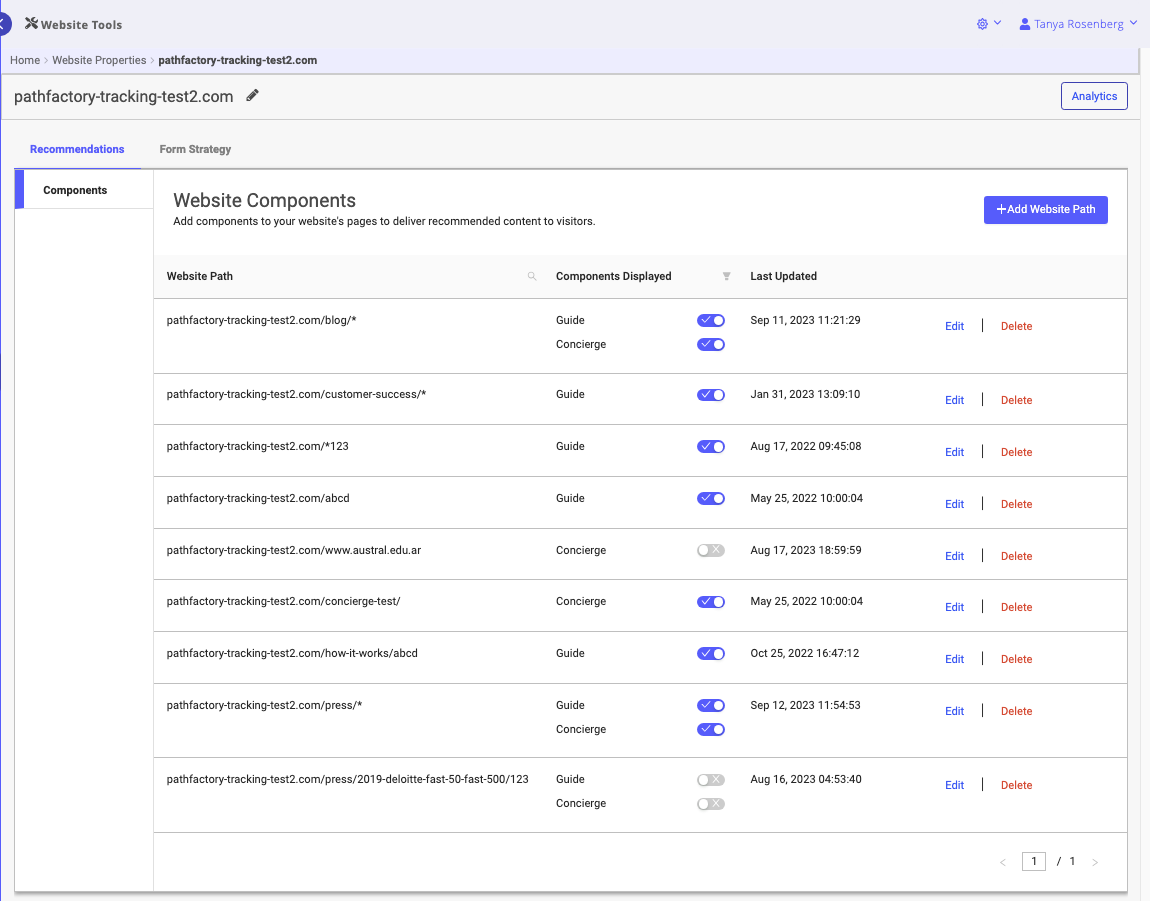
- Beside the Website Path you want to modify, click its associated Edit link. The Configure Component menu opens.
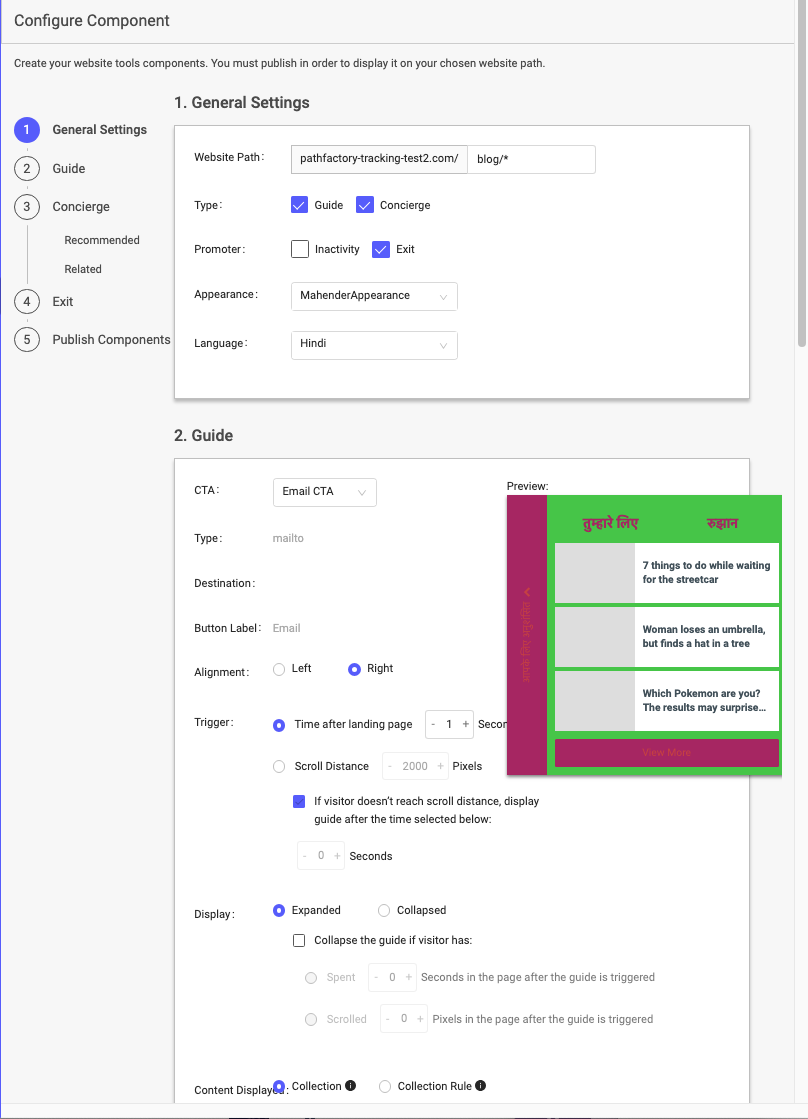
- Select which promoter to add to your script: Inactivity, or Exit, or both.
- When you are finished, scroll down the page to find and click the Save button.
Bulk Changes for Tags in VEX Sessions
PathFactory Virtual Experiences customers now have the ability to perform bulk updates on VEX session tags. To use this new functionality:
- Open Virtual Events.
- Select a Virtual Event to edit. Click on its Sessions tab.
- You’ll notice a checkbox beside each session. To perform an edit on your session tags, select the checkboxes for the sessions you wish to edit.
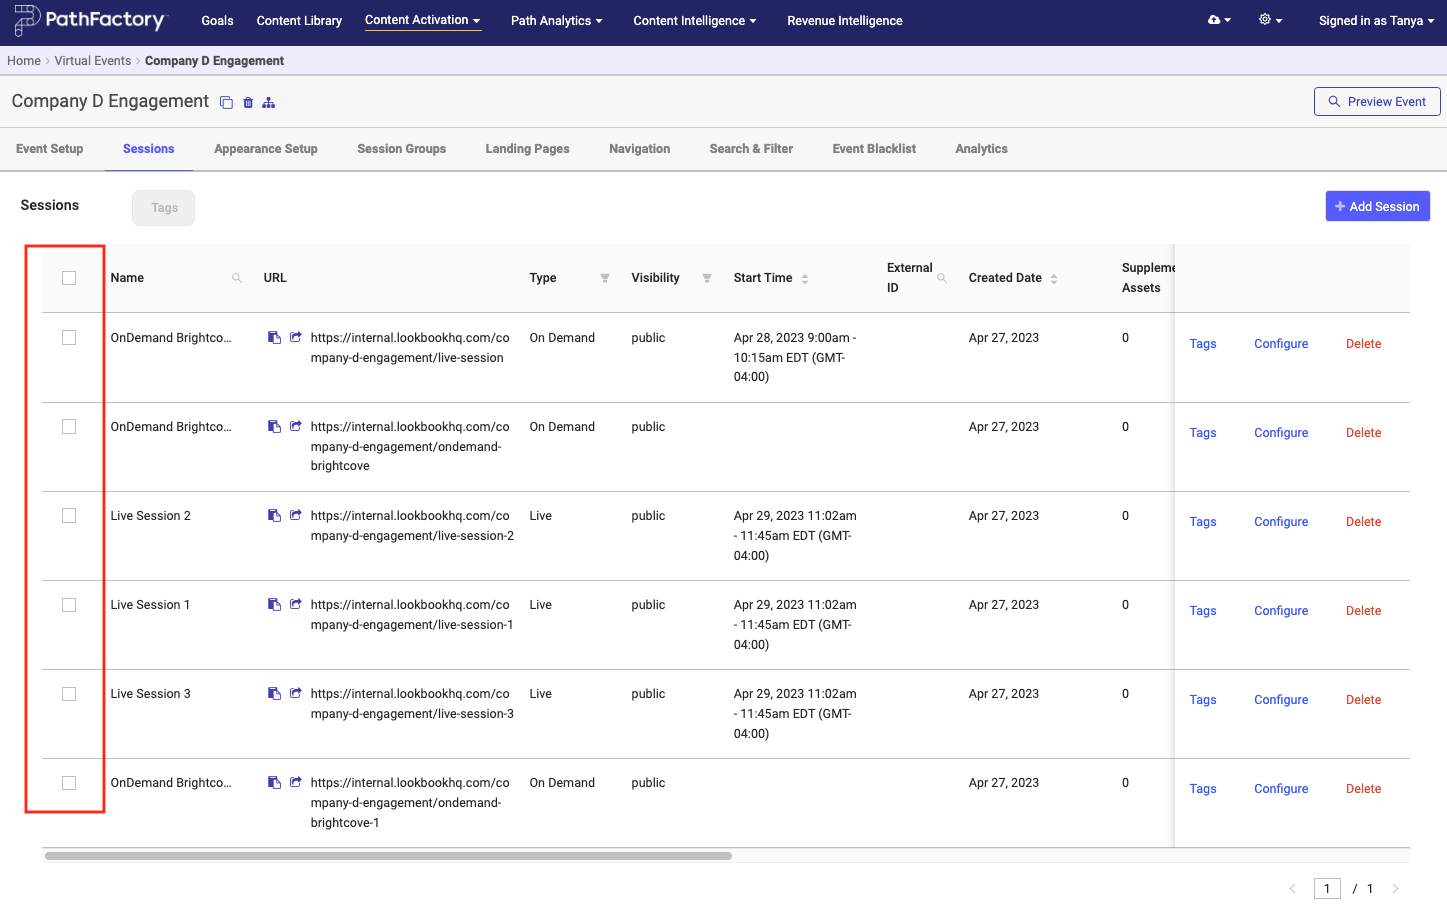
- At the top of the screen, you can see a record of how many sessions you have selected. Click the Tags link to continue the editing process.
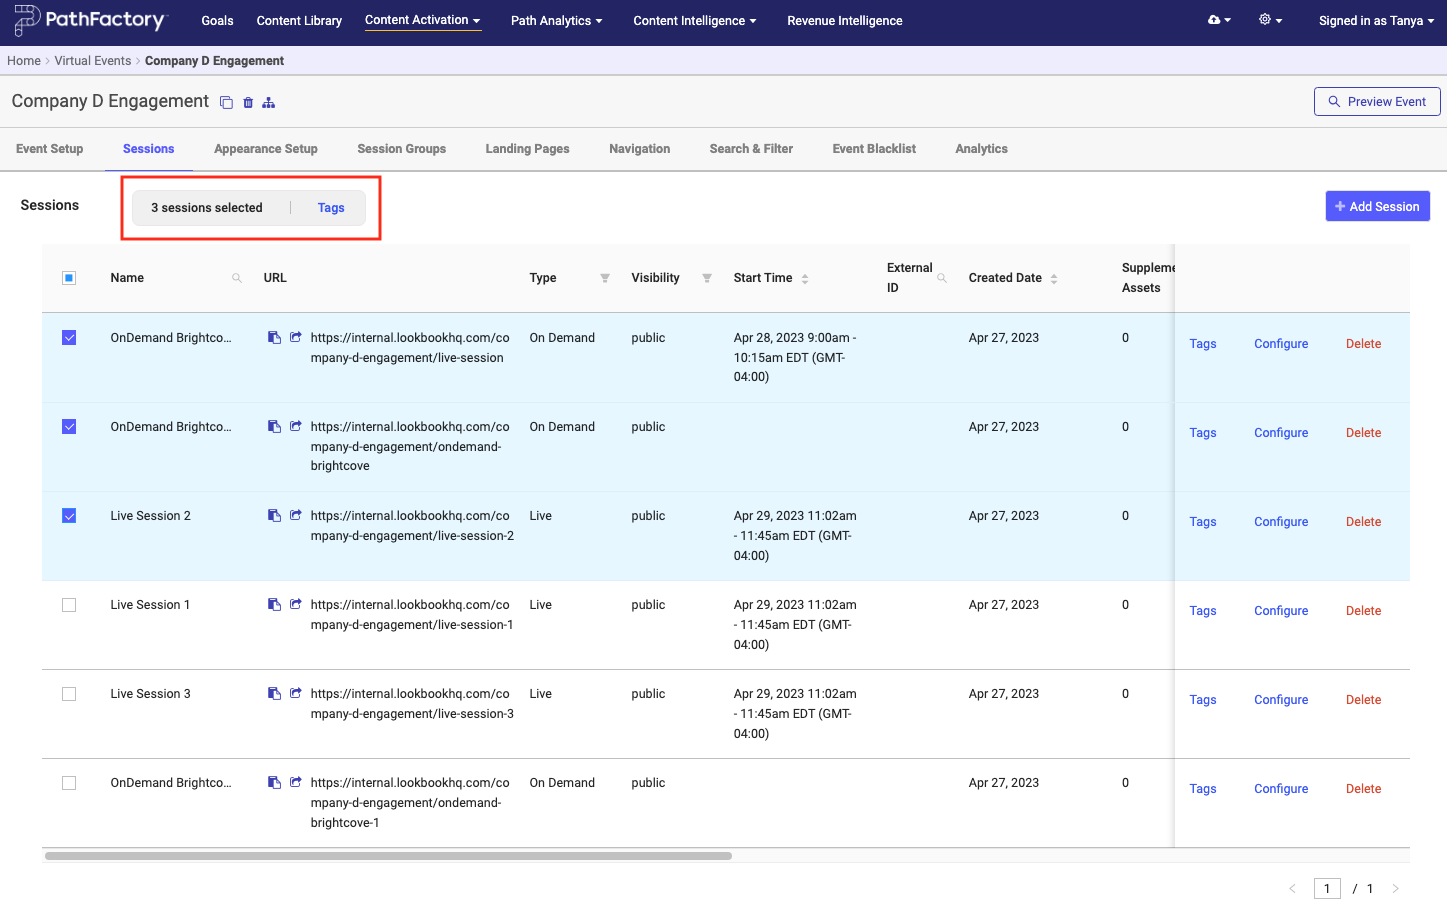
- The Bulk Edit Session Tags menu opens so you can edit all of the fields/tags at once. Click on a field to see its dropdown list options.

- To lock in your changes, click Save.
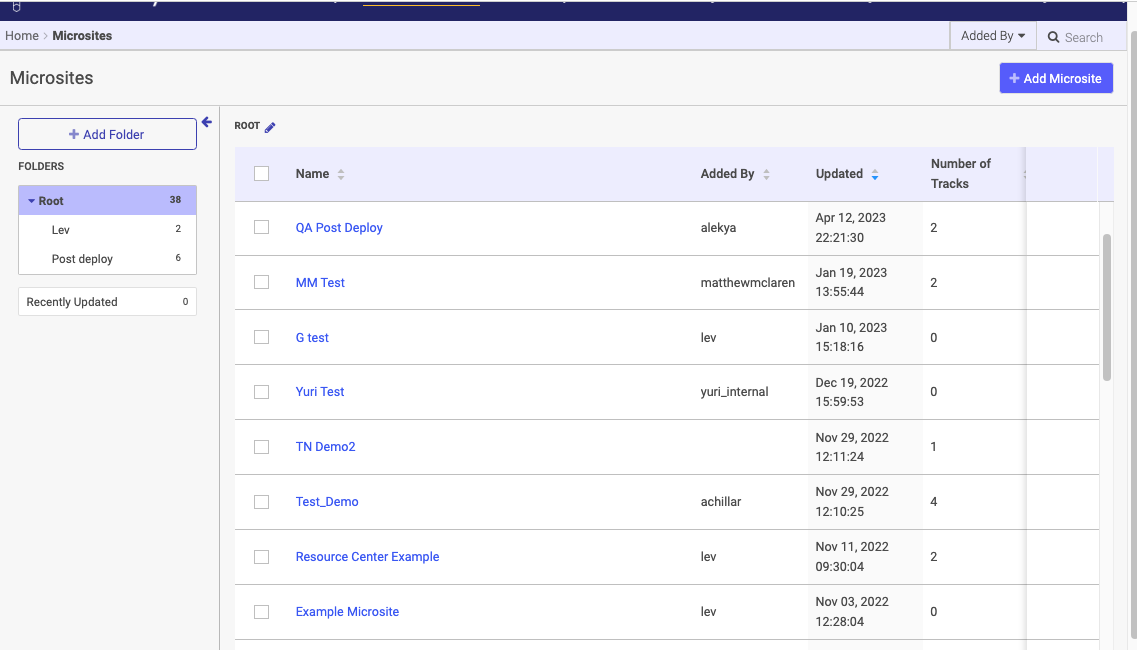
Microsites Inherit Track Level Protection Settings
Previously, when a visitor would land on tracks from a Microsite, the Microsite’s access configuration was overriding a Content Track’s configuration. Starting with Release R, you can now apply access protection that ensures Microsites’ access protection settings do not override Track settings. To set up the access protection for your Microsite so that it inherits Track level settings, follow these steps.
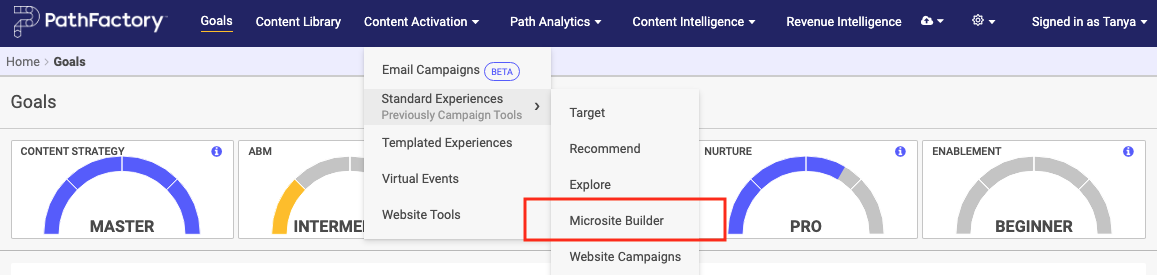
- On the main navigation menu, click Content Activation, then select Standard Experiences, and finally select Microsite Builder.
- From the list that appears, select a Microsite to open it.
- The Microsite opens on its Microsite Setup tab.
- Scroll down the page to see the Access Protection section. There is a new checkbox that, when activated, causes your Microsite to inherit and use the protection settings from the Track. This will prevent the Microsite configuration from overriding the Track settings.
You may have to scroll down the tab to see Access Protection, as highlighted below.
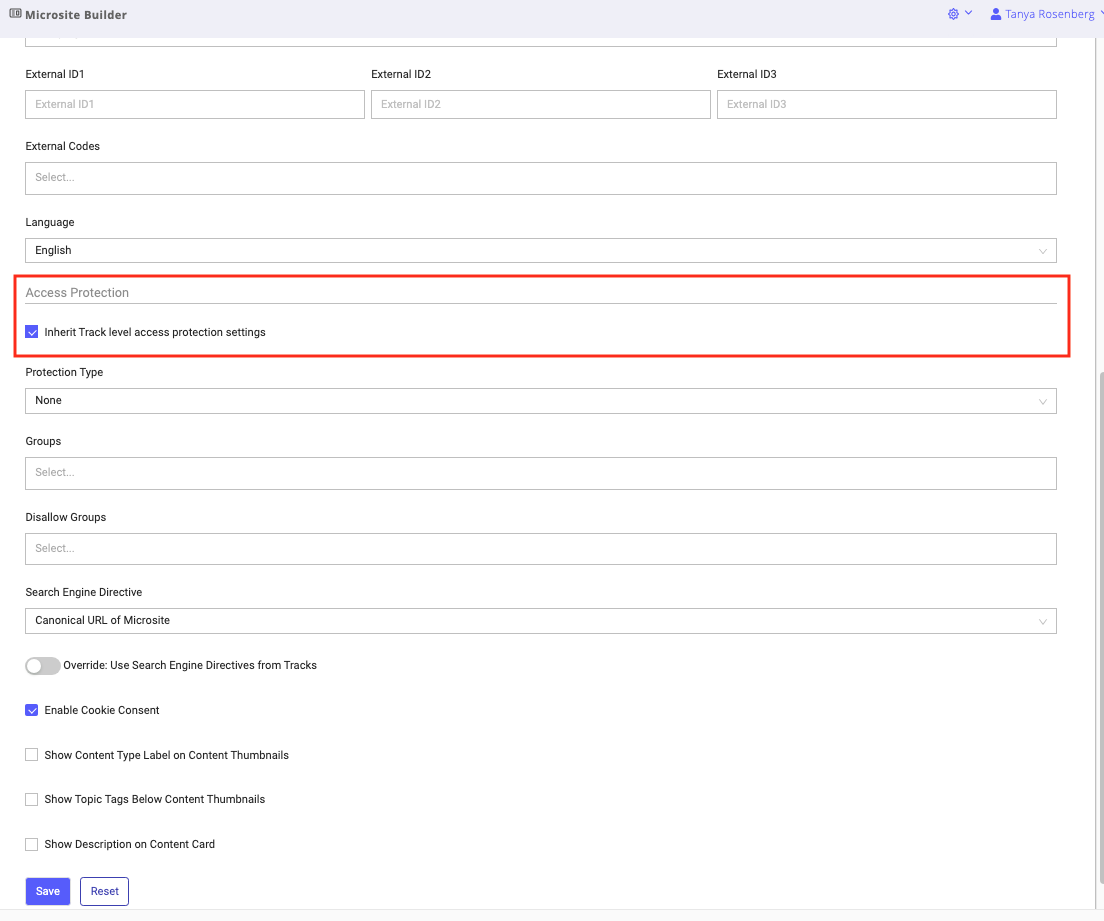
- Click Save when you are finished, to lock in the changes.
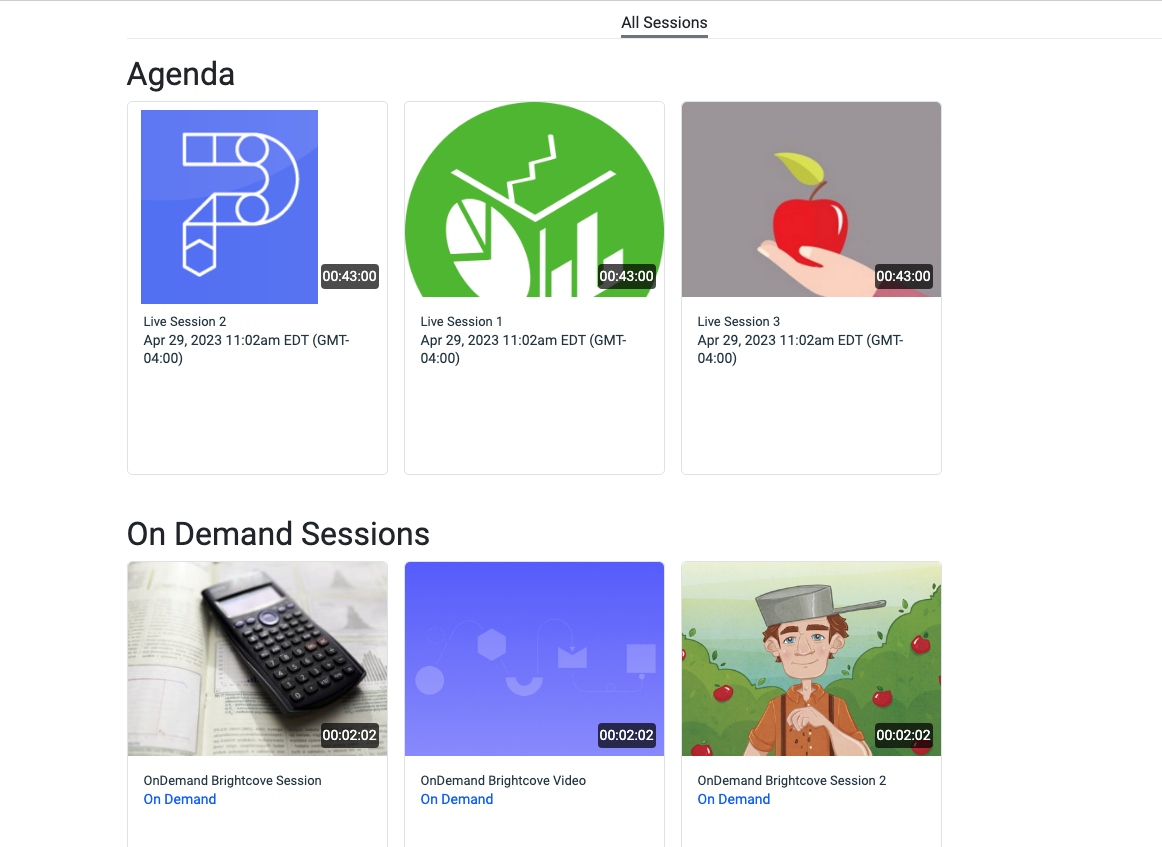
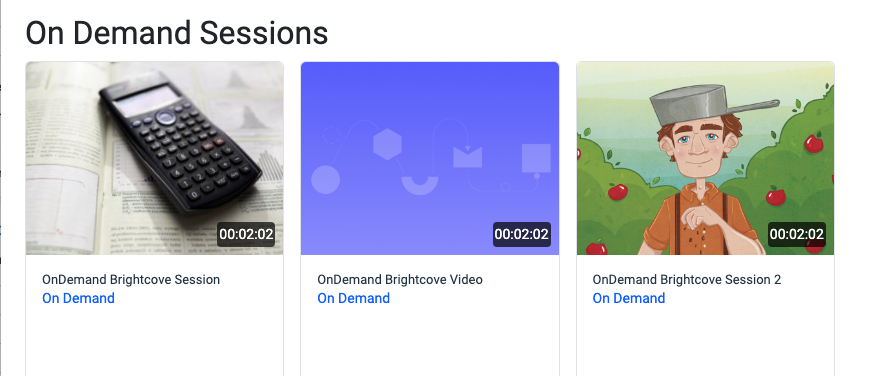
BrightCove Video Length Display in Virtual Events
Note: This feature is for Administrative roles only.
When you embed Brightcove videos in your VEX sessions, your visitors will now see the video run time displayed as an overlay on the video thumbnail. An improved connection to Brightcove API surfaces key information related to the shared content. By displaying the time required to watch a video, your visitors will be better prepared to know how much time they should set aside to view it.
Below is an example of this feature on a page that lists Virtual Event sessions.
Follow the instructions below to create that connection between Brightcove API and PathFactory.
- On the PathFactory home page, click on your login name at the top right of the screen.
- In the menu that drops down, click Organization Settings.
- Now find and click on the BrightCove API tab.
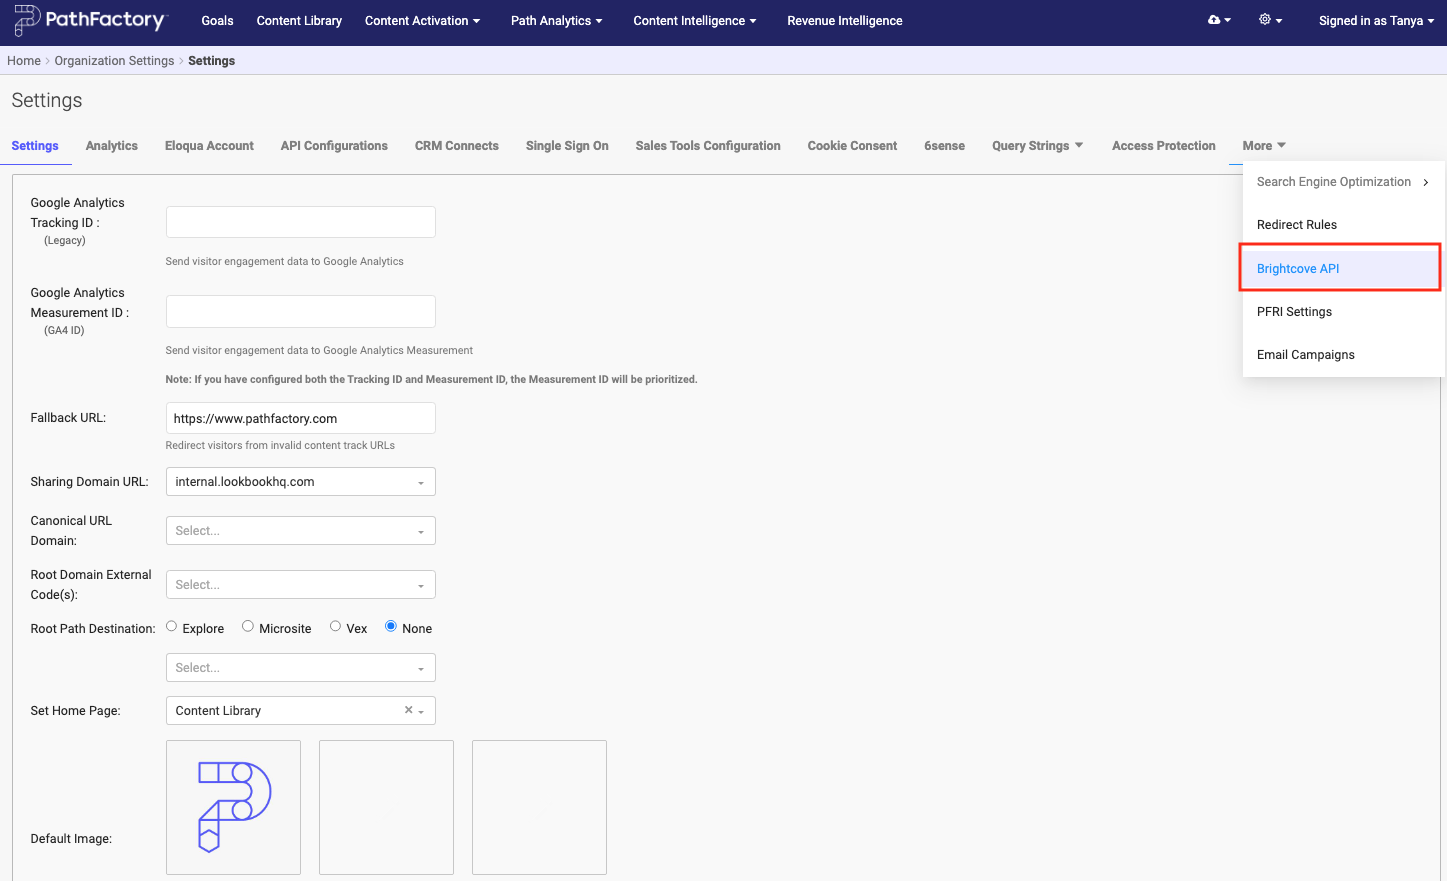
- The Brightcove API menu opens.
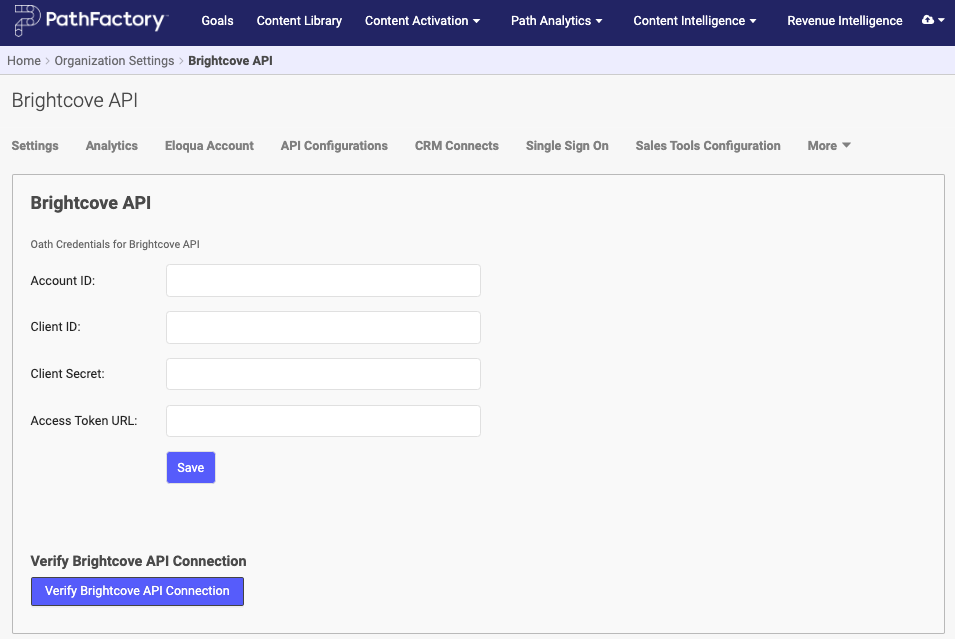
- Enter the following information:
- Account ID
- Client ID
- Client Secret
- Access Token URL
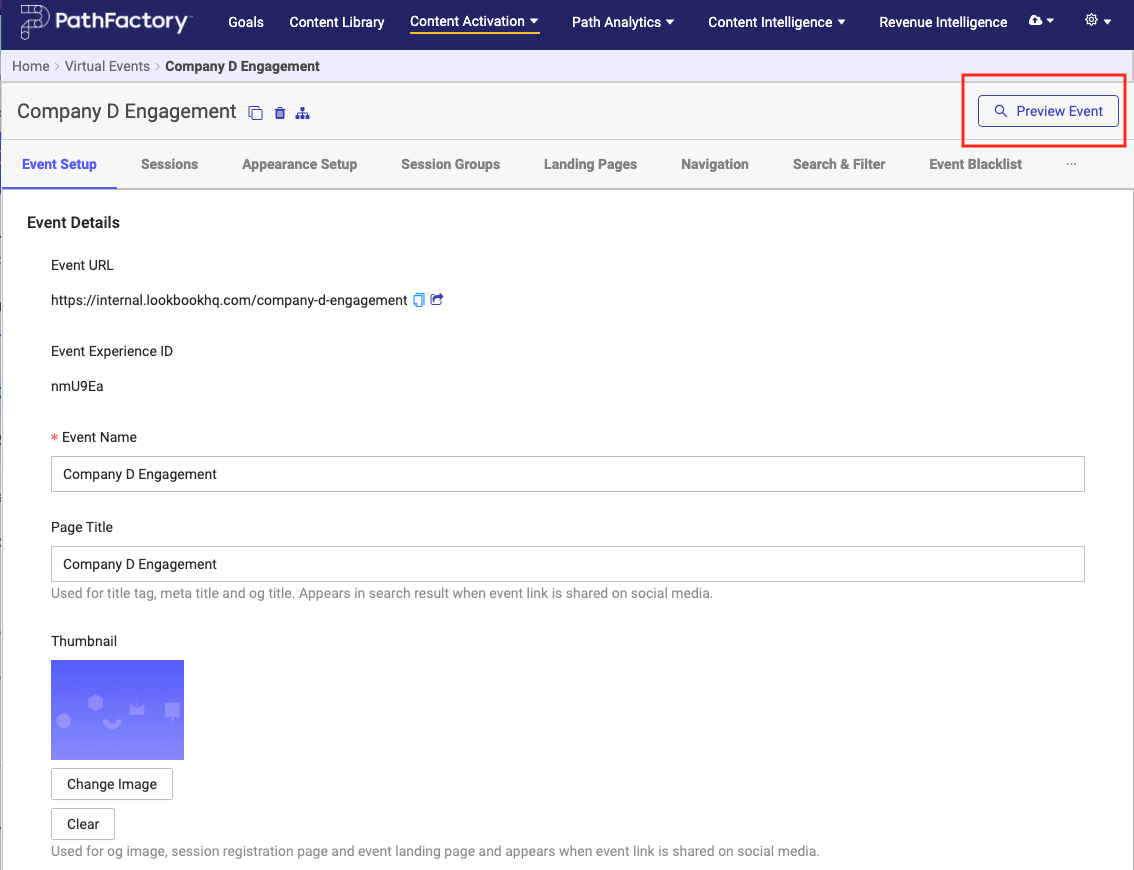
Preview your Virtual Event by clicking on the Preview Event button as highlighted below.
You will see the Brightcove video run times displayed as an overlay on the cards.
Thumbnail Image Aspect Ratio for Flow Promoter, Sidebar and Topic Sidebar
Previously, image padding for correct image aspect ratio was available only for thumbnail images of embedded content assets in email messages.
In our various digital experiences, such as Microsites and Website Tools, you now have the option to set the aspect ratio for thumbnails to ensure your images are displaying the way you want them to. Custom configuration is now available for Flow, Sidebar, Topic Sidebar, Signpost, Bottom Bar and Card Promoters. The default aspect ratio for these promoters are set to 4:3.
How to Edit the Thumbnail Image Aspect Ratio for Flow Promoters
To view and edit Flow Promoter image aspect ratio settings, follow these steps. They are very similar for each of the promoters.
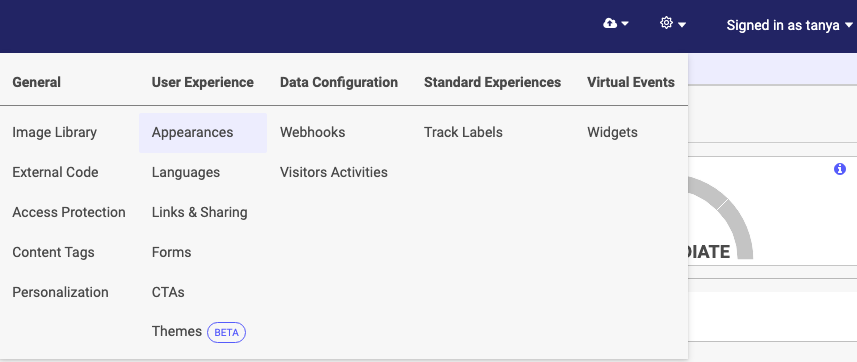
- On the PathFactory home page, click the gear icon and then select Appearances.
- Select the Standard Experiences tab. In the dropdown list, select an option. For this example, we chose Flow.

- In the Flow Settings menu that opens, activate the checkbox labeled Show Content Thumbnails.
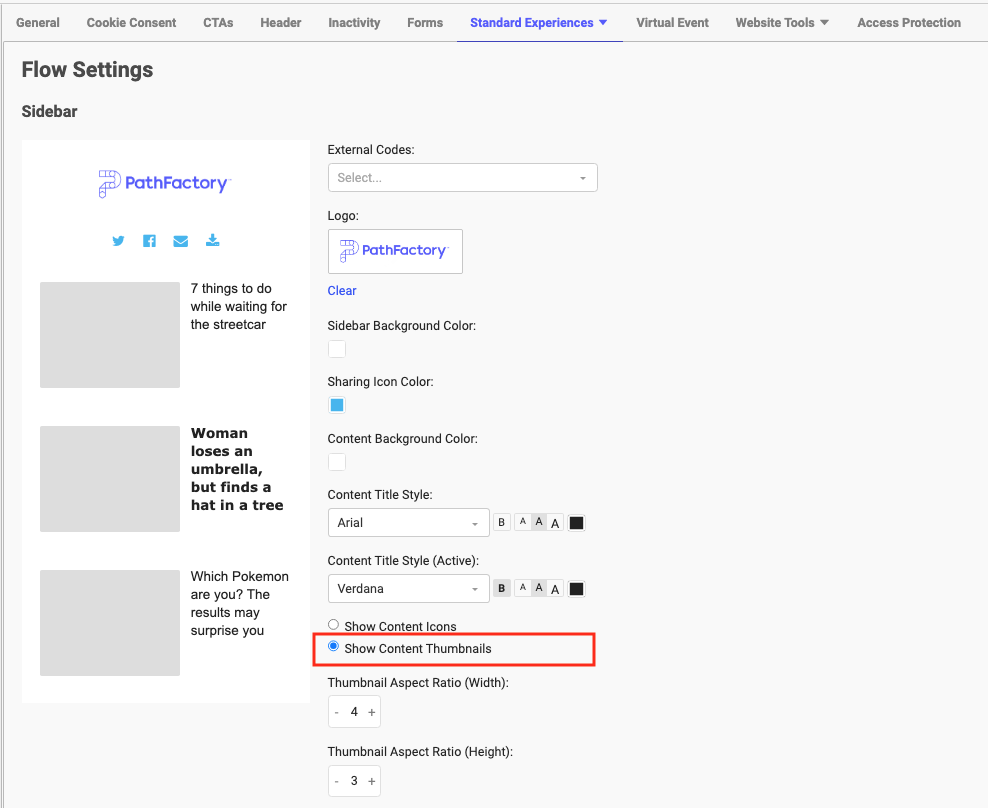
- After you have indicated you want to show content thumbnails, the thumbnail aspect ratio fields become available, which you can then configure to meet your needs.
Note: For all Flow Promoters the default image aspect ratio is set to 4:3. If you change the aspect ratio and the image does not render correctly, you should readjust the aspect ratio.
- When you are finished setting up the Promoter’s appearance and behavior, click Save.
Note: The Flow Promoter bar has a set width of 96 pixels. You can adjust the thumbnail width aspect ratio within that range. If you make changes that exceed the width of the Flow Promoter, the width is automatically capped, with the height adjusted accordingly.
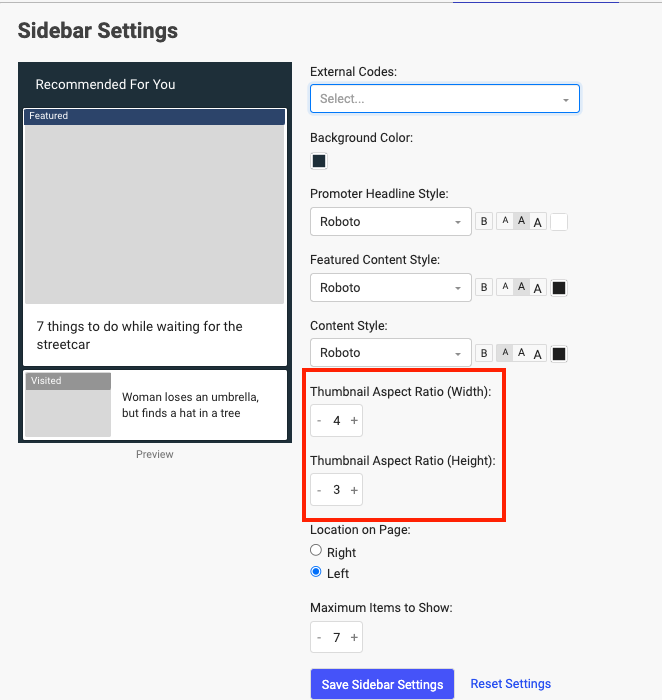
How to Edit the Thumbnail Image Aspect Ratio for Sidebars
Following the same navigation as for the Flow Promoter, in the Standard Experiences dropdown menu, select Sidebar. The following menu appears.
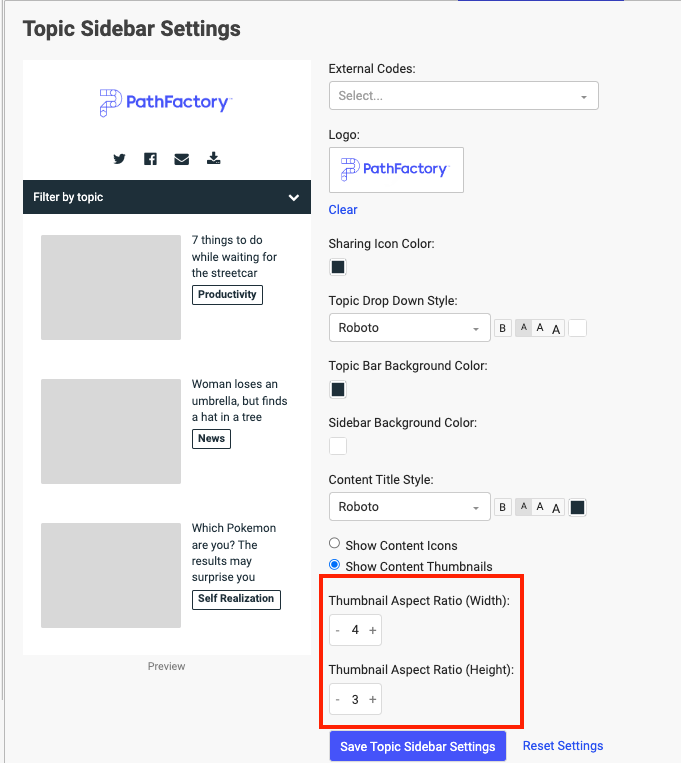
How to Edit the Thumbnail image Aspect Ratio for Topic Sidebars
- Following the same navigation as for the Flow Promoter, in the Standard Experiences dropdown menu, select Topic Sidebar. The following menu appears.
- Ensure you activate the checkbox to display content thumbnails first, and then the aspect ratio, width, and height configuration will appear.
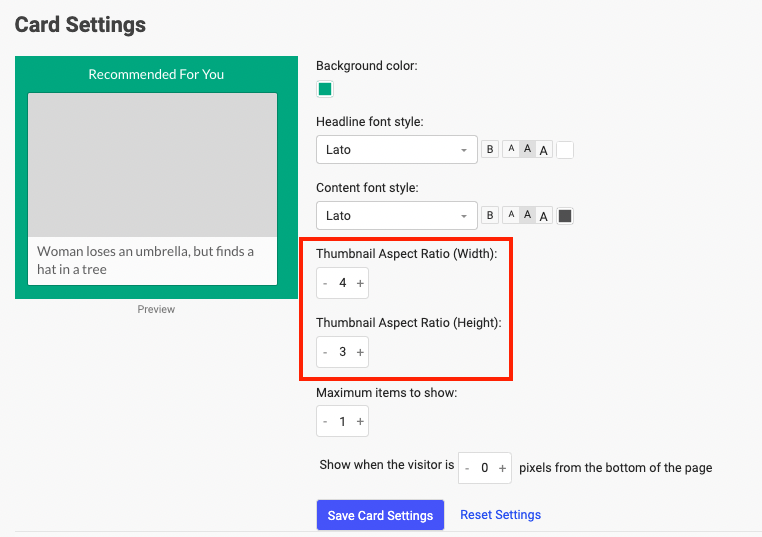
How to Edit the Thumbnail Image Aspect Ratio for Card Promoters
- Following the same navigation as for the Flow Promoter, in the Standard Experiences dropdown menu, select Card. The following menu appears.
- Ensure you activate the checkbox to display content thumbnails first, and then the aspect ratio, width, and height configuration will appear.
How to Edit Thumbnail Image Aspect Ratio for Bottom Bars
- Following the same navigation as for the Flow Promoter, in the Standard Experiences dropdown menu, select Bottom Bar. The following menu appears.
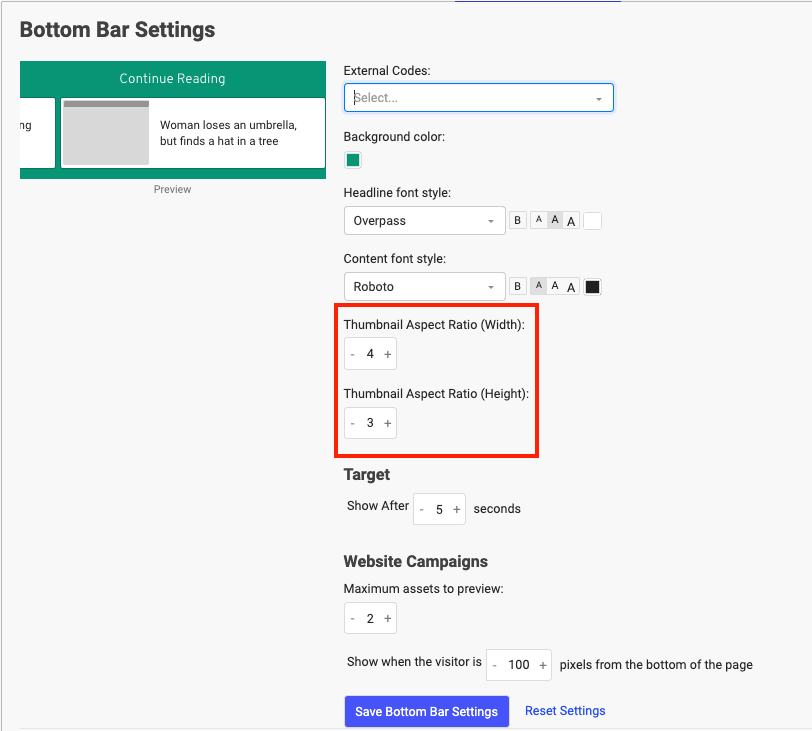
- Ensure you activate the checkbox to display content thumbnails first, and then the aspect ratio, width, and height configuration will appear.
Note: For the Bottom Bar, the height is capped at 72 px and the width is calculated based on the aspect ratio entered.
How to Edit Thumbnail Image Aspect Ratio for Signposts
- Following the same navigation as for the Flow Promoter, in the Standard Experiences dropdown menu, select Signposts. The following menu appears.
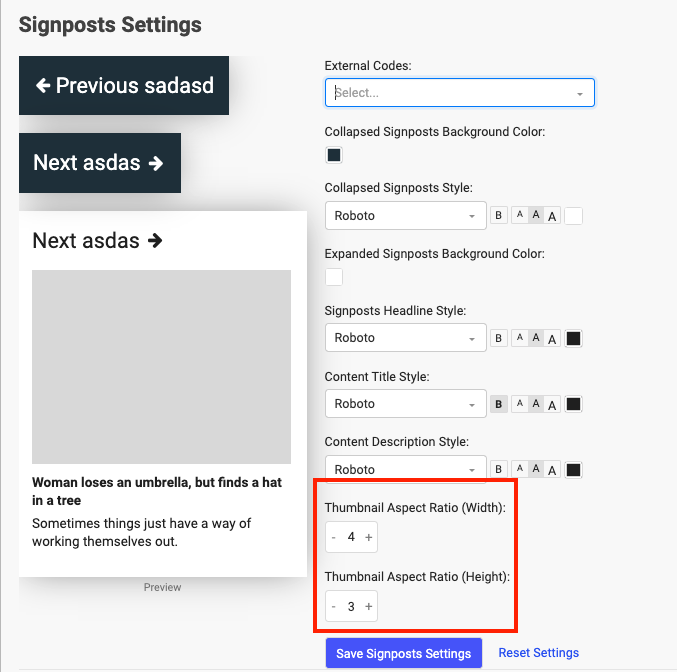
- Ensure you activate the checkbox to display content thumbnails first, and then the aspect ratio, width, and height configuration will appear.
Views: 81