2022 Release Notes: Release T
Release T is here and it’s the last one of the year! We have added the following features:
- more customization for your CTA labels;
- more search parameters to find specific market segments;
- better campaign tracking through external ID overrides;
- Time zone conversions for Virtual Events;
- setting default email tracking type; and
- more enhancements for our PathFactory for Revenue Intelligence.
Customize CTA labels for Tracks, Explore pages, and Virtual Events
With this implementation, you can override the CTA label at the experience level for Recommend and Target tracks, Explore pages and Virtual Events, which allows you to reuse the same CTAs across different use cases without having to clone or create new CTAs.
Previously, the only option available was for you to clone the CTA or create multiple CTA using the same form as the destination but a different CTA label. Now your organization can repurpose the same CTA but use different button labels for different experiences!
To see how to use this new feature within your tracks and virtual events, read on below.
Target and Recommend tracks, and Explore pages
- Navigate to the Target track or Explore page you want to edit.
- On the left panel, scroll down to the CTA section.
- To modify a CTA, select it. A popup menu appears.
CTA edit popup menu
- To Add a CTA, just click + Add CTA. The new undefined CTA appears in the CTA section. Select the new unnamed CTA to open the same popup menu as above. Here you can select the CTA you want to modify, and specify its look and navigation.
CTA edit popup menu

Virtual Events
- Open a Virtual Event. Select the Sessions tab to see all of the sessions associated with that event.
Sessions tab
- For the session you want to edit, click its corresponding Configure link.
To use this new CTA customization feature, you must select a session that has supplemental content, or else add the supplemental content when you get to the next step in this process. You can add the supplemental content on the Session Details tab by clicking + Add Content there.
Add Content button

- Ensure the toggle for CTA supplemental content is turned on.
Toggle for Supplemental Content - Next, customize the CTA label name, look and navigation by using the fields provided.

New search filters for Segments
PathFactory’s Personalization feature allows you to build various visitor segments to support your ABM efforts. With rule options based on query string parameters and visitor IP data, you can guide each of your visitors to the correct experience (tracks/microsites/explore pages) all from one link.
Segments currently have ‘equals’ and ‘does not equal’ as operators to select from when building your rules. With this release, we’re introducing two new operator values (listed below) that expand the rule building functionality and thereby adding further flexibility.
- contains
- does not contain
Override external ID for Content Tracks
Do you have a specific attribution strategy where you change the campaign ID for an asset depending on the experience in which it is being used? Are you ever using a single track across your campaign to promote to multiple verticals? If so, this enhancement is for you!
You are now able to assign a ‘Campaign_id” for each content asset to ensure that respective campaign attribution is accounted for. Previously, users could only assign a campaign ID to the track external ID which did not serve either use case, as campaign membership was related to the specific asset engagement and not the other assets in the track.
With this improvement, you can override the content external id at the track level which can be then used to assign a campaign ID for each content asset.
To use this new functionality, follow these steps.
- Open a Target or Recommend Track you want to edit.
- On the left panel, click an existing External ID or select + Add External ID. Either way, a popup menu appears.
External ID edit menu - Enter the External ID you want to associate with this content. To save your additions, click Update.
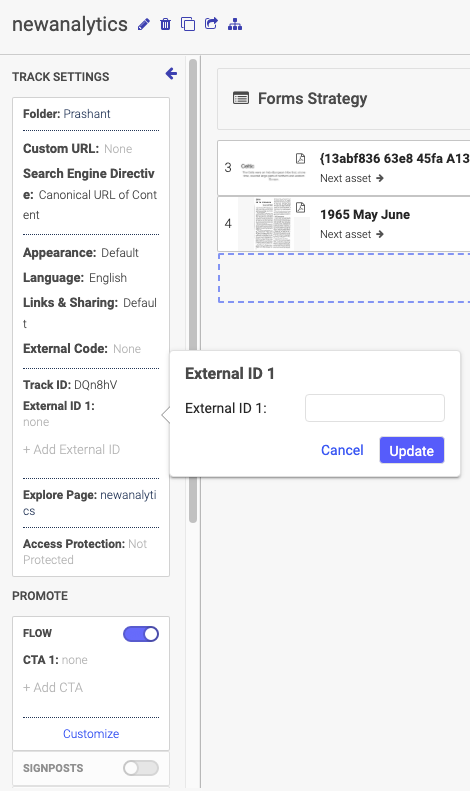
If you have performed an external id override action for any contents in the track, when the webhook gets triggered the override values are passed to the respective field in your MAP . If you have added {{external_id}} field merge for external code or you’re passing this as a hidden field for custom forms the override values will get populated accordingly.
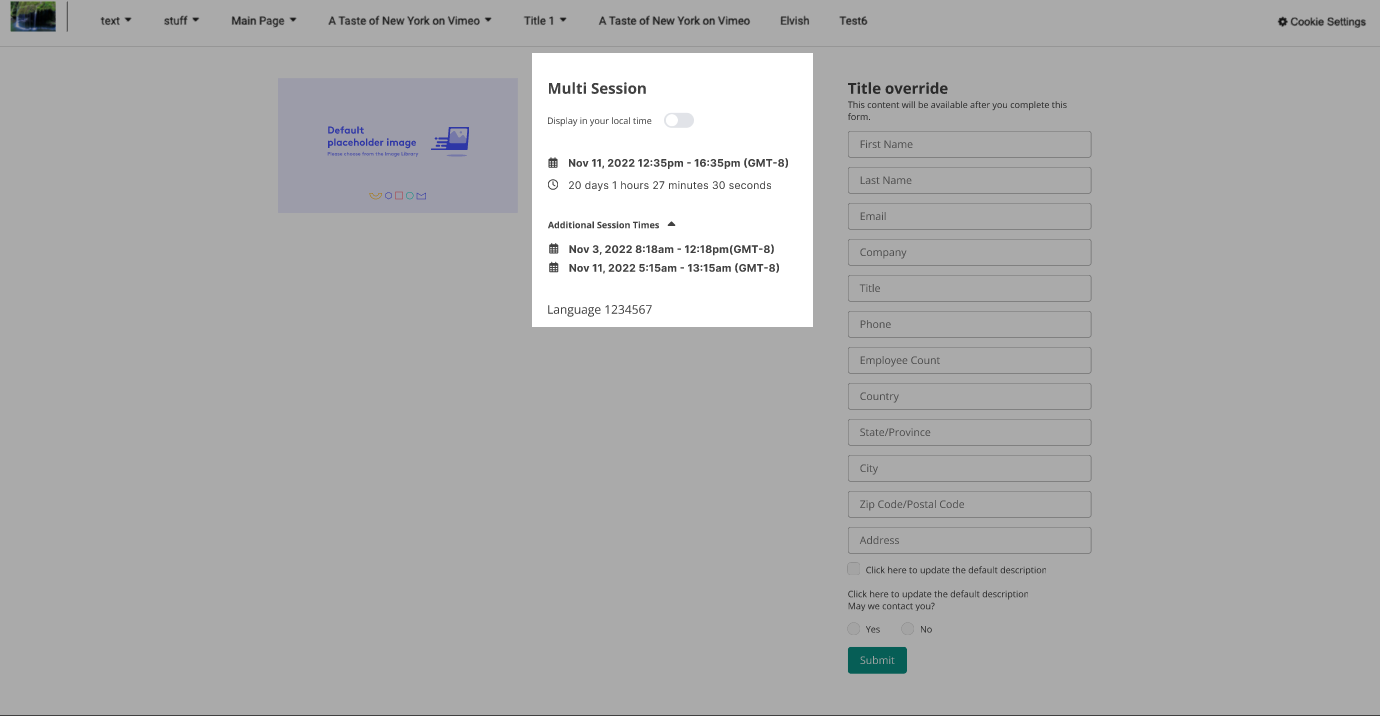
Time zone conversion for VEX session audience
We have added a new toggle “Display in your local time” for Virtual Event live session that lets your audience see the session in their local time. So no need to take out your calculator or count on your fingers – now you can see exactly when your live session will be available to your local audience.
Previously, when the visitor landed in a Virtual Events session, they were able to see the time and time zone that you had configured for the given sessions. This can be a hassle to keep converting the session time into your time zone, especially if you are traveling. This lack of translation could also result in the loss of potential attendees if you miscalculate their session time. This implementation ensures the time zones are dynamic, so that they will auto-adjust to the audience members’ time zone even when they are logged in through a VPN.
Note: This time zone translation accommodates 2 time zones only, session owner configured and audience member’s location.
PathFactory for Sales – set default email tracking type
With this enhancement, PathFactory for Sales administrators can set a default email tracking link that is automatically applied whenever a sales user chooses to copy a content URL through the Content Activation feature. This ensures that the appropriate tracking parameter to identify visitors is always present in the link when sales reps are sharing it with their prospects and customers.
Navigate to the Settings tab within PathFactory for Sales (in the Salesforce application).

From here, you can select a default email tracking type. By default, nothing is auto applied until a PathFactory for Sales administrator makes changes.
Once the admin has selected a default email tracking type, this setting is automatically applied in the email tracking section of the Content Activation tab. Users may change the selection as needed.
PathFactory for Revenue Intelligence
Restricting account views based on the user and teams
Within your PathFactory instance, when you select Revenue Intelligence, you can now see the accounts you own, as the default view. If you are a manager, you can use the filters to select your team group or an individual user within that group.

The following filter rules are applicable on all dashboards where the filters are shown.
- If you are a manager of a single team, then you see a filter with the team name, for example Team-ManagerName.
- By default, accounts are shown that are owned by the manager. The owner filter shows the name of the manager by default.
- The team filter is not editable, but the user can choose the other team members in the owner dropdown list.
- There is an option – All Sellers, in the owner dropdown, which lists the accounts owned by the team, including the manager.
- If you are a manager of multiple teams, then you can choose a team from the team dropdown and view all the accounts assigned to the team members.
- By default, the manager of multiple teams sees All Teams in the team filter and the manager’s name in the owner filter.
Content Plays Preview
Within PathFactory for Revenue Intelligence (PFfRI) we have added a dashboard to display content play previews and a log of content plays, so that your sales team can access the content plays associated with a client’s account, preview their content before sending it out, and easily view the analytics for a specific campaign. Team managers can also see a preview and a log of what content plays their sales team have sent out.
Content play logs are accessible at an account level. The log views are restricted based on the account owner and the seller’s team.
To access this feature, follow these steps.
- On the main menu, select Revenue Intelligence. The All Accounts screen opens.
- To see a list of all content plays for all of your accounts, click the Content Plays button as shown below.
Content Plays preview button
- To see details for a specific account, select an account from the list. The Account Overview screen opens.
Account Overview screen
- At the bottom of the screen you see the list of content plays that have been sent out to this account. To view the analytics for the content play, click its link.
Content Play analysis screen
- The analytics for this content play open. To see a list of the content plays that have been sent to this client account, click the Content Play Preview button as shown below.
Content Play Preview button
- Here you see a complete list of all content plays. To see a preview of any of the content plays, click one in the Content Play column. To see all content plays for all of your accounts, click the Content Play button on the top right of the screen.
Content Plays log
- Here is an example of a content play email preview.
Content Play email preview example
- On this screen, you will notice at the top there is a link for Email Preview and for Buyer’s Response.
Buttons for Email Preview and Buyers Response
- After you click on Buyer’s Response, you see the following information.
Buyers Response log
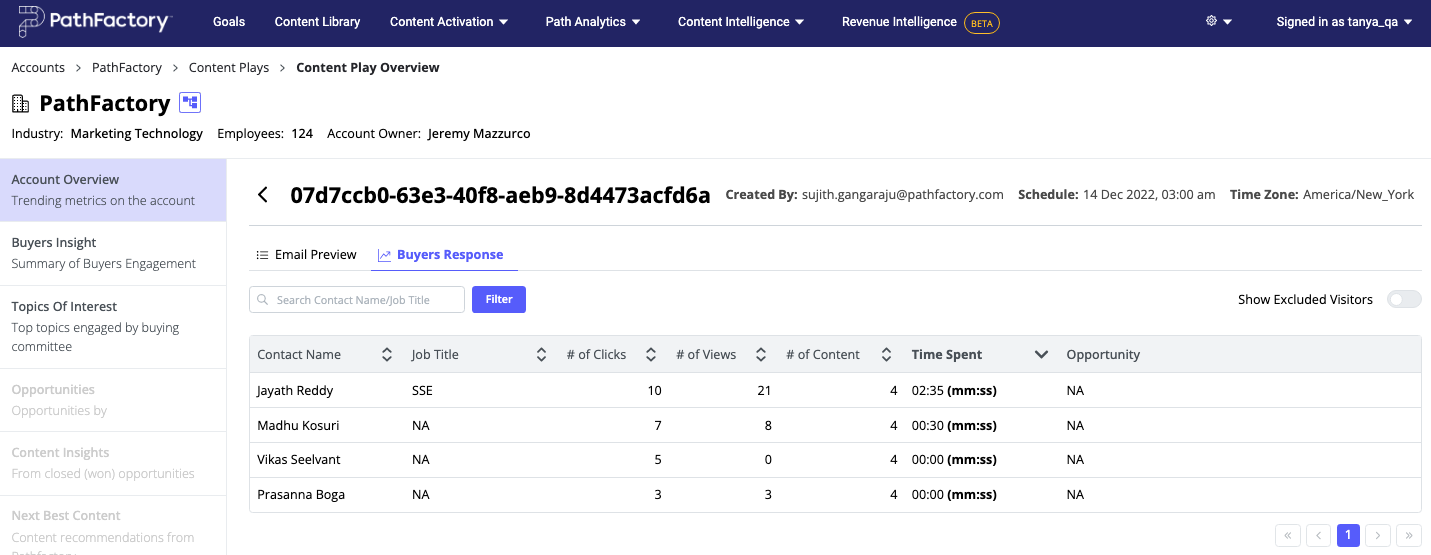
- Created by – who in your company created (and sent) the campaign.
- Schedule – when the campaign was sent.
- Time Zone – time zone of the sender.
- Contact name – name of person at the company the campaign has been sent to.
- Job title – title of recipient.
- # of clicks – how many times the recipient clicked on the campaign URL.
- # of views – how many times the campaign content was viewed.
- # of content – how many pieces of content has been viewed.
- Time Spent – how much time has been spent looking at the content.
- Opportunity – name and description of the deal for that account.
Views: 84