They say that April showers bring May flowers, and our latest release has a few blossoms for everyone. From having the ability to now choose additional design capabilities in a track, to grabbing a person by the form just before they leave your content, and having a single view of scheduled reports across multiple product modules, these features all come together as a colorful bouquet. Read on to see what’s new & improved this May.
Campaign Tools
IMPROVED:
Choose between thumbnails and icons for your track design
We have heard for a long time that this feature was highly desirable, so here it is. Target (Standard Campaign Tools) and Recommend (Premium Campaign Tools) carry unique capabilities to serve different needs in marketing across a buyer’s journey. This includes the manual curation of content to a known audience, as well as recommendations on the next best asset to consume to take the guesswork out of what to curate for new or unknown audiences. These content track differentiators are key to an effective strategy, but if you’ve ever wished that these two experience types could look more aligned from a brand perspective, your wish has now come true!
When defining your appearances for both Target Flow and Recommend Topic Sidebar layouts, you can now choose between surfacing icons alongside your content titles, or the content thumbnail images. This allows for more flexibility in the styling, while ensuring consistency in the look and feel for your visitors as they engage across these two experience types throughout their journey with your content.
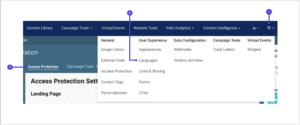
To apply these changes, navigate to Platform Settings > Appearances and select the Campaign Tools tab. From here, you can choose Flow or Topic Sidebar to see the new selection options (outlined below) for your given appearance configuration. This appearance can then be applied to your desired Target or Recommend track with the applicable layouts selected.
NOTE: Visual styling is not identical between Target and Recommend tracks, however external code may be used to match flow width, thumbnail ratio, etc. If you need help, reach out to your Solutions Engineer to assist.
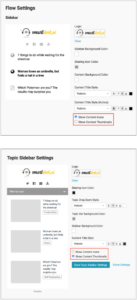 Examples of Target and Recommend Track styling
Generate a sitemap URL to enhance the SEO of your PathFactory experiences
We all know the importance of SEO and its impact on Top of Funnel. You are now able to generate a single sitemap URL that includes all PathFactory experience links matching the search engine directive criteria you’ve already selected. This saves you time by only needing to provide one URL to search engines so you can ensure that your experiences and the underlying assets are being picked up in the search console.
To generate the sitemap URL, follow the steps below:
- From the top-navigation menu, select Signed in as [Your Name] > Organization Settings.
- Next, select More > Search Engine Optimization > Global sitemap from the tab menu.
- Select from the Campaign Tools and SEO Direction fields and click the Get Sitemap URL button.
Note: these fields act as filters for your sitemap. Based on what you select, only the experiences (and their underlying assets) that match the Campaign Tools and SEO Directive criteria will be included in the sitemap.
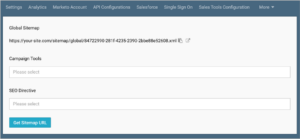 Example of URL Field
Serve a form within an exit promoter
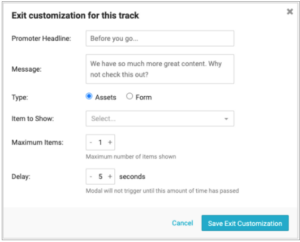
Have you ever wanted to serve a “last-chance” form to a visitor navigating away from your content experiences? How about a form for the visitor who needs to go, but wants to provide their email to pick things back up later? Now you can with improved exit promoter functionality. With this update, you can choose between serving assets or forms on your exit promoter. If you select the form, your full form library list will be available to select from.
To achieve this, follow the steps below:
- Select Campaign Tools > Target/Recommend from the top-navigation menu.
- Locate and select a track from the list displayed.
- Next, from the left pane, scroll down to the Promote section and toggle on Exit Promoter.
 Exit Promoter toggle
- Once toggled, click on the Customization link within the Exit Promoter section.
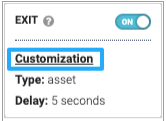 Customization link
- From the modal window, complete the fields displayed and click the Save Exit Customization button.
 Save Exit Customization button
Serve a form within an end promoter
The conversion opportunities keep growing! Similar to the above, you can also now serve a form within an end promoter on a Target content track. If you have a particular call to action you would like to serve to visitors who make it to the end of your experience, simply enable the End Promoter toggle located on the left-pane within Target/Recommend track and select the call to action from the drop-down list (CTA).
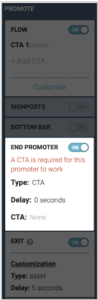 End Promoter example
Globally set all new videos to autoplay in your tracks
Tired of setting autoplay toggles manually for each video asset in a track? Now you can save time with the option to set the toggle globally within Organization Settings. This will be selected by default as it is our current behavior for videos. If you deselect this option at the global level, new videos added to a track moving forward will not be set to autoplay. The behavior of all existing track videos will remain however.
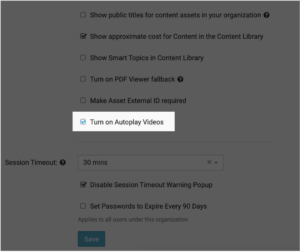 Autoplay checkbox
Core Platform
IMPROVED:
Configure the access protection confirmation email subject line
Are your confirmation emails that grant access to content getting lost in your visitors’ inboxes? If so, you can now configure the confirmation email subject line when setting up access protection to ensure your visitors know the email is coming from you. Simply navigate to the Languages section of Platform Settings and select the Access Protection tab. This also helps with localization efforts if you are sending content experiences out in multiple languages and want to apply access protection. The subject line can now be in the same language as the content experience itself.
 Subject line editing
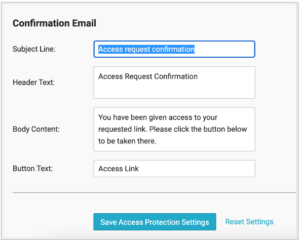 Confirmation Email settings
View all of your scheduled reports in Path Analytics
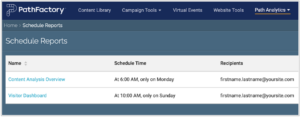
If you’ve wanted an easy place to view all of the Path Analytics reports scheduled across your platform, you are not alone! We’ve heard your feedback and are excited to provide this new tab within the Path Analytics main navigation menu (Path Analytics > Scheduled Reports). This view provides a listing of the following for all your Campaign Tools and Website Tools reports:
- report name
- schedule time
- recipients
By clicking on the name of a report(s), you will be routed directly to them to make updates to the schedules as needed. If you have access to the Campaign Tools and Website Tools reports within Path Analytics you will be able to see this new tab.
 List of Available Reports
Make content external IDs a required field
Platform governance is always top of mind at PathFactory and we’re pleased to roll out this latest improvement. Within the General tab of your Organization Settings, you are now able to make the external ID field for your content required to ensure that users within your organization do not forget to add any critical information when bringing content into the library.
NOTE: This requirement is currently available when users load content into the library via a website URL or file upload. We will be adding support for CSV upload in a future release.
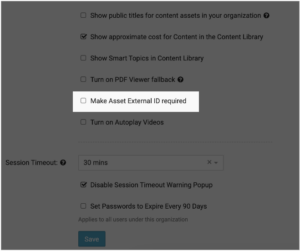 Make Asset External ID Required checkbox
VEX
IMPROVED:
New hero banner layout for your session lobby pages
Are you interested in quickly grabbing your visitor’s attention while better representing your brand and the story you want to tell for your session? If so, applying the new hero banner layout to your session lobby page is a great way to effectively showcase your brand or a particular event theme. You know the saying… A picture is worth a thousand words, and headline text doesn’t hurt either!
To begin using this new layout, follow these steps:
- Select Virtual Events from the top-navigation menu.
- Locate and select the event name from the list displayed.
- Next, click on the Sessions tab, locate the session name from the list displayed and select Configure.
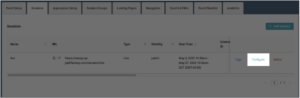 Configure button
- Toggle on the Hero Banner Layout.

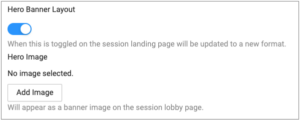 Hero Banner Layout toggle
- Next, click on the Add Image button to:
- Select an existing image from your library
- Search for an existing image from your library
- Upload a new image
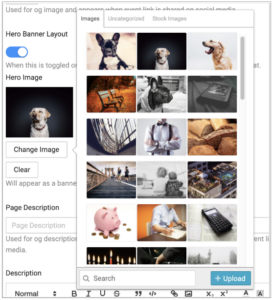 Upload Image example
- Once you’ve added an image, click on the Save button.
Here’s a sample of a session with the hero banner layout enabled:
 Example of a session with Hero Banner Layout
The following settings can be adjusted by navigating to the virtual event name > Sessions > Configure.
- Hero Image
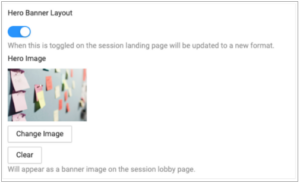 Hero Banner Layout
- Page Title
- Page Description
- Description
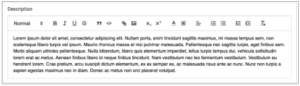 Description text
- Attendee Session Registration Form
Views: 779