Configuring your content is a prerequisite for Website Tools to make recommendations and for using Guide and Concierge. When setting up your content, you are setting guardrails around which groups of content can be recommended.
Together, content sources and collections help you define where the content comes from, and what the final pool of content will look like prior to content analysis and recommendation. Defining the content in this way within Website Tools allows you to more efficiently deliver content that is best suited to your visitors.
What Are Content Sources And Collections?
Conceptually, content is configured in two steps.
- Defining the content’s source.
- Grouping content from one or more content sources into collections. You can add explicit pieces of content in your collection, called manual collections, or use rules with inclusion and exclusion criteria, called rules-based collections.
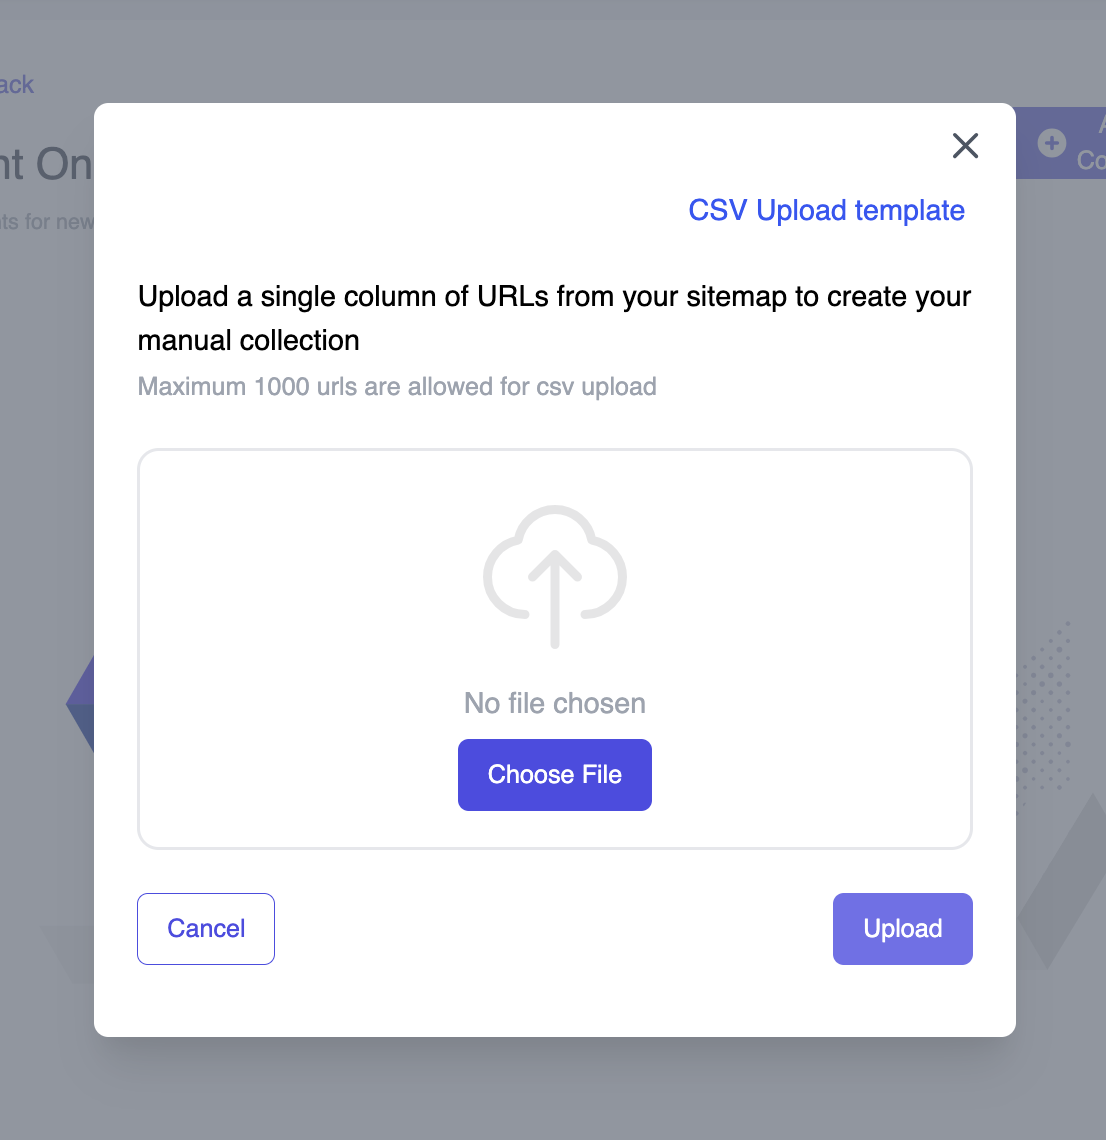
- For you manual collection, you may upload a CSV file
The benefit to this approach is the content configuration allows you to cross-reference content from more than one content source. For example, if you would like to recommend content from your main website (www.example.com), a resource hub (resource.example.com), and a second website (www.example2.com), you will be able to do so.
Note: In releases prior to April 2022, grouping was done using concepts called segments and content pools. Starting with the April 2022 release, we have introduced the concept of collections and rules to replace segments and content pools as it provides a more generalized approach to grouping content, and will give us more options in the future for grouping not just by content, but also by content attributes like topics, personas and other content metadata.
For a visual representation of content, content sources, and collections, see below.
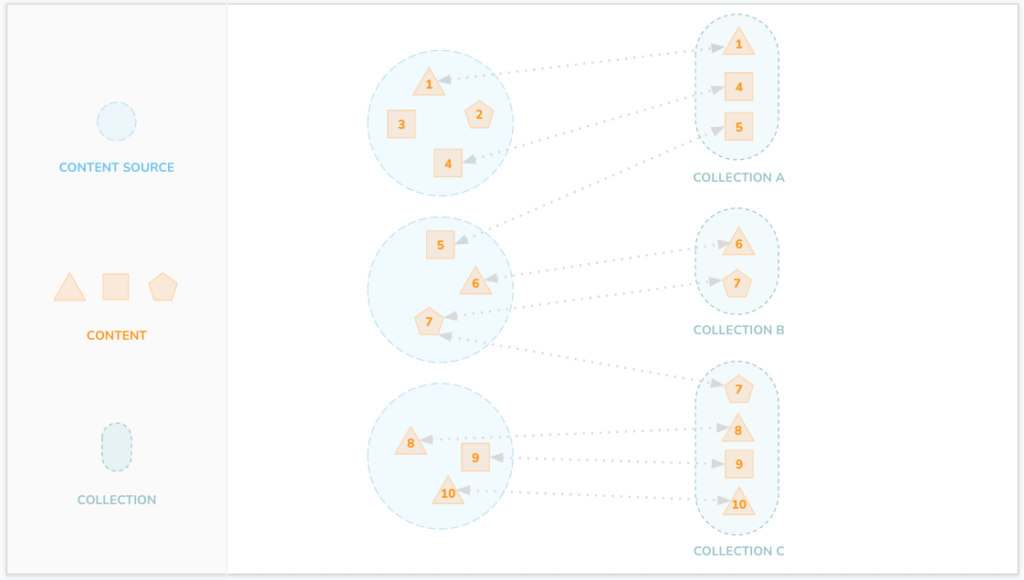
Definitions
Content
Content is any data or information you are using from a content source.
A content track can be configured as a content source, allowing content in that track to become part of the overall website content corpus. Each track is treated as separate content. If you need more info, reach out to your CSM.
Content Source
The content source represents the local (on someone’s device) or cloud-based solution used to store data (content). For any organization, two content sources cannot point to the same sitemap.
Currently, PathFactory supports the following content source types:
- Website URLs
- Website sitemaps
The accepted format for content sources are full paths, such as www.example.com or www.example.com/sitemap.xml. Wildcards are not supported. When a URL is used as a content source, Website Tools’ crawler follows every hyperlink to gather the content. For the best results, we recommend using a sitemap. A sitemap for content source can point to other sitemaps. In that case, all the child sitemaps are considered as part of that content source.
Collection
A collection is a curated list of content from one or more content sources based on defined criteria.
We have introduced the concept of collections and rules to replace segments and content pools as it provides a more generalized approach to grouping content, and will give us more options in the future for grouping not just by content, but also by content attributes like topics, personas and other content metadata.
There are two types of collections – Manual and Rules-based.
A manual collection contains specific URLs pointing to content from one or more content sources. Users can browse to a given piece of content from any content source and add it to their collection. For example, if <code>www.example.com</code> was your content source, you can then create a content segment labeled “Product Education” that could contain the following paths:
- www.example.com/product
- www.example.com/resources/*
Note: You can include the asterisk (*) in the middle of a path to create unique wildcard path patterns.
For example, <code>www.example.com/*/tag/*</code> will encompass the following paths:
- www.example.com/blogs/tag/title
- www.example.com/resources/tag/title
- www.example.com/content/tag/title
If you would like to include the whole content source, such as the whole <code>www.example.com</code> website, the content segment will include the following path:
- www.example.com/*
The accepted format for content source is full paths, and the root domain must match the content source. You may use an asterisk (*) to denote wildcard paths to include all content within a directory.
A rules-based collection allows you to define rules that group your content. The rules let you choose entire content sources or URLs and set inclusion or exclusion criteria between them. Wildcards are supported for URLs, and you can also choose to group rules together to create complex sets of criteria that allow you to precisely fine-tune exactly what content is part of the collection.
Analysis
Analysis is the process of extracting information from content in order to surface useful details about the content and to power AI-driven recommendations. Analysis starts when a content source is created and saved.
There are many benefits to this approach. Allows us to make significant performance enhancements around speeding up identification of new content and analyzing and recommending it, Improved user experience. Performance and better UI experience. Why we are doing what we are doing, why the changes were made and how we are doing it. Why are we going towards a central content intelligence library?
Step 1. Add a Content Source
- Select the manual collection you wish to add content to. The collection content page appears, with a list of previously added content, if any, in the manual collection.
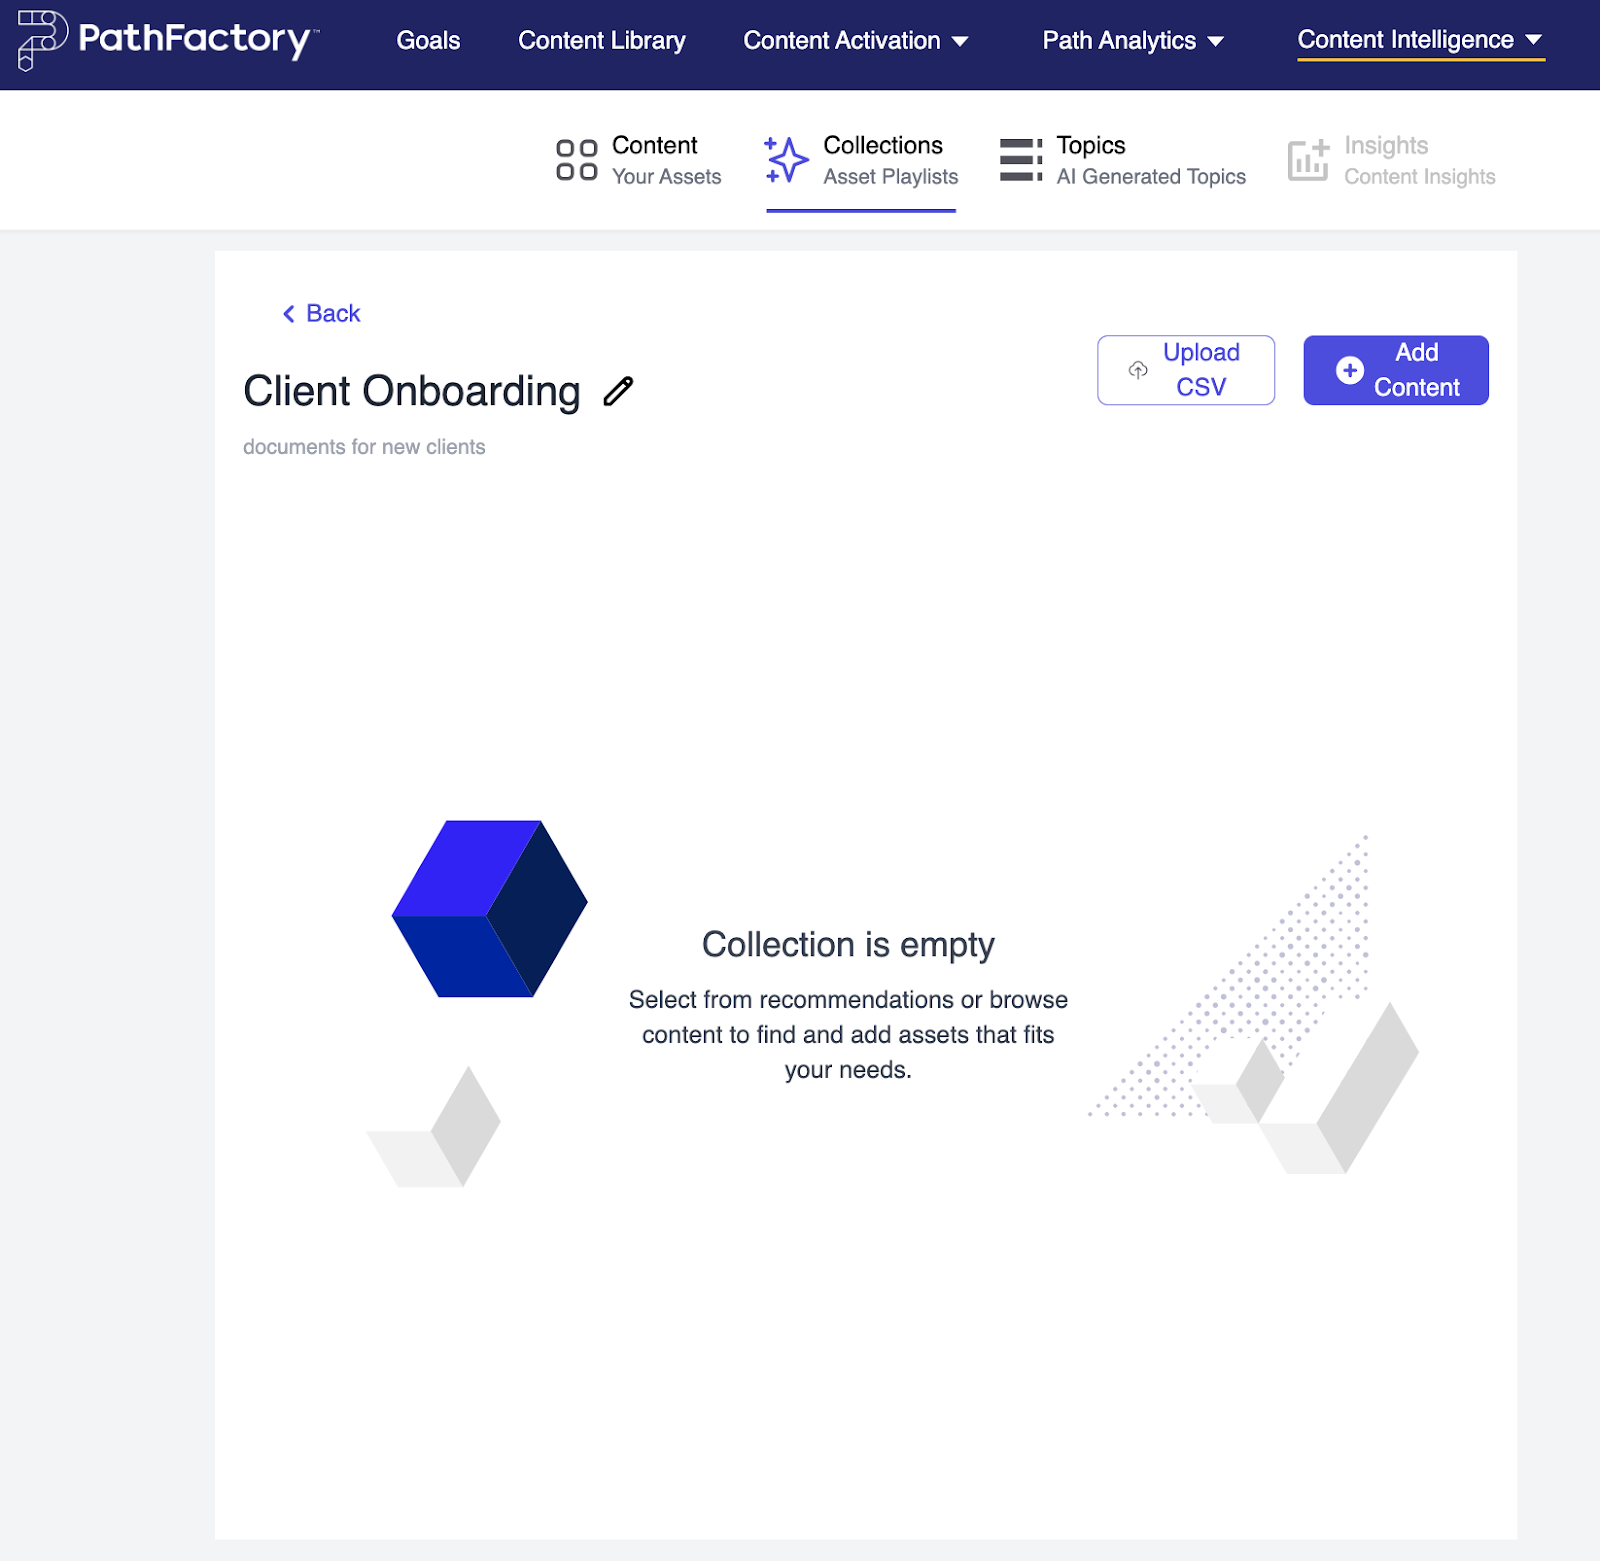
- You have two options for adding content.
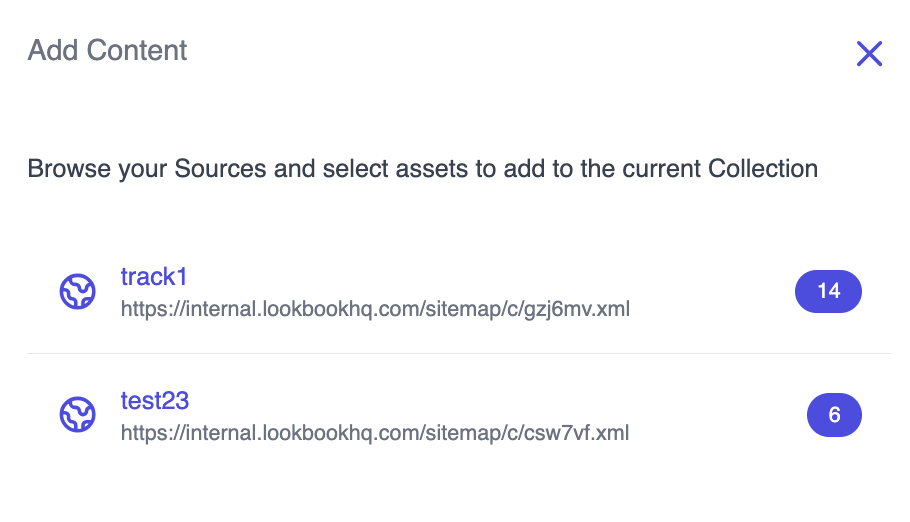
- Add Content – Follow the prompts to choose a content source and navigate to the content you want to add to the collection.
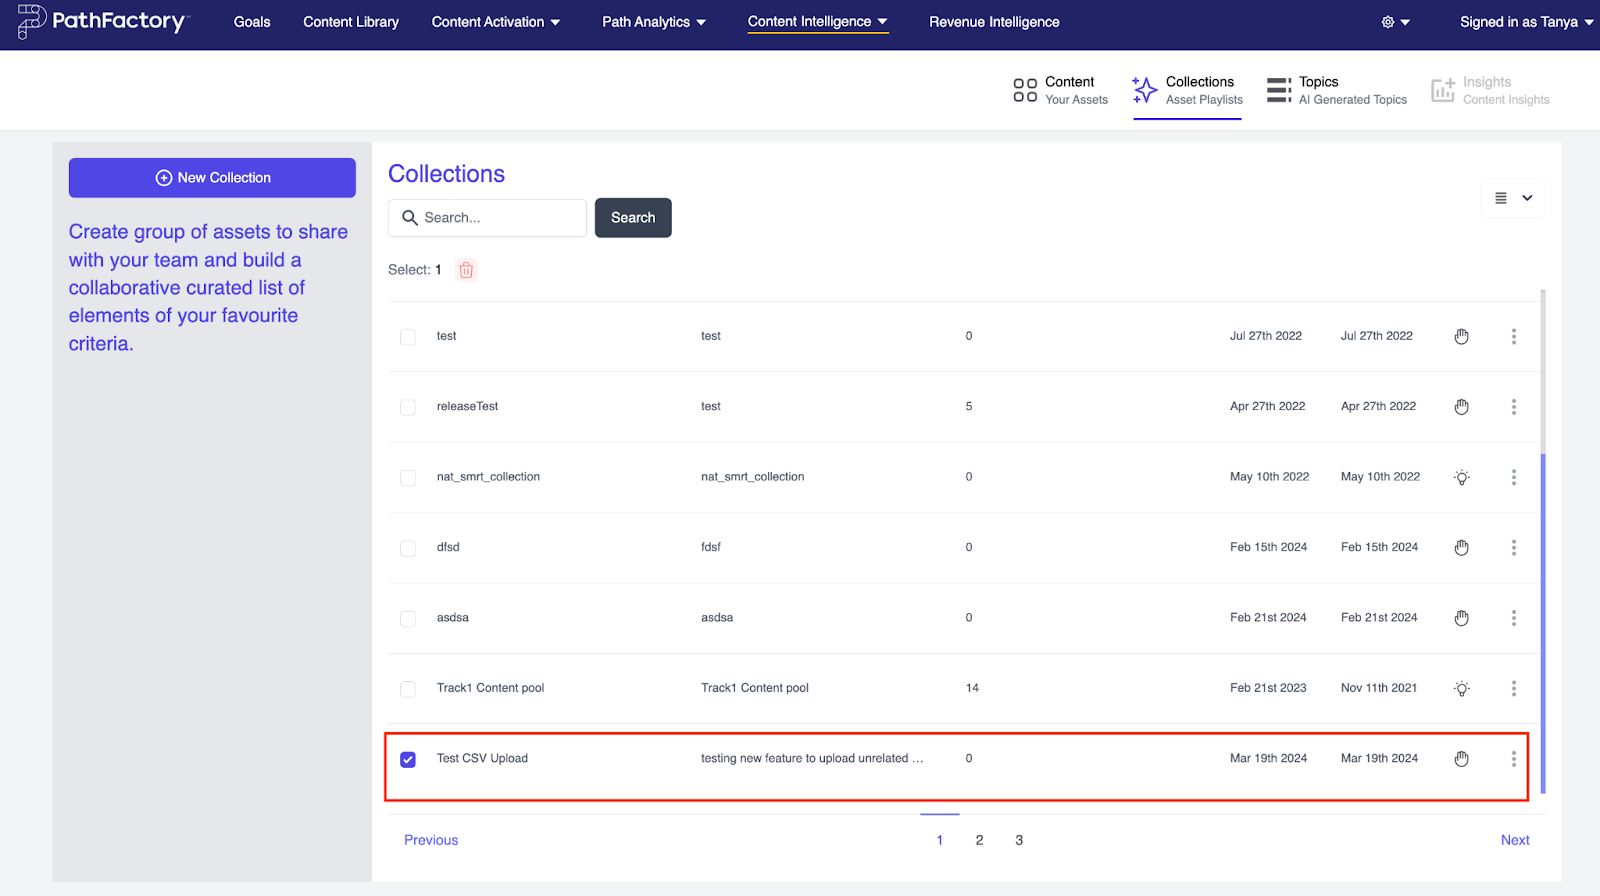
Add Content menu - Upload CSV – To upload a list of unrelated URLs to create a manual collection, select this option. A file window opens, for you to select the CSV file you want to add. After you have selected the file, select Upload.
CSV Upload Template menu - Select one or more pieces of content, and click the Add to Collection button.
- Whichever option you chose, you will then see an updated list of Collections with your new manual collection added.
Edit an Existing Content Source
You can edit any existing content source name.
- In the left sidebar, select the content source you want to edit.
- On the main screen area, beside the content source name, select CHANGE <img alt=”pencil” src=”https://buzzdata.github.io/kb/assets/img/ui/pencil.png” > Edit.
- Edit the content source name as required. Select Save when you’re done.
You can edit only the content source name. If you need to edit the sitemap URL, delete the content source and create a new one with the updated URL.
Delete a Content Source
- In the left sidebar, select the content source you want to delete.
- Beside the content source name, select CHANGE: <img alt=”pencil” src=”https://buzzdata.github.io/kb/assets/img/ui/pencil.png” > Edit.
- Select Delete Source. A confirmation message appears.
- Select Delete.
Warning: Deleted content sources cannot be recovered.
Step 2. Analyze a Content Source
- The Analysis process starts as soon as a content source is saved.
- Select the content source you just created.
- Click on the Start Crawling button or the Analyze button.
- After the analysis is completed, you will see a list of all the content in that content source. The content will be displayed as folders if a given page has child pages under it, otherwise it will be displayed as documents.
- The list will always display the name of the content. The Columns dropdown lets you control whether you can see the Title, URL, Date published and Date updated attributes.
- The Last Analyzed date is shown below the Re-Analyze button.
You may get a message saying another job is running. If you see that message, try the Analyze process again later.
Re-Analyzing a Content Source
You can re-analyze a content source at any time after an initial analysis has been completed.
- Click on the Re-Analyze button for that content source.
- The analysis process will be initiated for the content source.
Step 3. View Content Information Using Content 360
- Click on any piece of content.
- A slide out will show useful information about the content, such as:
- URL
- Name
- Asset type
- Last updated date
- SEO compliance
- Accessibility compliance
- Key phrases in the content
Step 4. View Collections
- In the top right, select the Collections tab. You will be taken to the Collections page.
- The page lists all the collections created so far, including a Description, Updated Date, Created Date and collection type (manual or rules-based).
- You can toggle the display to show a list view or a card view.
Step 5. Create And Manage Collections
- On the left sidebar, click on the New Collection button. A slide out menu on the right appears.
- Choose the type of collection you want to create – Manual or Rules-based.
- Complete the following fields:
- Collection Name: enter a name that describes the collection so you remember why it was created later (for example, “Corporate website blogs”).
- Description: enter a description of the collection.
- Default Title: choose the default title that will appear for all pages within the content pool.
- Page title: the title specified in the page’s HTML <page> tag.
- Meta title: the title specified in the page’s Open Graph title meta tag.
- Title: the title is predicted based on an analysis of the content with natural language processing. Use this option if your pages don’t have the appropriate meta or page title tags.
- Remove Prefix/Suffix from title: use this option to delete any prefix or suffix that appears in your page titles. Enter the exact text to be removed. PathFactory supports a pipe, colon, and hyphen in this field. For example, if all your pages follow the format of Page Name | Company Name, you can remove the pipe and company name. In our example, we would enter <code>Company Name</code>.
- Default Image: If there isn’t an option here for you to select a fallback image, it has automatically been set based on what is configured in Organization Settings for default images.
- Select Save to save your collection.
Edit an Existing Collection
- Locate the collection you wish to edit on the menu next to the collection.
- Edit the Collection name, Default title, Remove Prefix/Suffix from Title, Default image and Description as needed. When you’re finished, select Save.
Delete an Existing Collection
- Locate the segment you wish to delete on the menu next to the collection. A confirmation pop-up appears.
- Select Delete.
Step 6. Add Content to Collections
Add Content to a Manual Collection
- Select the manual collection you wish to add content to. The collection content page appears, with a list of previously added content, if any, in the manual collection.
- In the top right corner, click on the Add Content button.
- Choose a content source and navigate to the content you want to add to the collection.
- Select one or more pieces of content, and click the Add to Collection button.
Remove Content From a Manual Collection
- Click on the menu bar to the right of the content you want to remove.
- Select Delete. A confirmation message appears.
- Click on Delete in the message.
- In the left sidebar, select Add Content Pool.
Add Content to a Rules-Based Collection
- Select the manual collection you wish to add content to. The collection content page appears, with a list of previously added content, if any, in the manual collection.
- In the top right corner, click on the Add Content button.
- Choose a content source and navigate to the content you want to add to the collection.
- Select one or more pieces of content, and click on the Add to Collection button.
Remove Content From a Rules-Based Collection
- Click on the menu bar to the right of the content you want to remove.
- Select Delete. A confirmation message appears.
- At the prompt, click Delete.
Apply Order and Inclusions or Exclusions to Segments
You can now reorder your segments and apply inclusions or exclusions to them.
To reorder the segments, select, hold, and drag the handles.
To apply inclusion or exclusion actions, select the segment’s appropriate radio button.
<img src=”https://buzzdata.github.io/kb/assets/img/website-tools/content-segorder.png”>
Order your rules from most specific to least specific. If rules are the same specificity, place the exclusion rules before the inclusion rules.
As the URLs are crawled they’re assessed against the rules in the order you define. If the first rule does not match the URL, the URL is assessed against the second rule and so on. As soon as a URL matches a rule, the assessment process stops.
Step 7. Analyze the Content Pool
Now that you’ve completed configuration, Website Tools can analyze your content. All content pools must be analyzed before recommendations show up in Guide or Concierge.
You must manually initiate the analysis. Once you do, all the content you’ve added to the content pool, including PDFs that are in an iFrame or embedded on a webpage, is analyzed.
- In the left sidebar, select the content pool you wish to analyze.
- In the top right, select Analyze Content Pool.
Only one analysis can occur at a time per content pool. If an analysis is in progress, you will not be able to initiate a new analysis until the old one is complete.
To ensure the most up-to-date content recommendations are made to your visitors, you should re-analyze your content periodically.
Note: Guide and Concierge are disabled for the duration of the content analysis. Because of this, we suggest analyzing your content at times when your site gets less traffic.
Ordering, Inclusions and Exclusions
Here are a few example scenarios to help you understand how ordering and inclusions/exclusions work.
Scenario 1 – Most Specific Rule First
Consider this example, where the content source is www.example.com and we would like to recommend everything except the blog.
We create the following two segments:
- Blogs (www.example.com/blogs/*)
- Entire website (www.example.com/*)
If the two rules are defined as follows:
- Blogs (Exclude)
- Entire website (Include)
Then the results for the following URLs are:
- www.example.com/contact-us is included (Does not match Rule 1, but matches Rule 2)
- www.example.com/blog/abc is excluded (Matches Rules 1)
- www.example.com/take-a-demo is included (Does not match Rule 1, but matches Rule 2)
Scenario 2 – Least Specific Rule First
If we simply reverse the order of the rules above we’ll get a different result. In this scenario the two rules are defined as follows:
- Entire website (Include)
- Blogs (Exclude)
Then the results for the following URLs are:
- www.example.com/contact-us is included (Matches Rule 1)
- www.example.com/blog/abc is included (Matches Rule 1)
- www.example.com/take-a-demo is included (Matches Rule 1)
Scenario 3 – Ordering Rules of Multiple Specificity
Consider this third example, where you want to exclude all blog posts except one, and include the rest of the website.
In this example, you will have three segments:
- Blog post (www.example.com/blog/title)
- All other blogs posts (www.example.com/blog/*)
- Entire Website (www.example.com/*)
The correct order is:
- Blog post (Include)
- All other blog posts (Exclude)
- Entire website (Include)
In this case, the blog post segment is the most specific and the entire website segment is the least specific.
Views: 327