Governing the appearance of your PathFactory campaigns and content experiences is about to get easier to manage. This article describes what Themes are and how to set up and configure them. Themes are a prerequisite for using PathFactory Templated Experiences and your organization must set up at least one Theme before using Templated Experiences functionality. (You can use a starter Theme file we provide to do this.)
Note: A custom role is required for users to access Themes (unless the user is an Admin or Author). For instructions on how to add a custom user role for access to Themes, read here.
What Are Themes?
Themes are files that contain style settings such as brand fonts, logo, colors and images. Theme files ensure that any Templated Experiences (and their associated Content Pages and Landing Pages) created by sales for outreach or by marketing for campaigns reflect marketing-governed brand standards and guidelines. As mentioned above, PathFactory comes with a starter Theme file out of the box that you can configure to create your own Themes. You can create as many Themes as you want. For example, you may want a global master theme, a region-specific theme, or a partner-specific theme.
Your organization can easily modify the out-of-the-box starter Theme file to suit its needs using a WYSIWIG editor. If you want to configure more advanced theme elements, you can also use the Theme File Editor tool with the assistance of your organization’s development team. If you have questions about this, please contact your CSM.
The configuration of Preset Theme files ensures that, later on, when you create a Templated Experience, the styling is aligned with brand standards and other guidelines you’ve defined in your Themes. For example, marketing could make available a color palette selection that is compatible with the corporate colors, as well as a small variety of acceptable company logos and fonts. This allows users some flexibility and creativity while creating “guard rails” that ensure any Templated Experiences created remain true to the brand.
Who Manages Themes?
You can use the out-of-the-box Theme to change colors, fonts, font sizes, CTA look and feel, navigation look, and default logos, text and images. No development skills are required.
If you want a more specific look for a Theme’s Landing Page Template, for example, such as more detailed specifications in the look and feel and create Custom Sections for Landing Page Templates, you may require CSS changes or other configuration customizations. Talk to a PathFactory Solutions Consultant to review your requirements. They may be able to provide a solution immediately via CSS, or, if your requirements are complex, work with you on a project to implement a customized Theme.
Note: Once you have created Custom Sections, you can store and access them in the Themes Section Library. Read more in the article, How to Use the Themes Section Library and Add Custom Sections.
How to Create/Configure a Theme File
These instructions assume you have been assigned a role that has permission to create Themes. If not, see User Management for Themes and Templates.
To begin creating a Theme file to suit your organization’s needs, follow these steps.
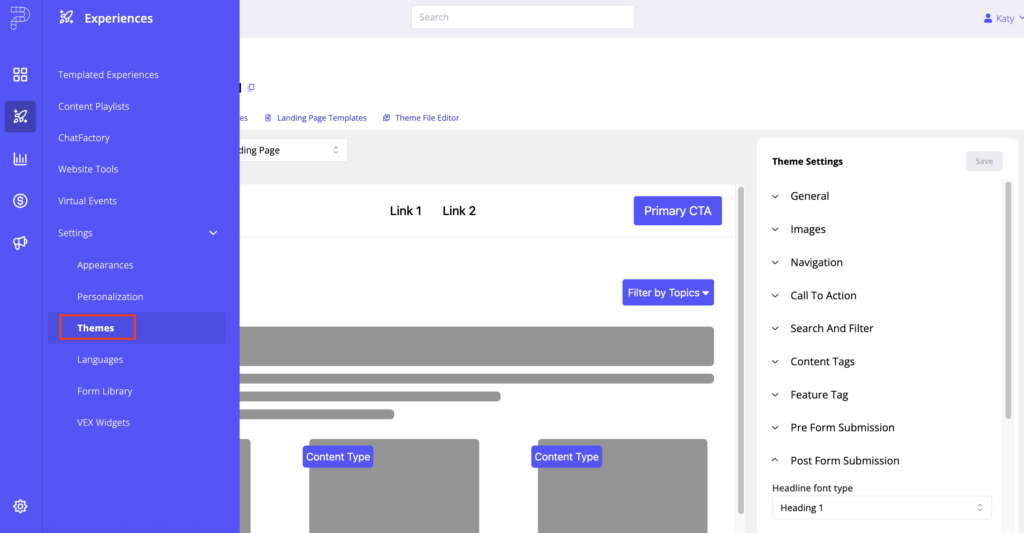
- On the main PathFactory navigation menu, click the gear icon on the top right of the screen. In the menu that appears, select Themes.
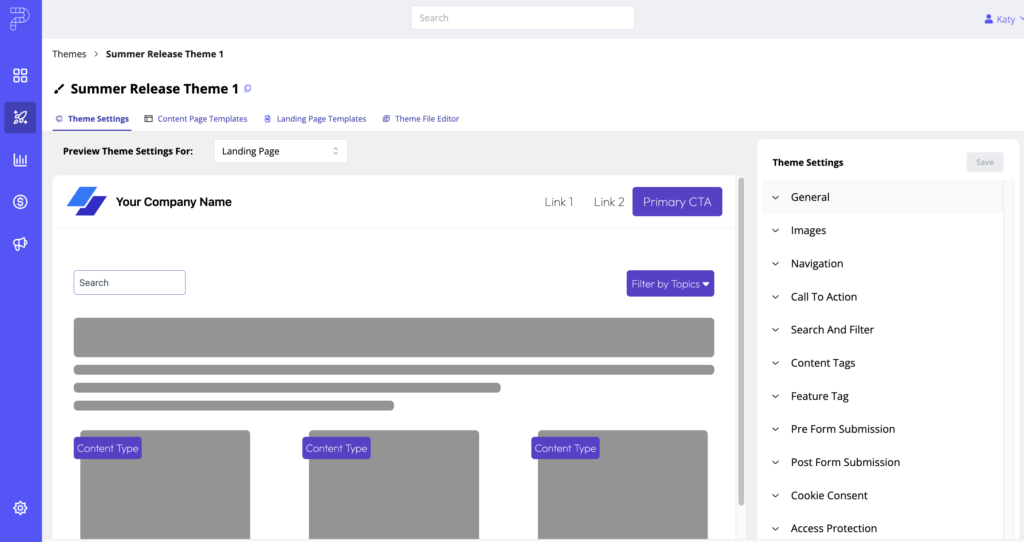
- The Themes page opens. If this is the first time you are creating a Theme, you will see a starter Theme file that is ready for you to edit and configure. If your organization has already created some Themes, you may select whatever pre-existing Theme you want and then you can clone and edit the selected Theme and save it as a new Theme with any desired modifications.
- If you are planning to edit an existing one you previously created, select that Theme. To add a new Theme, click Create Theme on the top right of the screen.
Note: If you do not see the Create Theme button, that means you do not have the proper permission to perform this action.
Note: If you have a long list of Themes, you can search for an existing Theme by entering in the Theme name (or partial name) in the Search field.
- After you click Create Theme on the top right of the screen, a popup window appears for you to enter a name for the new Theme, and select a Theme Preset. A Theme Preset is a pre-existing Theme file that you can then modify. Select Velocity from Theme Preset dropdown list. (This is the starter Theme Preset that PathFactory has provided all users as a starting point for creating their own Themes.) This action will create a copy of that starter Theme file, labeled with the name you entered.
- Click Save, and Themes opens, with your Theme file ready for you to customize.
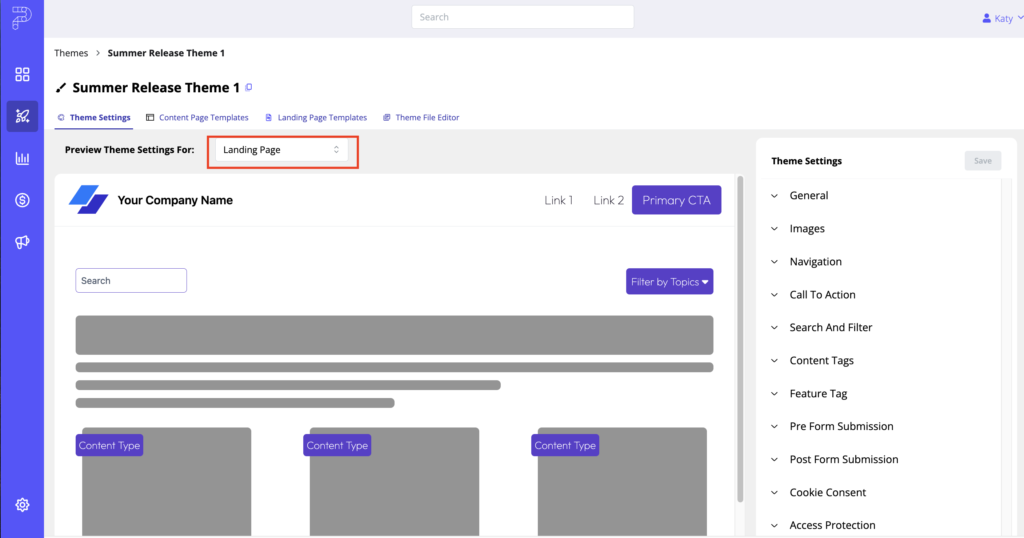
- You’ll notice a dropdown list in the body of the Theme preview (highlighted in the screen capture below). This is where you can see a mockup of how your Theme looks as it gets applied to Landing Page Templates, Content Page Templates, Access Protection and Cookie Consent associated with this Theme. (There is a link to instructions at bottom of this document for how to set up Landing Page Templates and Content Page Templates using a Theme.)
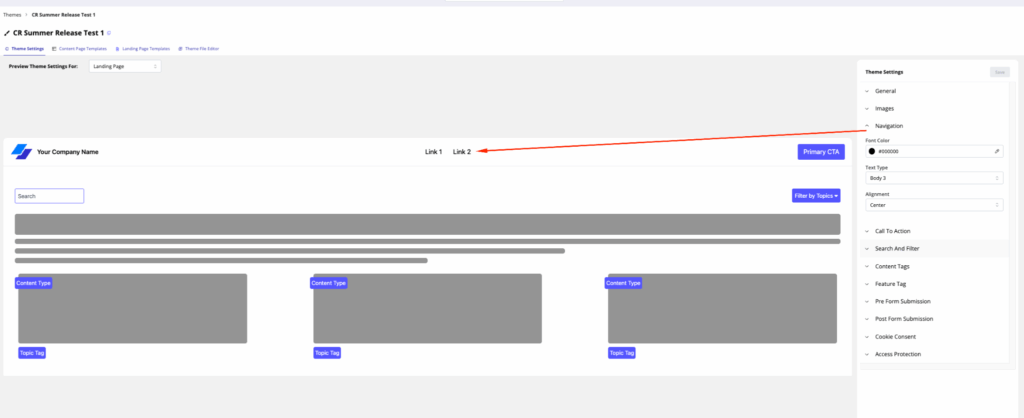
- You’ll also see menu items on the right side of the screen that allow you to edit the settings for General (fonts, logos, etc.), Favicon image, Navigation, Calls to Action (CTAs), Search and Filter.
Note: We recommend you organize your content using clearly defined headings. Search engines like Google prioritize content that is organized, as it helps them understand the main topics and subtopics of your page. - To modify the appearance of Cookie Consent and Access Protection to match your branding and style, expand the menus and select the options that work for your brand. To see the options available, expand the Sections by clicking on their associated arrow. Each time you choose/change a setting on the right side, you see a preview on the left of what the selected configurations will look like.
Below is an screen capture of the Access Protection editing menu.
Once you have created a Theme and configured the Theme Settings, you can use it to create Landing Page Templates and Content Page Templates. Landing Page and Content Page Templates are layouts you can create that inherit Theme Settings. When you start using Templated Experiences to build digital experiences, you will be given the opportunity to select which Content Page Template or Landing Page Template you want to apply based on the library of templates you build within Themes.
Here are detailed instructions on how to build a Landing Page Template or Content Page Template using a Theme.
How to Use Out-Of-The-Box Landing Page Templates
To make it easier for you to create highly targeted Landing Page Templates, we’ve added five out-of-the-box Landing Page Templates to help you quickly get started deploying campaigns, events, and demand generation efforts with minimal setup. Each Experience Template is fully customizable, allowing you to tailor the layout, content, and design to match your campaign goals while maintaining the overall structure suited to your specific campaign.
You can customize, clone, rename, and delete all templates, including Out-of-the-Box and Standard Templates, to better suit your team’s needs. For example, you can rename a Standard Template to “Regional Campaign Template” or “Seasonal Promo Base” to make it clear which campaigns the template is best suited for. Streamline collaboration by ensuring templates are labeled intuitively and outdated ones are removed to avoid confusion.
Below is a list of available preset Templates and a brief description of each.
1-to-Many Template: This Template is ideal for broad-reaching campaigns. It’s perfect for Content Experiences where you expect large numbers of visitors with diverse interests, and it includes multiple content sections that allow for flexible use based on your use case for the landing page.
1-to-1 Campaign Starter Template: This Template is optimized for personalized, one-on-one outreach to help you kick off targeted campaigns aimed at individual prospects or accounts, with sections built to highlight specific content or messaging relevant to a 1:1 digital experience.
Demand-Gen Starter Template: This Template is focussed on lead generation, helping you build Landing Pages geared toward capturing prospect information. It includes form fields, CTAs, and content areas that drive conversions, making it ideal for campaigns focused on attracting new leads through gated content or special offers.
Event Registration Template: This Template helps you streamline the event sign-up process and promote upcoming events, webinars, and conferences. It includes customizable fields for collecting registration details and features space for event-specific content, making it easy for you to manage attendee information and provide them with relevant details.
Event Follow-Up Template: This Template helps engage attendees after an event has concluded. It includes sections for event highlights, follow-up CTAs, and post-event resources, enabling you to keep the conversation going and provide additional content to prospects based on the event they attended.
Note: You can customize, clone, rename, and delete all templates, including Out-of-the-Box and Standard Templates, to better suit your team’s needs. For example, you can rename a Standard Template to “Regional Campaign Template” or “Seasonal Promo Base” to make it clear which campaigns the template is best suited for. Streamline collaboration by ensuring templates are labeled intuitively and outdated ones are removed to avoid confusion.
How to Access Out-Of-The-Box Landing Page Templates
Follow the steps below to open an Experience Template to edit.
- Create a new Theme or open a Theme that was created after October 8, 2024 (i.e., when this feature was released).
- With the new Theme open, select its Landing Page Template tab.
- On the left column you will see a list of five Templates ready to be customized.
- To manage the Templates, hover over one of them. Three options appear. You can rename, delete, or copy the given Landing Page Template.
How to Edit Font Styles in for Desktop and Mobile
In this section, you’ll see how to adjust font styles separately for desktop and mobile views. This feature enables you to ensure the text is appropriately formatted for each device type. To edit the fonts for a given Theme, follow the steps below.
- With a Theme open, on its Theme Settings tab expand the General menu.
- In the General menu, scroll down to the Font Style section, as shown in the screen capture below. You’ll notice there are two tabs: Desktop and Mobile. Adjusting font styles for each ensures the text is easily readable on different devices, whether viewed on a large desktop screen or a smaller mobile device.
- When you are finished setting up the Theme Settings tab, to lock in your changes, click Save. To leave without saving, select a different tab (Content Page Templates, Landing Page Templates or Theme File Editor). On the resulting confirmation popup menu, click Ok.
How to Set and Adjust Aspect Ratios for Thumbnail Images in Themes
The aspect ratio directly affects how an image will display in Templated Experiences and Content Playlists. By customizing the aspect ratio, you ensure that your thumbnails look polished and display properly across different devices and screen sizes.
You’ll often work with two common aspect ratios: 16:9 and 4:3.
- 16:9: A wide format perfect for video content and presentations, giving your thumbnails a cinematic feel. This aspect ratio is ideal for widescreen devices and is the standard size for social media images.
- 4:3: This traditional, box-like aspect ratio works well for images or content that needs to fit into a more compact space, helping you preserve details on smaller screens.
Note: When you set a thumbnail aspect ratio, it will apply to all Templated Experiences or Content Playlists based on the given Theme, ensuring consistency throughout your Experiences.
Follow the steps below to edit the thumbnail aspect ratio for images:
- On the Theme Settings tab, find and expand the Images menu.
- You’ll see an option to set a default thumbnail aspect ratio, as shown in the screen capture below. Use the arrow keys to make adjustments or click on the field and type in the dimensions for width and height.
3. Adjust the ratio as needed. To lock in this change, click Save. To leave without saving, select a different tab (Content Page Templates, Landing Page Templates or Theme File Editor). On the resulting confirmation popup menu, click Ok.
How to Clone a Landing Page Template
By cloning a Landing Page Template, you can get a head start on the development of a new campaign by reusing elements and structure from a previously-built template.
To clone a Landing Page Template, follow these steps.
- On the Theme File Editor, select the Landing Page Templates tab.
Landing Page Templates tab - On the left side of the screen you see the standard theme listed. Hover your mouse over the standard theme to see a clone icon as shown below.
Clone icon - To proceed, click the clone icon. A menu pops up, where you enter the name of the cloned Landing Page Template.
Clone Landing Page Template popup menu - Enter the name you want for the newly cloned Template, and click Save. To cancel out of this process, click Cancel.
Views: 103