There are a lot of virtual event platforms out there, and many allow you to build immersive event experiences. But none provide the ability to see and understand attendee journeys, or allow you to connect the event experience to other marketing efforts to aid in accelerating the path of your audience to revenue, like PathFactory.
PathFactory’s Virtual Event Experience (VEX) provides:
• A rich user experience for live or pre-recorded events – large and small
• The ability for attendees to move seamlessly between plenary, keynote, and breakout sessions
• Supplementary content to hold attendees’ attention longer
• Live engagement tools, including chat, comments, and polling
All of this while PathFactory tracks–down to the second–the keynotes, sessions, and content consumed by each individual visitor and account, giving you buying signals that you can act on immediately.
Getting Started
VEX uses templated appearance presets to ensure a simple turnkey event which displays consistently across browsers, and is easy for someone with no coding experience to configure. While most VEX customers use the templates as is, they can be customized by adding external CSS, Javascript or HTML (see advanced customization below). We recommend you create one or more VEX specific appearances as this allows you to create a look and feel purpose-built for your events. Doing this ensures you will not impact any existing Content Tracks or Explore pages that may use an existing appearance.
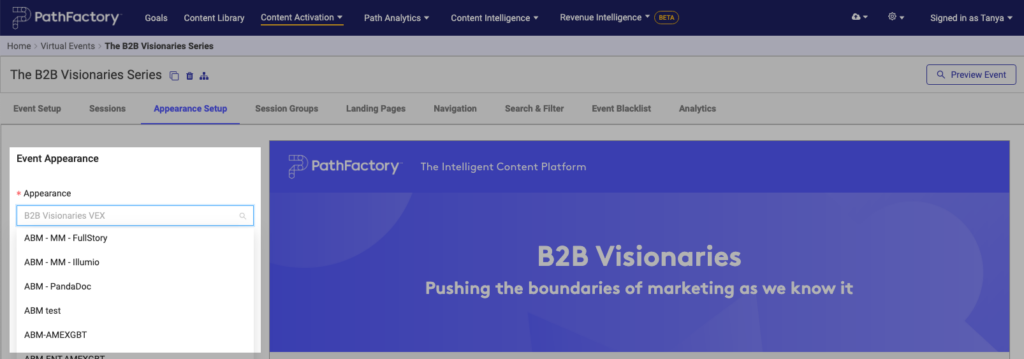
To configure the appearance of your event first navigate to the Appearance Setup tab within your event.
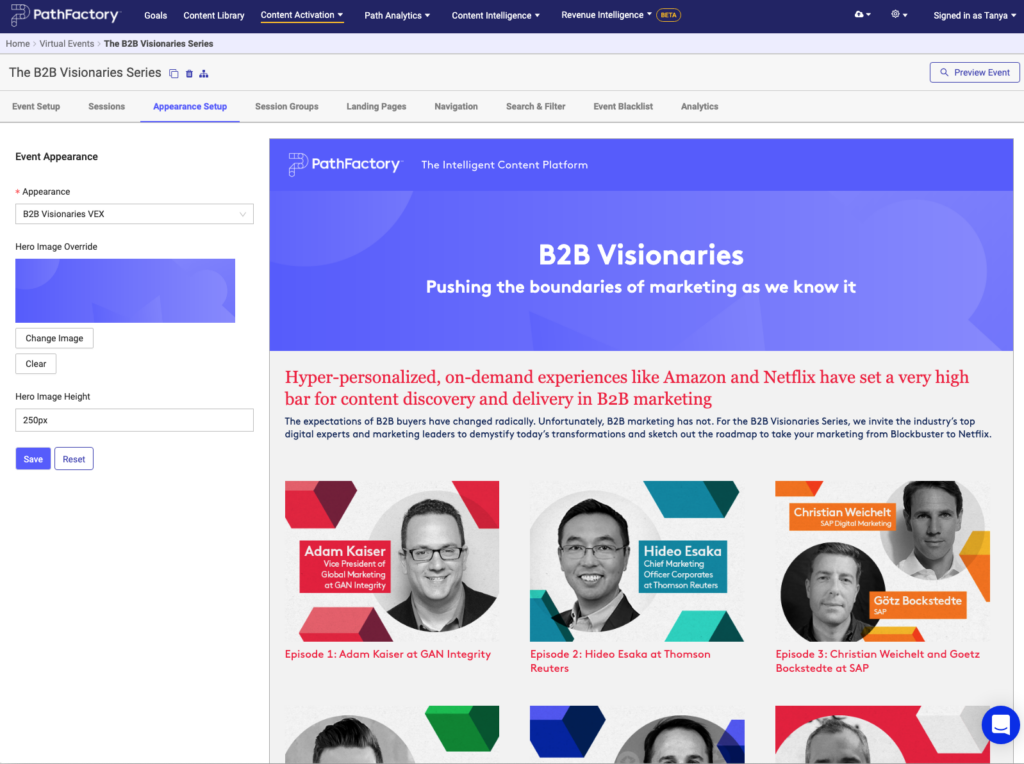
From here, select the appearance preset you wish to apply to your event from the Appearance dropdown menu. This list pulls from your PathFactory appearance settings.
Note: Each event can be tied to only one appearance preset. Pressing the save button will update the preview to reflect the appearance preset.
A VEX Event uses several appearance settings used elsewhere within PathFactory’s Appearances Configuration. To customize the VEX event, follow these instructions.
- Click on the Gear icon and then select Appearances.
- On the Appearances Configuration screen, select the Virtual Event tab.
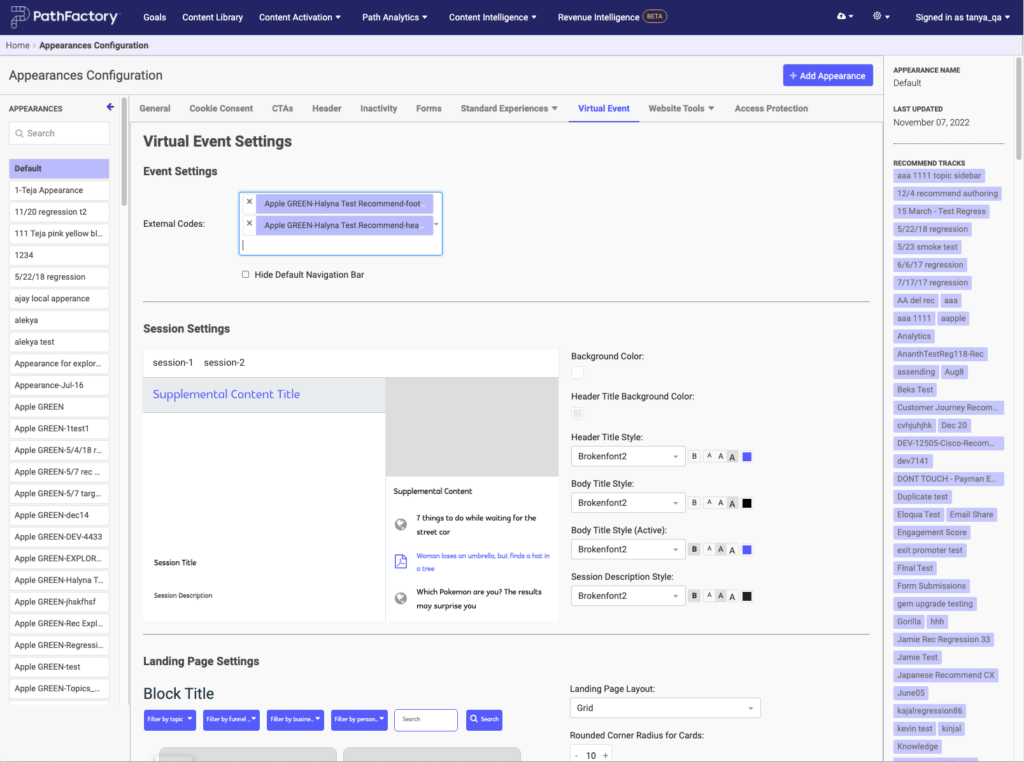
Virtual Event appearance configuration - Here you can add external codes and edit session settings. When you are finished, click Save Virtual Event Settings (or Reset Settings to cancel).
You may wish to change settings in one of these areas to support your VEX event, which may in turn impact how that appearance preset is displayed elsewhere within PathFactory (eg. Campaign Tools). Because of this it is recommended that you make a separate dedicated appearance preset for your event(s) that are separate from those you use in Explore pages and Content Tracks. For more information on the appearance settings used by VEX see the Configuring an Appearance Presets for VEX section below.
The VEX Appearance Setup tab also allows for the configuration of additional VEX elements:
Hero Image Override – Allows you to overwrite the hero image defined by the appearance preset for the event. Note, the recommended image width for hero images is 1600px. Hero image height is also separately configurable (highlighted in the screenshot below). We have created .ai, .indd and .psd templates your graphic designer can use with our recommended dimensions and includes safety margins. We recommend you include text on your hero banner using the Hero title text and hero description text fields (highlighted in the screenshot below), which are positioned on top of your hero banner image, rather than including text directly on the hero image you create. This will ensure more consistent display of text across different screen sizes and best accommodates the use of our registration forms.
Hero Image Height – Allows control over the height (in pixels) of the hero image.
The following text fields accommodate custom copy for your event:
Hero Title Text
Hero Description Text
Page Title Text
Page Description Text
When updating any of these fields, be sure to click save after editing.
Configuring an Appearance Preset for VEX
To configure an appearance preset for your event, start by clicking on the cog in the upper right corner and selecting Appearances. Then create an appearance for your event by clicking ‘+ Add Appearance’, or find an existing appearance preset to wish to clone. Note: you clone an appearance by selecting an existing appearance in the Clone From: section of the Add Appearance window.
The following Appearance Settings are used within VEX to control the event look and feel:
General
Favicon – used as the favicon across all pages in your event
Logo – used in Email Authentication window if the Track Protection feature is enabled for your event
Cookie Consent
All Fields are used if Cookie Consent is enabled for the event
Explore
The following settings within Explore apply to the Event Home Page
Hero Layout – Not used in VEX
Hero Background Color – Used in VEX if there is no hero image or behind a hero image if set to Fixed
Hero Image – Used as the Event Home Page hero image (can be overridden in the Event Appearance Setup)
Fixed/Fill Toggle – Used in VEX to determine if an image spans the full browser width or be a fixed width.
Hero Title Style – Used in VEX on top of the hero image
Hero Subtitle Style – Used in VEX on top of the hero image Layout – Not used in VEX
Page Background Color – Used as the page background color in VEX
Page Title Style – Used in VEX as the event page title
Description Style – Used in VEX as the event page description
Content Title Style – Used in VEX as the appearance of the session title, live session time, and the session description in the event page (including All Sessions and grouped ‘Day’ tabs.
Content Type/Featured Labels Style – Not used in VEX
Search/Filters Style – Not used in VEX
Search Field Input Style – Not used in VEX
+ Advanced Customization – All advanced customization code added will be applied to the VEX event home page and any additional landing pages you build for the event using our Landing Page builder, however it does not apply to session pages. This can include your website header navigation and footer if you wish to emulate your website more closely.
Flow
The settings within Flow apply to the session pages within your Virtual Event.
Logo – Not used in VEX
Sidebar Background Color – Not used in VEX
Sharing Icon Color – Not used in VEX
Content Background Color – Used in VEX as the background color of the right sidebar of a session
Content Title Style – Used to control the text appearance of supplementary content content asset titles in a session, the session title, and the session description.
Content Title Style (Active) – Used as the color of an active piece of supplementary sontent in a session. All signpost Appearance Settings are not used in VEX
Header
The header appears on the Event Page and on all Session Pages.
Background Color – Used in the VEX Header as shown in the appearance preview.
Logo – Used in the VEX Header as shown in the appearance preview.
Logo Size – Used in the VEX Header as shown in the appearance preview.
Header Title Style – Used in the VEX Header as shown in the appearance preview (the text displayed is the Event Name).
Sharing Icon Color – Not used in VEX
Views: 79