This release includes updates to Virtual Events, new webhooks, and an update to the custom CSS application for Website Tools Concierge.
- Virtual Event Improvements – We have added functionality to VEX sessions for you to add a heading to supplemental content on the VEX session page.
- New Webhooks – Four new webhooks are available that provide more detailed reporting on visitor engagement activity in VEX experiences.
- Global Appearance Override in Website Tools – The CSS from the Global Appearance now overrides all child Concierge Appearance settings. Only the CSS defined at the Global Appearance gets carried over to the Concierge Appearances.
How to Customize A Supplemental Content Heading in VEX
It is now possible to customize the Supplemental Content heading for a VEX session, in VEX language settings.
Note: This feature is available for Administrator roles only.
To add a heading for supplemental content in Virtual Event sessions, follow these steps.
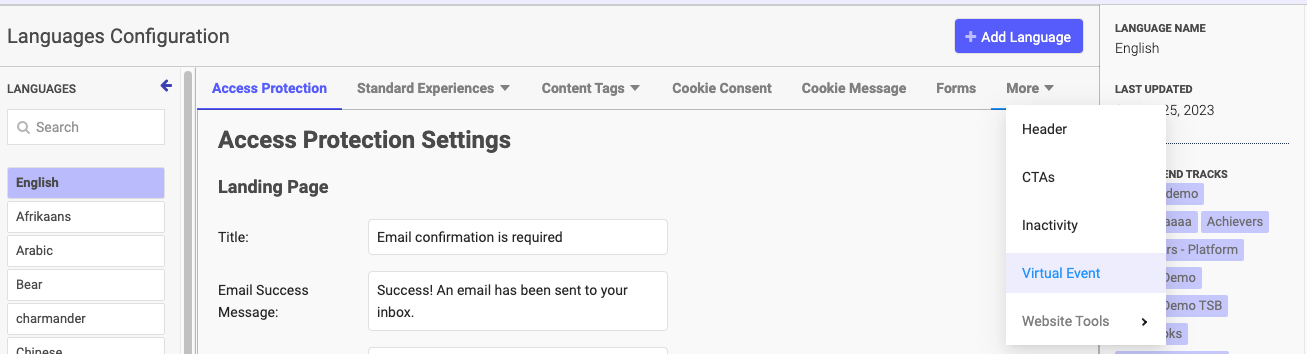
- On the main navigation menu, click the gear icon and then from the popup menu, select Languages.
- The Languages configuration menu opens. Find and select the Virtual Event tab.
- On this tab, you’ll notice the new field Supplemental Content Heading. Enter the heading text you want to display for your Virtual Events. The default value of this field is Supplemental Content, which you may leave as-is if you choose.
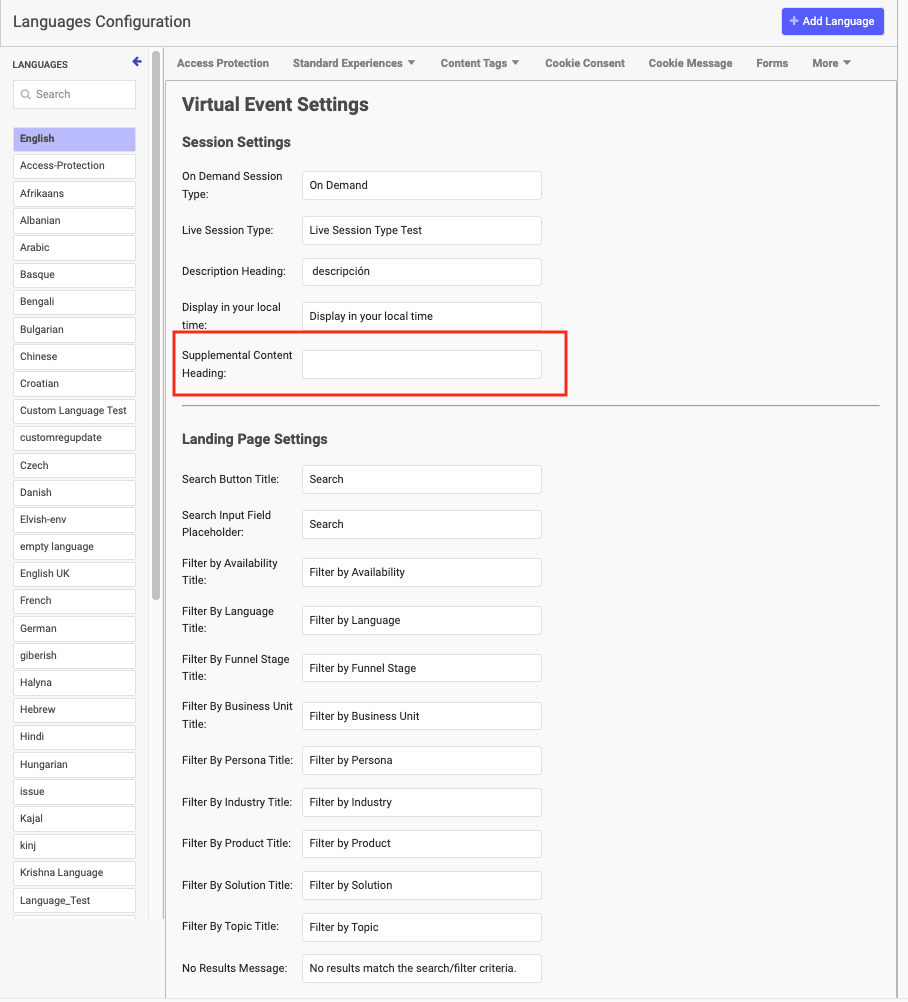
Note: If you delete the default text and leave this field blank, the heading is not displayed at all in the Virtual Event. Also, for this heading to be available to you, you must have content added to the VEX Session. To add content, open the VEX Sessions tab and click Add Content. Follow the prompts to complete this task.
- Scroll down the tab and click Save Virtual Event Settings. The system updates the components in the Virtual Events to reflect the text you entered.
New Webhooks to Measure Asset Engagement in VEX
The following new webhooks provide insight into individual webinars or other supplemental content the visitor has seen during their visit, instead of measuring only the visitor’s engagement with a VEX session.
To find out more about how to use webhooks, see What Are Webhooks?
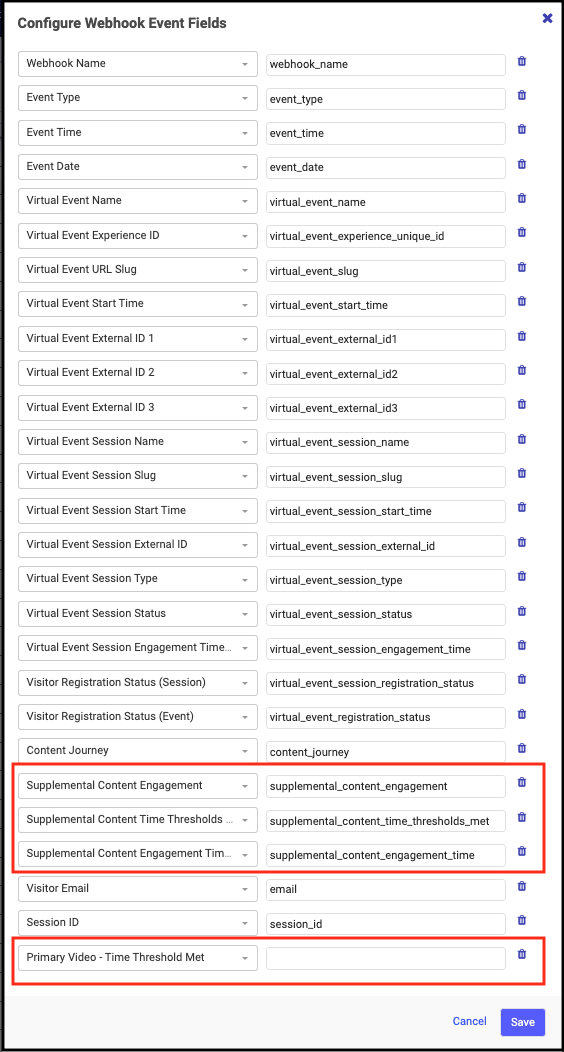
- Supplemental Content Engagement (supplemental_content_engagement): Know when a visitor engages with supplementary materials such as PDFs, articles, or additional videos.
- Supplemental Content Time Thresholds Met (supplemental_content_time_thresholds_met): Receive notifications when a visitor spends a certain amount of time with supplementary content, indicating a deeper level of interest.
- Supplemental Content Engagement Time (in seconds) (supplemental_content_engagement_time): Track the exact duration a visitor spends on supplementary content, allowing you to measure their level of involvement.
- Primary Video – Time Threshold Met (primary_video_time_threshold_met): Get alerted when a visitor meets a predefined time threshold while watching the primary video, indicating a high level of engagement.
Follow the steps below to use the new webhooks to capture VEX supplemental content engagement.
- On the main PathFactory menu, click the gear icon, and then select Webhooks. The Webhooks menu opens.
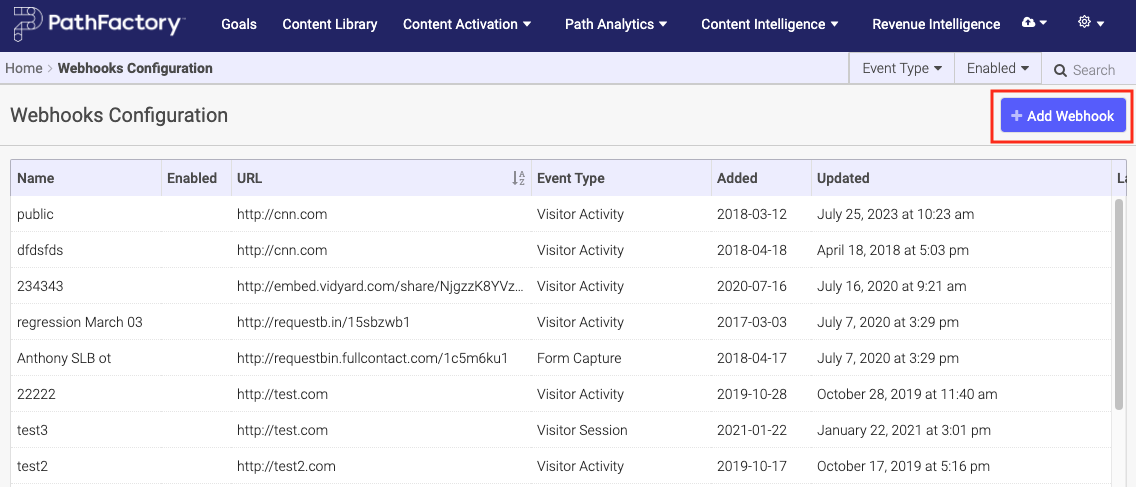
- Click Add Webhook. The Add Webhook menu opens.
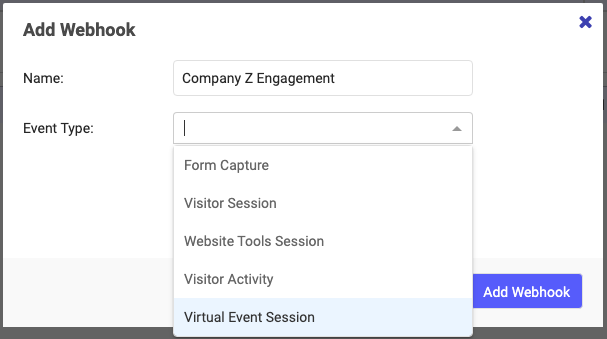
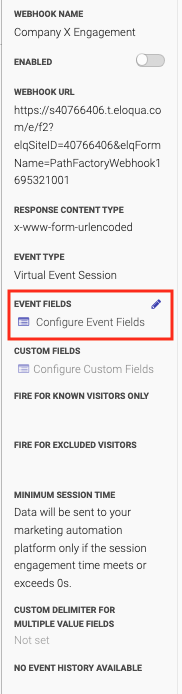
- In the menu that appears, enter a name for your webhook and in the Event Type dropdown list select Virtual Event Session.
- Click Add Webhook. You are returned now to the list of webhooks with your new webhook selected.
- On the right-side panel you can further refine your settings for this webhook. Click on the Event Fields link within the right-panel.
6. You’ll notice the four new webhooks in the popup list as highlighted in the screen capture below. Select one to open.
Website Tools Concierge Custom CSS
To address reported issues with the use of customer CSS in Concierge, we have configured PathFactory to now only and exclusively apply whatever custom CSS is configured in Global Appearance settings.
PathFactory used to allow users to customize the appearance of a website path at both a global level and for each Concierge level. Each appearance option came with its own custom CSS field, and the CSS for each Concierge level was applied independently based on the selected appearance.
As of Release S, even if custom CSS has been applied at the Concierge level, only the CSS applied within Global Appearance will be applied.
To reiterate, custom CSS within Concierge settings will not take effect even if there is no custom CSS at the Global Appearance level. In that case the appearance displays the default option. You must set up your CSS in Global Appearance to apply it in Concierge.
To read more about modifying the appearance of Concierge, read Change the Appearance of Guide and Concierge.
Views: 73