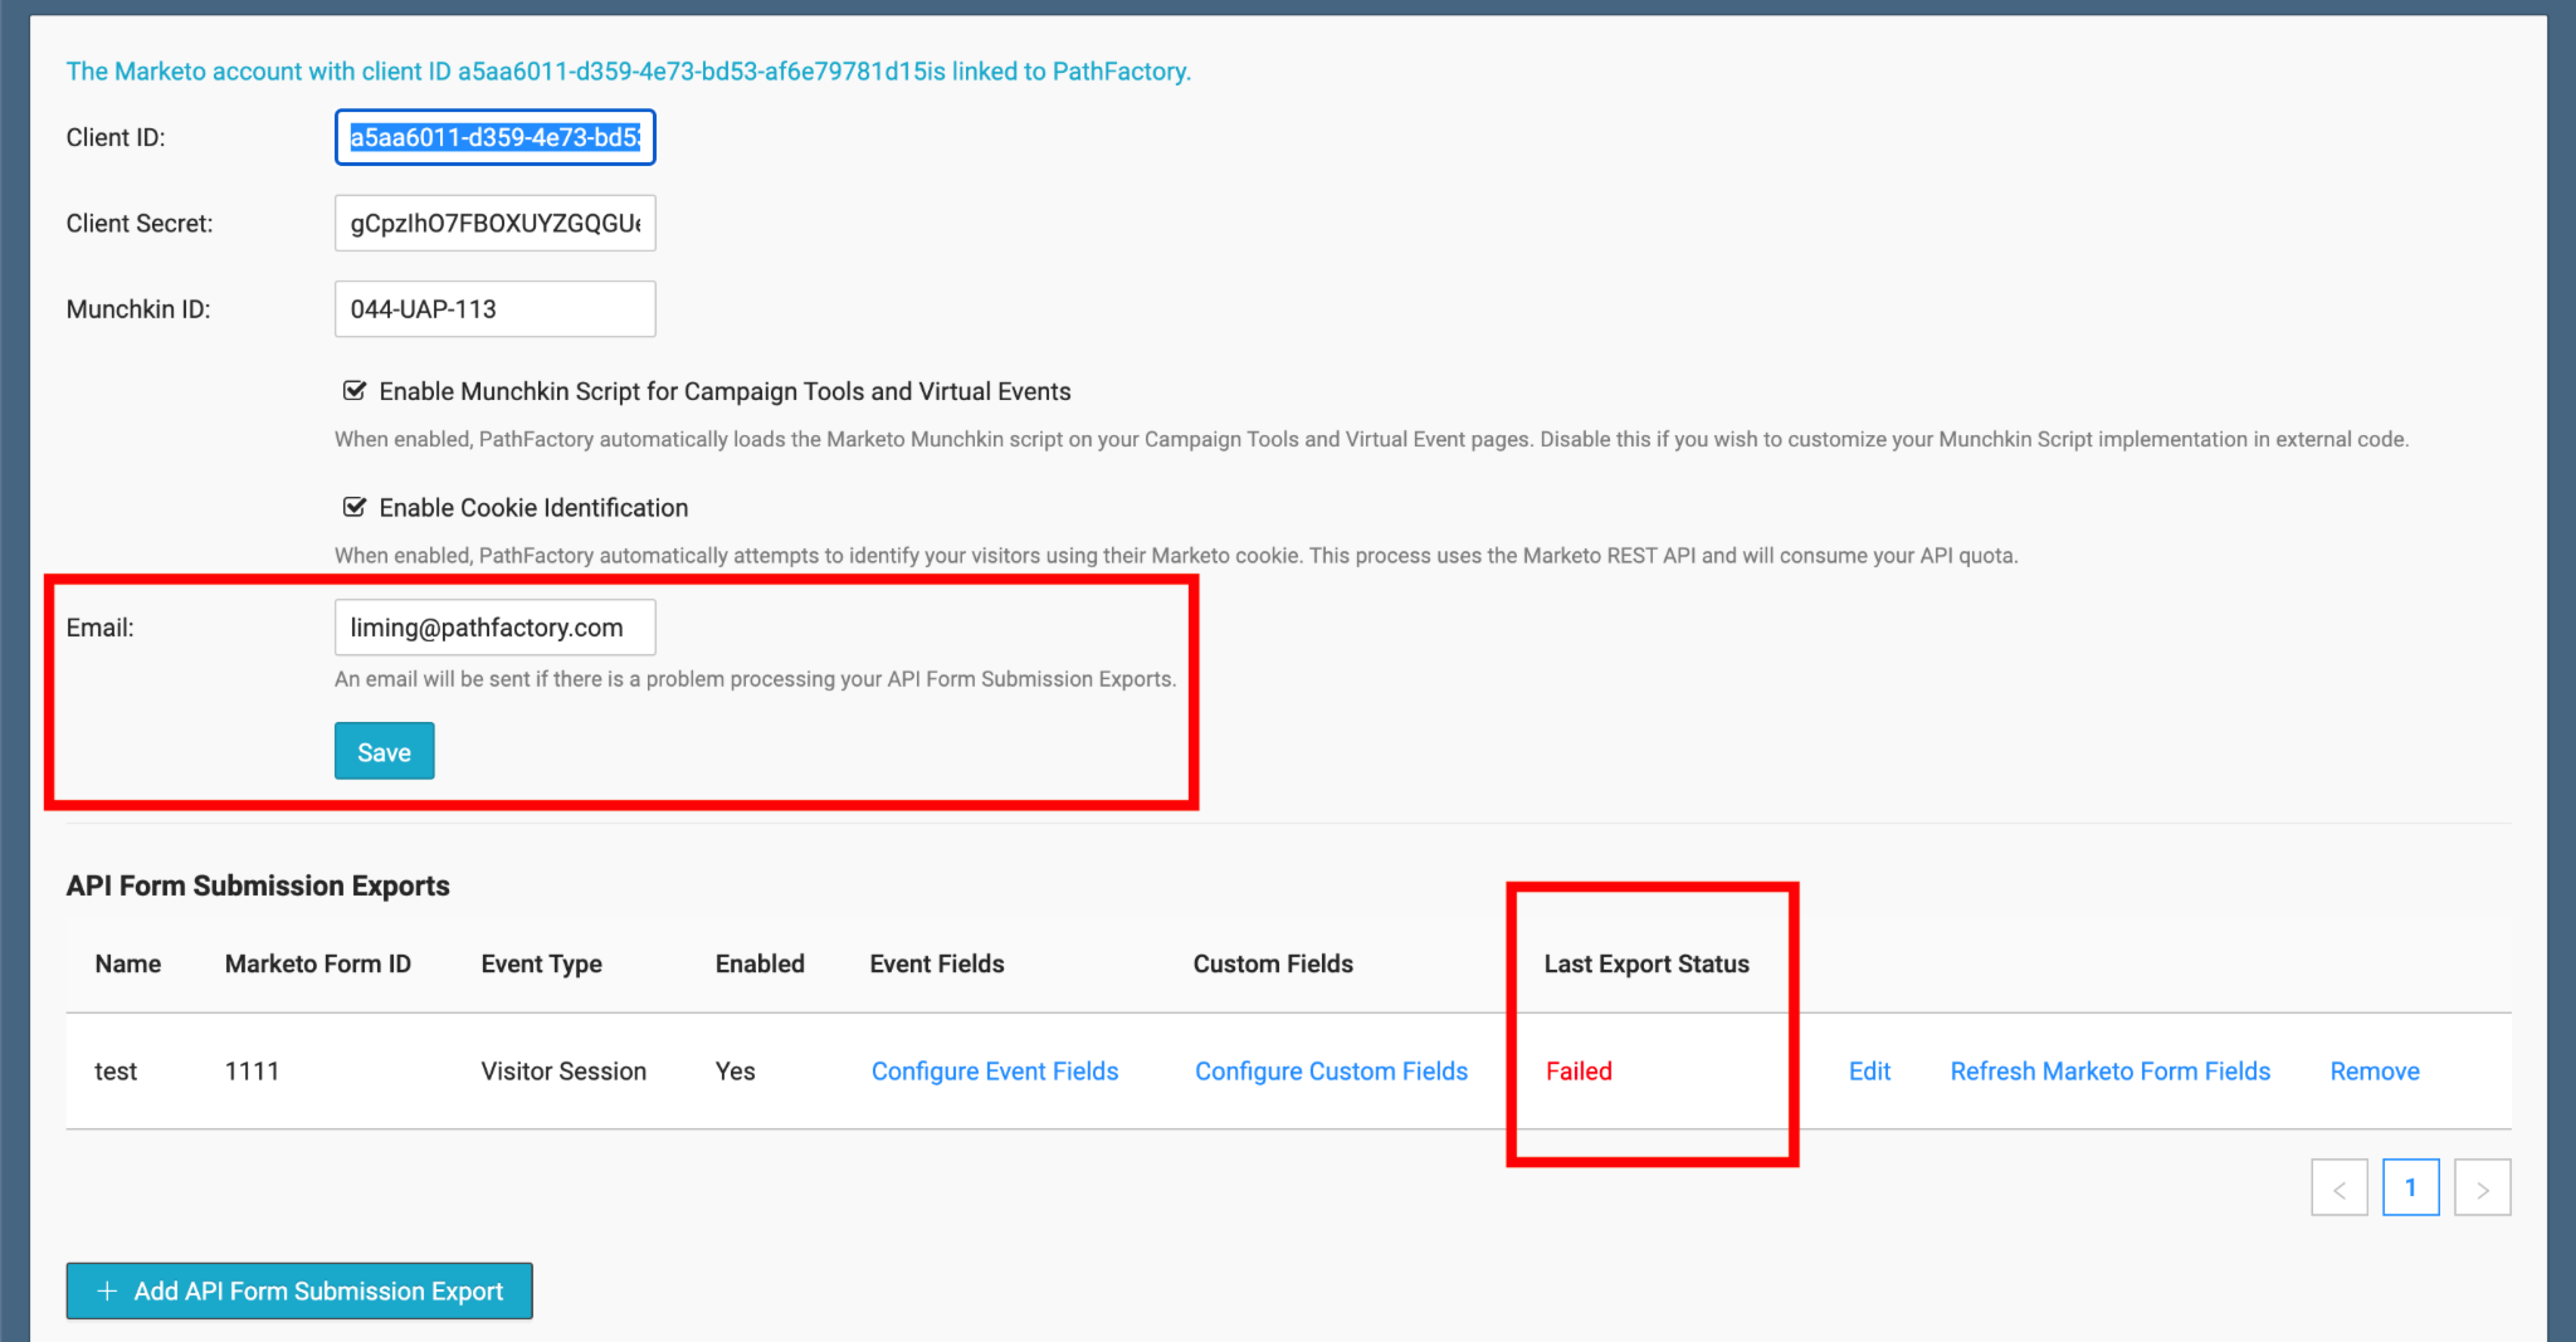
Set up Notification Email for Export Failures
The API form submission export includes call logs as well automated email notification when failed calls occur. This feature ensures you will be notified immediately if an issue occurs with this data flow, versus having to periodically check.
If the last export was successfully processed, you’ll see the last processed date and time in UTC format. If the last export was not successful, you’ll see the last attempted export date and time in UTC format, and the failure log.
To set up an email notification, navigate to Organization Settings and select the Marketo Account tab. Here you can input the email address for the notification to be sent to. You can also see the last export status within this tab.
In 2021, Marketo disabled posts to save2 endpoint. As a result, PathFactory switched to utilizing the Marketo Form Submit API export as a way to facilitate engagement session data send from PathFactory to Marketo.
Step 1: Create Fields in Marketo
First, you need to create new custom property fields in Marketo. You can find this configuration in Marketo’s Admin Settings > Field Management.
You will typically be sent a standard list of fields by one of our Implementation Specialists if you are currently onboarding with us. See the following list of field names for your reference.
Field names
Field Name: PathFactory Experience Name
Field Value: pathFactoryExperienceName
Field Type: String
Field Name: PathFactory Number of Assets Viewed
Field Value: pathFactoryNumberofAssetsViewed
Field Type: Integer
Field Name: PathFactory Content Count – Threshold Met
Field Value: pathFactoryContentCountMetThreshold
Field Type: Integer
Field Name: PathFactory Content Journey
Field Value: pathFactoryContentJourney
Field Type: Text Area
Field Name: PathFactory Content List – Threshold Met
Field Value: pathFactoryContentListThresholdMet
Field Type: Text Area
Field Name: PathFactory Topic List – Threshold Met
Field Value: pathFactoryTopicListThresholdMet
Field Type: String
Field Name: PathFactory Funnel Stage – Threshold Met
Field Value: pathFactoryFunnelStageThresholdMet
Field Type: String
Field Name: PathFactory Content Types List– Threshold Met
Field Value: pathFactoryContentTypesListThresholdMet
Field Type: Text Area
Field Name: PathFactory Engagement Score
Field Value: pathFactoryEngagementScore
Field Type: Integer
Field Name: PathFactory External ID
Field Value: pathFactoryExternalID
Field Type: String
Field Name: PathFactory Engagement Time
Field Value: pathFactoryEngagementTime
Field Type: Integer
Field Name: PathFactory Last Viewed Content Title
Field Value: pathFactoryLastViewedContentTitle
Field Type: String
Field Name: PathFactory Last Viewed Content Source URL
Field Value: pathFactoryLastViewedContentSourceURL
Field Type: String
NOTE: Please use the Field Type as we have recommended.
Step 2: Create a Marketo Form
PathFactory Forms API SessionsorPathFactory Visitor Sessions.This form won’t be displayed to your visitors so keep the fields surfaced on the form as it could help us with testing.
Step 3: Set up the Form API Export in PathFactory
Name: this name only appears in PathFactory, so choose whatever works best for you. Common examples are
PathFactory Visitor SessionorPathFactory Session.Marketo Form ID: find this ID in your Marketo form embed code and paste it here. In the following example, my form ID is 1842.
Event Type: Choose Visitor Session
Fire for Excluded Visitors: select this option if you want data for excluded visitors (such as both your internal employees and PathFactory employees) to be included in the data.
Step 4: Add the Fields in Your Forms API
Since your API is connected to your PathFactory instance, you don’t need to manually populate the fields.
Additional Form Submit API Export Settings
Edit: use if you want to edit the name of your form in PathFactory.
Refresh Marketo Form Fields: use to make updated, deleted, or new fields appear in the Marketo Form Field drop-down.
Remove: use to delete the form from PathFactory.
WARNING: removal is permanent. Deleted forms cannot be retrieved. You’ll have to re-create any removed forms.