Summary
In this article we’ll outline the steps needed to send data to Eloqua via a PathFactory webhook:
- Set up an Eloqua Form
- Create a PathFactory Webhook
- Test Webhook
Step 1: Set Up an Eloqua Form
- Create a form in Eloqua and ensure the following:
- The Eloqua form has a field for each of the event field data points for a Form Capture Webhook, Visitor Session Webhook, and/or Visitor Activity Webhook. Click here for definitions of each webhook field and descriptions of the different webhook types.
- The fields you would like to receive data for are mapped. If you would like to limit the data that is being sent via the webhook map only the data points you would like to send and leave all others blank.
- The HTML name of each of the form fields matches the value you have provided in the field mapping area while setting up the Webhook.
The video below provides a walkthrough of the above step:
- Uncheck the validation option “Must not contain any URL’s” for all the form fields in Eloqua to ensure that the engagement successfully appears in the Eloqua form.
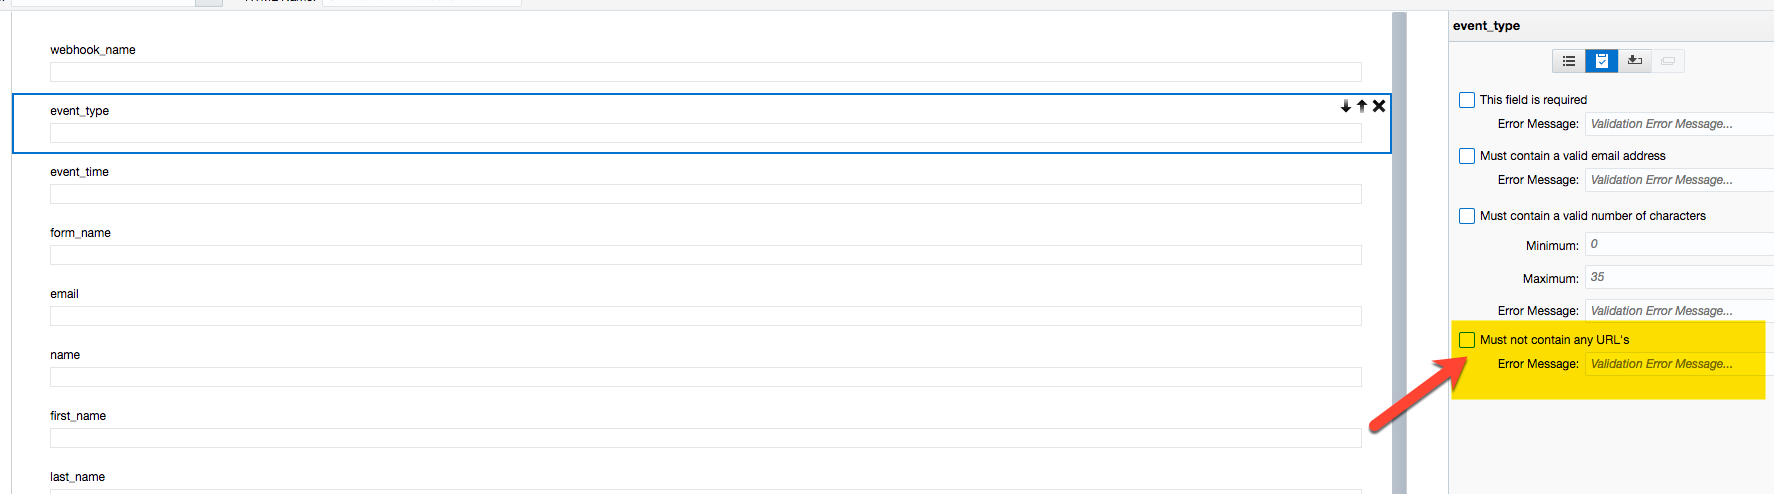 Example of an Error Message
Step 2: Create a PathFactory Webhook
- Click on the gear icon at the top right of the page, and select Webhooks from the drop-down menu.
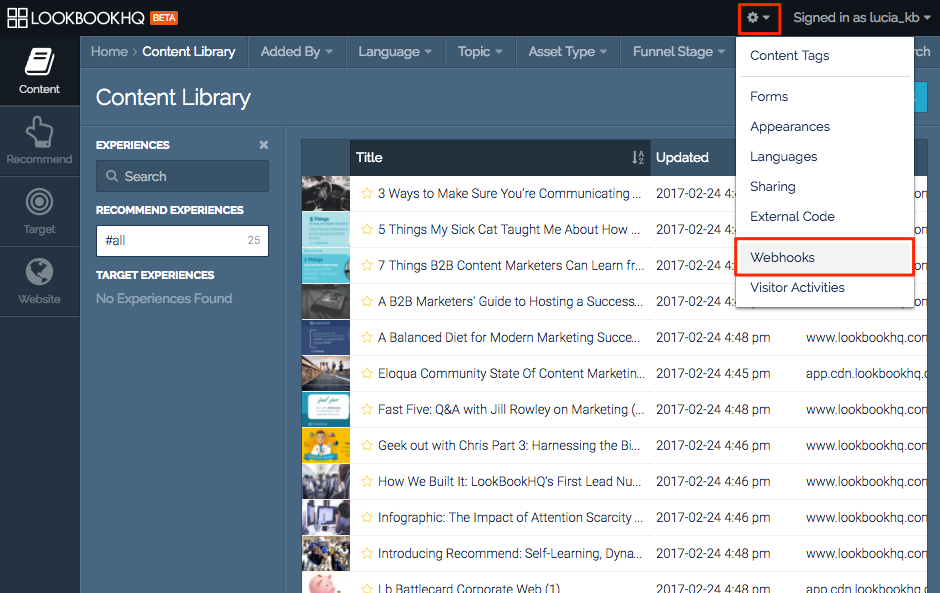 Webhooks menu item
 - You are now on the Webhooks page. Click Add Webhook.
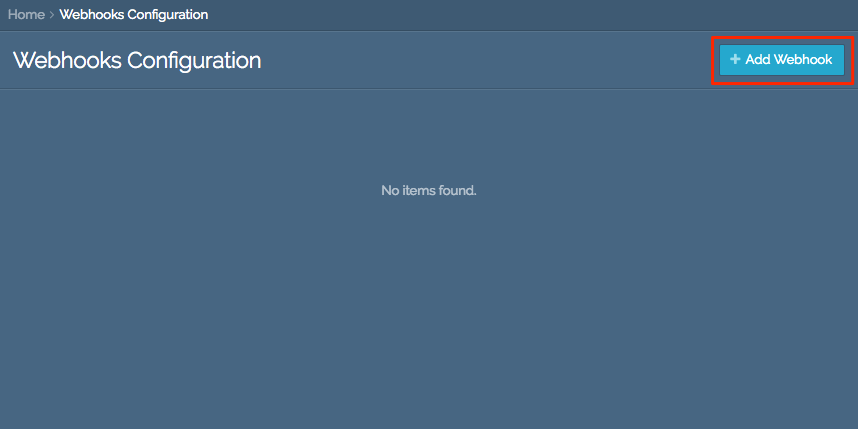 Add Webhook button
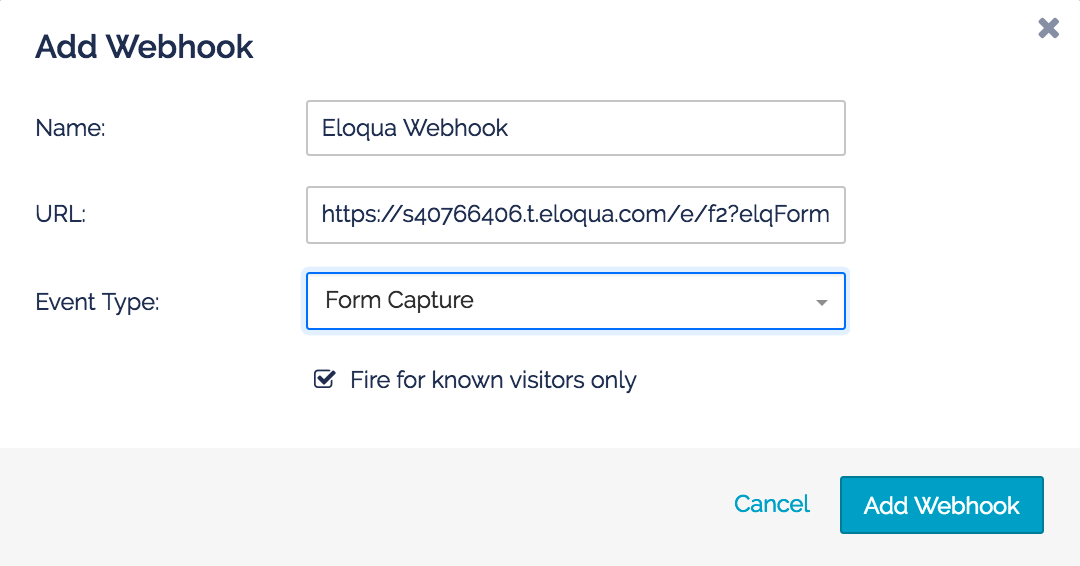
 - Name the webhook.
- Provide the Eloqua form submission URL, Eloqua form name, and Eloqua Site ID in the URL field
- Select the webhook event type which will trigger this webhook.
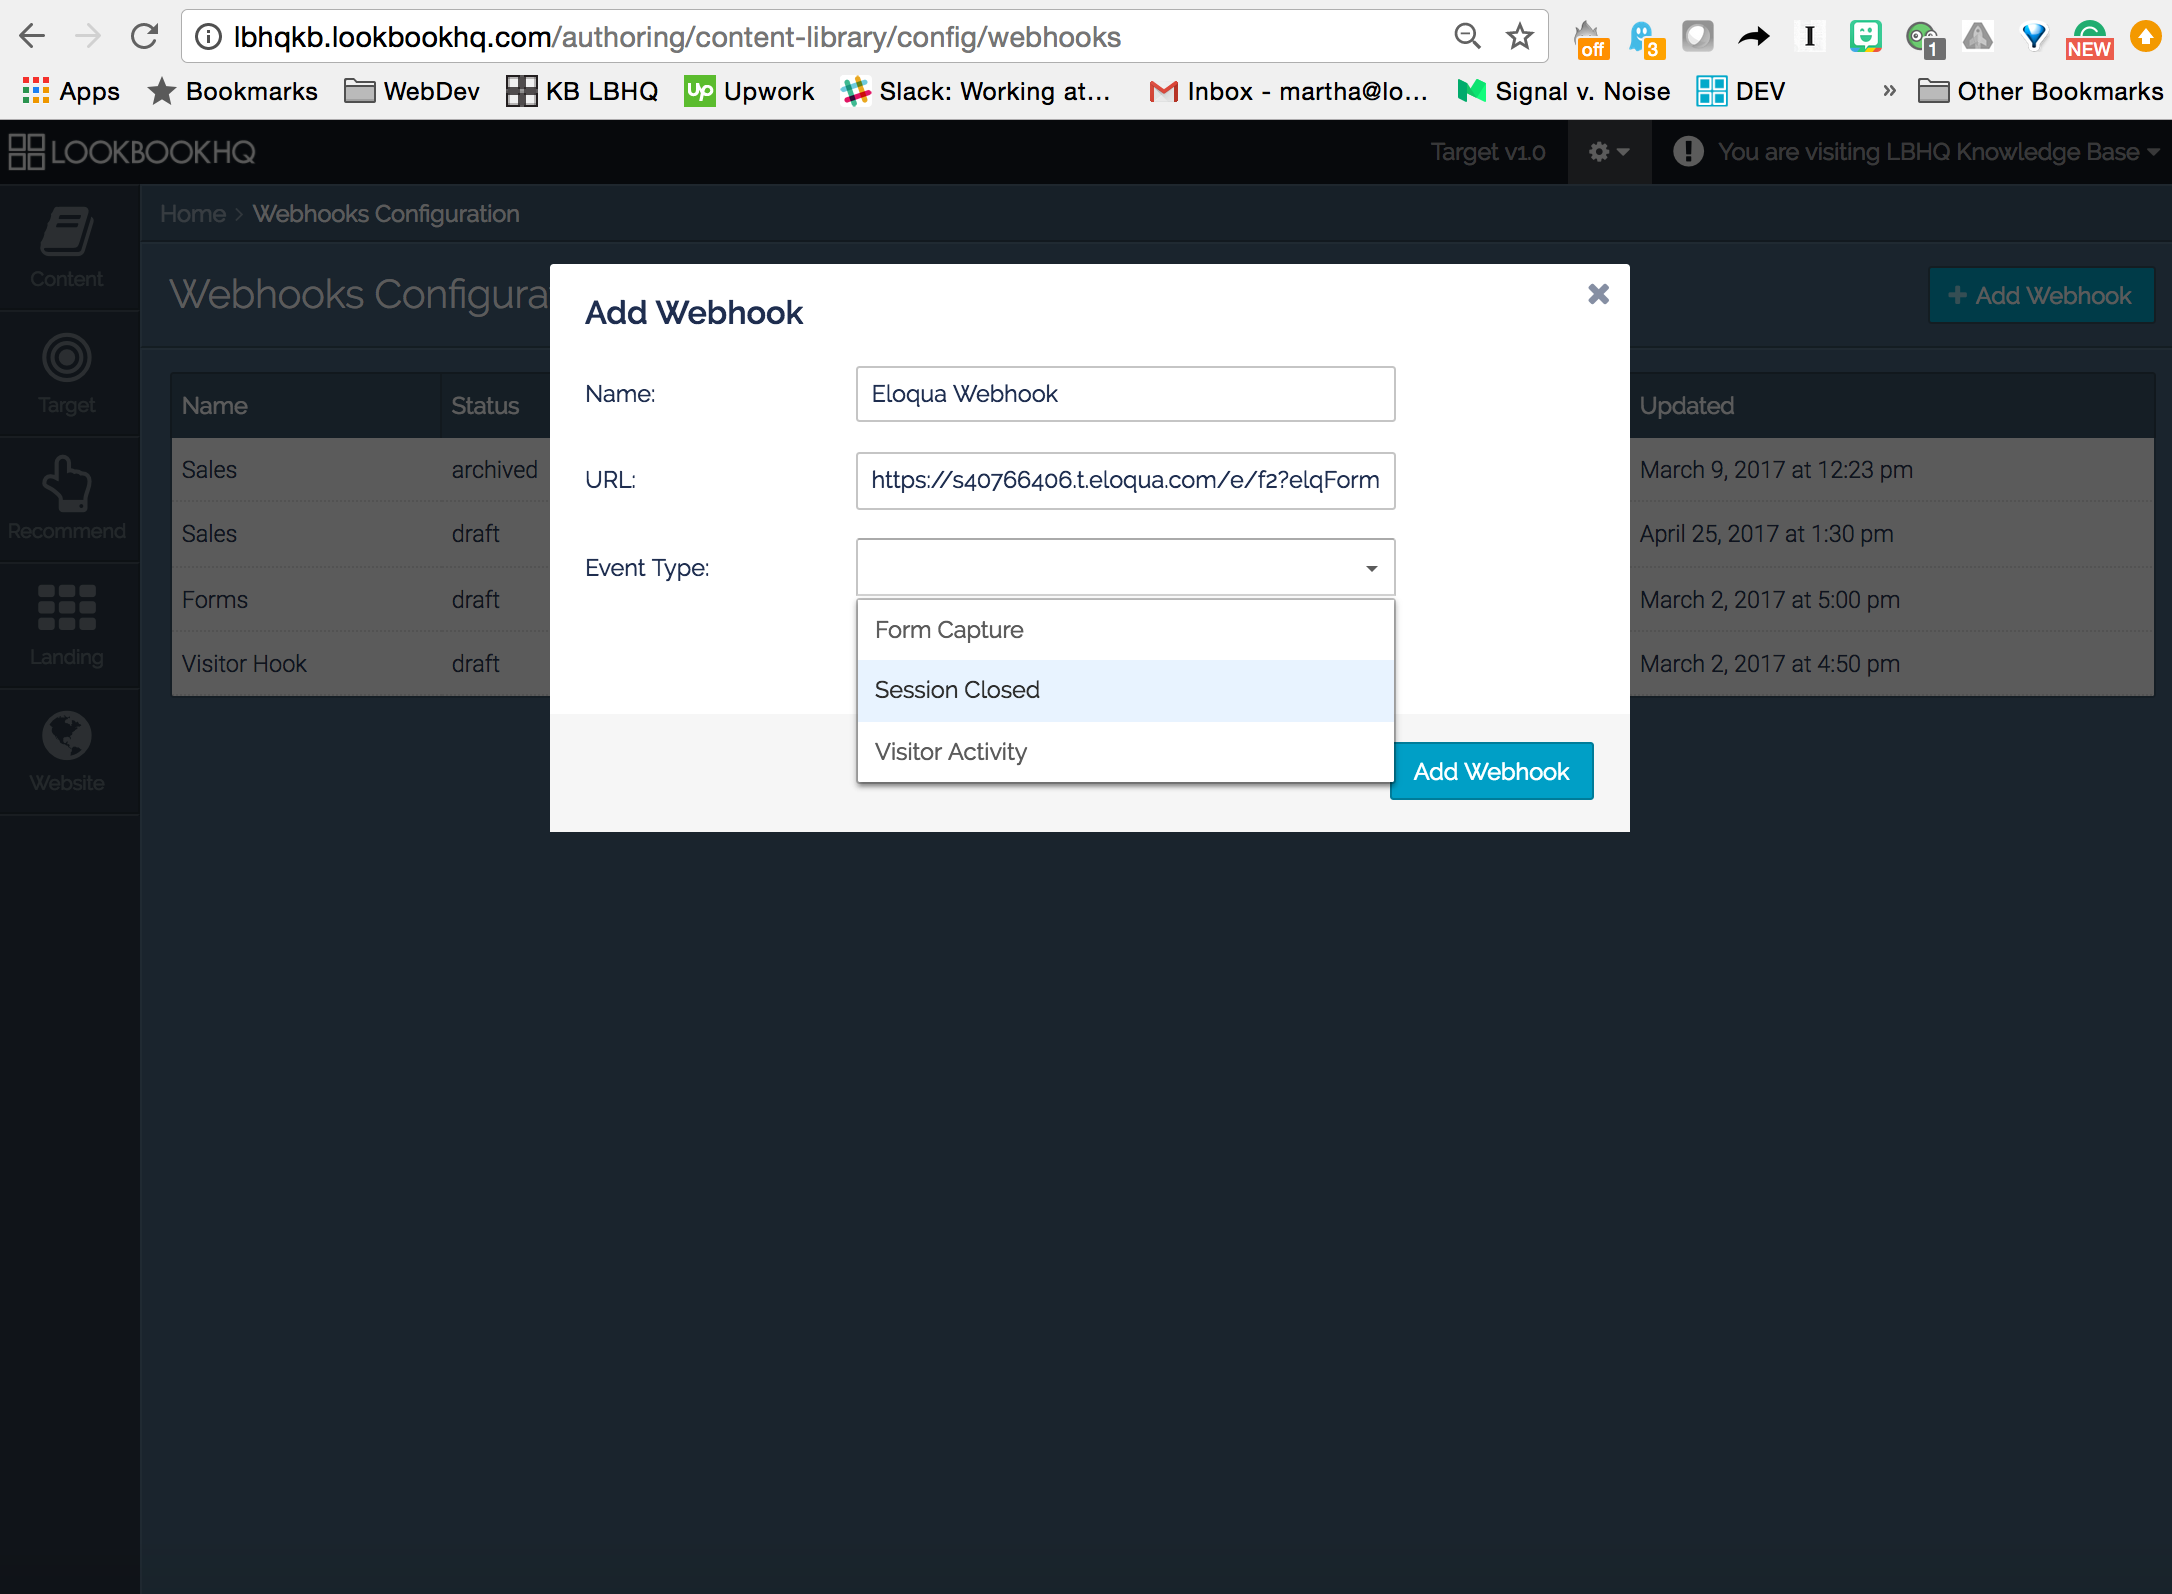 Event Type dropdown list
 - If you only want information sent for visitors who are known, click Fire for known visitors only.
 Add Webhook menu
- Click Add Webhook.
 Add Webhook button
- Ensure that all the mapped event fields that you need are present in Event Fields and any custom fields are set up in Custom Fields via the webhook configuration on the right hand side of the screen.
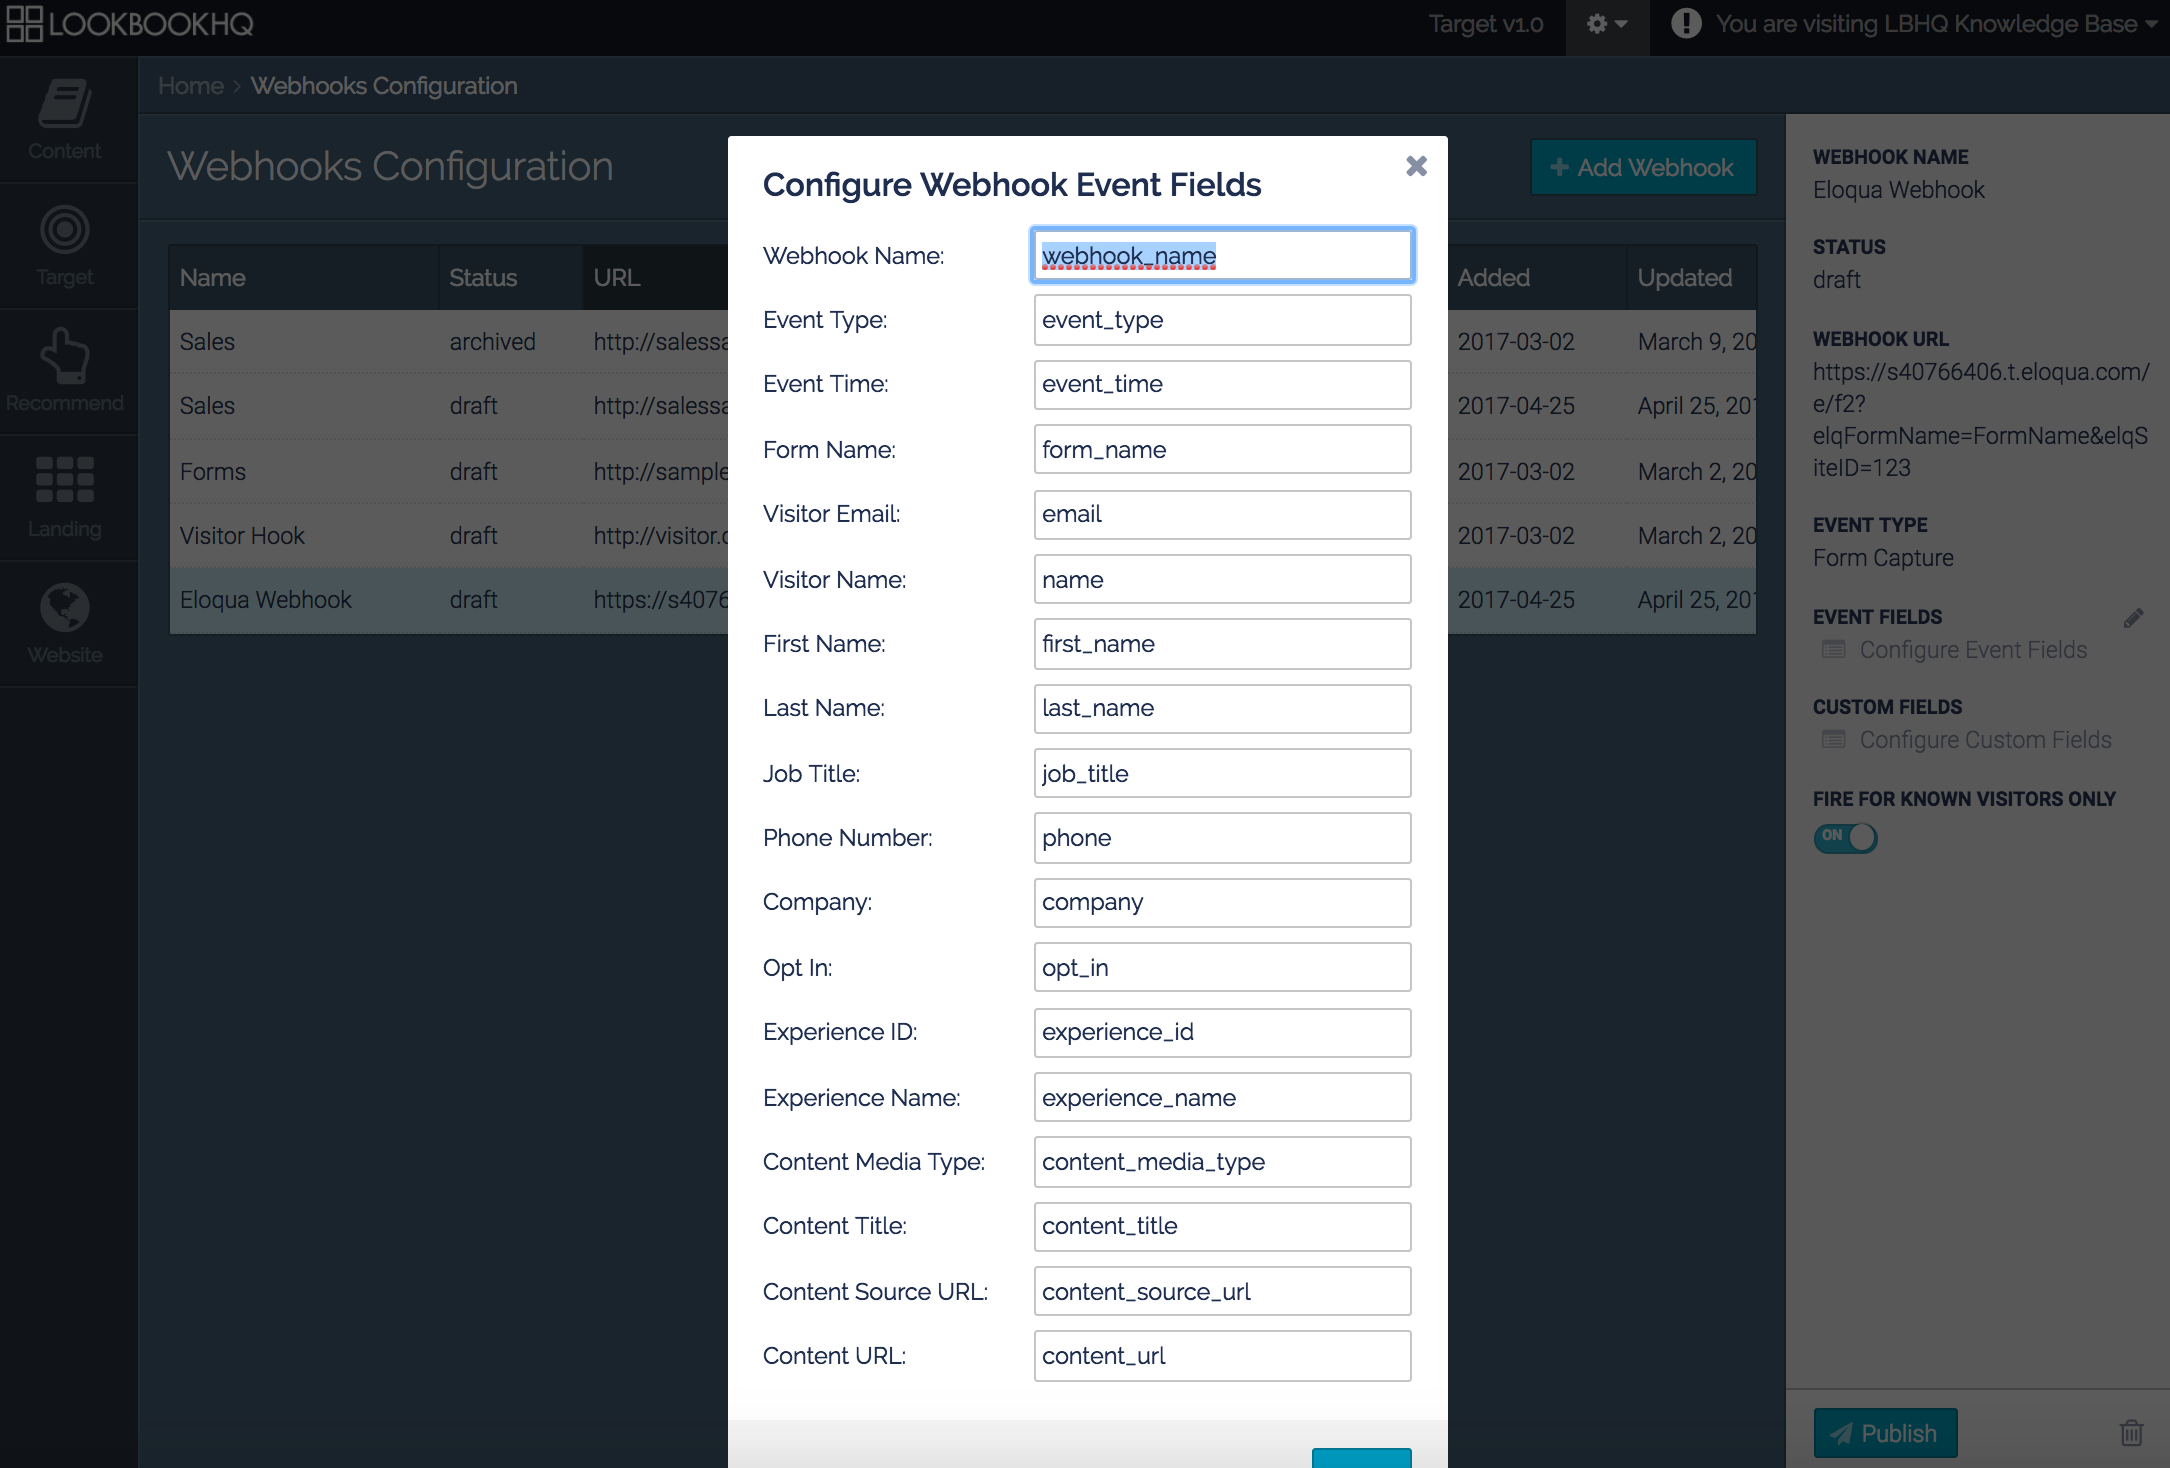 Webhook Event Fields
- Publish the webhook by clicking Publish at the bottom of the webhook configuration on the right hand side of the screen.
 Publish button
The video below provides a walkthrough of the above steps:
|
Note
|
You may choose to have one form in Eloqua to receive engagement data from all of the webhooks you setup in our platform. Alternatively, you may choose to setup a unique Eloqua form for each type of webhook (a form for “Form Capture”, a form for “Session Closed”, and a form for “Visitor Activity.”) |
Step 3: Test Webhooks
Test a Form Capture Webhook
- Create a Form Capture webhook.
- Create a form in the external system to which you want to send PathFactory engagement data.
- Enable our PathFactory Standard form on one of the assets in a PathFactory content track.
- Engage with the PathFactory asset that has the form enabled and submit the form.
- The engagement data will appear in the target form in the external system within 2 minutes after our standard form has been submitted.
Test a Session Activity Webhook
- Create a Visitor Activity (Session Closed) Webhook.
- Create a form in the external system where you want to send PathFactory engagement data to.
- Engage with one or more PathFactory content tracks you have built in your PathFactory install. Close the PathFactory content tracks after ending your engagement.
- The engagement data will appear in the target form in the external system after 30 minutes from the time you have finished engaging with the PathFactory content tracks.
|
Note
|
Please note that if, after finishing your initial engagement with the content track(s) as outlined above, you subsequently engage again with any PathFactory content track you have in the same browser, this will reset the 30 minute time period needed for the data to appear in the external system form. The new time window will be 30 minutes after you have finished your subsequent engagement with the content tracks. |
Test a Visitor Activity Webhook
- Create a new Visitor Activity.
- Create a Visitor Activity Webhook.
- Create a form in the external system where you want to send PathFactory engagement data to.
- Engage with one or more PathFactory content tracks you have built in your PathFactory install, ensuring that the criteria set in the visitor activity is fulfilled.
- The engagement data will appear in the target form in the external system after 30 minutes from the time you have finished engaging with the PathFactory content tracks. Close the PathFactory content tracks after ending your engagement.
|
Note
|
Please note that if, after finishing your initial engagement with the content track(s) as outlined above, you subsequently engage again with any PathFactory content track you have in the same browser, this will reset the 30 minute time period needed for the data to appear in the external system form. The new time window will be 30 minutes after you have finished your subsequent engagement with the content tracks. |
Views: 82