You can easily upload images while you are creating Templated Experiences without having to exit and upload the image elsewhere. Anywhere there is a thumbnail, hero image, icon or logo within the Content Pages or Landing Pages, you may add an image of your choosing to appear.
Uploading images to use in Templated Experiences also saves the image to the image library. This helps reduce workflow when using the image again in future, because it has already been uploaded. For example, when you save an image under the Hero or Thumbnail tab, that image is uploaded and saved to the respective category in the image library as well.
To use this feature, follow these steps.
- Open a Templated Experience in edit mode. To do this, follow these navigation instructions depending on which version of PathFactory your organization is using.
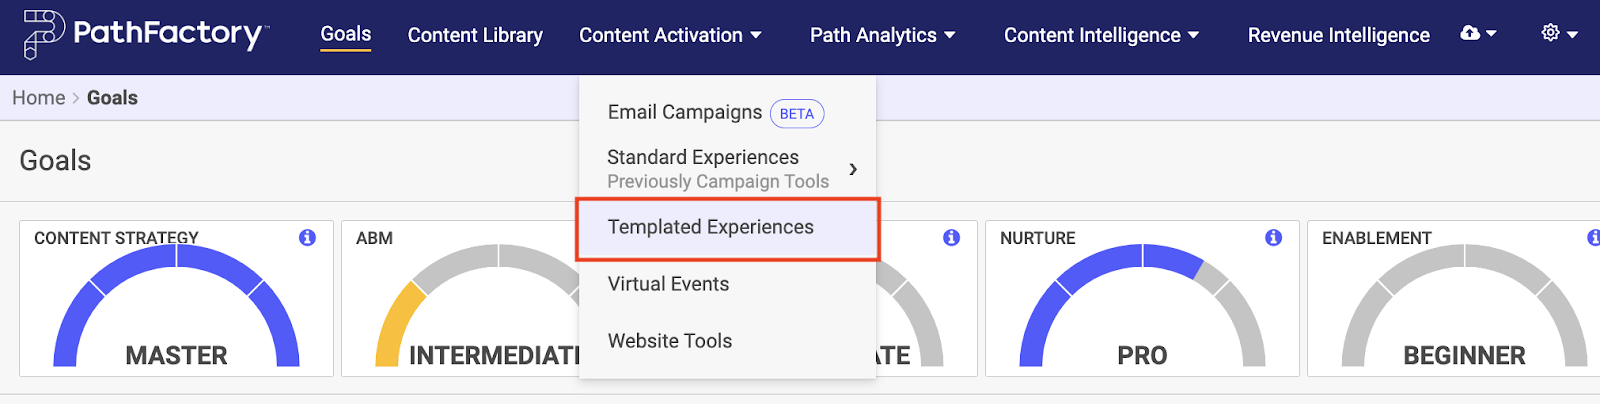
- In the legacy interface, on the top navigation click Content Activation and then select Templated Experiences.
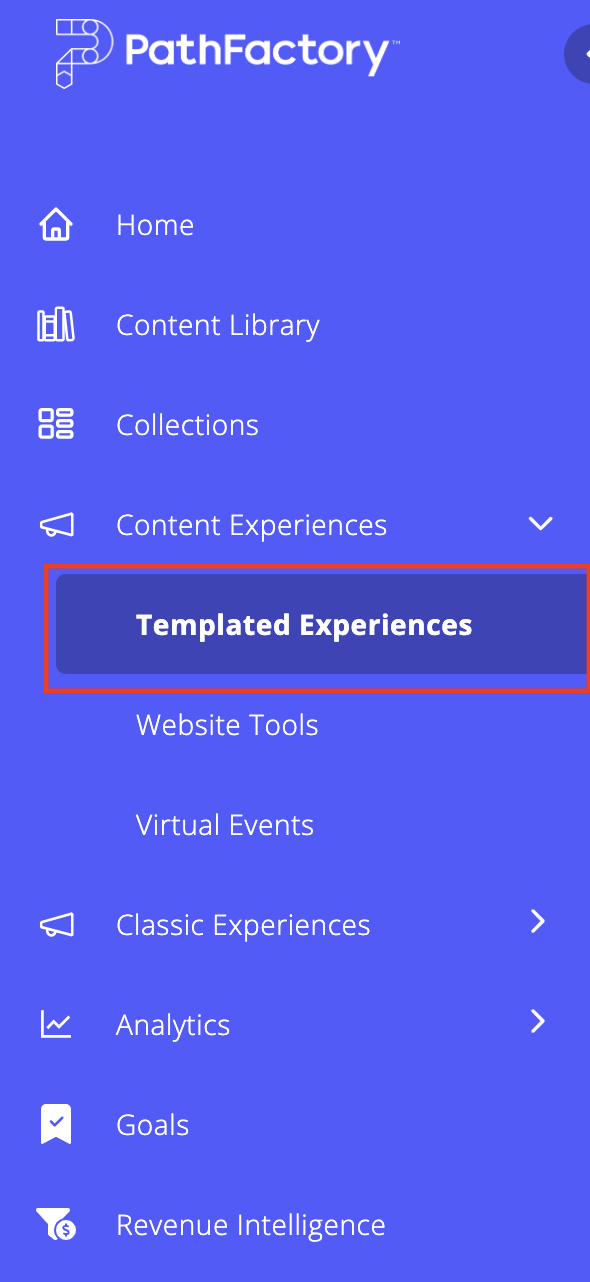
- In the latest interface, expand the panel on the left side and then select Templated Experiences.
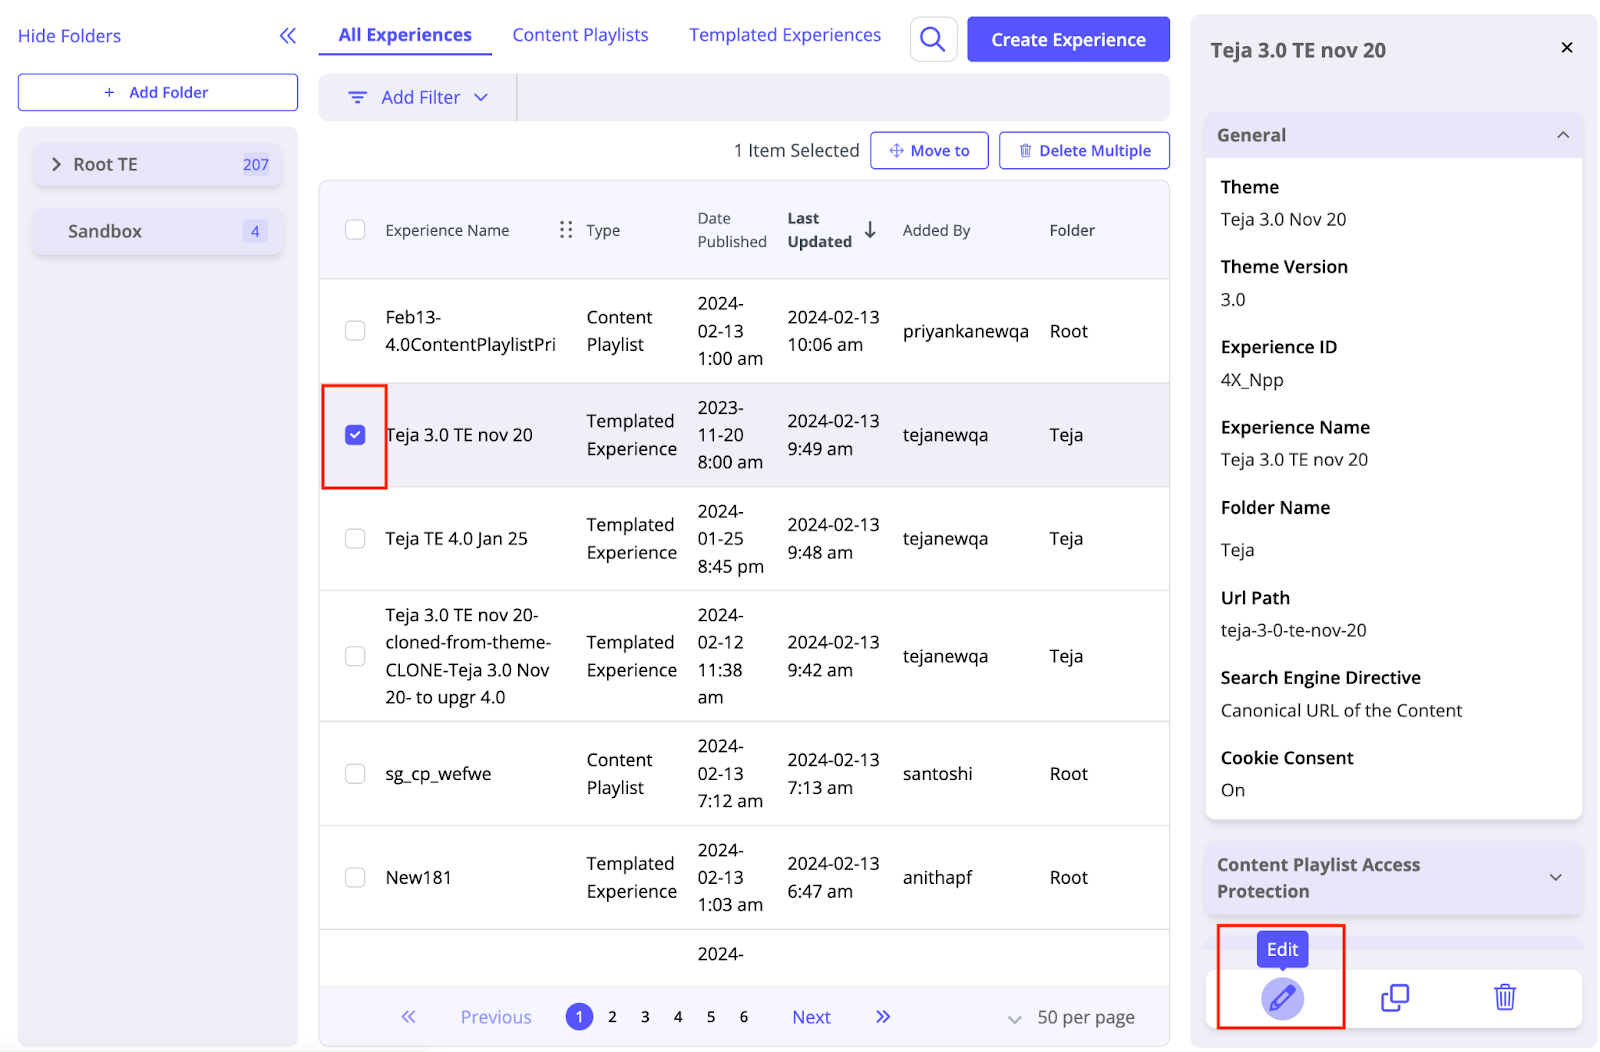
- In the list that appears, select the checkbox for the Templated Experience you want to edit, and then select the edit icon, as shown below.
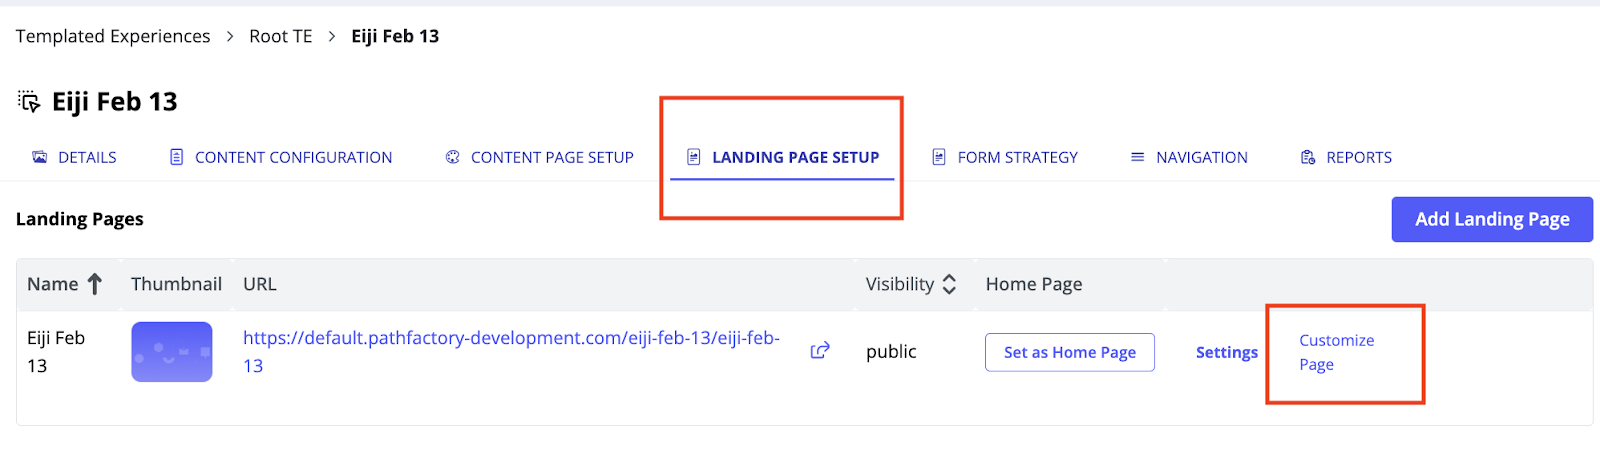
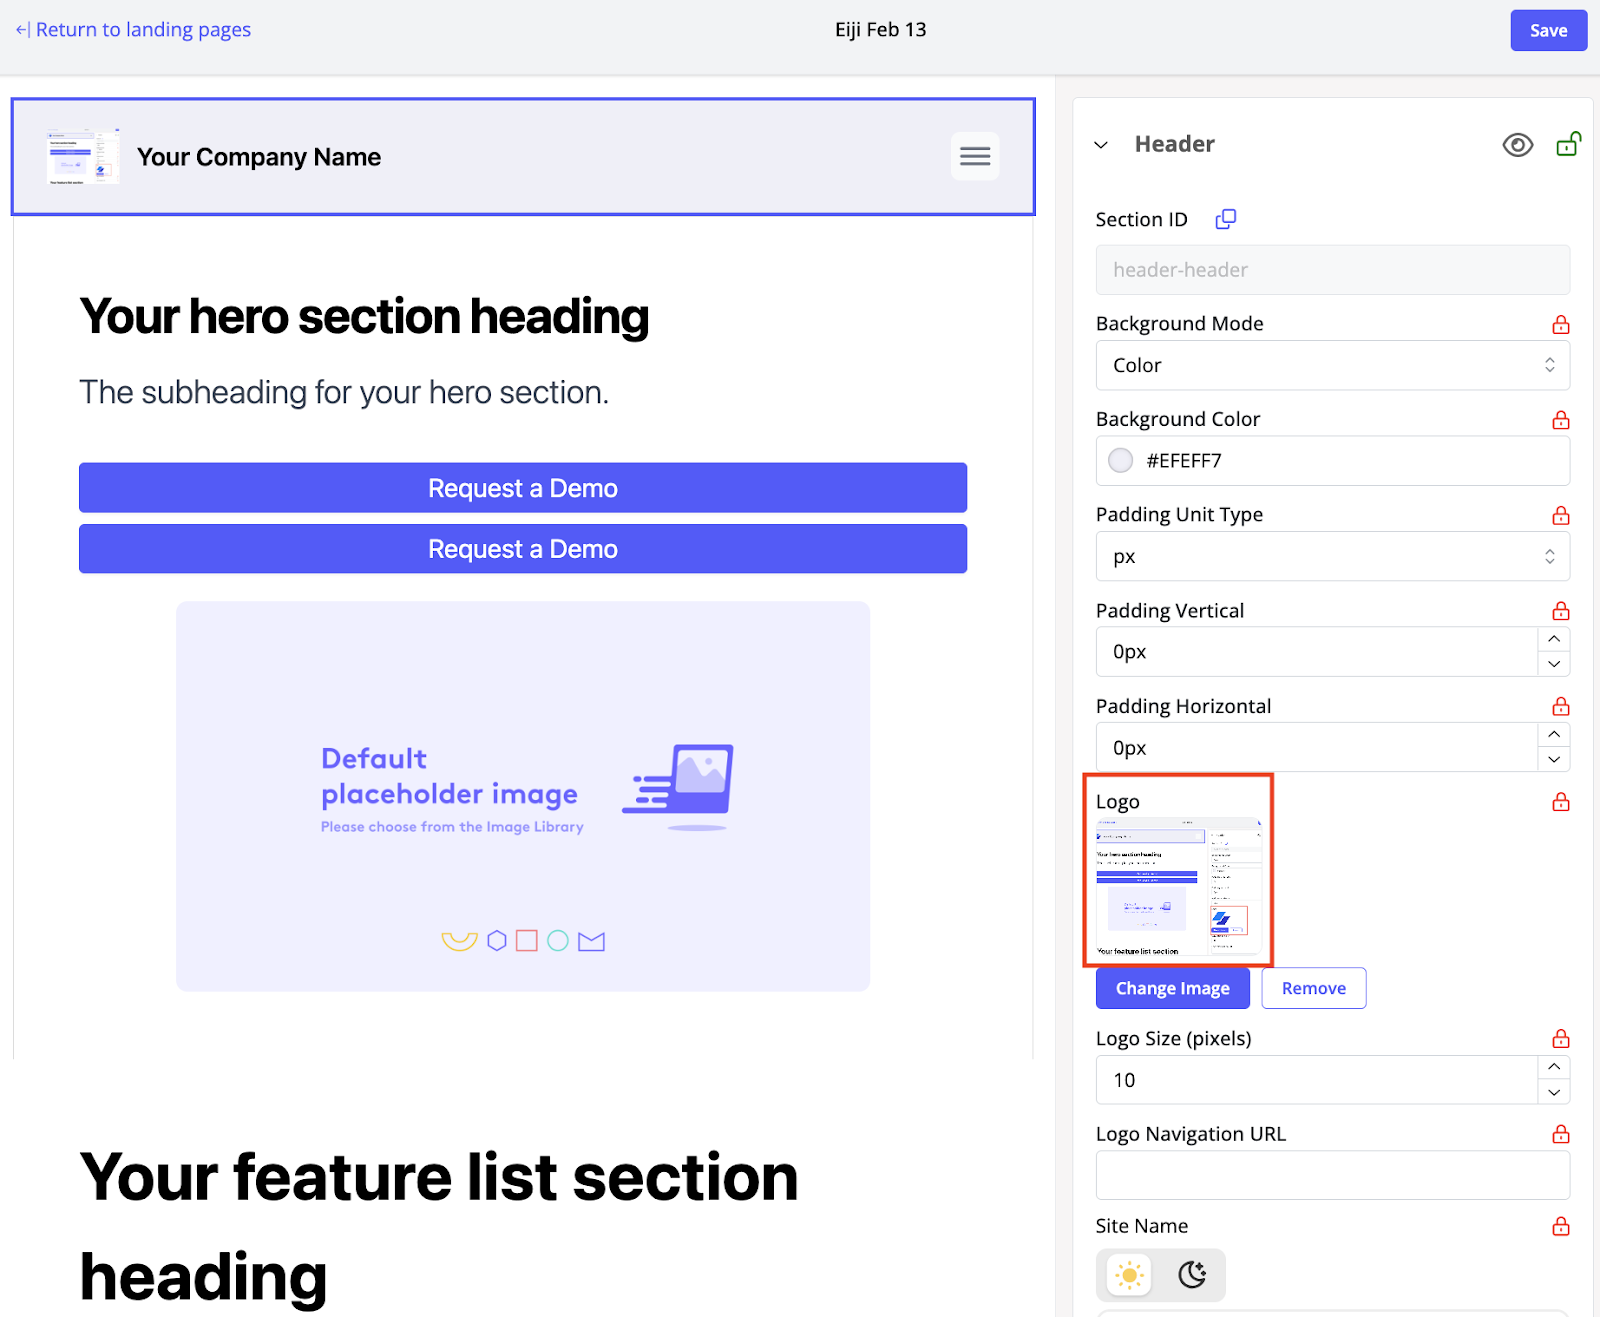
- Select the Content Page Setup tab or the Landing Page Setup tab. In this example, we will be editing a Landing Page. Click the Landing Page’s associated Customize Page link.
- With the Landing Page open, expand the Header menu to see the Logo section as shown below.
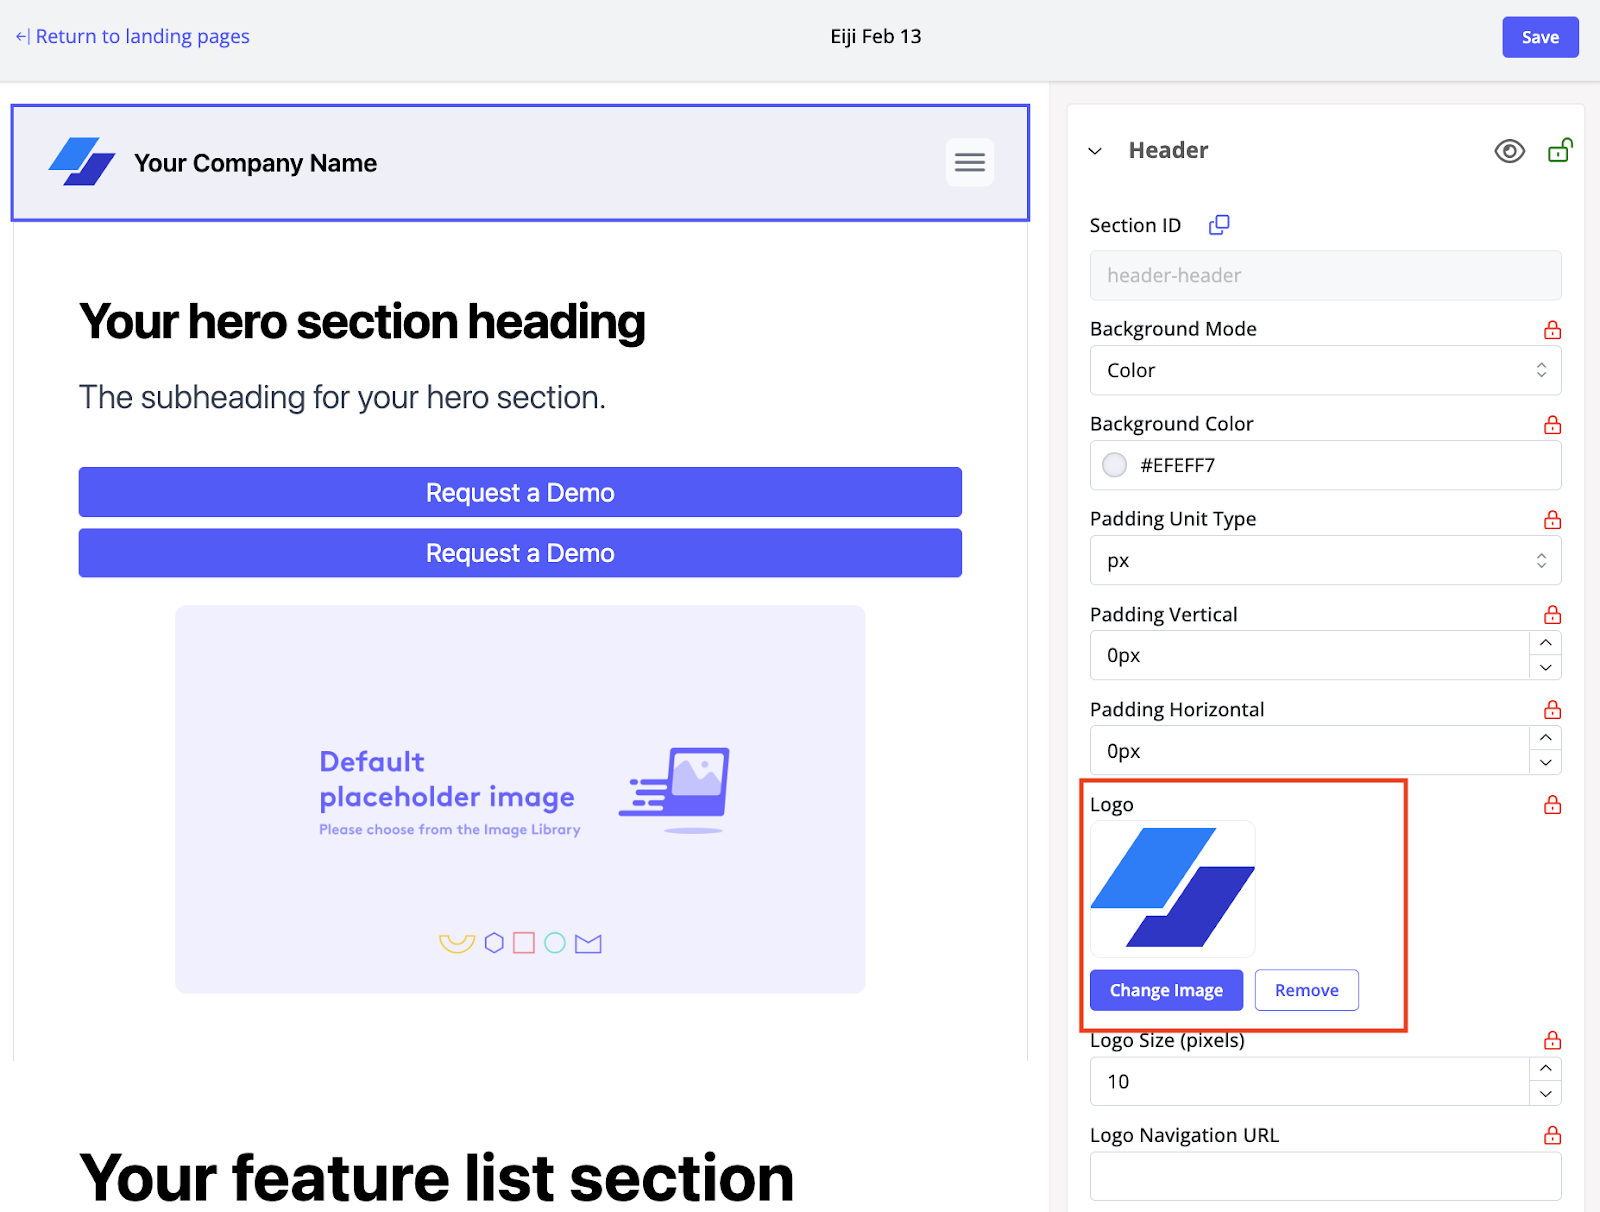
- Click Change Image. The Choose Image menu appears.
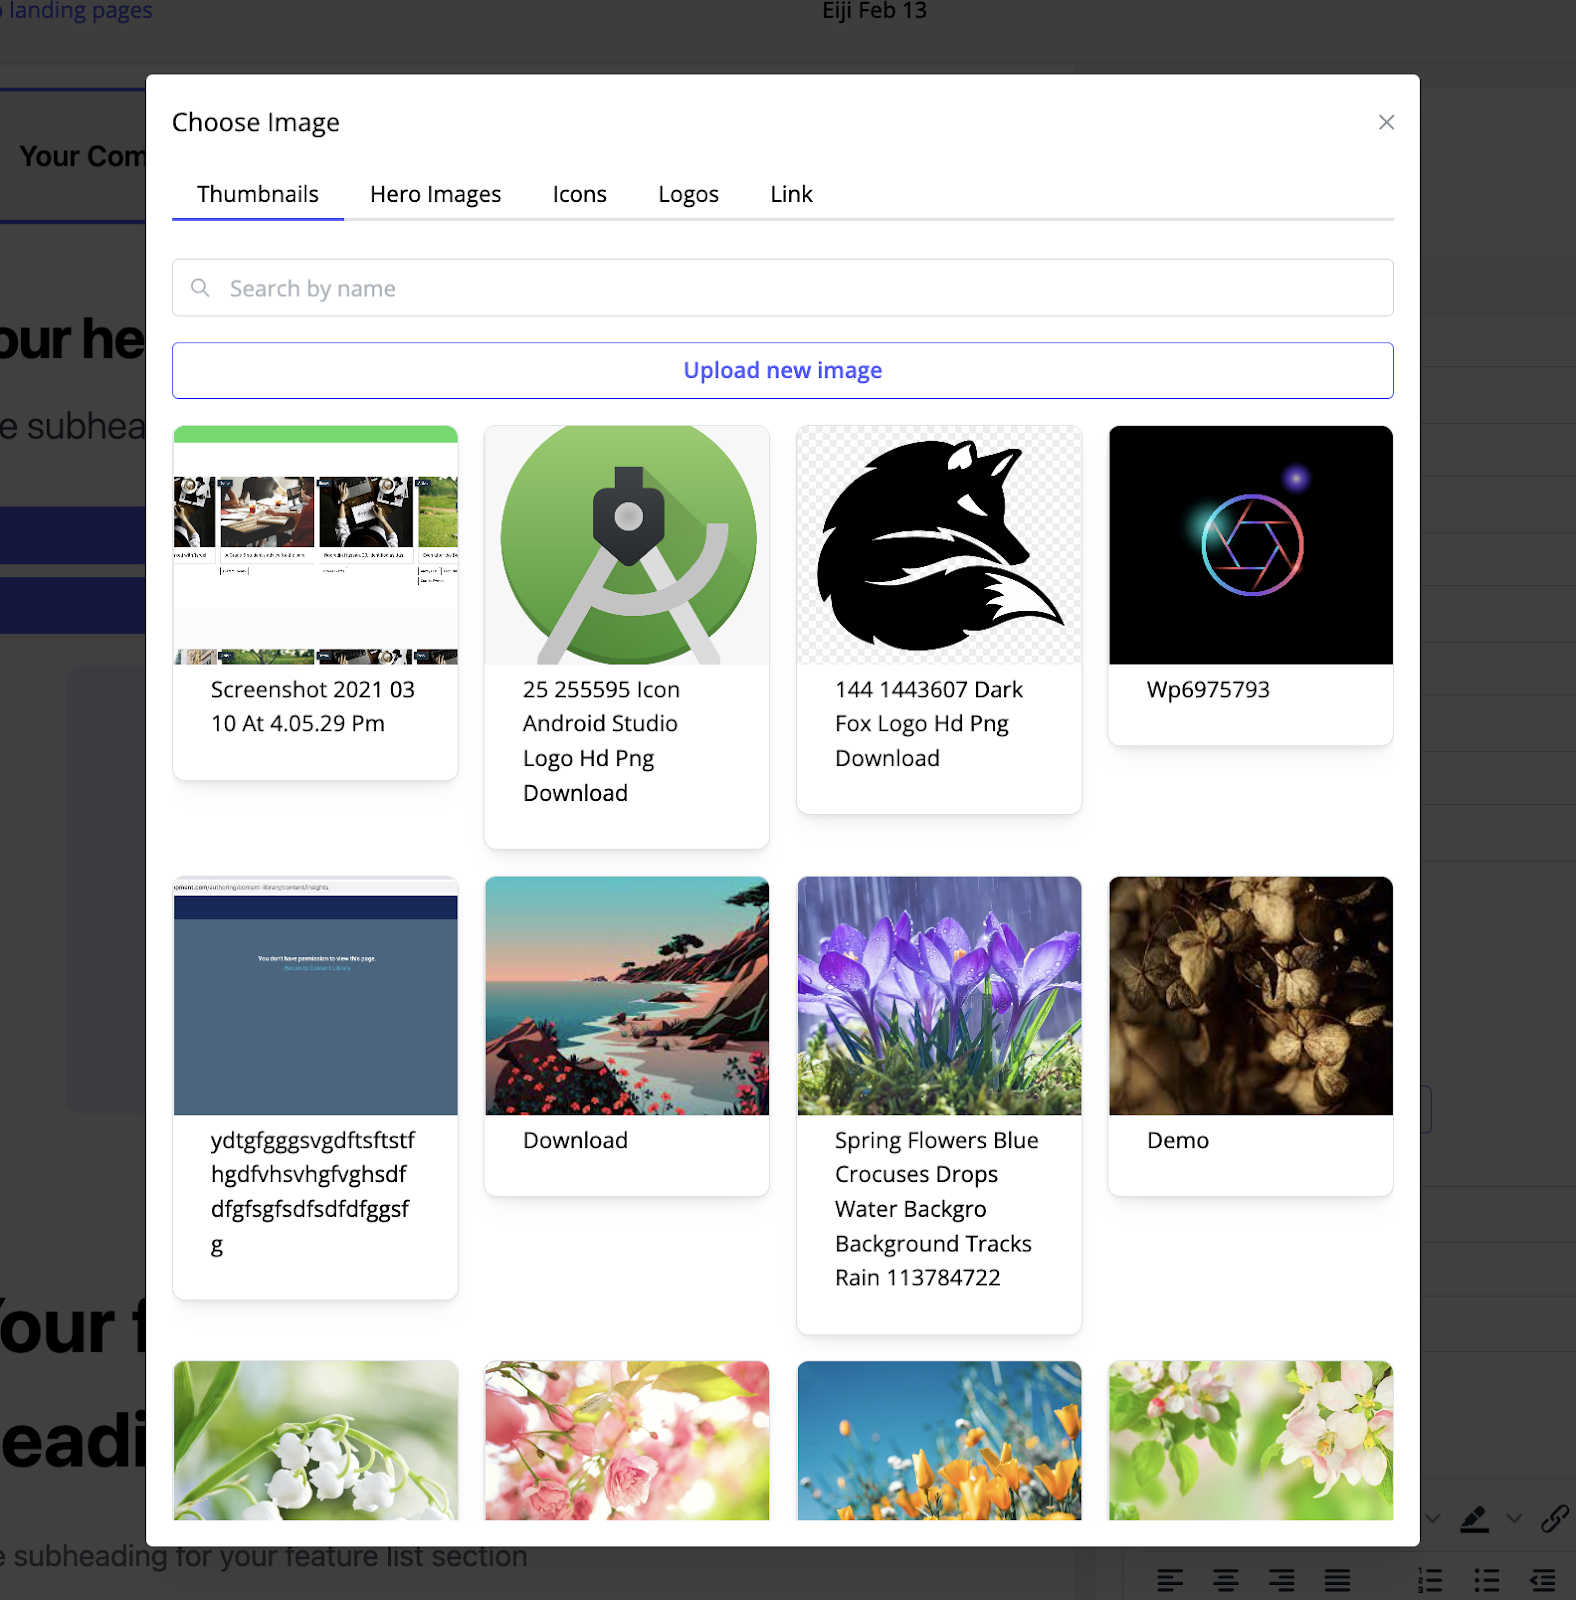
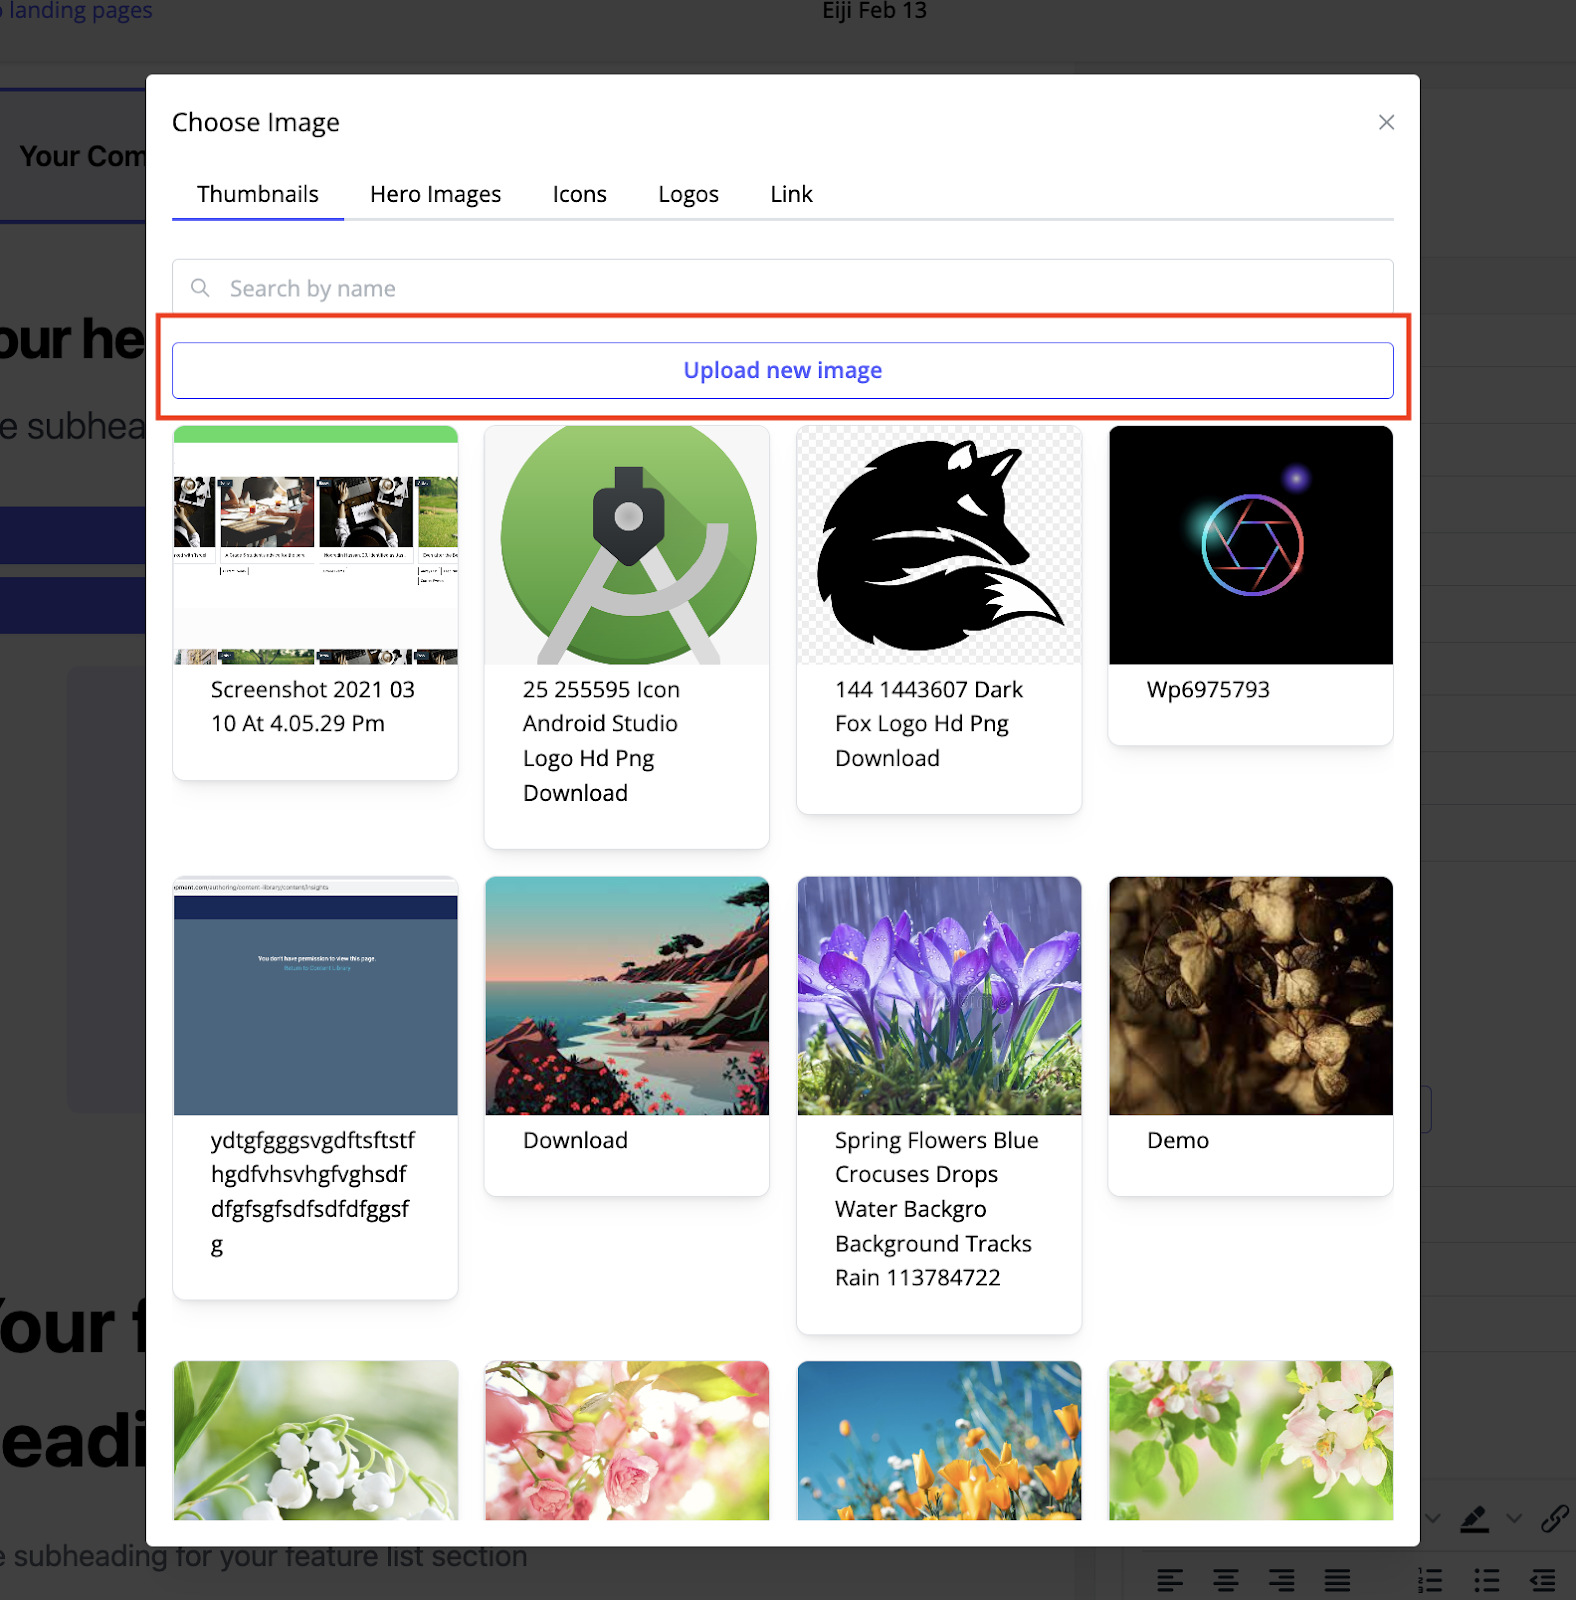
- Select an image type depending on your needs (Thumbnails, Hero Images, Icons, Logos) and then click Upload New Image.
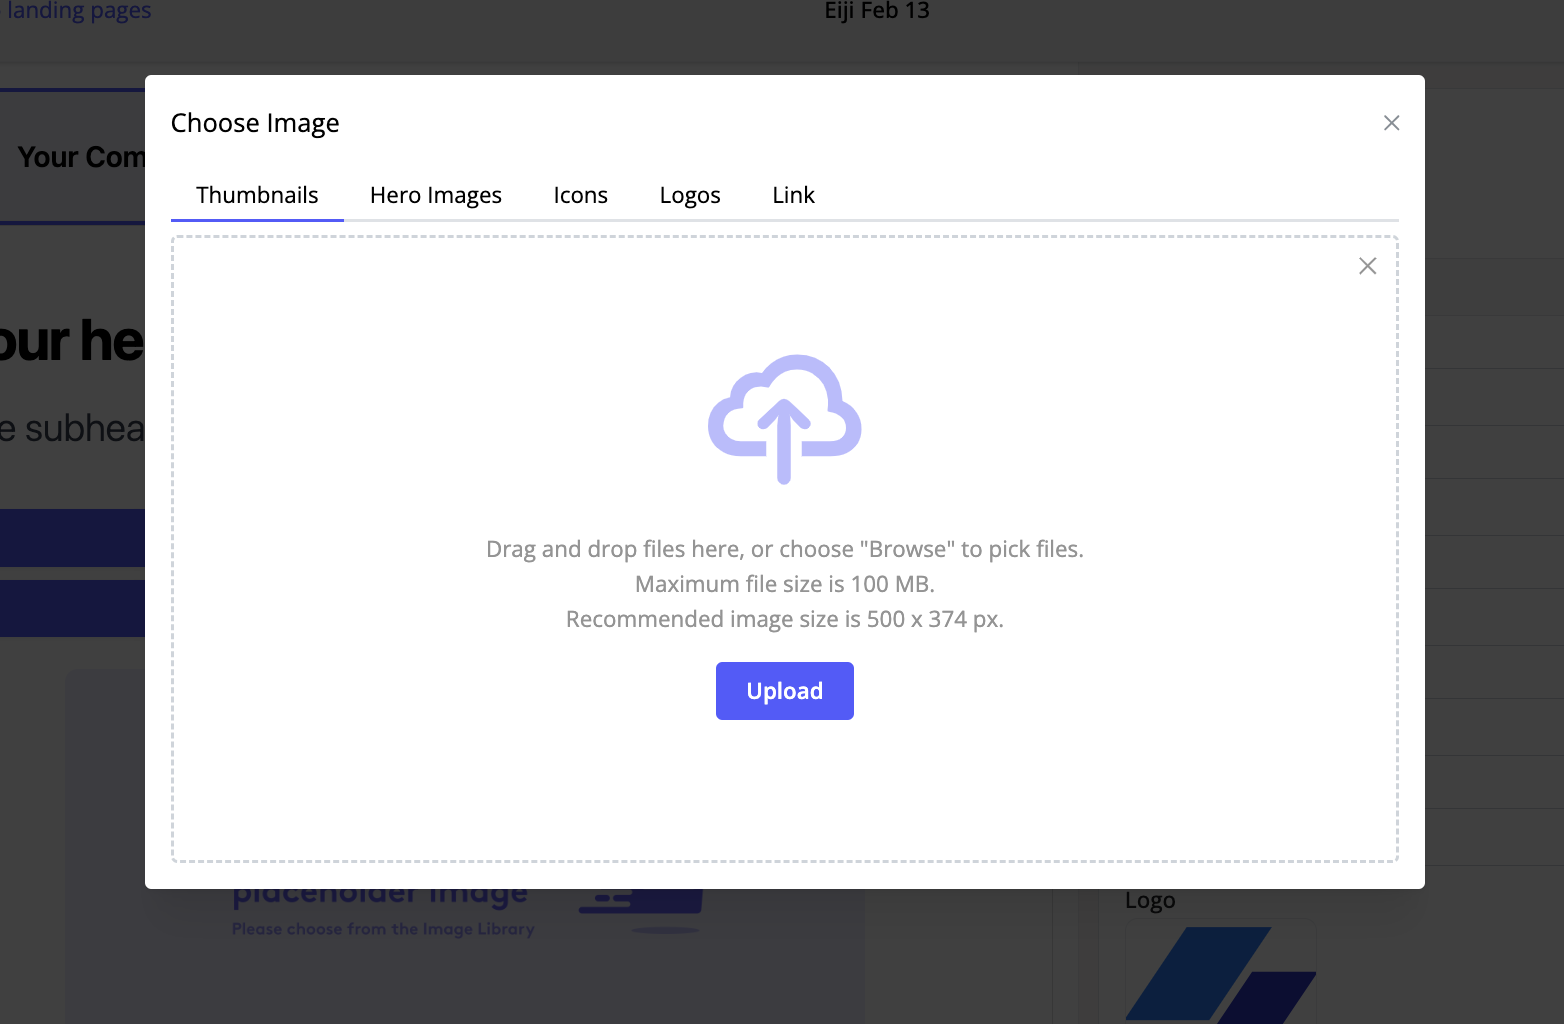
- The Choose Image menu displays an Upload button. You may click Upload, or drag and drop from your file storage, the image you want to add.
- Once the image is uploaded, the Choose Image menu updates with the newly added image displayed.
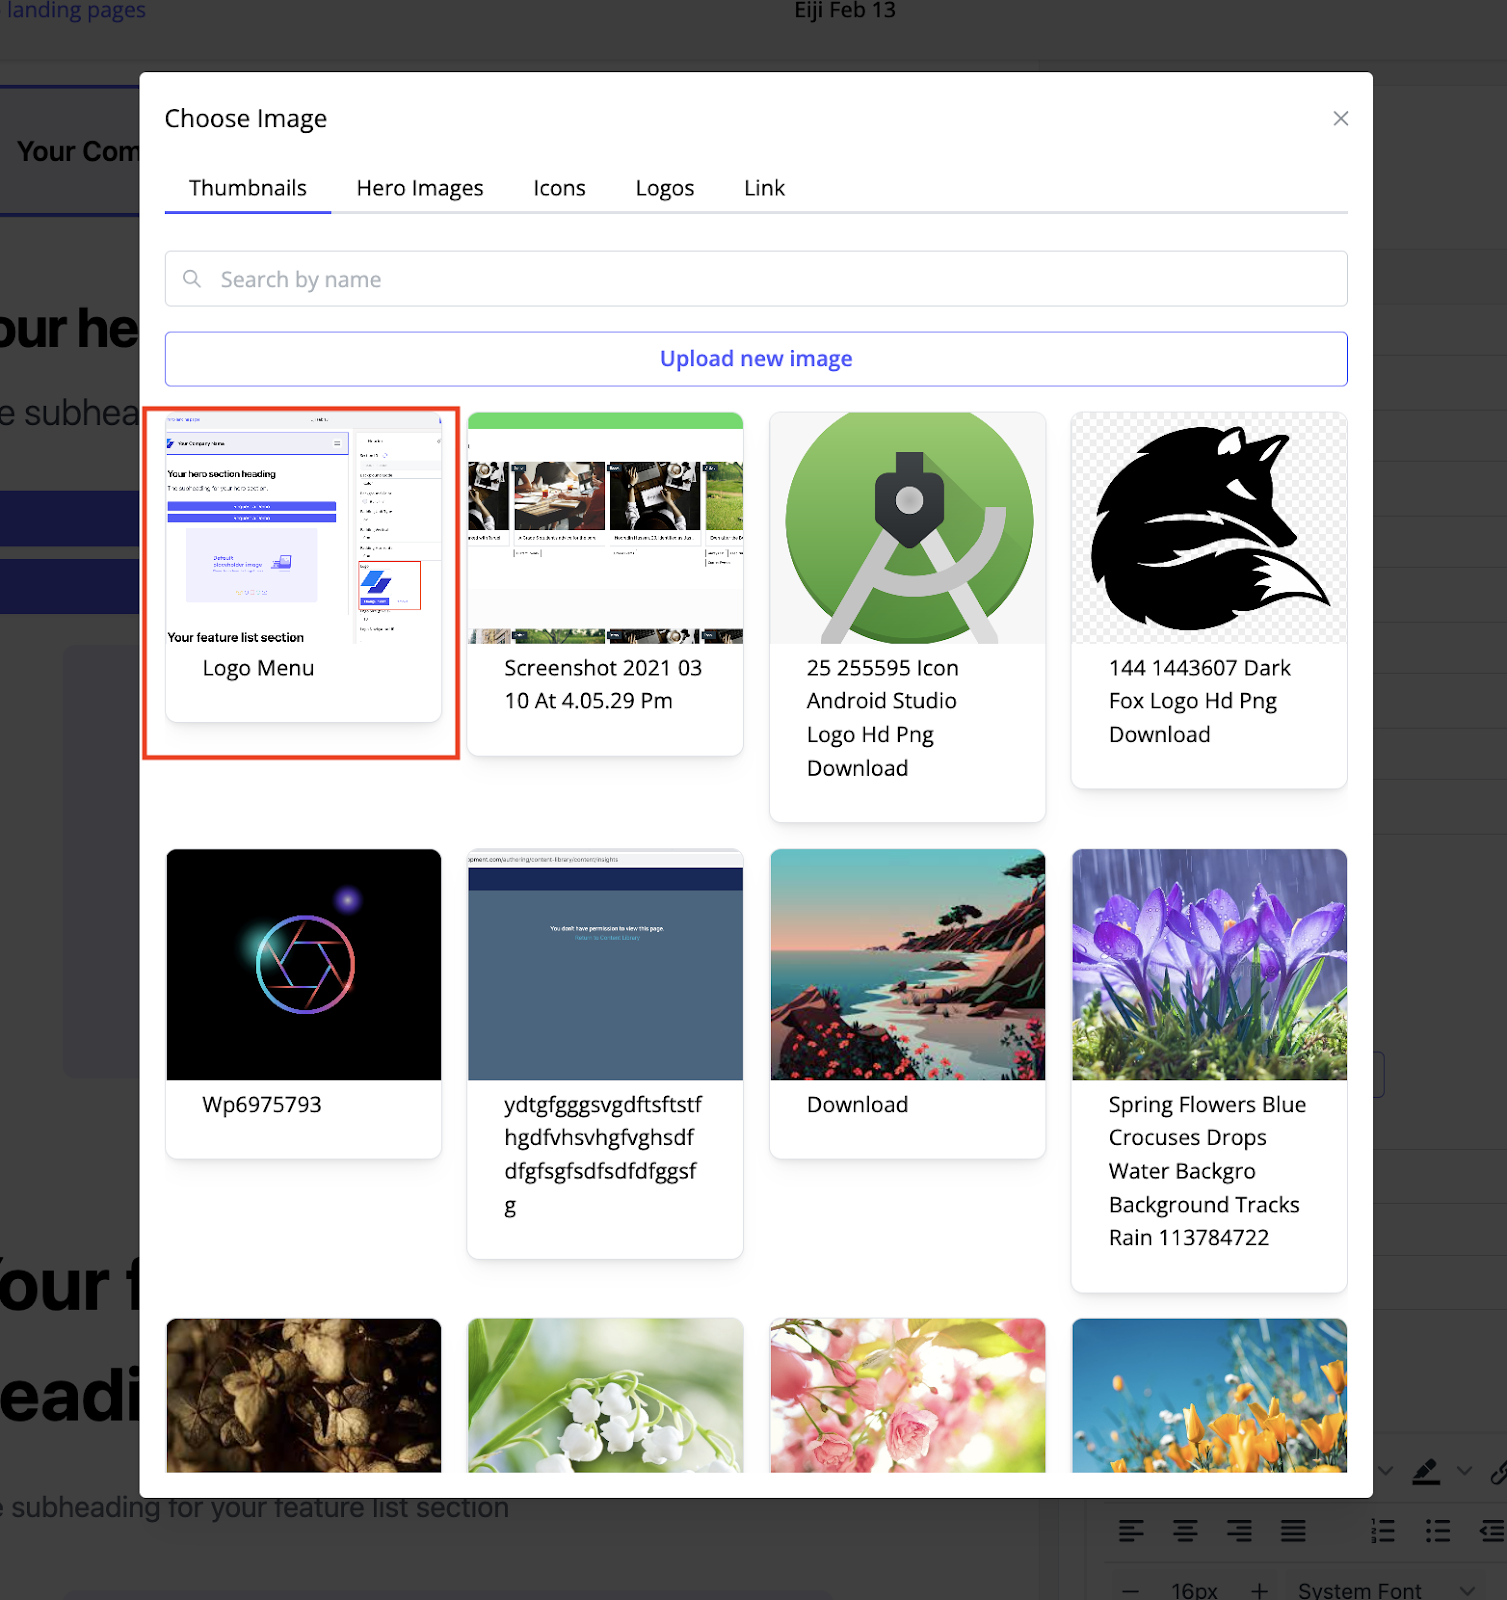
- Click on the image to add it to the Landing Page. The Landing Page will update to display the new image, as shown below.
Views: 115