Adding Content Assets to Your PathFactory Content Library
Before you can build experiences in PathFactory, you need to add content assets to the Content Library. You can add assets individually or in bulk.
Note: Unsure what types of content you can upload? Here’s a full list of the file types PathFactory supports.
Adding Individual Assets
To upload individual content assets to the Content Library, follow these steps.
File Upload
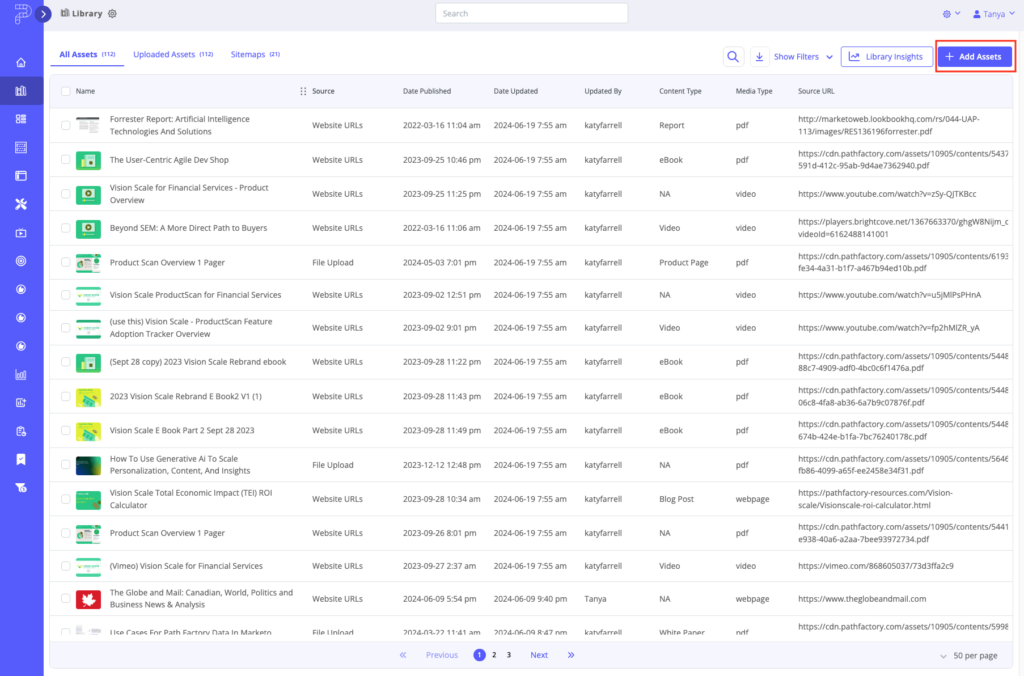
In the Content Library, click Add Assets.
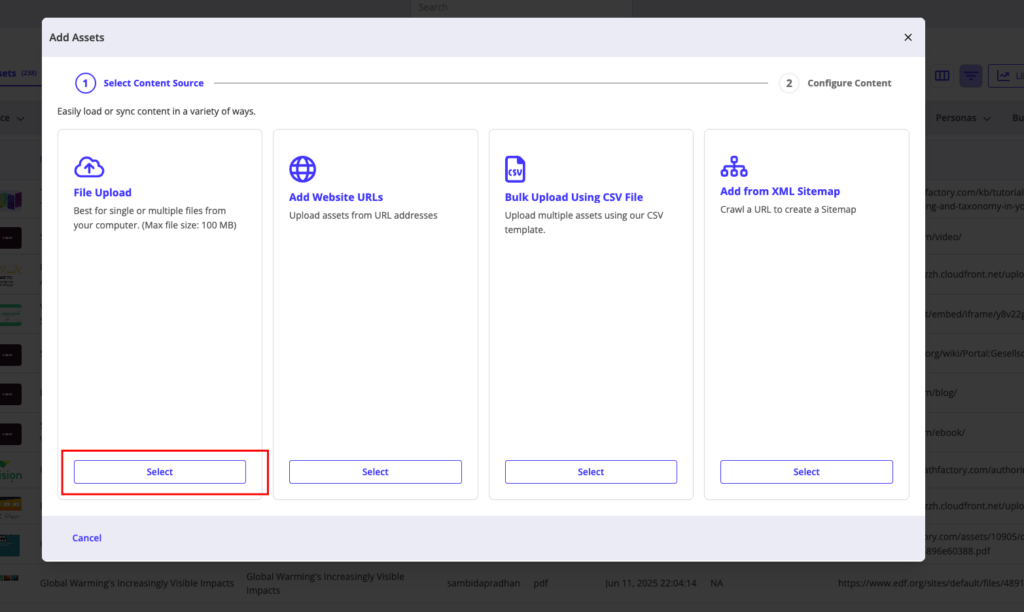
Select File Upload
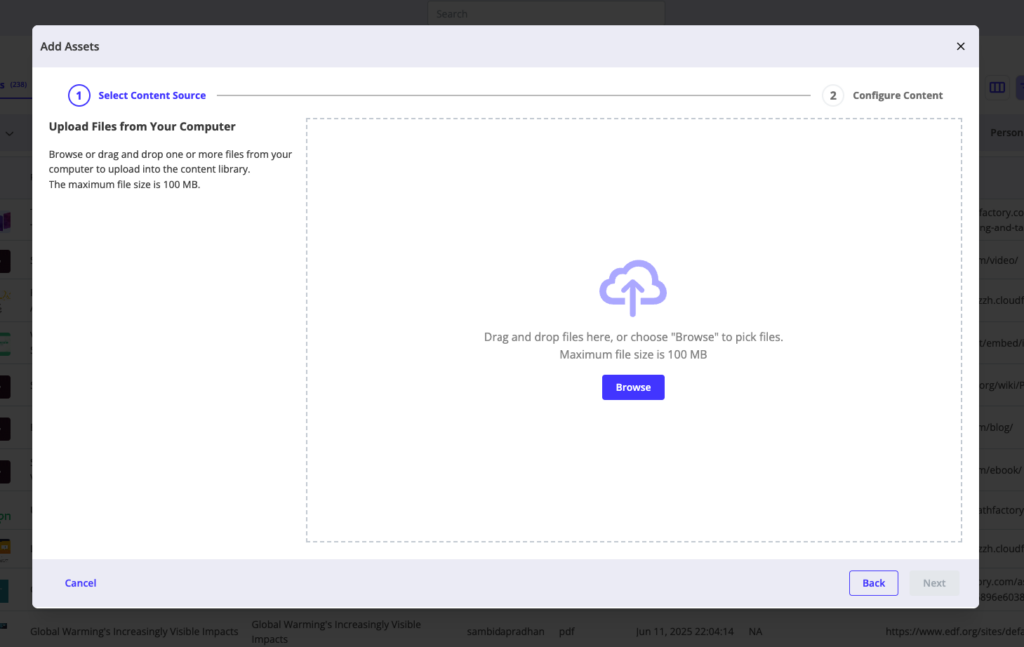
Browse files to upload your desired asset.
Add Website URL(s) to Your Content Library
The following instructions guide you through adding a website URL address to the Content Library.
- Copy the URL to your clipboard.
- Go to your PathFactory Content Library, select Add Assets.
- On the popup menu that appears, click the Select button for Add Website URLs.
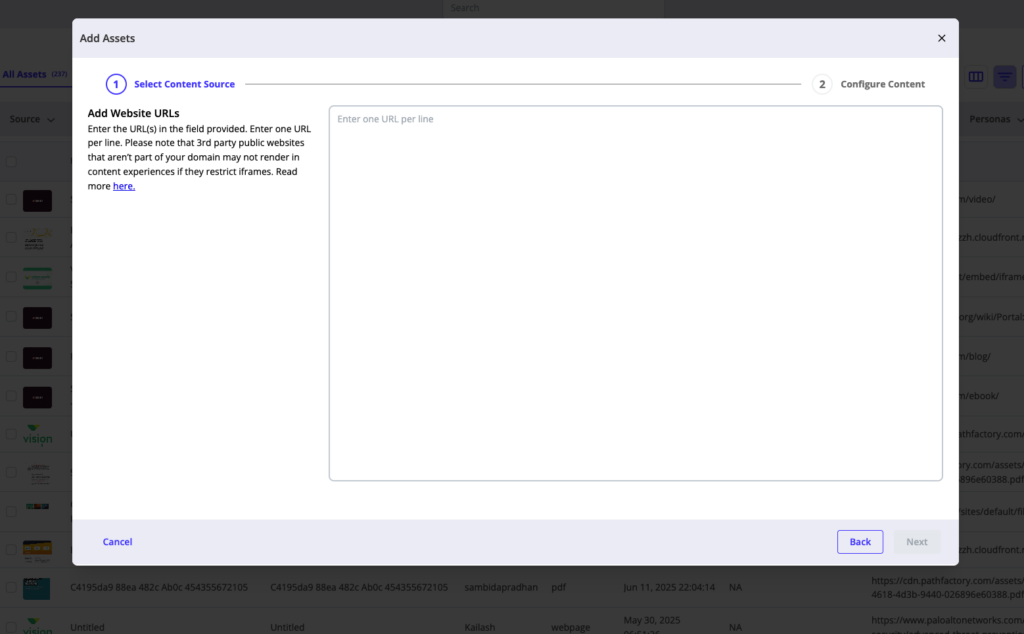
- Paste the links you want to add to your Library into the Website URLs field as shown below. This field has no character limit, so you can add as many URLs as you wish, separated by line.
- Click Next.
- The Add Assets menu opens.
- Configure your fields
- Required Fields – fill in all required fields as mandated by your system admin to conform to tagging & taxonomy requirements.
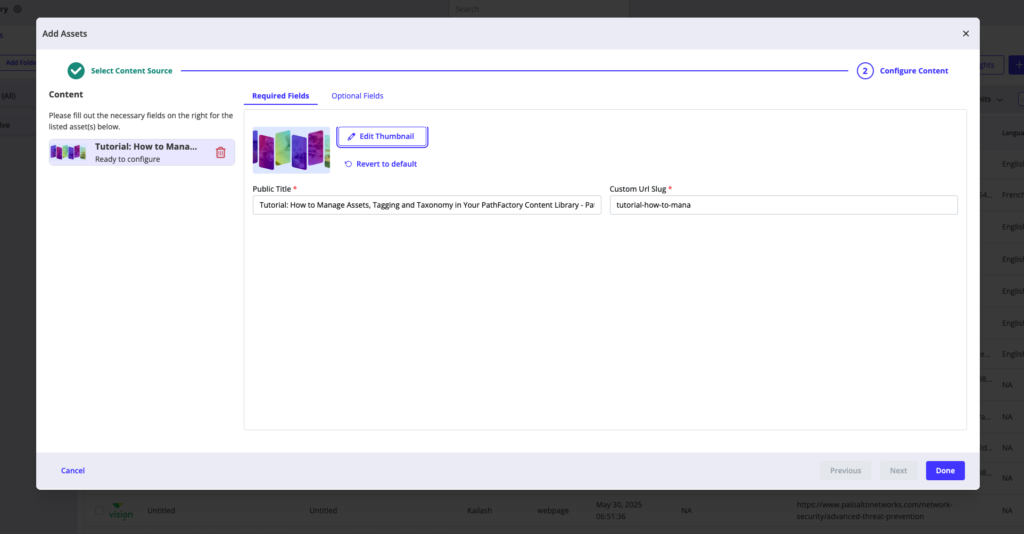
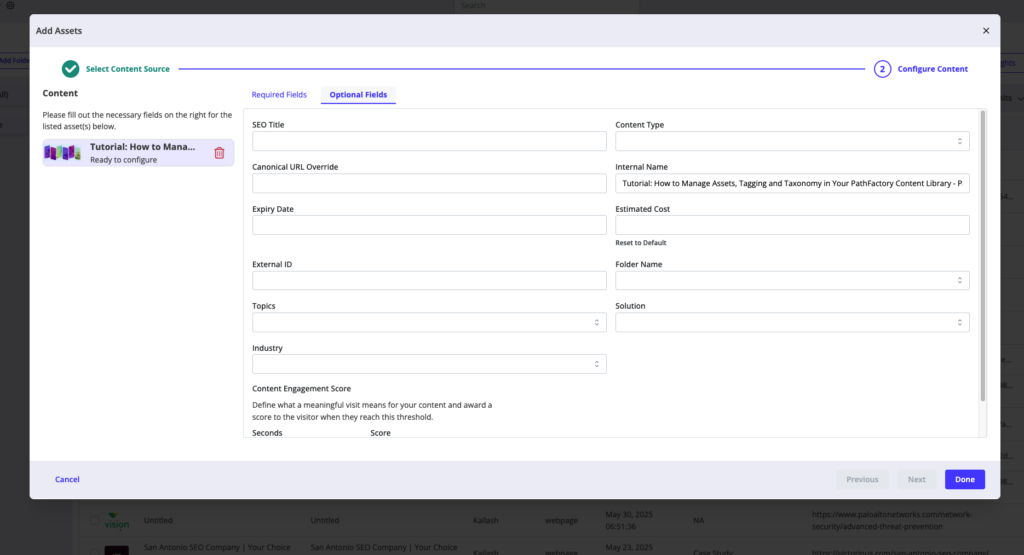
- Optional Fields – fill in the optional fields mandated by your system admin to conform to tagging and taxonomy requirements.
- When you have set up your new content asset, click Done.
Tip: You can use Google Files as URLs in PathFactory. Here is a quick tutorial to learn how to set up Google Files as URLs for import into your Content Library.
Adding Assets in Bulk
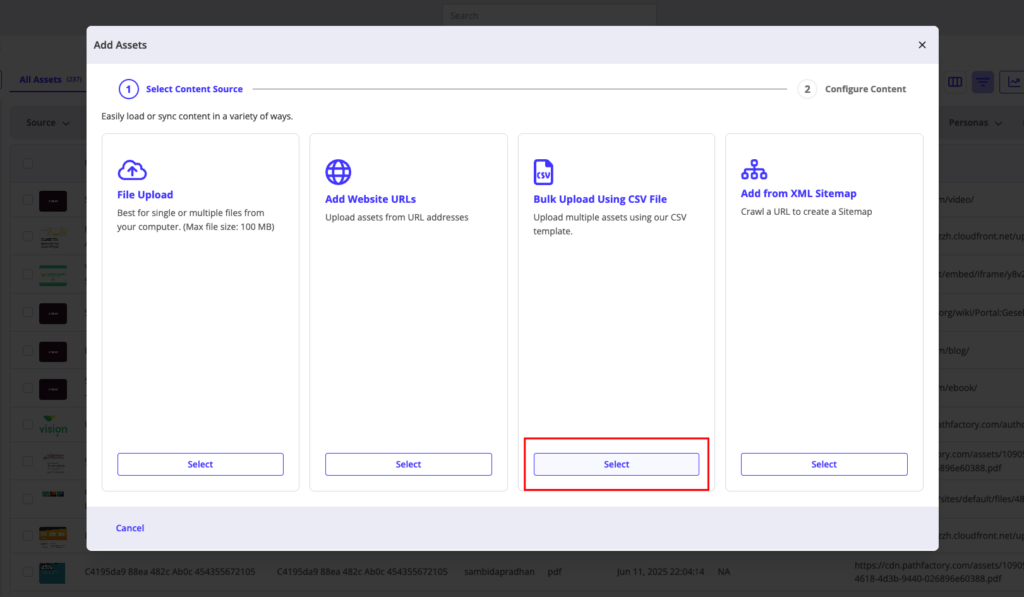
There are three ways to add assets in bulk to PathFactory.
Bulk Upload using CSV File – Best for uploading multiple assets simultaneously using our CSV template. This method is efficient for large batches of content, such as a collection of case studies or product sheets. Simply fill in the CSV template with the URLs and metadata for each asset.
Add from XML Sitemap – Best for crawling a domain to create a Sitemap. This is particularly helpful for importing an entire website or a large number of web pages from a site.
CRUD API – PathFactory’s CRUD API (Create, Read, Update, Delete) allows you to connect other content or asset management systems with PathFactory to create, tag, update and delete assets. This API connection allows for a real-time connection, but it requires technical expertise to set up. For more information, contact your Customer Team.
Bulk Upload using CSV File
Making bulk changes via a CSV file enables you to upload many assets at once and efficiently add/change categories and tags associated with those assets. Follow the instructions below to use the bulk CSV approach.
Note: You can also upload Website URLs in bulk using XML Sitemap or by including them on a CSV spreadsheet for upload.
- With the Content Library open, click Add Assets.
- A popup menu appears for you to select the upload method of your choice. In this case, click the Select button for the option labeled Bulk Upload Using CSV File.
- Upload CSV File menu pops up. On this menu, you have a few options that are listed and briefly described below the screen capture.
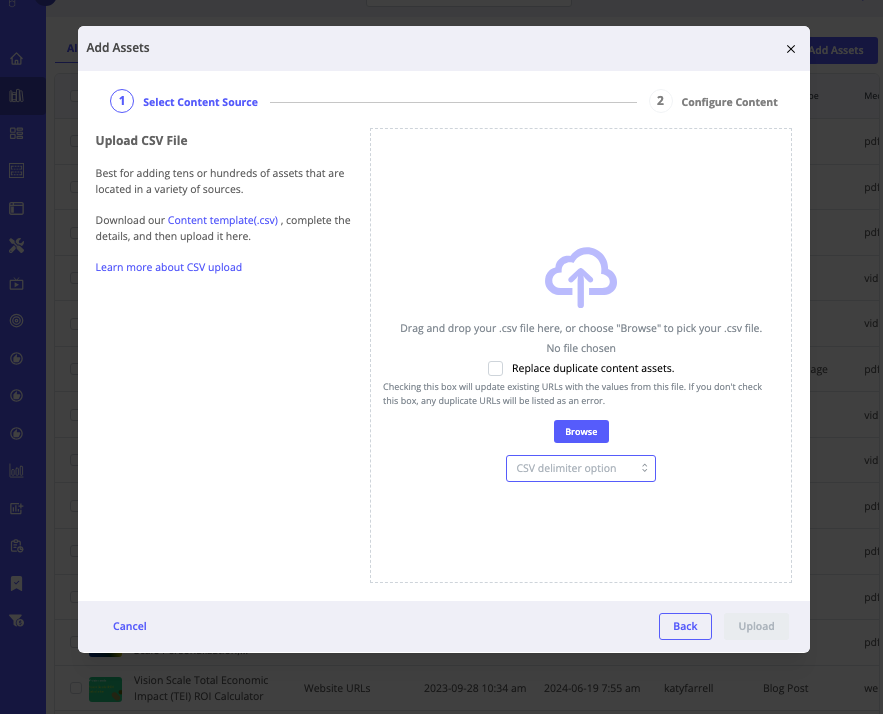
Activate the Replace Duplicate Content Assets checkbox – By enabling this checkbox, PathFactory compares URLs in uploaded CSVs against the Content Library. When URLs match, the system updates all fields with the new CSV data. Check this box to update existing assets and replace field values like tags or metadata.
CSV Delimiter Option – Click here to select Semicolon Separated Value (SSV) file format instead of the default CSV format.
Download the Content Template (.csv) – Click this link to download a copy of the pre-formatted CSV template to your computer. This template includes all the necessary fields required to ensure your content is imported correctly into your Content Library.
Once you have filled out the template, click the option to Browse to the CSV file on your computer. Find and select your file and click Open to upload it to PathFactory.
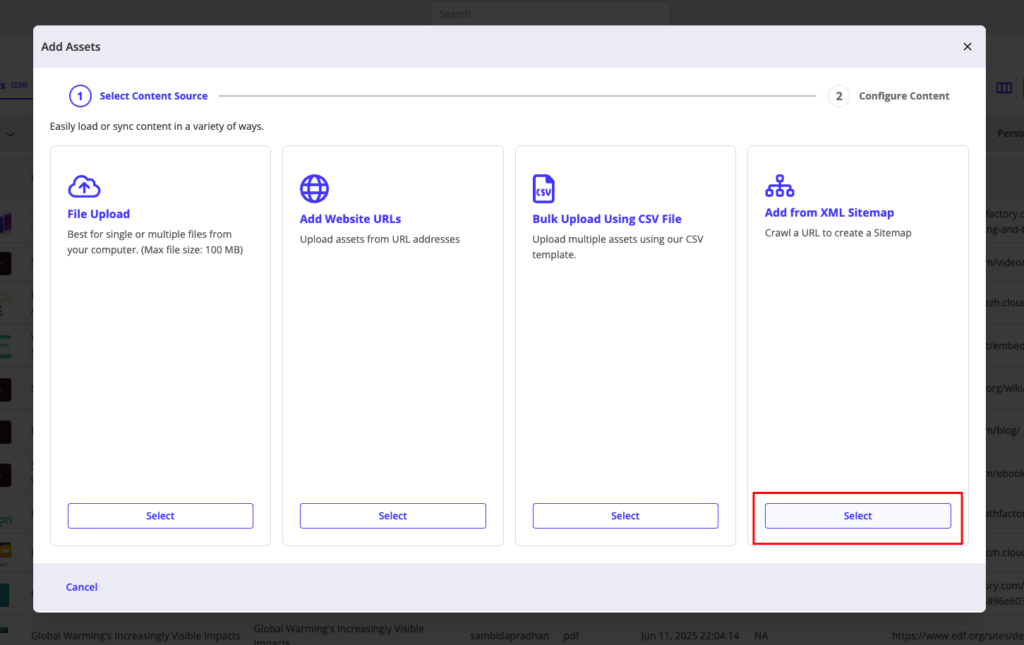
Add from XML Sitemap
Adding an XML Sitemap allows PathFactory to access an entire web property and create PathFactory assets from the entire list of URLs. A great use case for this is a Resource Center, support site, or blog.
- Start by choosing the “Add from XML Sitemap” Option
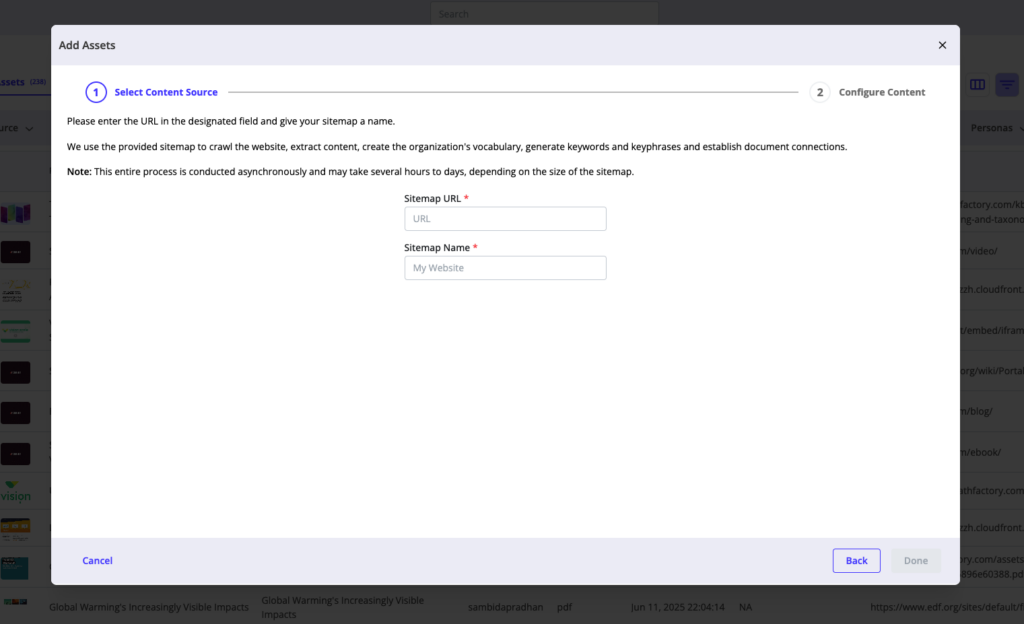
2. Add the URL of the Sitemap, and name it. Choose an easily identifiable name, as it will appear as the Source of each asset in the Content Library.
Our system will parse the sitemap, add the included metadata of each URL including Title, Thumbnail, Last Modified Date and Media Type.
We also put each URL through our pipeline to ensure that assets can be used for AI Recommendations.
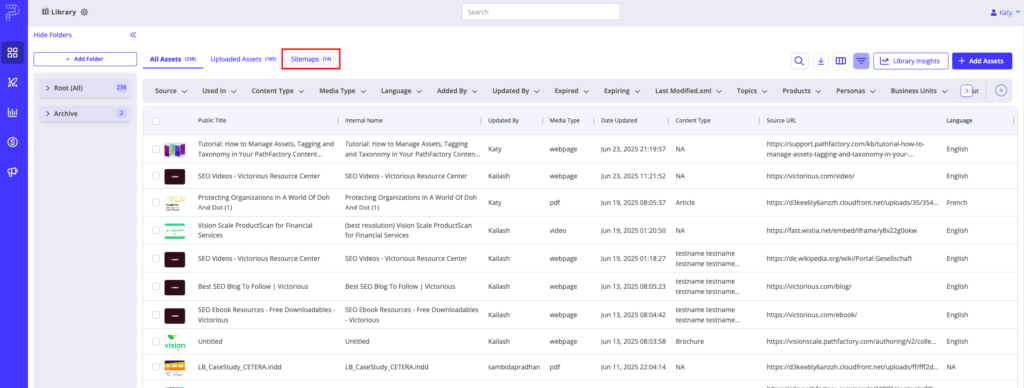
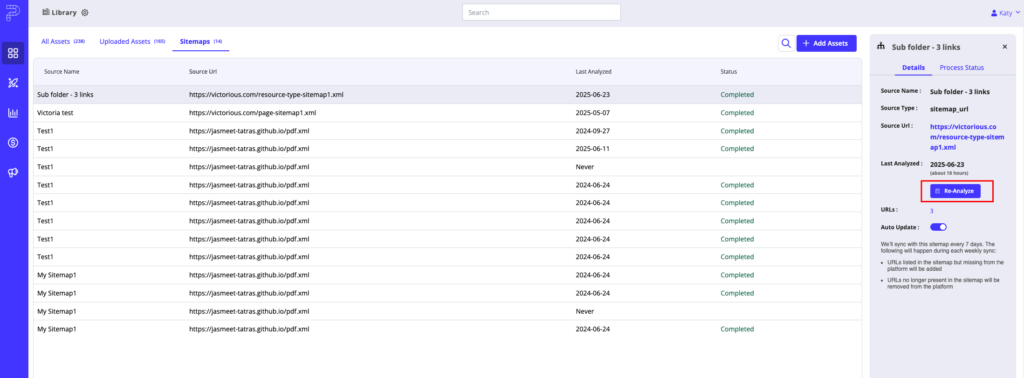
3. To manage your sitemap and check the progress of its analysis, click on the “Sitemaps” tab of your Content Library
4. Each Sitemap has a quickpane with the process status, date, and other vital information.
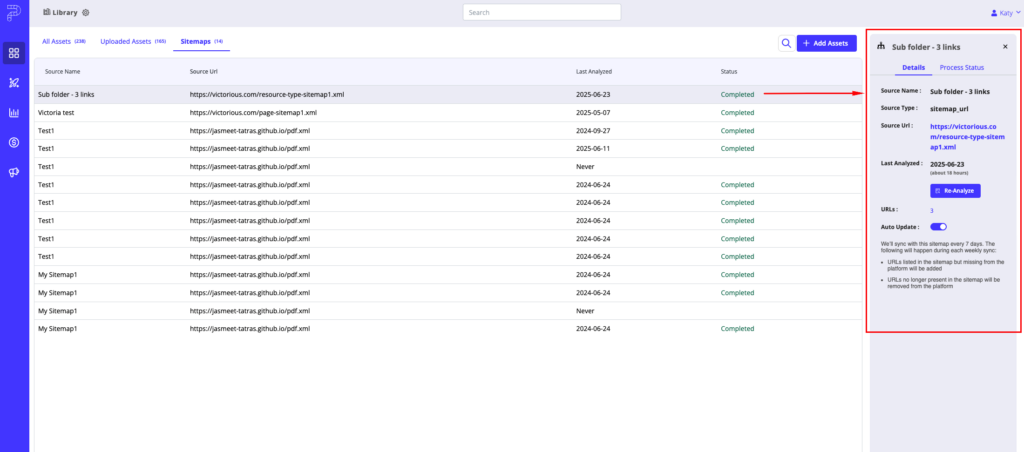
Re-Analyzing your Sitemap
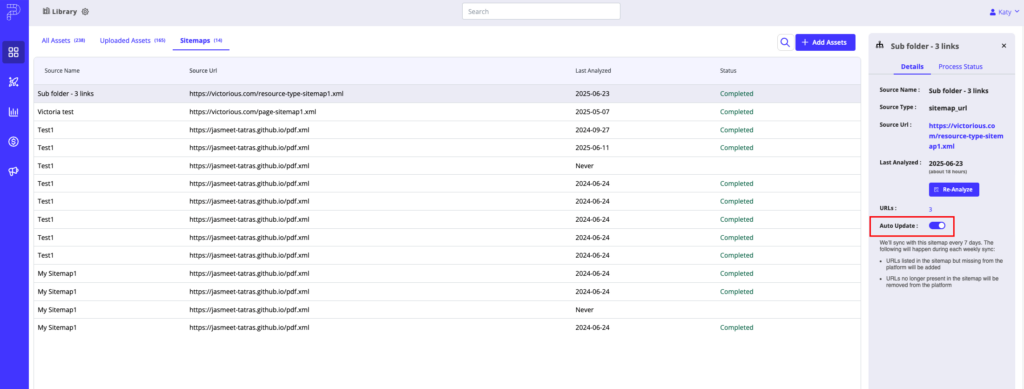
Clicking on “Re-Analyze” in the quickpane will begin the reanalysis, but many customers want to set up regular analyses of their content to automatically pull in any new assets that have been added to the sitemap and reflect any changes to the metadata such as titles, or last modified dates.
For a one-time reanalysis, click on “Re-Analyze” in the quickpane:
To schedule regular updates, use the toggle for “Auto Update”
Views: 292